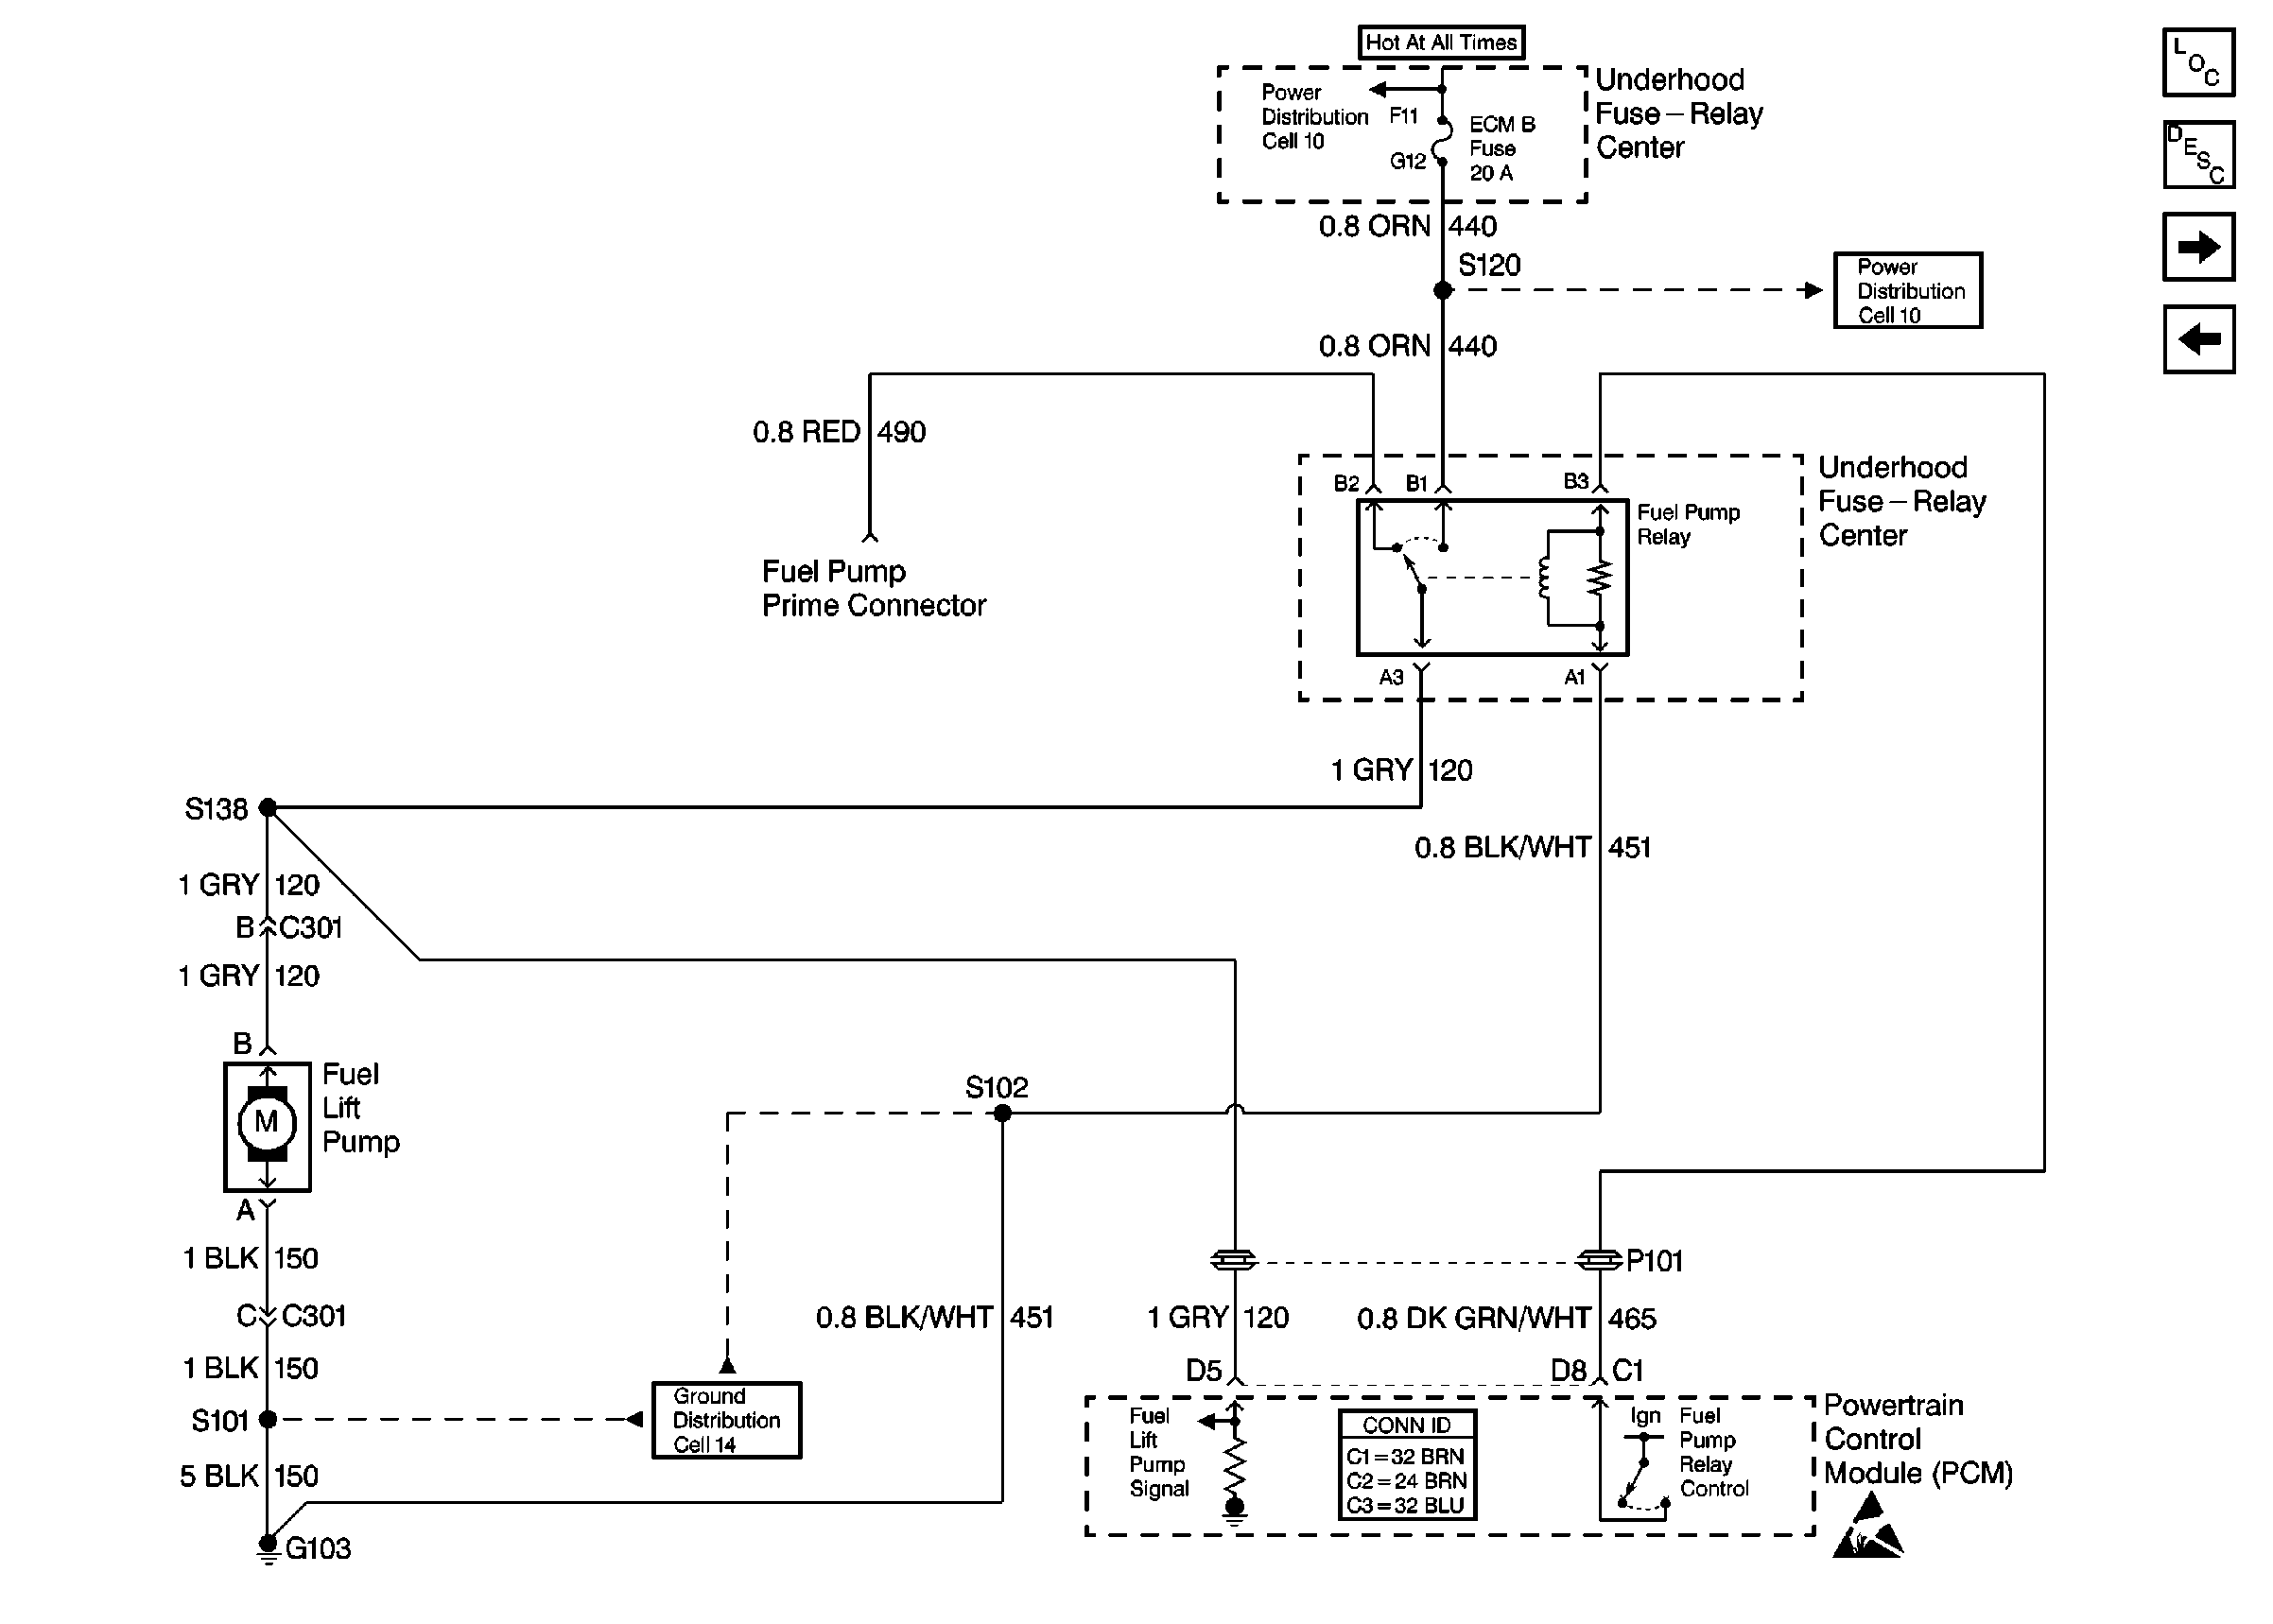
Refer to Engine Controls Schematics
Cell 22: Fuel Pump Controls

.
Circuit Description
The status of the lift pump is monitored by the PCM. This signal is also used in order to store a DTC if the fuel pump relay is defective or if the fuel pump voltage is lost while the engine is running. There should be about 12 volts on circuit 120 during the glow plug cycle.
Conditions for Running the DTC
The fuel lift pump is commanded ON.
Conditions for Setting the DTC
| • | The difference between the ignition voltage and the fuel pump voltage is greater than 4 volts. |
| • | The condition was met for 2 seconds. |
Action Taken When the DTC Sets
| • | The PCM illuminates the malfunction indicator lamp (MIL) on the second consecutive drive trip the diagnostic runs and fails. |
| • | The PCM records the operating conditions at the time the diagnostic fails. The first time the diagnostic fails, the Failure Records store this information. If the diagnostic reports a failure on the second consecutive drive trip, the Freeze Frame records the operating conditions at the time of failure and updates the Failure Records. |
Conditions for Clearing the MIL/DTC
| • | The PCM will turn the MIL off after 3 consecutive trips without a fault condition. |
| • | A history DTC clears after 40 consecutive warm-up cycles, if this or any other emission related diagnostic does not report any failures. |
| • | The scan tool Clear Info function was used. |
Diagnostic Aids
This DTC will not check the fuel pump for operation.
Test Description
The number(s) below refer to the step number(s) on the Diagnostic Table.
-
This fuel pump can also be felt for a pulsing which will also determine if the fuel pump is working.
Step | Action | Value(s) | Yes | No |
|---|---|---|---|---|
1 |
Important: Before clearing any DTCs, use the scan tool Capture Info function to save the Freeze Frame and the Failure records for reference. The control module's data is deleted once the Clear Info function is used. Was the Powertrain On-Board Diagnostic (OBD) System Check performed? | -- | ||
Does the scan tool indicate the fuel pump is operating? | -- | Go to Diagnostic Aids | ||
Is the voltage at the specified value? | B+ | |||
4 |
Is the voltage at the specified value? | B+ | ||
5 |
Did you perform a repair? | -- | ||
6 |
Did you perform a repair? | -- | ||
7 |
Did you perform a repair? | -- | ||
8 |
Is the test lamp ON? | -- | ||
9 | Repair the open in the battery feed circuit to the fuel pump relay. Refer to Wiring Repairs . Is the action complete? | -- | -- | |
10 | Connect a J 35616-200 unpowered test lamp between terminal number B1 and terminal number A1 of the fuel pump relay harness connector. Is the test lamp ON? | -- | ||
11 | Repair the open fuel pump relay ground circuit. Refer to Wiring Repairs . Is the action complete? | -- | -- | |
12 |
Does the J 35616-200 unpowered test lamp come ON during the glow plug cycle and then go OFF after the glow plug cycle is complete? | -- | ||
13 |
Does the J 35616-200 unpowered test lamp come ON during the glow plug cycle and then go OFF after the glow plug cycle is complete? | -- | ||
Check for an open or short to ground in the circuit from the fuel pump relay harness connector terminal number B3 and the PCM. Repair as necessary. Refer to Wiring Repairs . Did you perform a repair? | -- | |||
15 | Repair the open or short to ground in the fuel pump relay control circuit. Refer to Wiring Repairs . Is the action complete? | -- | -- | |
16 |
Important: The new PCM must be programmed. Refer to Powertrain Control Module Replacement/Programming . Replace the PCM. Is the action complete? | -- | -- | |
17 | Check for poor connections at the fuel pump relay connector. Repair as necessary. Refer to Wiring Repairs . Did you perform a repair? | -- | ||
18 | Replace the fuel pump relay. Refer to Fuel Pump Relay Replacement . Is the action complete? | -- | -- | |
19 |
Does the scan tool indicate the diagnostic Passed? | -- | ||
20 | Does the scan tool display any additional undiagnosed DTCs? | -- | Go to the Applicable DTC Table | System OK |
