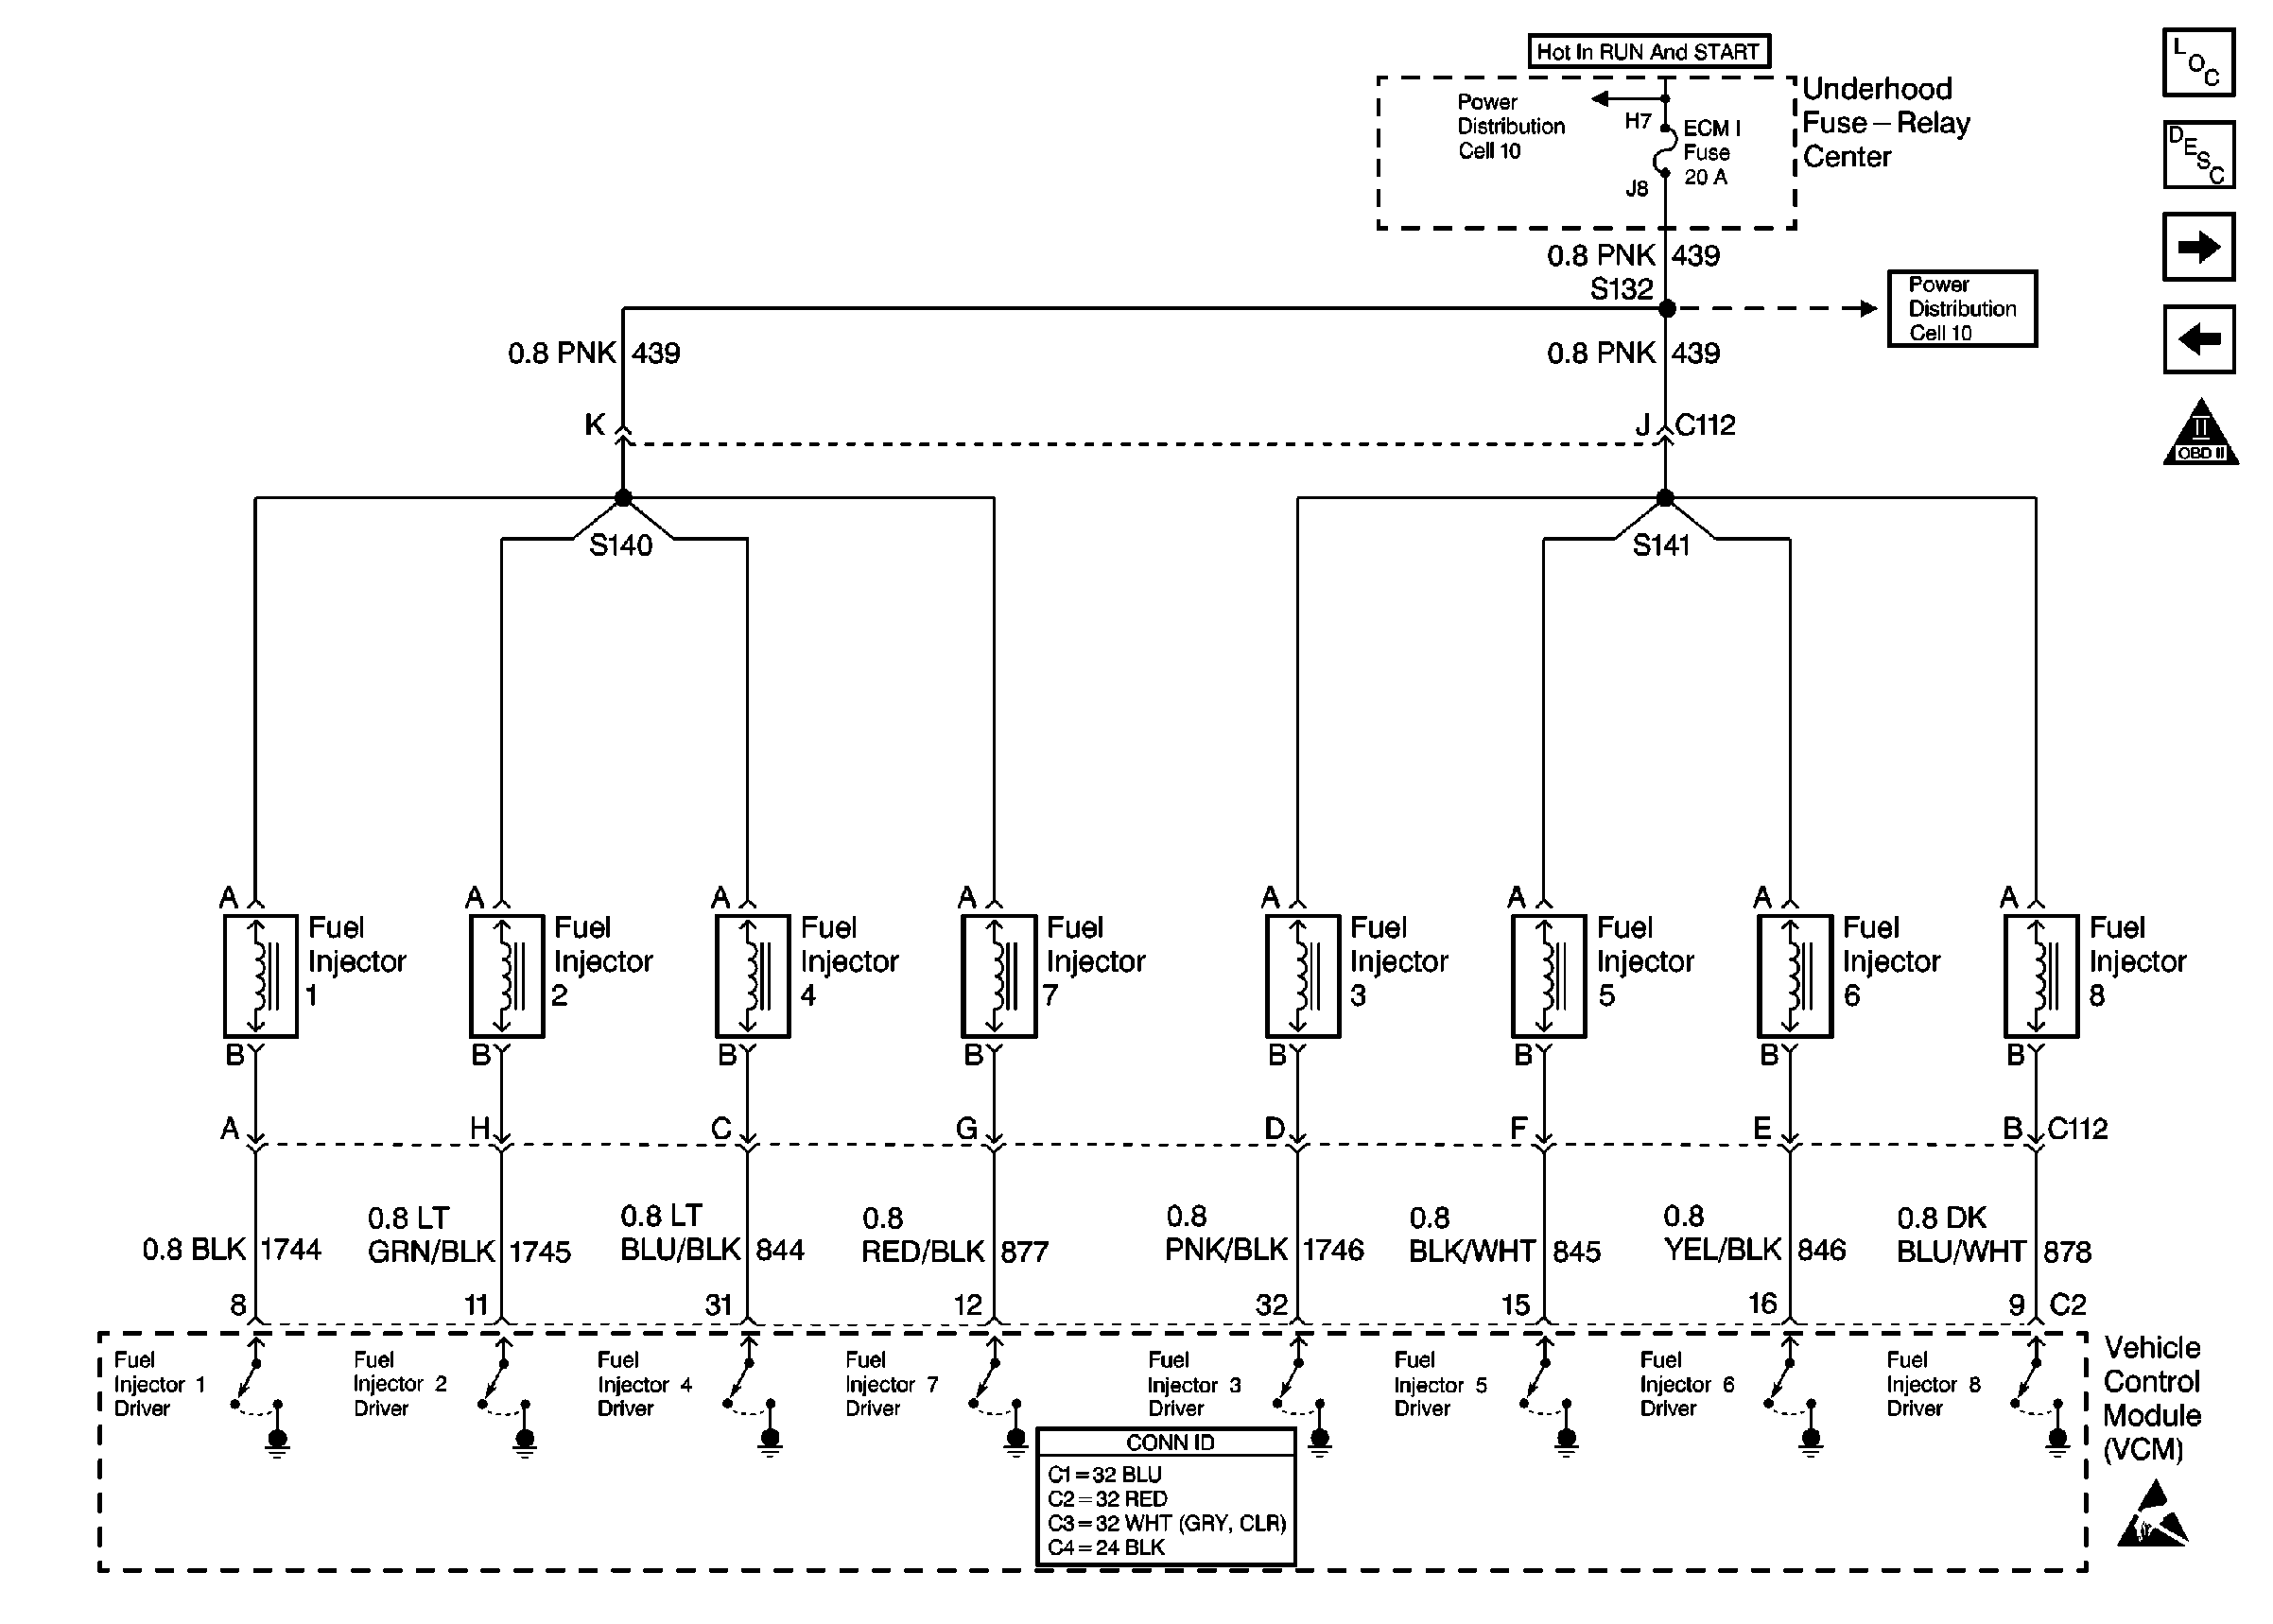
Refer to Engine Controls Schematics
Cell 23: Fuel Injector Controls

.
Diagnostic Aids
The vehicle control module (VCM) has integrated circuits that are fault protected, therefore, if a circuit has failed, the integrated circuits may not be damaged. If this is the case, the ignition control (IC) will keep the circuit open until you have corrected the fault in the circuit. When you have corrected the fault, reinstall the VCM. Check the circuit. Replace the VCM only if the circuit is still inoperative.
Test Description
The numbers below refer to the step numbers on the diagnostic table.
-
This step determines if the ignition feed circuit to the injectors are OK.
-
This step determines if the injector control circuits are OK.
-
This step determines if there is an internal VCM short to ground for an injector control circuit.
Step | Action | Value(s) | Yes | No |
|---|---|---|---|---|
1 | Did you perform the Powertrain On-Board Diagnostic (OBD) System Check? | -- | ||
Is the test lamp ON for both the injector positive voltage circuits? | -- | |||
3 | Is the test lamp ON for only one injector positive voltage circuit? | -- | ||
4 | Check the injector fuse. Is the fuse open? | -- | ||
5 | Check for an open on the effected injector ignition positive voltage circuit. Was a problem found? | -- | -- | |
Does the injector test lamp flash for each injector? | -- | |||
7 | Is the injector test lamp on steady for any injector circuit? | -- | ||
Is the injector test lamp OFF? | -- | |||
9 | Check for an open injector control circuit. Was a problem found? | -- | ||
10 | Check for a short to ground on the injector ignition positive voltage circuit. Was a problem found? | -- | -- | |
11 | Repair the open or short to ground on both of the injector ignition positive voltage circuits. Is the action complete? | -- | -- | |
12 | Repair circuit as necessary. Refer to Wiring Repairs in Wiring Systems. Is the action complete? | -- | -- | |
13 | Repair the short to ground in the injector control circuit. Refer to Wiring Repairs in Wiring Systems. Is the action complete? | -- | -- | |
14 | Check the terminal contact at the VCM. Was a problem found? | -- | ||
15 | Repair terminal contact as necessary. Refer to Connector Repairs in Wiring Systems. Is action complete? | -- | -- | |
16 |
Important:: The replacement VCM must be programmed. Replace the VCM. Refer to VCM Replacement/Programming . Is the action complete? | -- | -- | |
17 |
Important: : Before starting the engine, it may be necessary to check for fuel flooded cylinders or oil contamination (fuel).
Does the engine start and continue to run? | -- | ||
18 |
Are any DTCs displayed that have not been diagnosed? | -- | Go to the applicable DTC table | |
19 | Use the scan tool in order to display the Capture Info and the Review Capture Info function. Are there any DTCs displayed that have not been diagnosed? | -- | Go to the applicable DTC table | System OK |
