Removal Procedure
- Disconnect the negative battery cable. Refer to Battery Negative Cable Disconnection and Connection in engine Electrical.
- Remove the engine cover from the vehicle. Refer to Engine Cover Replacement in Interior Trim.
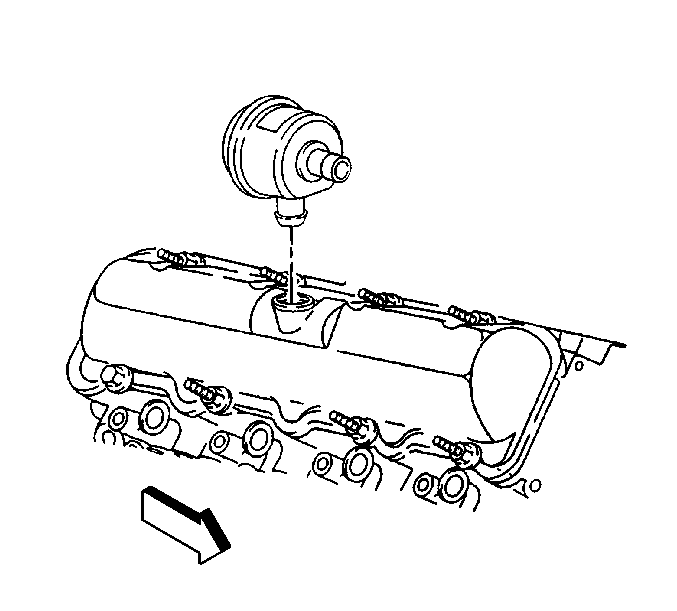
- Remove the crankcase depression regulator (CDR) valve.
- Remove the air cleaner assembly from the vehicle. Refer to Air Cleaner Assembly Replacement in Engine Controls-6.5L.
- Remove the air cleaner intake duct from the turbocharger.
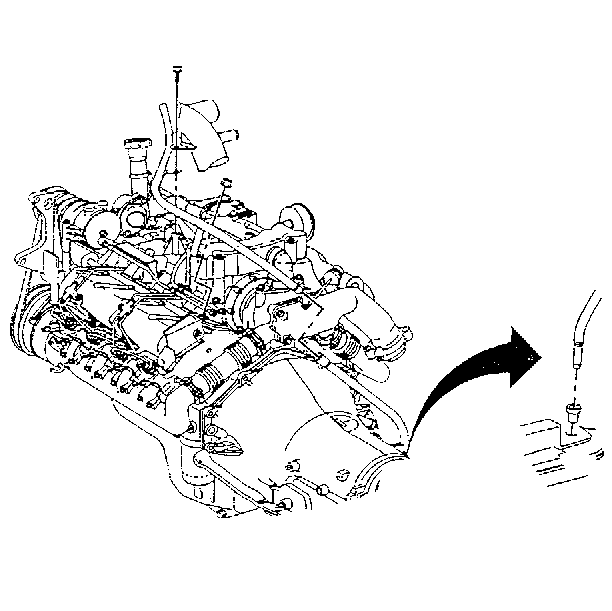
- Remove the transmission oil level indicator and tube from the upper intake manifold.
- Remove the upper intake manifold from turbocharger. Refer to Intake Manifold Replacement .
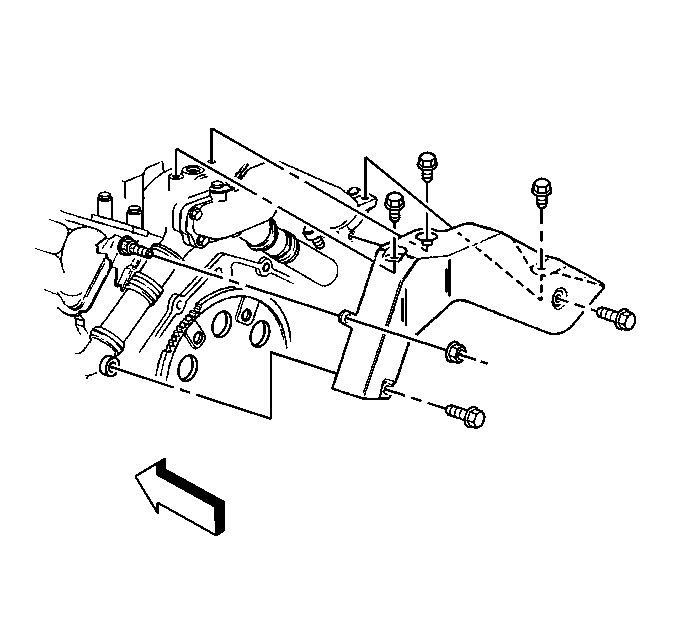
- Remove the turbocharger heat shield mounting bolts.
- Remove the turbocharger heat shield.
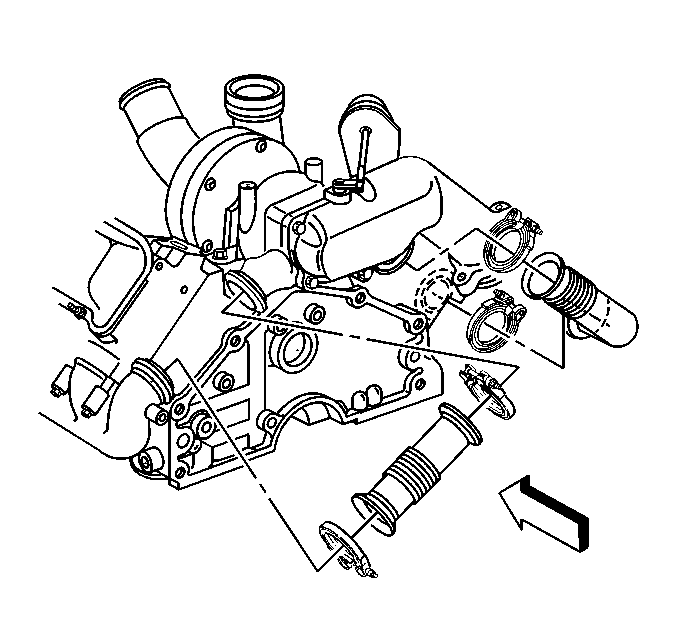
- Remove the exhaust pipe clamps from the exhaust pipes that connect the turbocharger to the exhaust manifolds.
- Remove the exhaust pipes that connect the turbocharger to the exhaust manifolds.
- Remove the turbocharger mounting bolts.
- Remove the turbocharger assembly from the engine block.
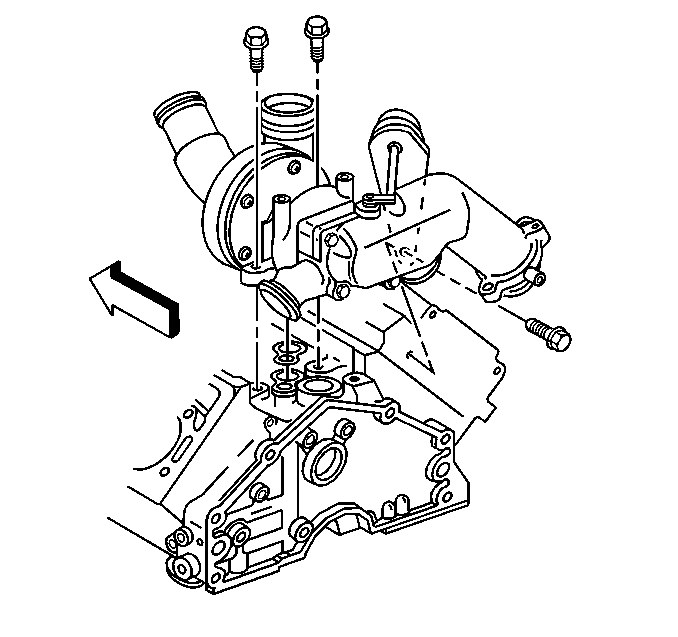
Important: Usually some quantity of oil will exist inside the vent system. The crankcase vapor consists of vaporized oil that condenses within the vent and intake system. The inside of the air intake duct and compressor wheel housing can be quite oily due to the venting of the crankcase vapors.
Installation Procedure
Important: Perform the following steps before installing the turbocharger:
• Check the intake and exhaust systems leading to and from the turbocharger
in order to ensure that there is no debris. Even small debris can cause severe
wheel damage if drawn in during high speed operation. • Make sure the turbocharger and exhaust manifold flanges are clean
and free of any foreign material. • Use high temperature anti-seize compound GM P/N 1052771
on all threaded fasteners connected to the turbocharger. • Inspect the oil feed and return passages in the engine block and
the turbocharger. Make sure these passages are clean and open. • Always replace the O-ring between the turbocharger and the engine
block.
- Install the turbocharger assembly to the engine block.
- Install the turbocharger mounting bolts.
- Install the exhaust pipes that connect the exhaust manifolds to the turbocharger.
- Install the exhaust pipe clamps.
- Install the vacuum line to the wastegate actuator.
- Install the turbocharger heat shield.
- Install the turbocharger heat shield mounting bolts and nut.
- Tighten the bolts (right and top) to 30 N·m (22 lb ft).
- Tighten the center bolts to 22 N·m (17 lb ft).
- Tighten the heat shield nut to 30 N·m (22 lb ft).
- Install the upper intake manifold on the turbocharger. Refer to Intake Manifold Replacement .
- Install the transmission oil level indicator tube to the upper intake manifold.
- Install the air cleaner intake duct to the turbocharger.
- Install the air cleaner assembly in the vehicle. Refer to Air Cleaner Assembly Replacement in Engine Controls-6.5L.
- Install the CDR valve on the valve rocker arm rocker cover.
- Connect the battery negative cables to the batteries. Refer to Battery Negative Cable Disconnection and Connection in Engine Electrical.
- Install the engine cover in the vehicle. Refer to Engine Cover Replacement in Interior Trim.

Notice: Use the correct fastener in the correct location. Replacement fasteners must be the correct part number for that application. Fasteners requiring replacement or fasteners requiring the use of thread locking compound or sealant are identified in the service procedure. Do not use paints, lubricants, or corrosion inhibitors on fasteners or fastener joint surfaces unless specified. These coatings affect fastener torque and joint clamping force and may damage the fastener. Use the correct tightening sequence and specifications when installing fasteners in order to avoid damage to parts and systems.
Tighten
Tighten the bolts to 65 N·m (48 lb ft).

Tighten
Tighten the clamps to 10 N·m (90 lb in).

Tighten


Important: Run the engine at an idle for at least 2 minutes after completing the installation of the turbocharger. This will allow the oil to lubricate the bearing inside the turbocharger. While running the engine, check for any leaks.
