Engine Coolant Thermostat Replacement 4.3L
Removal Procedure
- Remove the air cleaner and the duct assembly. Refer to Air Cleaner Assembly Replacement in Engine Controls.
- Partially drain the coolant. Refer to Cooling System Draining and Filling .
- Remove the coolant recovery reservoir. Refer to Coolant Recovery Reservoir Replacement .
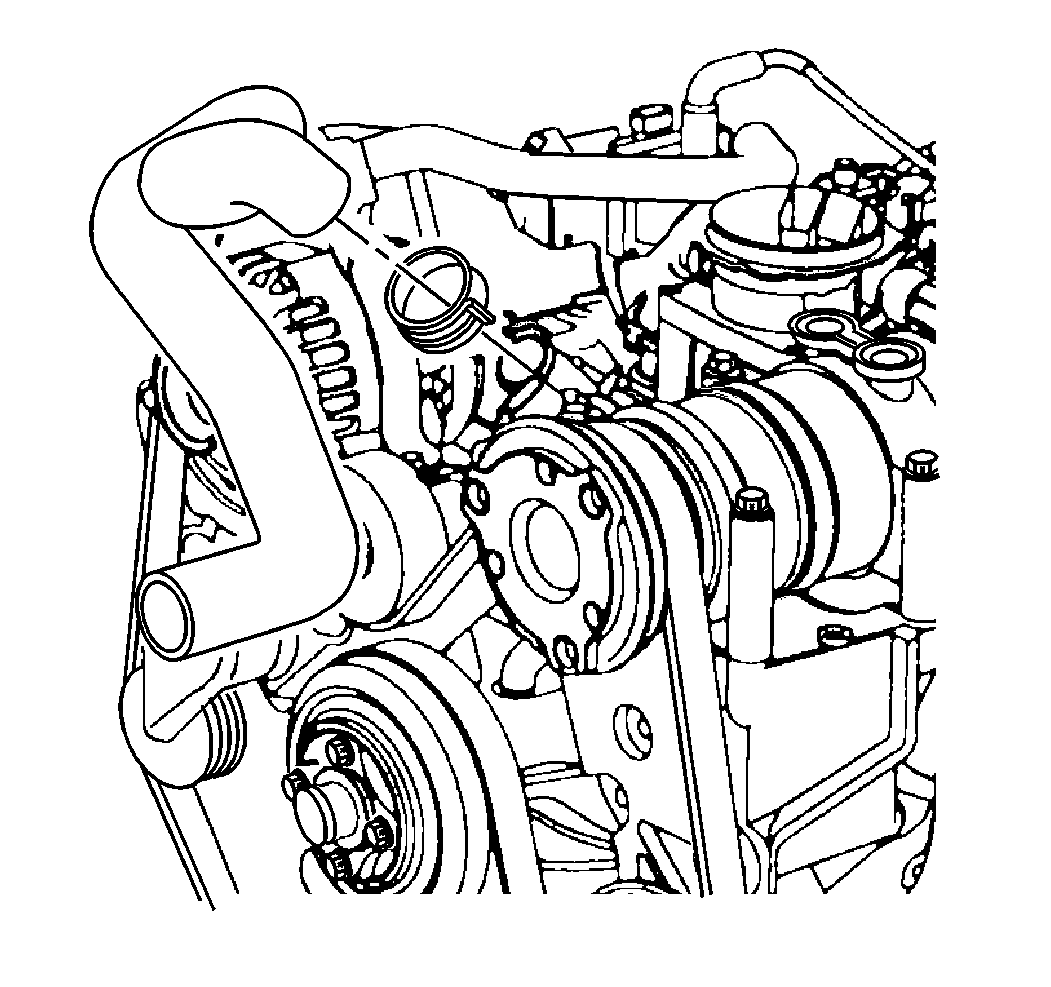
- Disconnect the radiator hose from the thermostat housing.
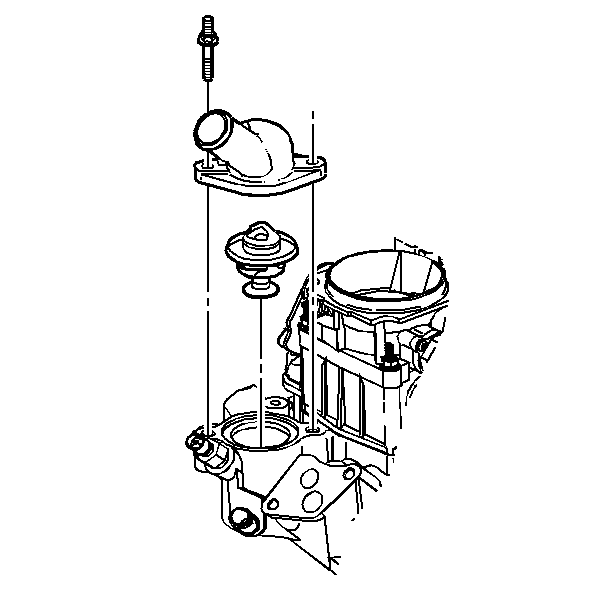
- Remove the bolts attaching the thermostat housing to the thermostat.
- Remove the thermostat housing.
- Remove the thermostat.
- Clean the gasket mating surfaces.
Installation Procedure
Notice: When adding coolant, use DEX-COOL® coolant. If silicated coolant is added to the system, premature engine, heater core or radiator corrosion may result. In addition, the engine coolant will require change sooner-at 50 000 km (30,000 mi) or 24 months.
- Install the thermostat.
- Install the thermostat housing to the intake manifold.
- Install the bolts to the housing.
- Connect the radiator hose to the thermostat housing.
- Install the coolant recovery reservoir. Refer to Coolant Recovery Reservoir Replacement .
- Install the air cleaner and the duct. Refer to Air Cleaner Assembly Replacement in Engine Controls.
- Refill the cooling system. Refer to Cooling System Draining and Filling .
- Bleed the air from the cooling system.
- Inspect the thermostat housing and the gasket for coolant leaks. Refer to Cooling System Leak Testing .

Tighten
Tighten the bolts to 25 N·m (18 lb ft).

Engine Coolant Thermostat Replacement 5.0/5.7L
Removal Procedure
- Remove the air cleaner and the duct assembly. Refer to Air Cleaner Assembly Replacement in Engine Controls.
- Partially drain the coolant. Refer to Cooling System Draining and Filling .
- Remove the coolant recovery reservoir. Refer to Coolant Recovery Reservoir Replacement .
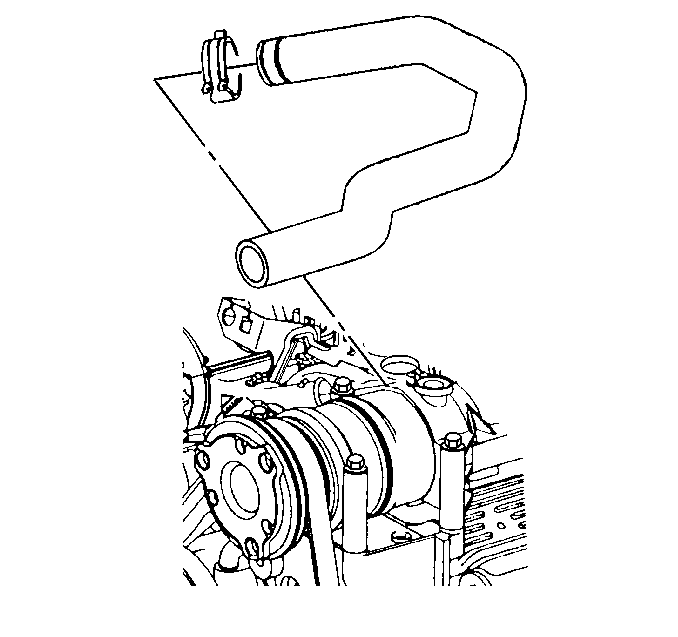
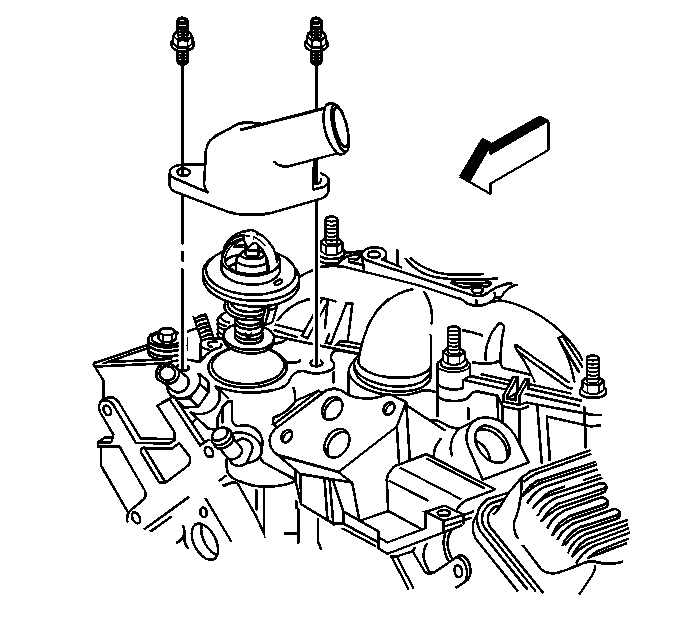
- Disconnect the radiator hose from the thermostat housing.
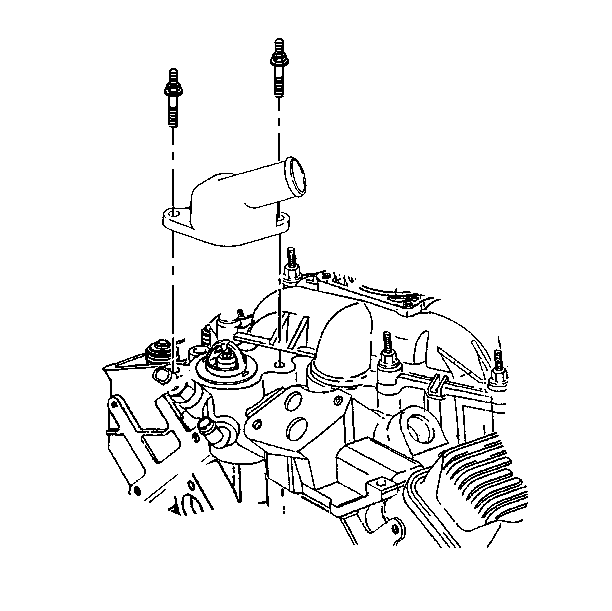
- Remove the bolts attaching the thermostat housing to the thermostat.
- Remove the thermostat housing.
- Remove the thermostat.
- Clean the gasket mating surfaces.
Installation Procedure
Notice: When adding coolant, use DEX-COOL® coolant. If silicated coolant is added to the system, premature engine, heater core or radiator corrosion may result. In addition, the engine coolant will require change sooner-at 50 000 km (30,000 mi) or 24 months.
- Install the thermostat.
- Install the thermostat housing to the intake manifold.
- Install the bolts to the housing.
- Connect the radiator hose to the thermostat housing.
- Install the coolant recovery reservoir. Refer to Coolant Recovery Reservoir Replacement .
- Install the air cleaner and the duct. Refer to Air Cleaner Assembly Replacement in Engine Controls.
- Refill the cooling system. Refer to Cooling System Draining and Filling .
- Bleed the air from the cooling system.
- Inspect the thermostat housing and the gasket for coolant leaks. Refer to Cooling System Leak Testing .


Tighten
Tighten the bolts to 25 N·m (18 lb ft).

Engine Coolant Thermostat Replacement 7.4L
Removal Procedure
- Remove the air cleaner and the duct assembly. Refer to Air Cleaner Assembly Replacement in Engine Controls.
- Drain the coolant. Refer to Cooling System Draining and Filling .
- Remove the coolant recovery reservoir. Refer to Coolant Recovery Reservoir Replacement .
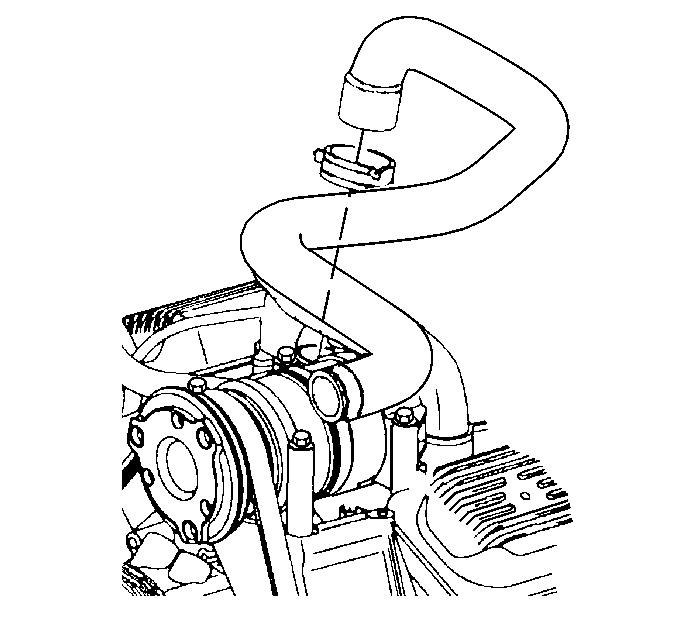
- Disconnect the radiator hose from the thermostat housing.
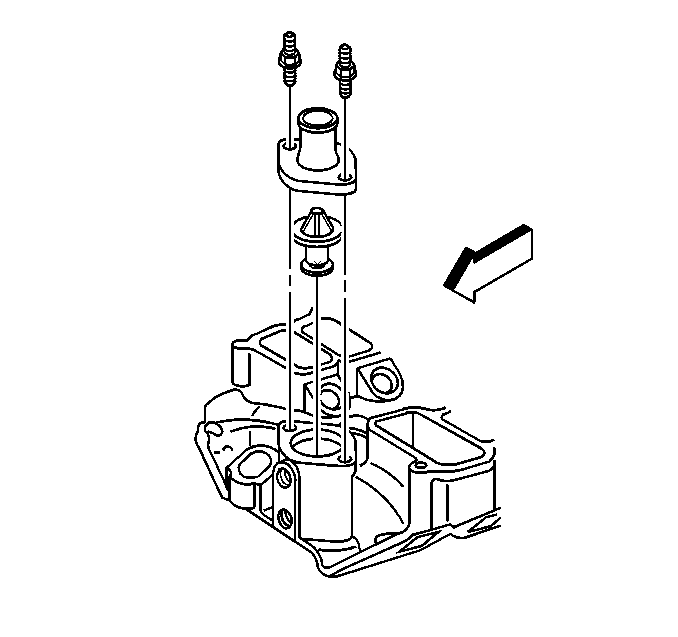
- Remove the bolts attaching the thermostat housing to the thermostat.
- Remove the thermostat housing.
- Remove the thermostat.
- Clean the gasket mating surfaces.
Installation Procedure
Notice: When adding coolant, use DEX-COOL® coolant. If silicated coolant is added to the system, premature engine, heater core or radiator corrosion may result. In addition, the engine coolant will require change sooner-at 50 000 km (30,000 mi) or 24 months.
- Install the thermostat.
- Install the thermostat housing to the intake manifold.
- Install the bolts to the housing.
- Connect the radiator hose to the thermostat housing.
- Install the coolant recovery reservoir. Refer to Coolant Recovery Reservoir Replacement .
- Install the air cleaner and the duct. Refer to Air Cleaner Assembly Replacement in Engine Controls.
- Refill the cooling system. Refer to Cooling System Draining and Filling .
- Bleed the air from the cooling system.
- Inspect the thermostat housing and the gasket for coolant leaks. Refer to Cooling System Leak Testing .

Tighten
Tighten the bolts to 40 N·m (30 lb ft).

Engine Coolant Thermostat Replacement 6.5L Diesel
Removal Procedure
- Remove the engine cover. Refer to Engine Cover Replacement in Interior Trim.
- Remove the air cleaner and the duct assembly. Refer to Air Cleaner Assembly Replacement in Engine Controls - 6.5 (L65).
- Partially drain the coolant. Refer to Cooling System Draining and Filling .
- Remove the surge tank. Lay the surge tank aside. Refer to Surge Tank (Diesel) Replacement .
- Remove the transmission fill tube retaining nut and bolt. Remove the upper portion of the transmission fill tube.
- Remove the oil level indicator tube retaining nut. Remove the upper portion of the oil level indicator tube.
- Remove the upper radiator hose from the thermostat housing.
- Remove the engine harness connector retaining bolt from the bracket. Disconnect the connector and lay aside.
- Remove the fuel feed hose from the lift pump pressure test block. Plug the feed hose and position away from the thermostat housing bolts.
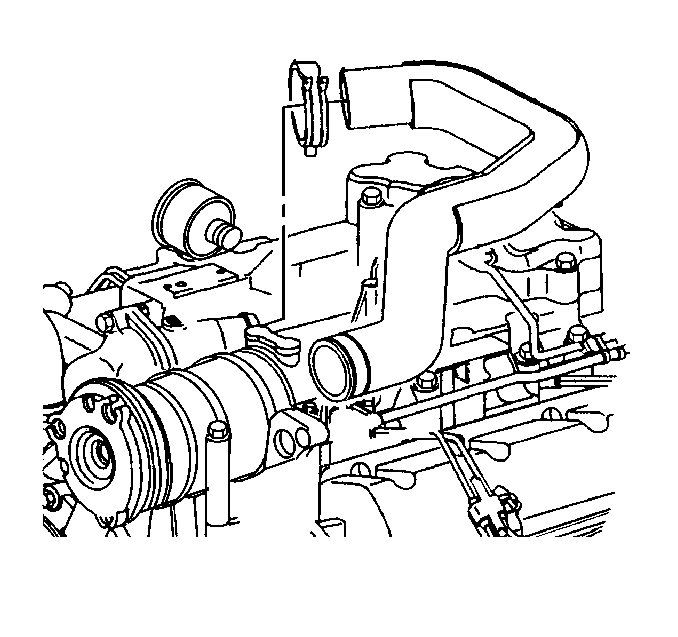
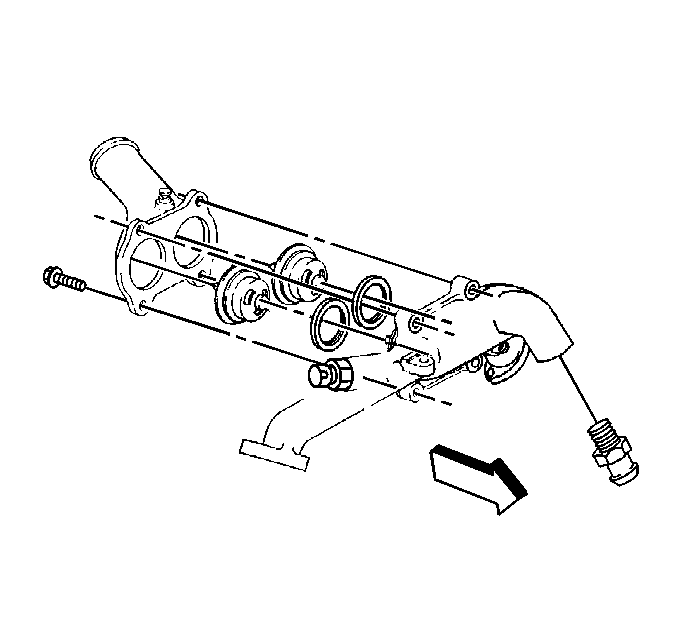
- Remove the bolts attaching the thermostat housing to the thermostat housing crossover.
- Remove the thermostat housing.
- Remove the thermostats.
- Clean the gasket mating surfaces.
Installation Procedure
Notice: When adding coolant, use DEX-COOL® coolant. If silicated coolant is added to the system, premature engine, heater core or radiator corrosion may result. In addition, the engine coolant will require change sooner-at 50 000 km (30,000 mi) or 24 months.
Important: Thermostats must be replaced in pairs.
- Install the thermostats.
- Install the thermostat housing to the thermostat housing crossover.
- Install the bolts to the housing.
- Connect the lift pump feed hose to the lift pump pressure test block.
- Reconnect the engine harness connector. Install the retaining bolt to the bracket.
- Connect the upper radiator hose to the thermostat housing.
- Install the upper portion of the oil level indicator tube and retaining nut.
- Install the upper portion of the transmission fill tube. Install the retaining nut and bolt.
- Tighten the nut to 25 N·m (18 lb ft).
- Tighten the bolt to 47 N·m (35 lb ft).
- Install the surge tank. Refer to Surge Tank (Diesel) Replacement .
- Install the air cleaner and the duct. Refer to Air Cleaner Assembly Replacement in Engine Controls - 6.5 (L65).
- Refill the cooling system. Refer to Cooling System Draining and Filling .
- Bleed the air from the cooling system.
- Inspect the thermostat housing and the gasket for coolant leaks. Refer to Cooling System Leak Testing .

Notice: Refer to Fastener Notice in the Preface section.
Tighten
Tighten the bolts to 42 N·m (31 lb ft).
Tighten
Tighten the bolt to 47 N·m (35 lb ft).
Tighten
Tighten the nut to 22 N·m (16 lb ft).
Tighten

Important: In order to properly fill a system that has been completely drained, use the air bleed vents, located on the thermostat housing.
