For 1990-2009 cars only
The roof panel consists of a single layer outer panel. The original panel is removal by cutting the panel to leave the side welded flanges attached at the drip rail. The service panel is not modified for installation other than drilling holes for plug welding. These procedures have been developed to simplify roof panel replacement.
- Remove all related panels and components.
- Visually inspect and restore as much of the damage as possible to factory specifications.
- Remove sealers and anti-corrosion materials as necessary.
- Remove seam sealer along the drip rails. Use 3M Scotch Brite Clean and Strip Discs P/N 7460 or equivalent.
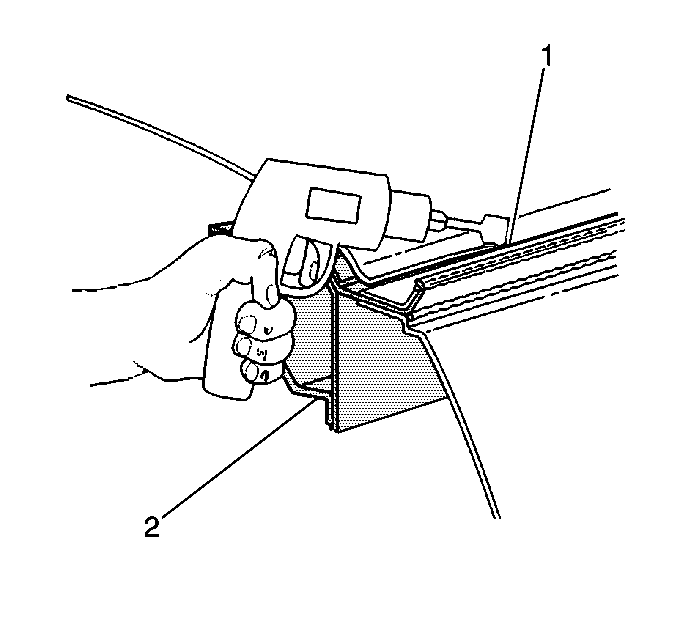
- Cut the sides of the original roof panel at the floor of the drip rail (1).
- Leave the weld flange attached to the roof rail reinforcement (2).
- Cut the roof panel from the support bows using a windshield adhesive cutting tool, such as wire cutting tool, or equivalent.
- Locate, mark, and drill out the factory spot welds attaching the roof panel at the front windshield pinch-weld flange and rear door frame opening pinch-weld flange.
- Remove damaged roof panel.

Installation Procedure
- Prepare mating surfaces and check for proper fit and alignment.
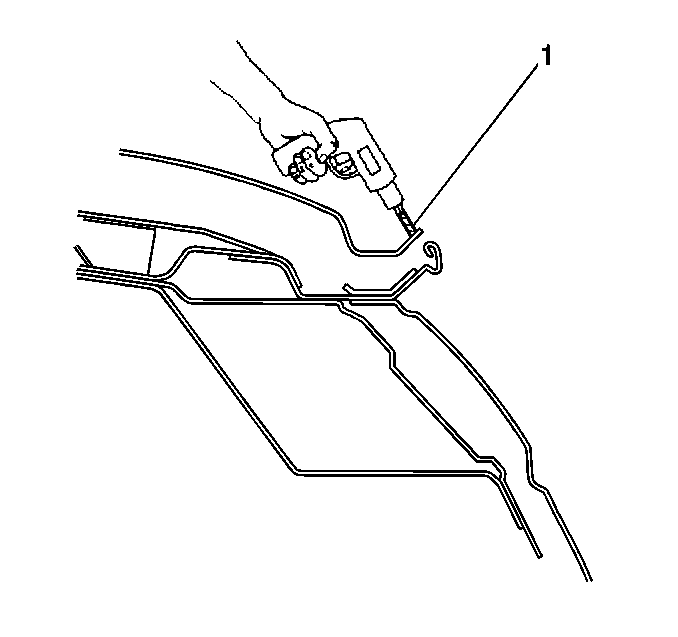
- Grind the lip remaining at the weld flange (1) for a proper fit of the service roof panel, if necessary.
- Drill 8 mm (5/16 in) holes for plug welding in the following areas: (1)
- Apply anti-corrosion materials to bare metal weld flanges as necessary.
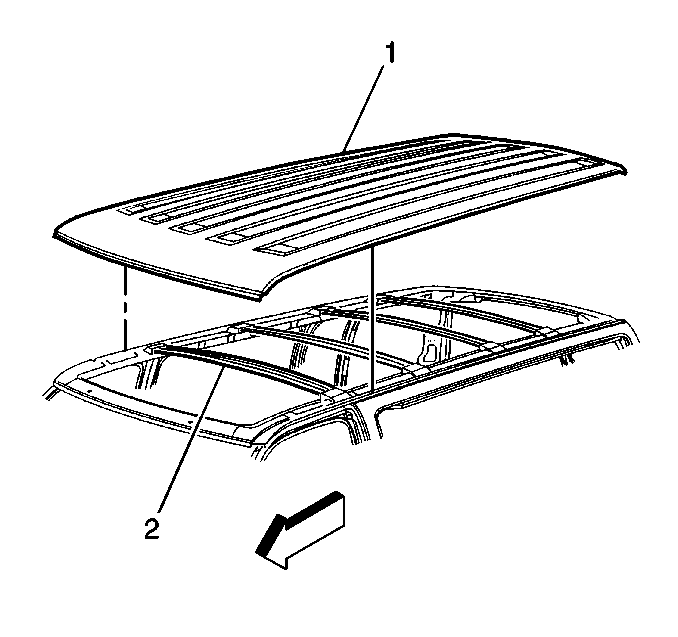
- Apply anti-flutter material to roof support bows (2).
- Position the service panel (1).
- Check for proper fit and plug weld as necessary.
- Clean and prepare all surfaces. The bonding area should be a primer surface ONLY and NOT an aftermarket top coat.
- Apply sealers and anti-corrosion materials as necessary.
- Install all related panels and components.

| • | Side rail weld flanges |
| • | Pinch weld flanges |
| • | Rear door frame opening pinch-weld flanges 62 mm (2½ in) apart |

Important: The type of anti-flutter materials used on the bows will determine whether it is to be applied before or after the roof panel is installed.
Important: Do not combine paint systems. Refer to manufacturers recommendations.
