For 1990-2009 cars only
Removal Procedure
- Remove the negative battery cable. Refer to Battery Negative Cable Disconnection and Connection in Engine Electrical.
- Recover the refrigerant from the system. Refer to Refrigerant Recovery and Recharging .
- Remove the coolant recovery or the surge tank. Refer to Coolant Recovery Reservoir Replacement or Surge Tank (Diesel) Replacement in Engine Cooling.
- Remove the air cleaner from the vehicle. Refer to Air Cleaner Assembly Replacement , Air Cleaner Assembly Replacement , Air Cleaner Assembly Replacement or Air Cleaner Assembly Replacement in Engine Controls.
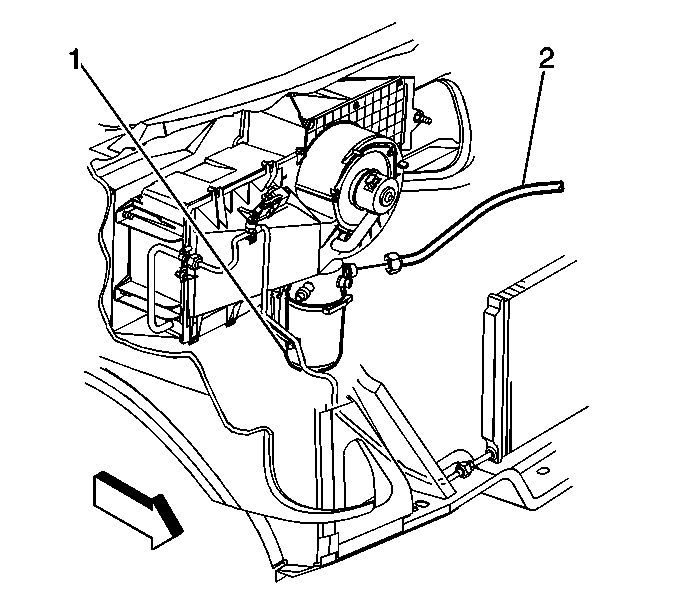
- Remove the air conditioning line (2) connection from the accumulator (1).
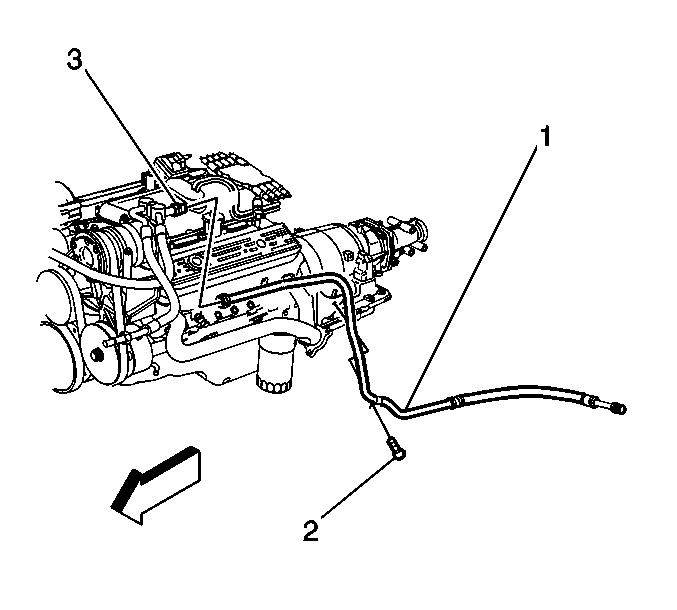
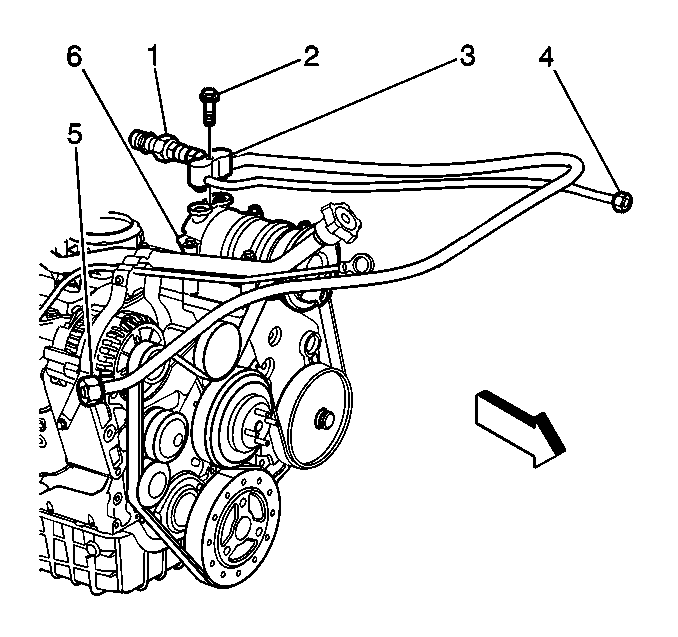
- Remove the auxiliary hose (1) connection from the compressor (3), if equipped.
- Remove the air conditioning line from the condenser (4).
- Remove the bolt (2) from the hose assembly to the compressor (6).
- Cap or plug all open connections to prevent contamination.
- Remove the hose (3) from the vehicle.
Caution: Unless directed otherwise, the ignition and start switch must be in the OFF or LOCK position, and all electrical loads must be OFF before servicing any electrical component. Disconnect the negative battery cable to prevent an electrical spark should a tool or equipment come in contact with an exposed electrical terminal. Failure to follow these precautions may result in personal injury and/or damage to the vehicle or its components.


Installation Procedure
- Remove the cap or plugs from the connections.
- Install the hose (3) to the vehicle compressor.
- Install the hose assembly retaining bolt (2) to the compressor.
- Install the air conditioning line to the condenser (4).
- Install the auxiliary hose (1) connection at the compressor (3), if equipped.
- Install the air conditioning lines (2) to the accumulator (1).
- Evacuate and Recharge the refrigerant to the system. Refer to Refrigerant Recovery and Recharging .
- Install the air cleaner to the vehicle. Refer to Air Cleaner Assembly Replacement , Air Cleaner Assembly Replacement , Air Cleaner Assembly Replacement or Air Cleaner Assembly Replacement in Engine Controls.
- Install the coolant recovery or the surge tank. Refer to Coolant Recovery Reservoir Replacement or Surge Tank (Diesel) Replacement in Engine Cooling.
- Install the negative battery cable. Refer to Battery Disconnect Caution in Engine Electrical.

Tighten
Tighten the hose retaining bolt to 45 N·m
(33 lb ft).
Tighten
Tighten the A/C line to the condenser to 28 N·m
(21 lb ft).

Tighten
Tighten the auxiliary hose connection to the compressor
to 48 N·m (35 lb ft).

Tighten
Tighten the A/C line to the accumulator to 48 N·m
(35 lb ft).
