Tools Required
J 42851 Front Cover Oil Seal Installer
Removal Procedure
- Remove the crankshaft balancer. Refer to Crankshaft Balancer Replacement .
- Remove the water pump. Refer to Water Pump Replacement in Engine Cooling.
- Disconnect the camshaft position (CMP) sensor electrical connector (2).
- Remove the CMP sensor bolt.
- Remove the CMP sensor.
- Inspect the CMP sensor O-ring for cuts, cracks, tears, or damage. Replace the O-ring as needed.
- Drain the engine oil. Refer to Engine Oil and Oil Filter Replacement .
- Loosen, but do not remove enough oil pan bolts for the front cover to be removed.
- Remove the engine front cover bolts (2).
- Remove the engine front cover (1).
- Remove the engine front cover gasket.
- Remove the crankshaft front oil seal from the front cover.
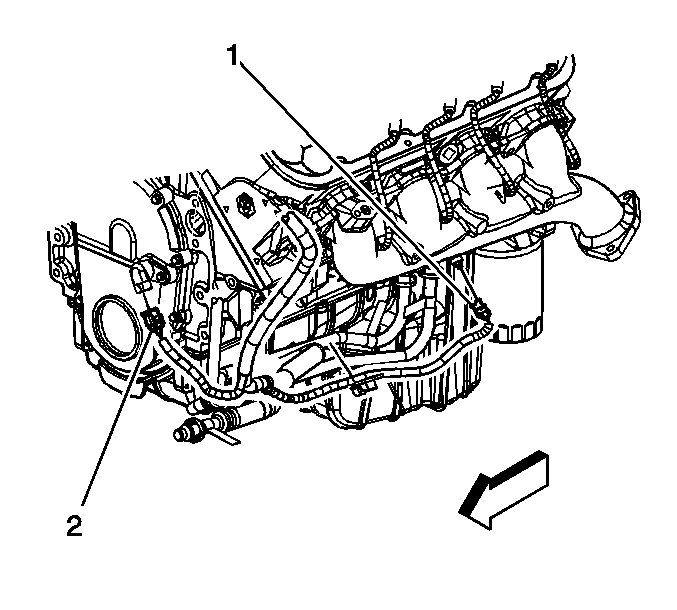
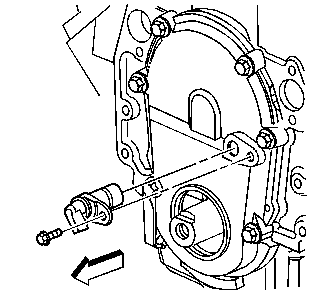
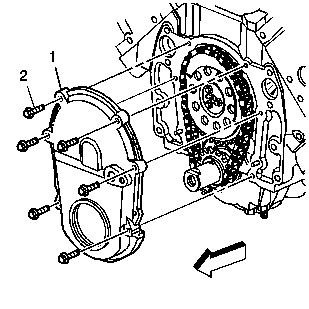
Important: The engine front cover gasket is reusable.
Installation Procedure
- Install a NEW crankshaft front oil seal using J 42851 .
- Lubricate the sealing surface of the crankshaft front oil seal with clean engine oil.
- Apply sealant GM U.S. P/N 12346286, Canada P/N 10953472, or equivalent in two places (1) on the engine block where the front cover meets the oil pan.
- Install the engine front cover gasket into the front cover.
- Install the front cover.
- Install the engine front cover bolts.
- Tighten the engine front cover bolts.
- Tighten the engine front cover bolts in sequence a first pass to 6 N·m (54 lb in).
- Tighten the engine front cover bolts in sequence a final pass to 12 N·m (106 lb in).
- Inspect the CMP sensor O-ring for cuts, cracks, tears or damage. Replace the O-ring as needed.
- Apply a light film of clean engine oil to the CMP sensor O-ring.
- Install the CMP sensor.
- Install the CMP sensor bolt.
- Connect the CMP sensor electrical connector (2).
- Install the water pump. Refer to Water Pump Replacement in Engine Cooling.
- Install the crankshaft balancer. Refer to Crankshaft Balancer Replacement .
- Raise and suitably support the vehicle with safety stands. Refer to Lifting and Jacking the Vehicle in General Information.
- Tighten the oil pan bolts.
- Tighten the oil pan bolts in sequence a first pass to 10 N·m (89 lb in).
- Tighten the oil pan bolts in sequence a final pass to 25 N·m (18 lb ft).
- Lower the vehicle.
- Fill the crankcase with new engine oil. Refer to Engine Oil and Oil Filter Replacement .
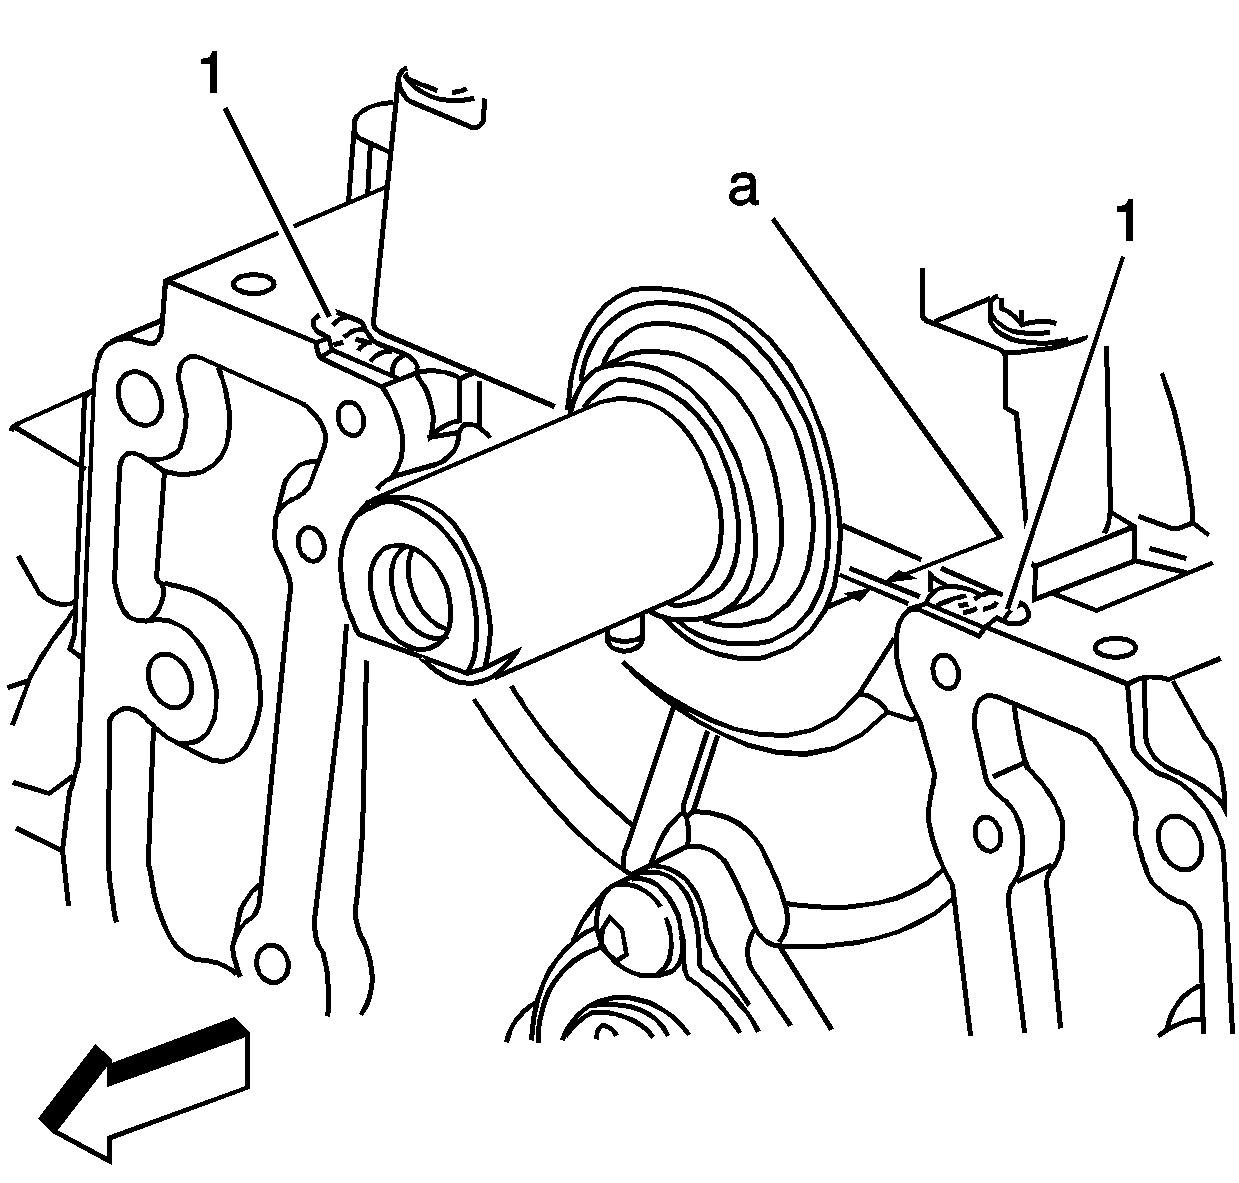
Important: The engine front cover must be installed and the fasteners tightened while the sealant is still wet to the touch.
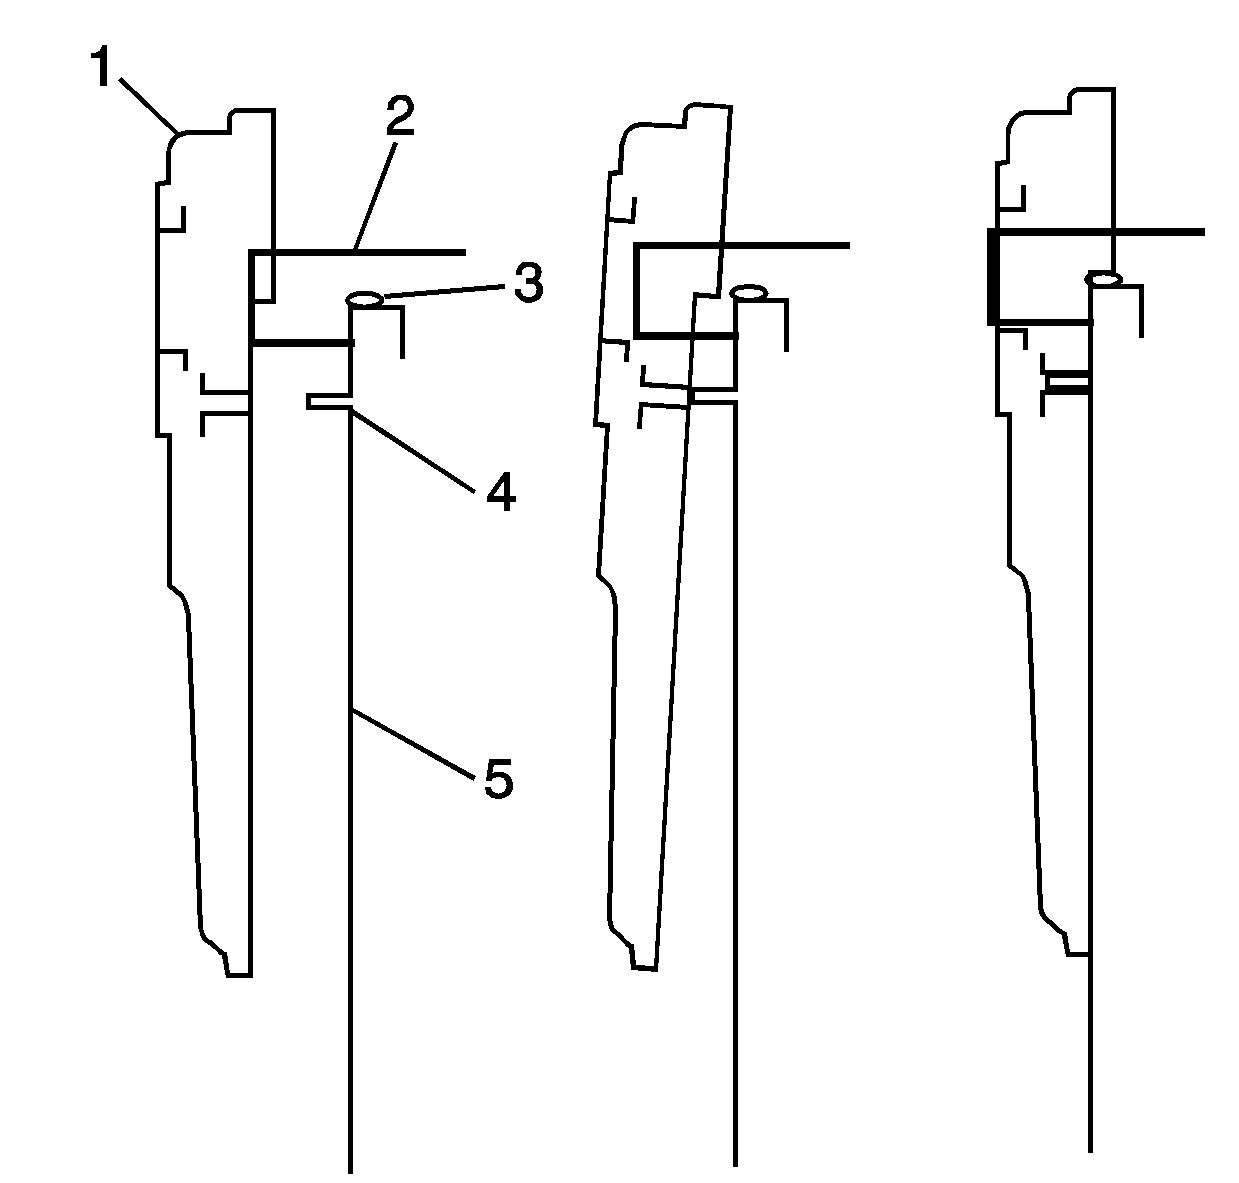
Important: The following method must be used when installing the engine front cover. Failure to follow the instructions will push the sealant out, which may cause an oil leak.
| 5.1. | Hold the front cover (1) up to the crankshaft (2). |
| 5.2. | Lift the front cover (1) while sliding the cover over the crankshaft (2). |
| 5.3. | Slide the front cover towards the engine block (5) while keeping the cover raised. |
| 5.4. | Lower the cover down over the dowel pin (4), allowing the front cover to rest on the sealant (3). |
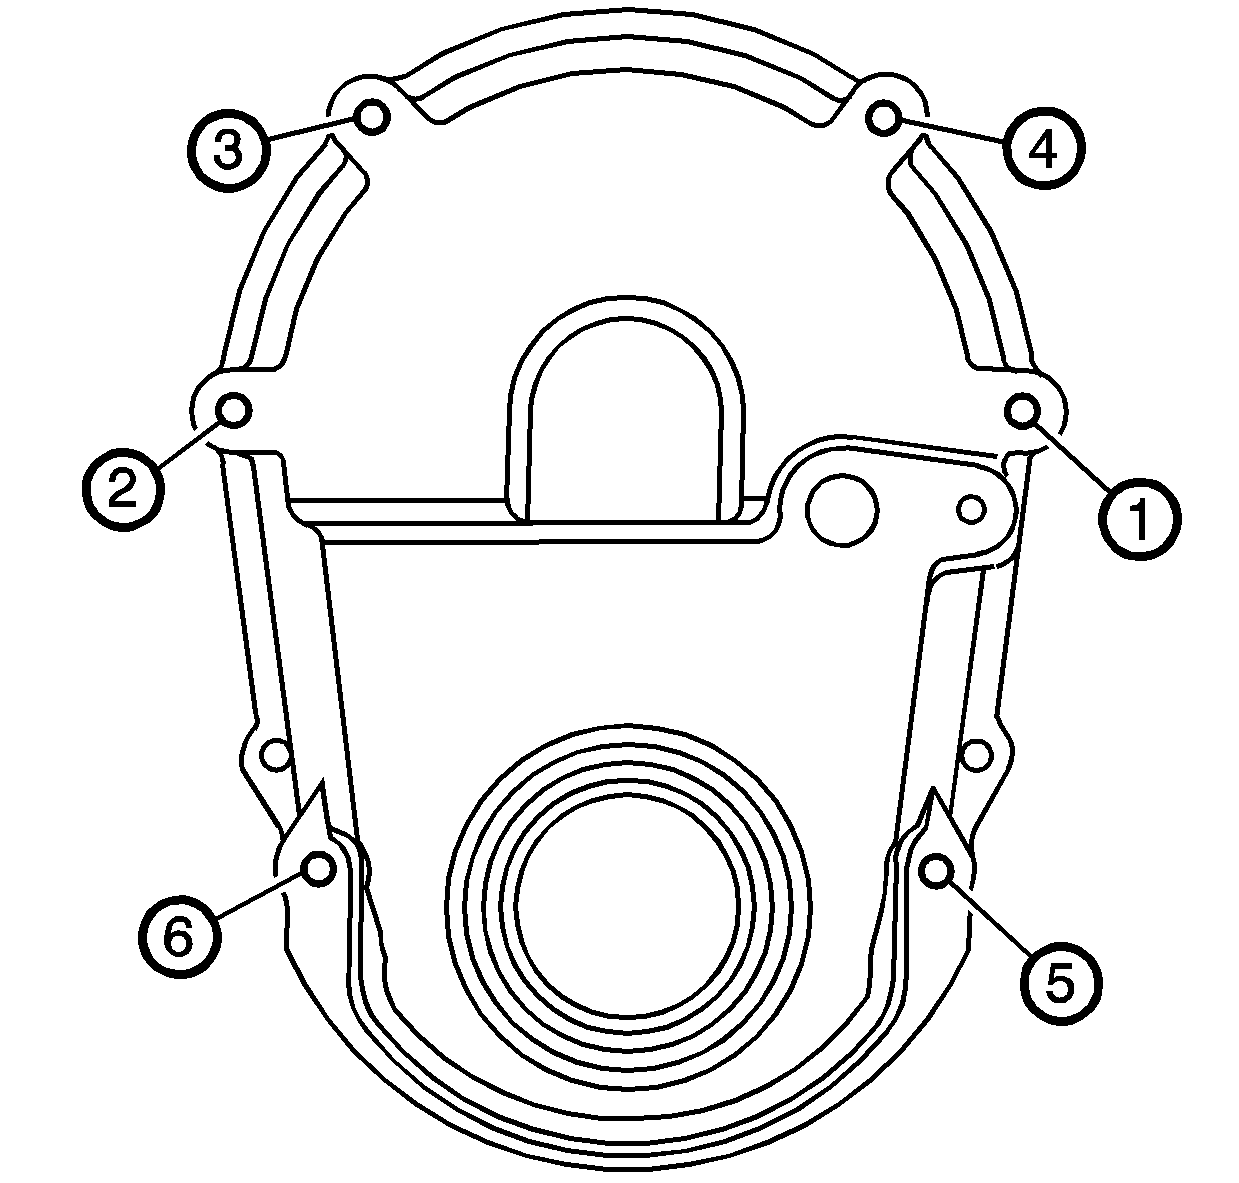
Notice: Use the correct fastener in the correct location. Replacement fasteners must be the correct part number for that application. Fasteners requiring replacement or fasteners requiring the use of thread locking compound or sealant are identified in the service procedure. Do not use paints, lubricants, or corrosion inhibitors on fasteners or fastener joint surfaces unless specified. These coatings affect fastener torque and joint clamping force and may damage the fastener. Use the correct tightening sequence and specifications when installing fasteners in order to avoid damage to parts and systems.
Tighten

Tighten
Tighten the CMP sensor bolt to 12 N·m (106 lb in).

Tighten
