For 1990-2009 cars only
Rear Axle Replacement 8.6, 9.5, 10.5 Inch Axle
Removal Procedure
- Raise the vehicle. Refer to Lifting and Jacking the Vehicle in General Information.
- Place jack or utility stands (such as GMDE 123-B67313) at the front end of the vehicle.
- Drain the axle lubricant from the rear axle.
- Disconnect the propeller shaft. Refer to One-Piece Propeller Shaft Replacement or Two-Piece Propeller Shaft Replacement .
- Remove the tire and wheel assemblies. Refer to Tire and Wheel Removal and Installation in Tires and Wheels.
- Disconnect the parking brake cable. Refer to Parking Brake Rear Cable Replacement .
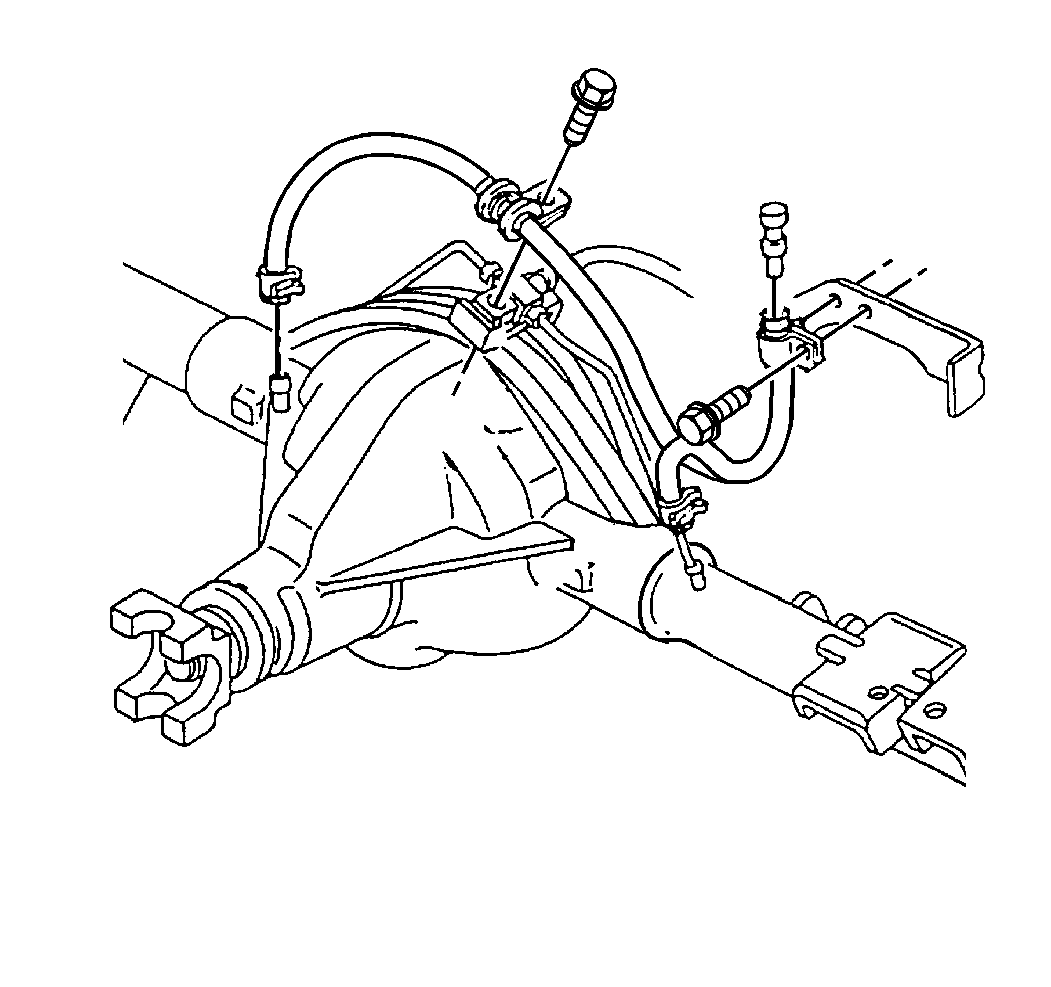
- Remove the brake line bracket bolts. Suspend the brake lines from the vehicle with heavy mechanics wire.
- Disconnect the shock absorbers from the axle brackets. Refer to Shock Absorber Replacement in Rear Suspension.
- Remove the vent hose from the rear axle vent fitting. Refer to Vent Hose Replacement .
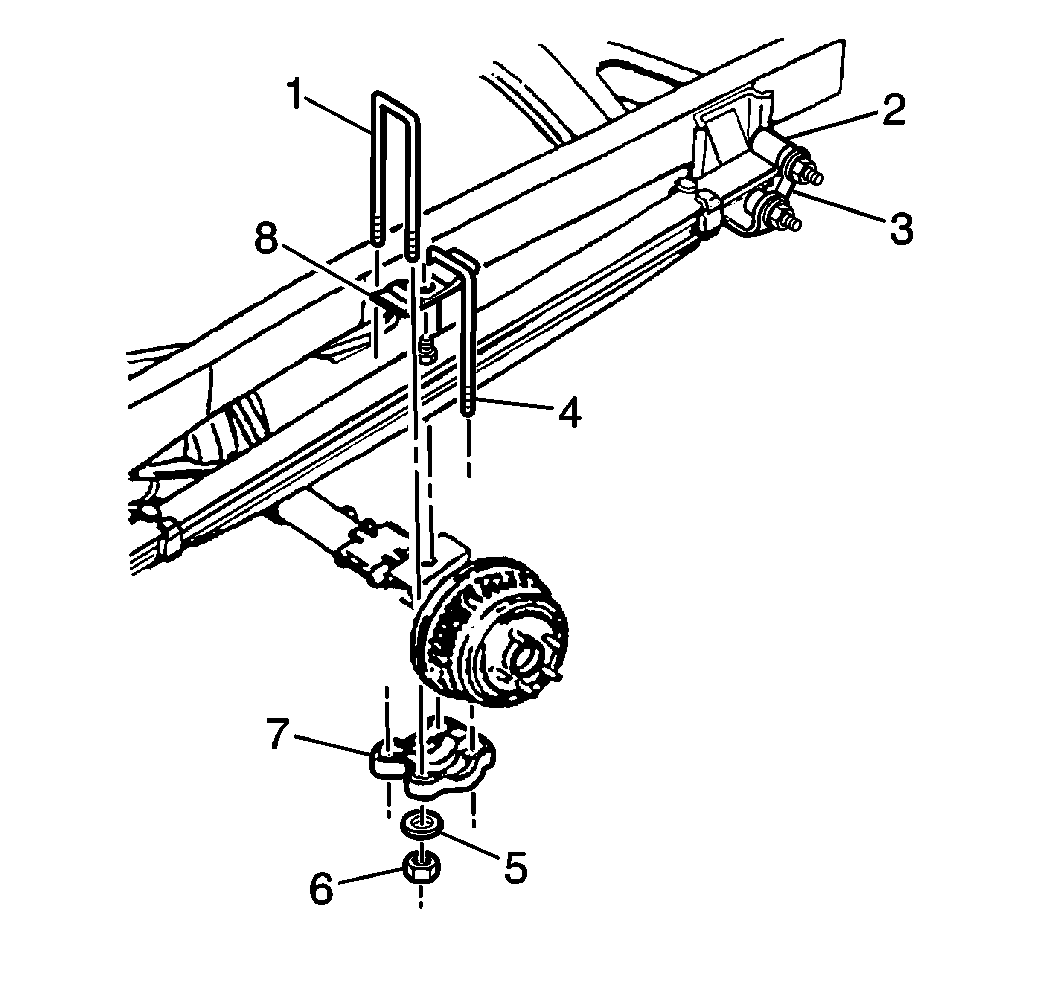
- Remove the nuts and the washers from the U-bolts.
- Remove the U-bolts (4), the spring plates (7) and the spacers (8) from the axle assembly.
- Lower the axle assembly.
Important: Observe and accurately mark the positions of all driveline components relative to the propeller shaft and axles prior to disassembly. These components include the propeller shaft, drive axle, pinion flanges, and output shafts. Reassemble all components in the exact relationship the components had to each other during removal. Follow the specifications and torque values. Follow any measurements made prior to disassembly.


Installation Procedure
- Transfer any necessary parts to the replacement axle.
- Place the rear axle assembly under the vehicle.
- Align the rear axle assembly with the springs.
- Install the spacers (8), the spring plates (7) and the U-bolts (4) to the rear axle.
- Raise the rear axle assembly into position.
- Install the washers and the nuts to the U-bolts.
- Install the vent hose to the rear axle vent fitting. Refer to Vent Hose Replacement .
- Connect the shock absorbers to the rear axle. Refer to Shock Absorber Replacement in Rear Suspension.
- Install the brake lines and the brake line bracket bolts to the axle.
- Connect the parking brake cable. Refer to Parking Brake Rear Cable Replacement in Park Brake.
- Install the tire and wheel assemblies. Refer to Tire and Wheel Removal and Installation in Tires and Wheels.
- Connect the propeller shaft. Refer to One-Piece Propeller Shaft Replacement or Two-Piece Propeller Shaft Replacement in Propeller Shaft.
- Fill the axle with lubricant. Use the proper fluid. Refer to Approximate Fluid Capacities and Fluid and Lubricant Recommendations in Maintenance and Lubrication.
- Remove the utility stands.
- Lower the vehicle.

Notice: Refer to Fastener Notice in the Preface section.
Tighten
| • | Tighten the nuts (with attached washer) to 72 N·m (53 lb ft). |
| • | Tighten the nuts (without attached washer) to 137 N·m (101 lb ft). |

