Removal Procedure
Important: The intake manifold, throttle body, fuel
rail, and injectors may be removed as an assembly. If not servicing the individual
components, remove the manifold as a complete assembly.
- Remove the throttle body. Refer to
Throttle Body Assembly Replacement
in Engine Controls - 4.8L, 5.3L, and 6.0L.
- Remove the oil fill tube. Refer to
Oil Level Indicator and Tube Replacement
.
- Remove the fuel injectors. Refer to
Fuel Injector Replacement
in Engine Controls - 4.8L, 5.3L, and 6.0L.
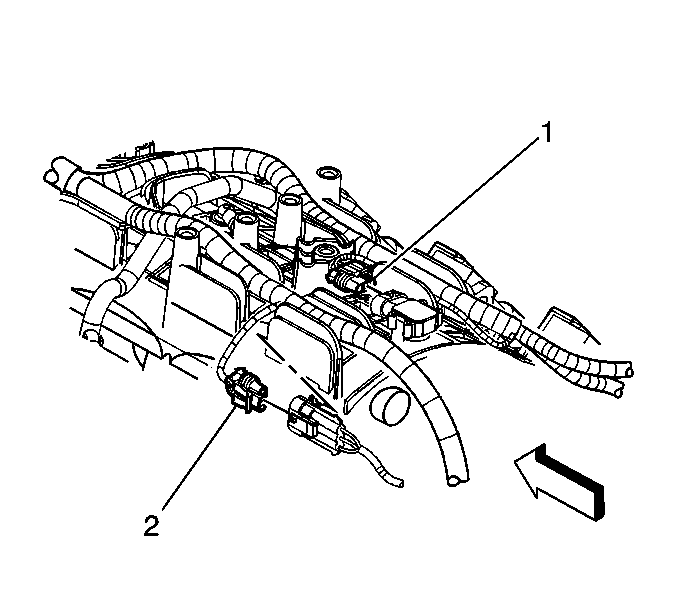
- Disconnect the following electrical connectors:
| • | Manifold absolute pressure (MAP) sensor (1) |
| • | Exhaust gas recirculation (EGR) valve, if equipped |
- Remove the knock sensor harness electrical connector from the intake
manifold.
- Set the electrical harness aside.
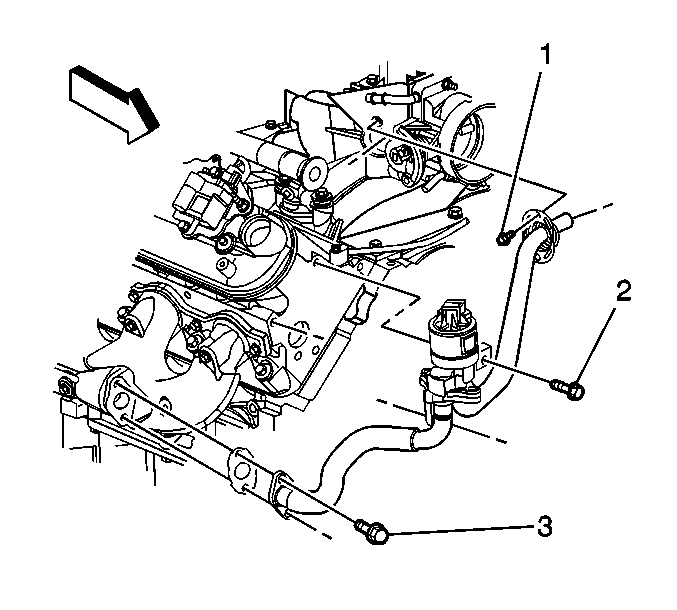
- If equipped, remove the following EGR pipe
bolts:
- If equipped, remove the EGR pipe (with valve).
- If equipped, remove the EGR pipe gasket from the exhaust manifold.
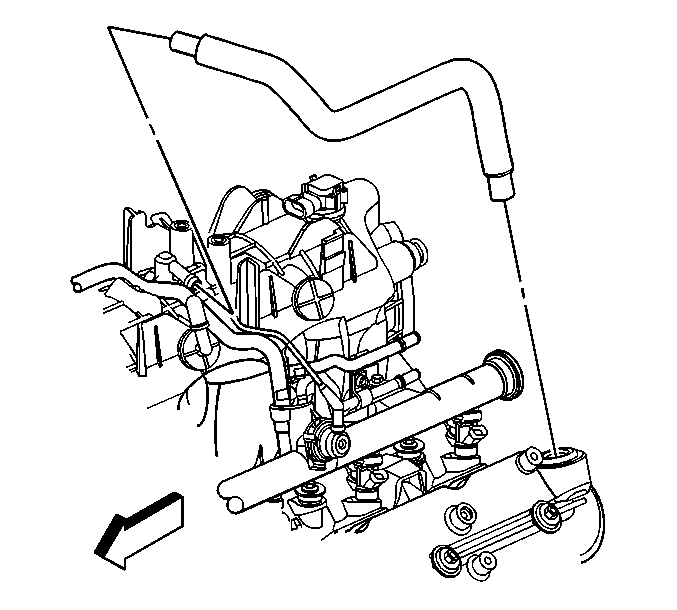
- Remove the positive crankcase ventilation
(PCV) hose (with valve).
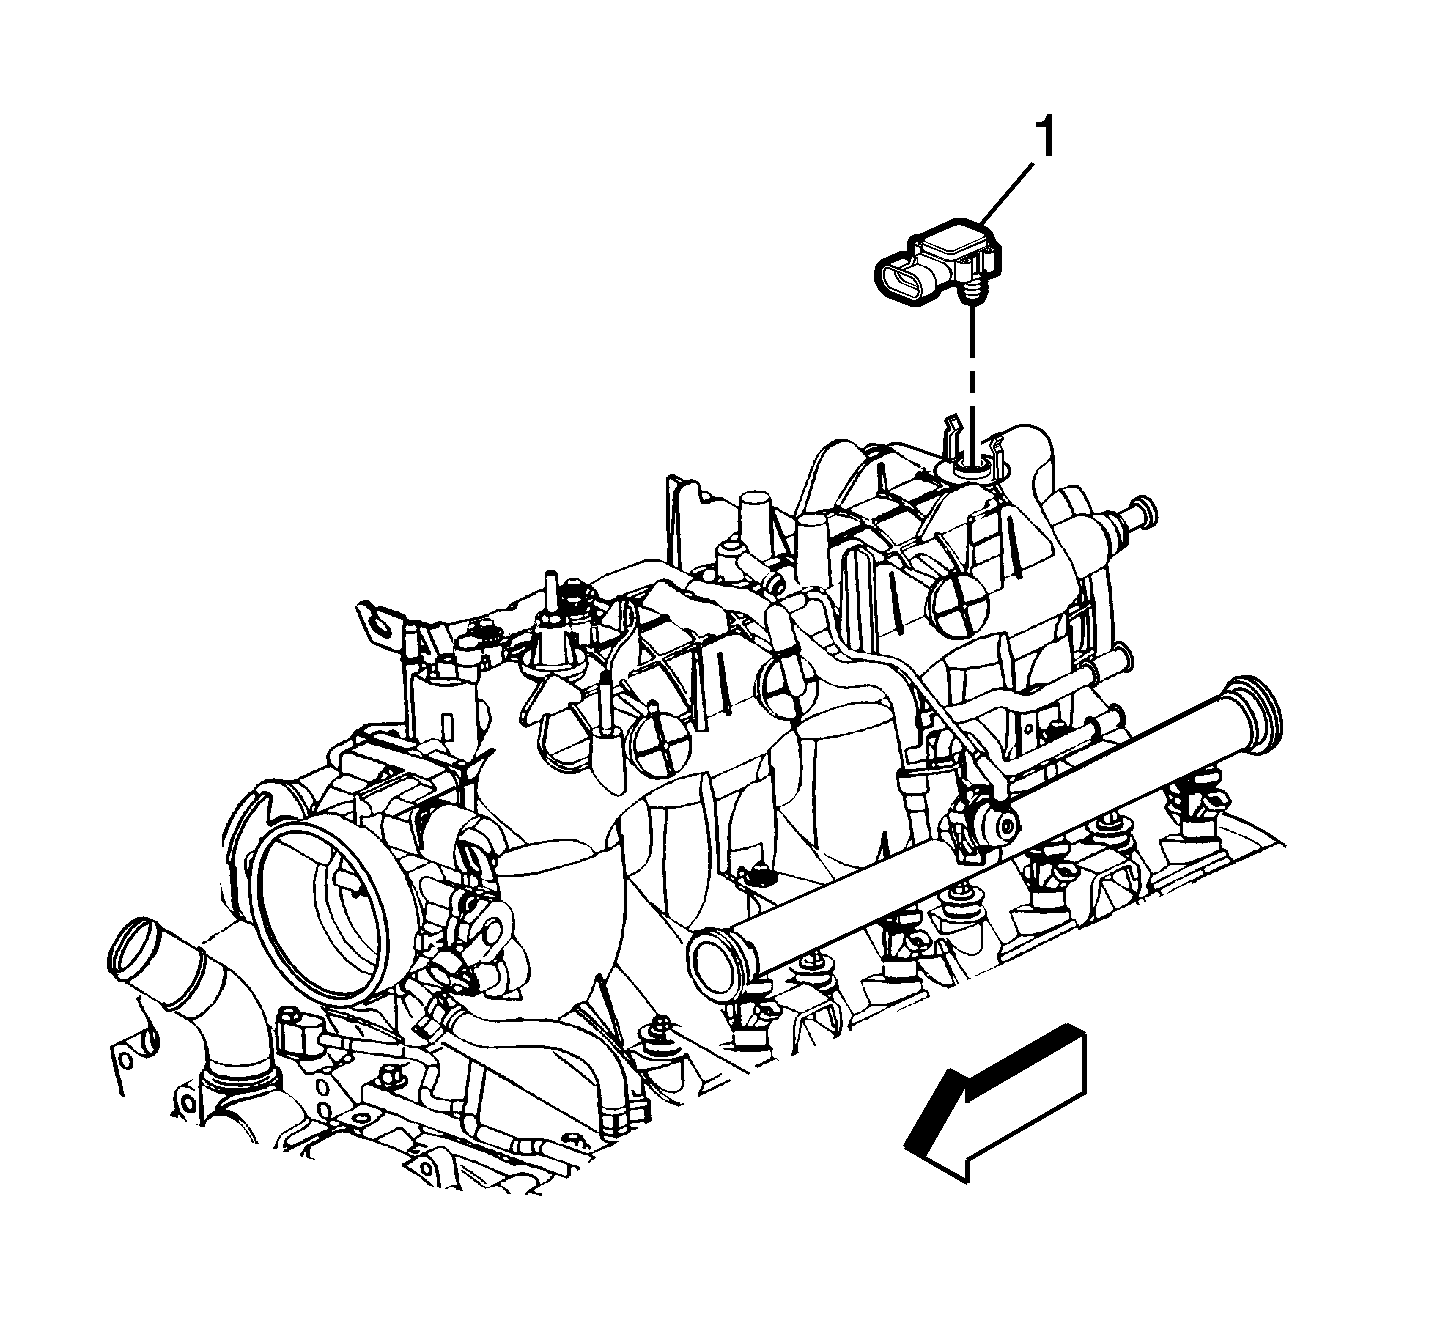
- Remove the MAP sensor (1) from the intake
manifold.
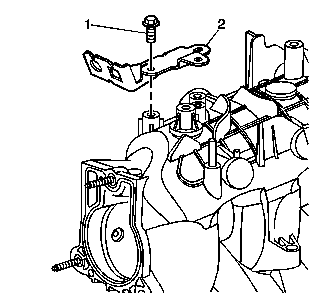
- Remove the accelerator control cable bracket
bolts (1).
- Remove the accelerator control cable bracket (2) from the intake manifold.
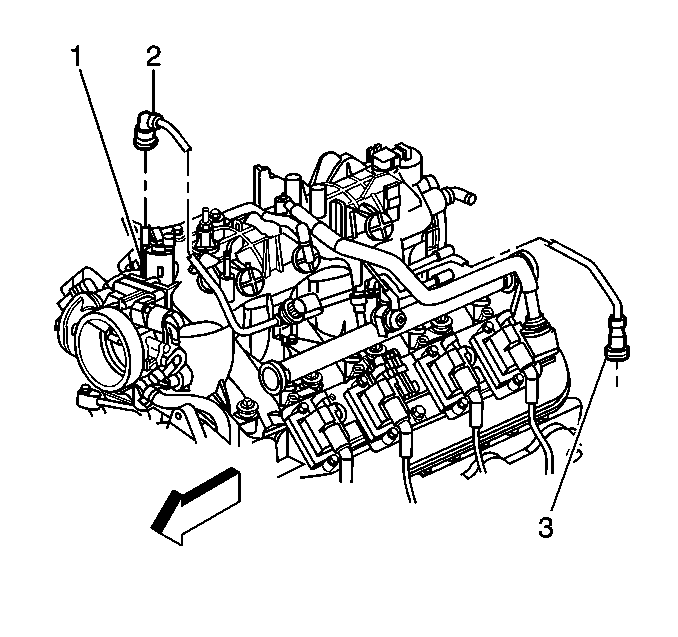
- Remove the evaporative emission (EVAP)
purge solenoid vent tube by performing the following:
| 14.1. | Remove the EVAP tube end (2) from the solenoid (1). |
| 14.2. | Squeeze the EVAP pipe quick connect fitting (3) retainer together. |
| 14.3. | Remove the EVAP tube end (3) from the vapor pipe. |
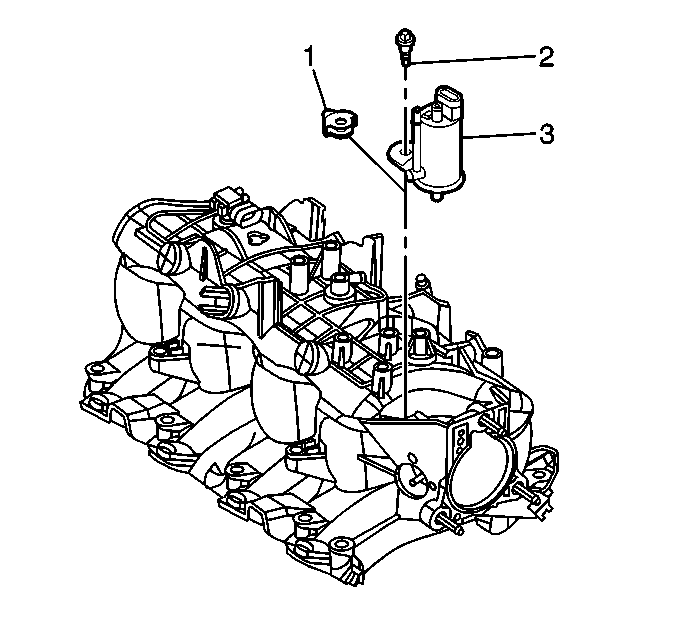
- Remove the EVAP purge solenoid bolt (2),
solenoid (3), and isolator (1) from the intake manifold.
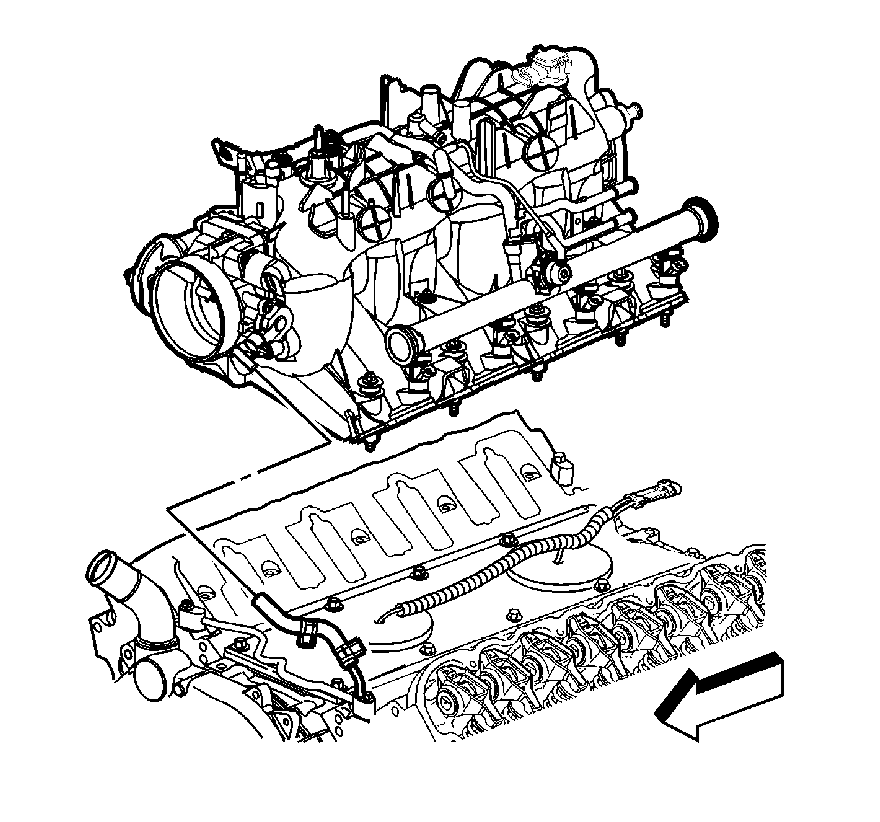
- Remove the intake manifold bolts.
- Remove the intake manifold.
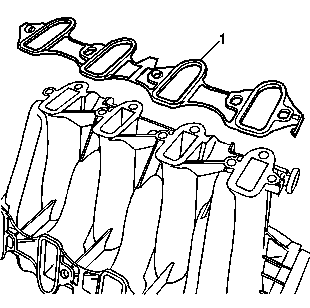
- Remove the intake manifold gaskets (1) from
the intake manifold.
- Discard the old intake manifold gaskets.
- Clean the gasket surfaces of the EGR pipe and the exhaust manifold, if
equipped.
Installation Procedure

- Install new intake manifold gaskets (1)
to the intake manifold.

- Install the intake manifold.
- Apply a 5 mm (0.20 in) band of threadlock GM P/N
12345382 (Canadian P/N 10953489) or equivalent to the threads of the
intake manifold bolts.
Notice: Refer to Fastener Notice in the Preface section.
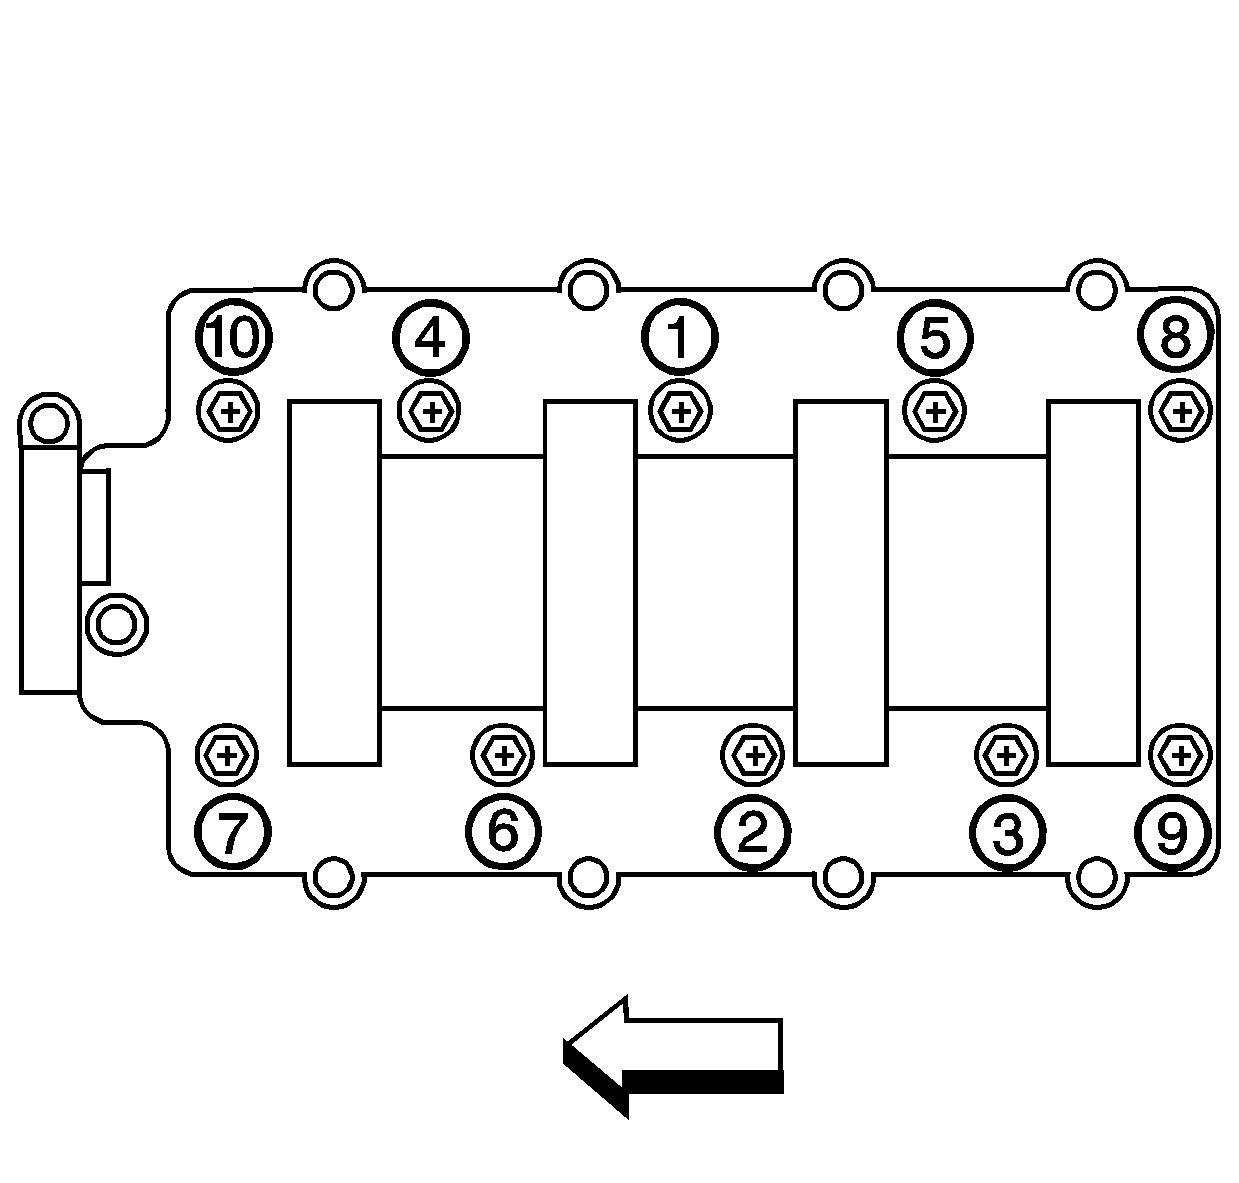
- Install the intake manifold bolts.
Tighten
- Tighten the intake manifold bolts a first pass in sequence to 5 N·m
(44 lb in).
- Tighten the intake manifold bolts a final pass in sequence to 10 N·m
(89 lb in).

- Install the EVAP purge solenoid (3), isolator
(1), and bolt (2) to the intake manifold.
Tighten
Tighten the EVAP purge solenoid bolt to 10 N·m
(89 lb in).

- Install the EVAP purge solenoid vent tube
to the solenoid (1) and vapor pipe.

- Install the accelerator control cable bracket
(2) to the intake manifold.
- Install the accelerator control cable bracket bolts (1).
Tighten
Tighten the accelerator control cable bracket bolts
to 10 N·m (89 lb in).

Important: Lightly coat the MAP sensor seal with clean
engine oil before installing.
- Install the MAP sensor (1) to the intake manifold.

- Install the PCV hose (with valve).

- If equipped, position a new EGR pipe gasket
on the exhaust manifold.
- If equipped, install the EGR pipe (with valve).
- If equipped, install the following EGR pipe bolts until snug:
- If equipped, tighten the EGR pipe bolts.
Tighten
| • | Tighten the EGR valve pipe-to-intake manifold bolts to 10 N·m
(89 lb in). |
| • | Tighten the EGR valve pipe-to-cylinder head bolts to 50 N·m
(37 lb ft). |
| • | Tighten the EGR valve pipe-to-exhaust manifold bolts to 30 N·m
(22 lb ft). |
- Route the electrical harness into position over the engine.

- Connect the knock sensor harness electrical
connector to the intake manifold.
- Connect the following electrical connectors.
- Install the fuel injectors. Refer to
Fuel Injector Replacement
in Engine Controls - 4.8L, 5.3L, and 6.0L.
- Install the oil fill tube. Refer to
Oil Level Indicator and Tube Replacement
.
- Install the throttle body. Refer to
Throttle Body Assembly Replacement
in Engine Controls - 4.8L, 5.3L, and 6.0L.


