For 1990-2009 cars only
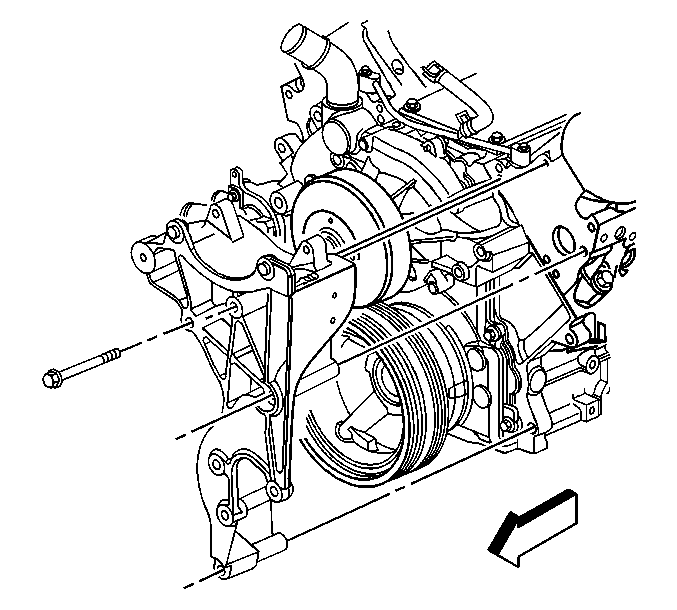
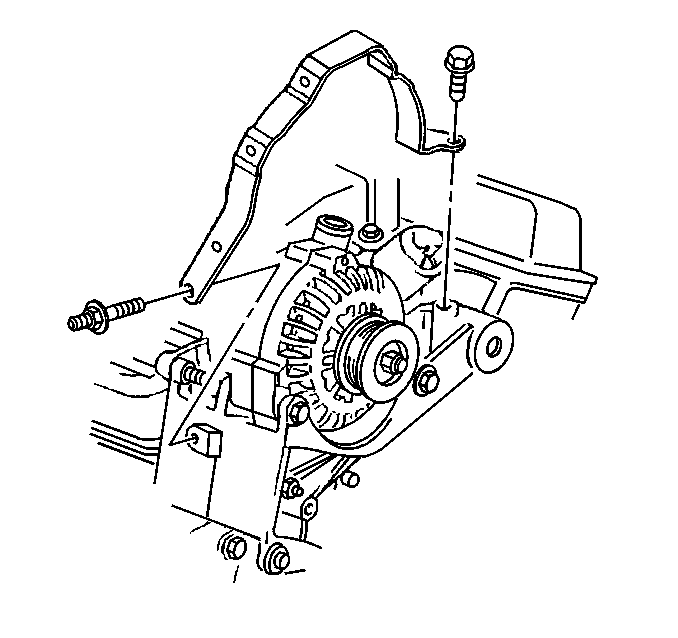
Generator Bracket Replacement 4.8L /5.3L /6.0L
Removal Procedure
- Remove the generator. Refer to Generator Replacement .
- Remove the power steering pump. Refer to Power Steering Pump Replacement .
- Remove the generator bracket bolts.
- Remove the generator bracket.
Installation Procedure
- Install the generator bracket.
- Install the generator bracket bolts.
- Install the power steering pump. Refer to Power Steering Pump Replacement .
- Install the generator. Refer to Generator Replacement .
Notice: Refer to Fastener Notice in the Preface section.
Tighten
Tighten the generator bracket bolts to 50 N·m (37 lb ft).
Generator Bracket Replacement 4.3L Engine
Removal Procedure
- Disconnect the battery negative cable. Refer to Battery Negative Cable Disconnection and Connection .
- Remove the engine cover. Refer to Engine Cover Replacement in Interior Trim.
- Remove the coolant recovery reservoir. Refer to Coolant Recovery Reservoir Replacement in Engine Cooling.
- Remove the air cleaner assembly and the air inlet duct from the throttle body. Refer to Air Cleaner Assembly Replacement in Engine Controls - 4.3L.
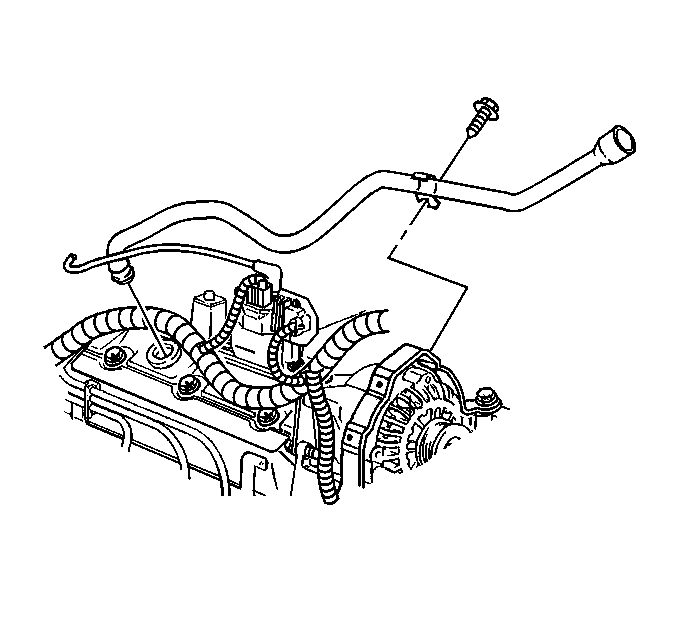
- Remove the engine oil and the transmission fluid level indicators.
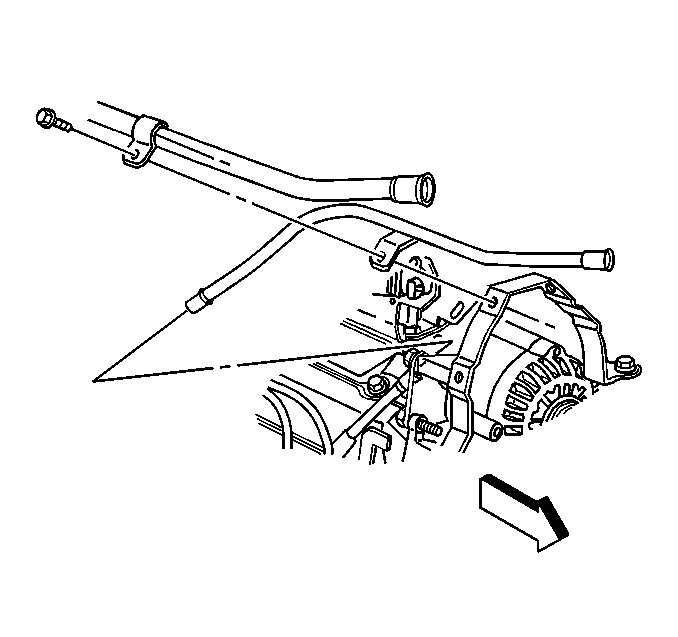
- Remove the screw holding the oil level indicator tube and the transmission fluid fill tube to the oil fill tube lower support.
- Remove the upper section of the oil level indicator tube.
- Remove the nut holding the transmission fluid fill tube to the rear of the right cylinder head.
- Remove the upper section of the transmission fluid fill tube.
- Remove the screw holding the oil fill tube to the oil fill tube lower support.
- Remove the oil fill tube.
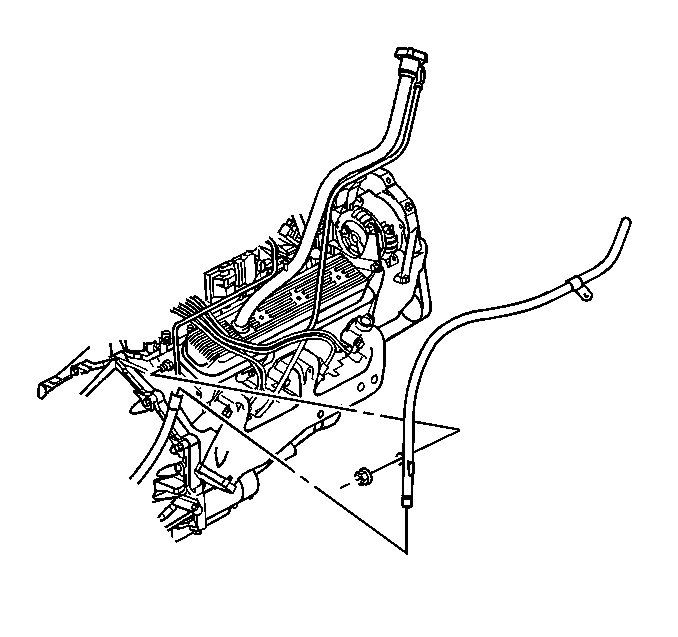
- Remove the bolts holding the heater outlet and inlet hoses to the oil fill tube lower support.
- Remove the engine wiring harness retainer from the stud at the oil fill tube lower support.
- Remove the stud and the bolt for the oil fill tube lower support.
- Remove the oil fill tube lower support.
- Remove the upper fan shroud section. Refer to Fan Shroud Replacement in Engine Cooling.
- Remove the drive belt. Refer to Drive Belt Replacement in Engine Mechanical - 4.3L.
- Remove the generator. Refer to Generator Replacement .
- Remove the drive belt tensioner. Refer to Drive Belt Tensioner Replacement in Engine Mechanical - 4.3L.
- Remove the drive belt idler pulley. Refer to Drive Belt Idler Pulley Replacement in Engine Mechanical - 4.3L.
- Remove the 2 bolts and nut holding the generator mounting bracket to the engine.
- Slide the generator mounting bracket off of the stud.


Installation Procedure
- Slide the generator mounting bracket on the stud.
- Install the 3 bolts and the nut.
- Install the drive belt idler pulley. Refer to Drive Belt Idler Pulley Replacement in Engine Mechanical - 4.3L.
- Install the drive belt tensioner. Refer to Drive Belt Tensioner Replacement in Engine Mechanical - 4.3L.
- Install the generator. Refer to Generator Replacement .
- Install the drive belt. Refer to Drive Belt Replacement in Engine Mechanical - 4.3L.
- Install the upper fan shroud section. Refer to Fan Shroud Replacement in Engine Cooling.
- Install the oil fill tube lower support, the bolt and the stud.
- Install the engine wiring harness retainer on the stud.
- Install the heater inlet and outlet hose brackets and the bolts to the oil fill tube lower support.
- Install the oil fill tube into the right valve rocker arm cover.
- Install the screw holding the oil fill tube to the oil fill tube lower support.
- Install the transmission fluid fill upper tube in the lower tube.
- Install the nut holding the transmission fluid fill tube to the rear of the right cylinder head.
- Apply sealer GM P/N 12346004 (Canadian P/N 10953480) or equivalent on the area of the upper section of the oil level indicator tube where it fits into the lower section.
- Install the upper section of the oil level indicator tube into the lower section.
- Install the bolt holding the oil level indicator tube and the transmission fluid fill tube to the oil fill tube lower support.
- Install the engine oil level indicator and the transmission fluid level indicator.
- Install the air inlet duct to the throttle body and the air cleaner assembly. Refer to Air Cleaner Assembly Replacement in Engine Controls - 4.3L.
- Install the coolant recovery reservoir. Refer to Coolant Recovery Reservoir Replacement in Engine Cooling.
- Install the engine cover. Refer to Engine Cover Replacement in Interior Trim.
- Connect the battery negative cable. Refer to Battery Negative Cable Disconnection and Connection .
Notice: Refer to Fastener Notice in the Preface section.
Tighten
Tighten the generator mounting bracket bolts and the nut to 41 N·m
(30 lb ft).
Tighten
Tighten the oil fill tube lower support stud and the bolt to 25 N·m
(18 lb ft).
Tighten
Tighten the heater hose bracket bolts to 5 N·m (44 lb in).
Tighten
Tighten the transmission fluid fill tube nut to 10 N·m (88 lb in).
Tighten
Tighten the oil level indicator tube and the transmission fluid fill tube to
lower support bolt to 5 N·m (44 lb in).
