Installation Instructions -- Emergency Vehicle Lamp Wiring
Insert Notice SIO#
- Disconnect the negative (-) battery cable at the battery. The negative (-) battery cable must be disconnected before the positive wiring lead is connected to the emergency lamp relay.
- Locate the emergency vehicle lamp connection point under the hood (refer to following illustration). Use the upper stud on the relay mounted at the upper right of front of the dash, in the engine compartment.
- Complete installation of additional fused wiring from the emergency lamp relay to the emergency lamp (refer to following illustration). Use the supplied boot to cover the terminal nut. Torque the nut assembly to 5.5 lb-ft (7.5 N·m).
- With the emergency lamp switch in the off position, reconnect the negative (-) battery cable to the battery. Torque to 12.5 lb-ft (17 N·m).
- Reset the clock time and radio preset buttons as needed.
Terminal for Owner Added Accessory
Retaining Nut, M8
Passenger-side Fender Panel
Your vehicle is equipped with wiring provisions for a 12 volt accessory power supply. Refer to the following instructions when adding electrical accessories that will use the 9L4 12 volt power supply feeds connected to your vehicle's electrical system. After reading the following information, keep it with your owner's manual for future reference.
Notice: Before modifying or adding any wiring, be sure that it will work properly with your vehicle's wiring system. Because there are so many modifications that can be made for many different bodies and accessories, GM cannot take responsibility for any changes made. Such changes may not be covered by your GM Warranty. Have the work done by an experienced electrical technician.
All wiring must be properly protected by fuses, etc. and must be routed properly so that it will not be cut, pinched or rubbed by other parts of the vehicle. Do not route wiring in areas where it will be very hot. Be sure not to overload the vehicle's wiring, connectors and components. All added wire must be at least the same size as the wire being attached to for proper fuse protection.Installation Instructions -- 12 Volt Accessory Power Supply
- Disconnect the negative (-) battery cable at the battery. The negative (-) battery cable must be disconnected before the positive wiring lead is connected to the power accessory.
- Install the power supply harness under the instrument panel near the steering column (see attached illustration). The wire bundle consists of the ignition (IGN), battery (BAT) and negative (NEG) wire feeds.
- Remove the tape to release the wire bundles from the power supply harness.
- Remove the tape from the wires that are to be used to connect the power accessory. Do not remove the tape from the unused wires. Tape the unused wires back in their original position under the instrument panel.
- The body builder is to complete the wiring installation with additional wire required for the specific electrical accessory power connection. All wires must be at least the same size (gage) as the wire it is being attached to for proper fusing.
- The ignition must be turned to OFF or ACC prior to attaching the cables to the battery, or serious damage to the Electronic Control Module (ECM) may result.
- Reconnect the negative (-) battery cable to the battery. Torque the bolt to 12.5 lb-ft. (17 N·m).
- Reset the clock time and radio pushbuttons as desired.
The windshield wiper switch and the radio must be turned off before attaching cables to the battery.
The IGN A and IGN B connections have voltage supplied and are hot when the ignition is turned to ACC or RUN.
The BAT A and BAT B connections have voltage supplied and are hot at all times.
The combined electrical load of IGN A and BAT A must not exceed 21 amps (250 watts). Additionally, the combined electrical load of IGN B and BAT B must not exceed 28 amps (340 watts).
Notice: Before modifying or adding any wiring, be sure that it will work properly with your vehicle's wiring system. Because there are so many modifications that can be made for many different bodies and accessories, GM cannot take responsibility for any changes made. Such changes may not be covered by your GM Warranty. Have the work done by an experienced electrical technician.
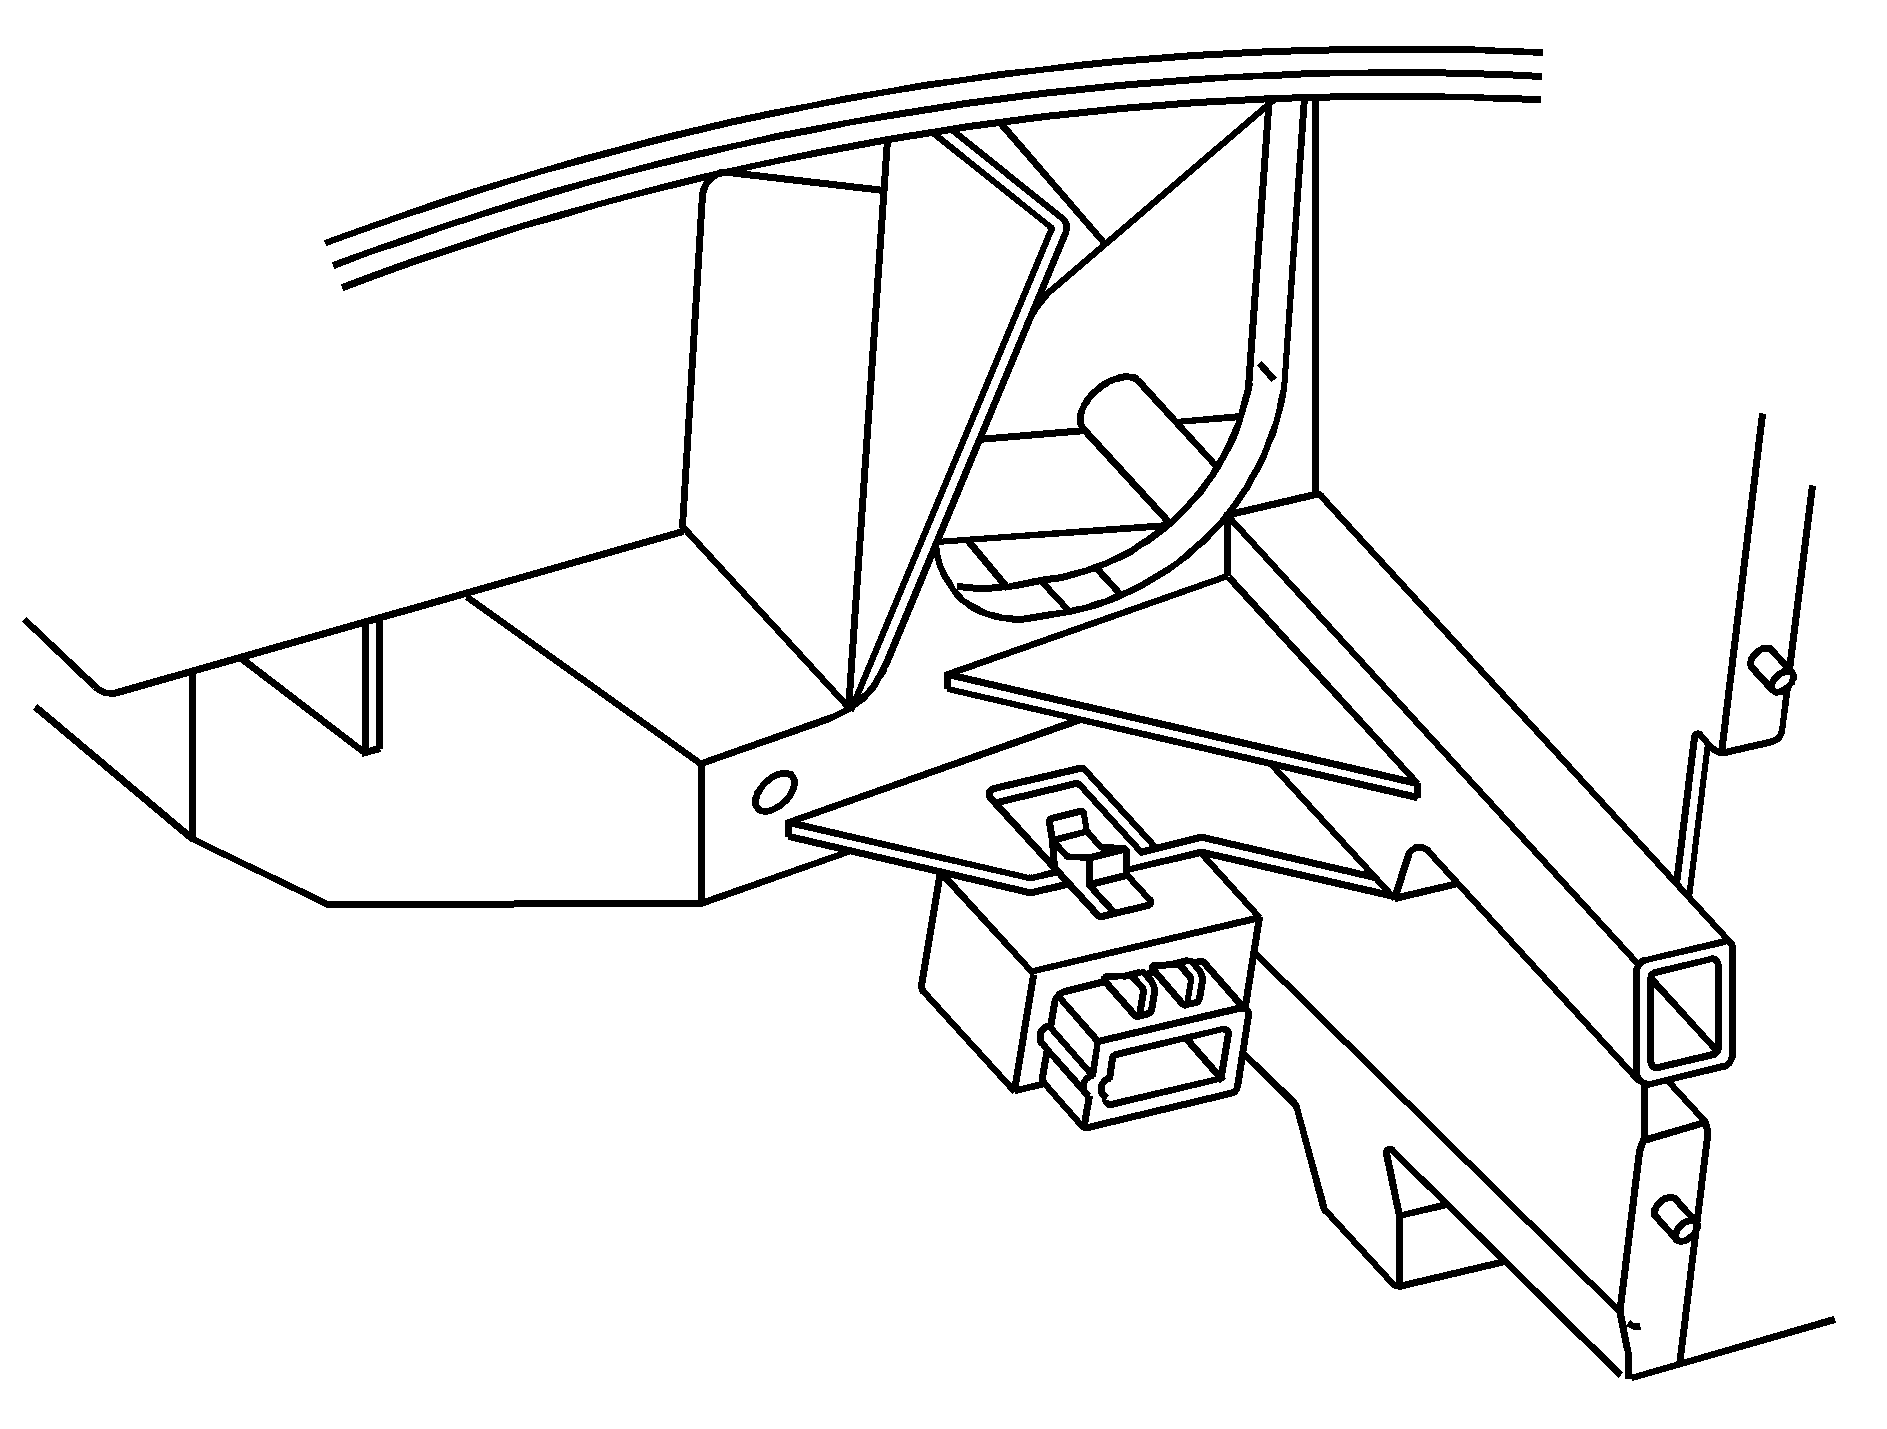
All wiring must be properly protected by fuses, etc. and must be routed properly so that it will not be cut, pinched or rubbed by other parts of the vehicle. Do not route wiring in areas where it will be very hot. Be sure not to overload the vehicle's wiring, connectors and components. All added wire must be at least the same size as the wire being attached to for proper fuse protection.Installation Instructions -- Emergency Vehicle Roof Panel Lamp
- Disconnect the negative (-) battery cable at the battery.
- Drill a hole in the outer roof panel. The drilled hole should pierce the outer roof panel only. Remove all sharp edges from the roof panel drilled hole.
- Pull the vehicle installed lamp harness wires through the outer roof panel hole. Use care when pulling the harness through the panel hole to avoid wire insulation damage.
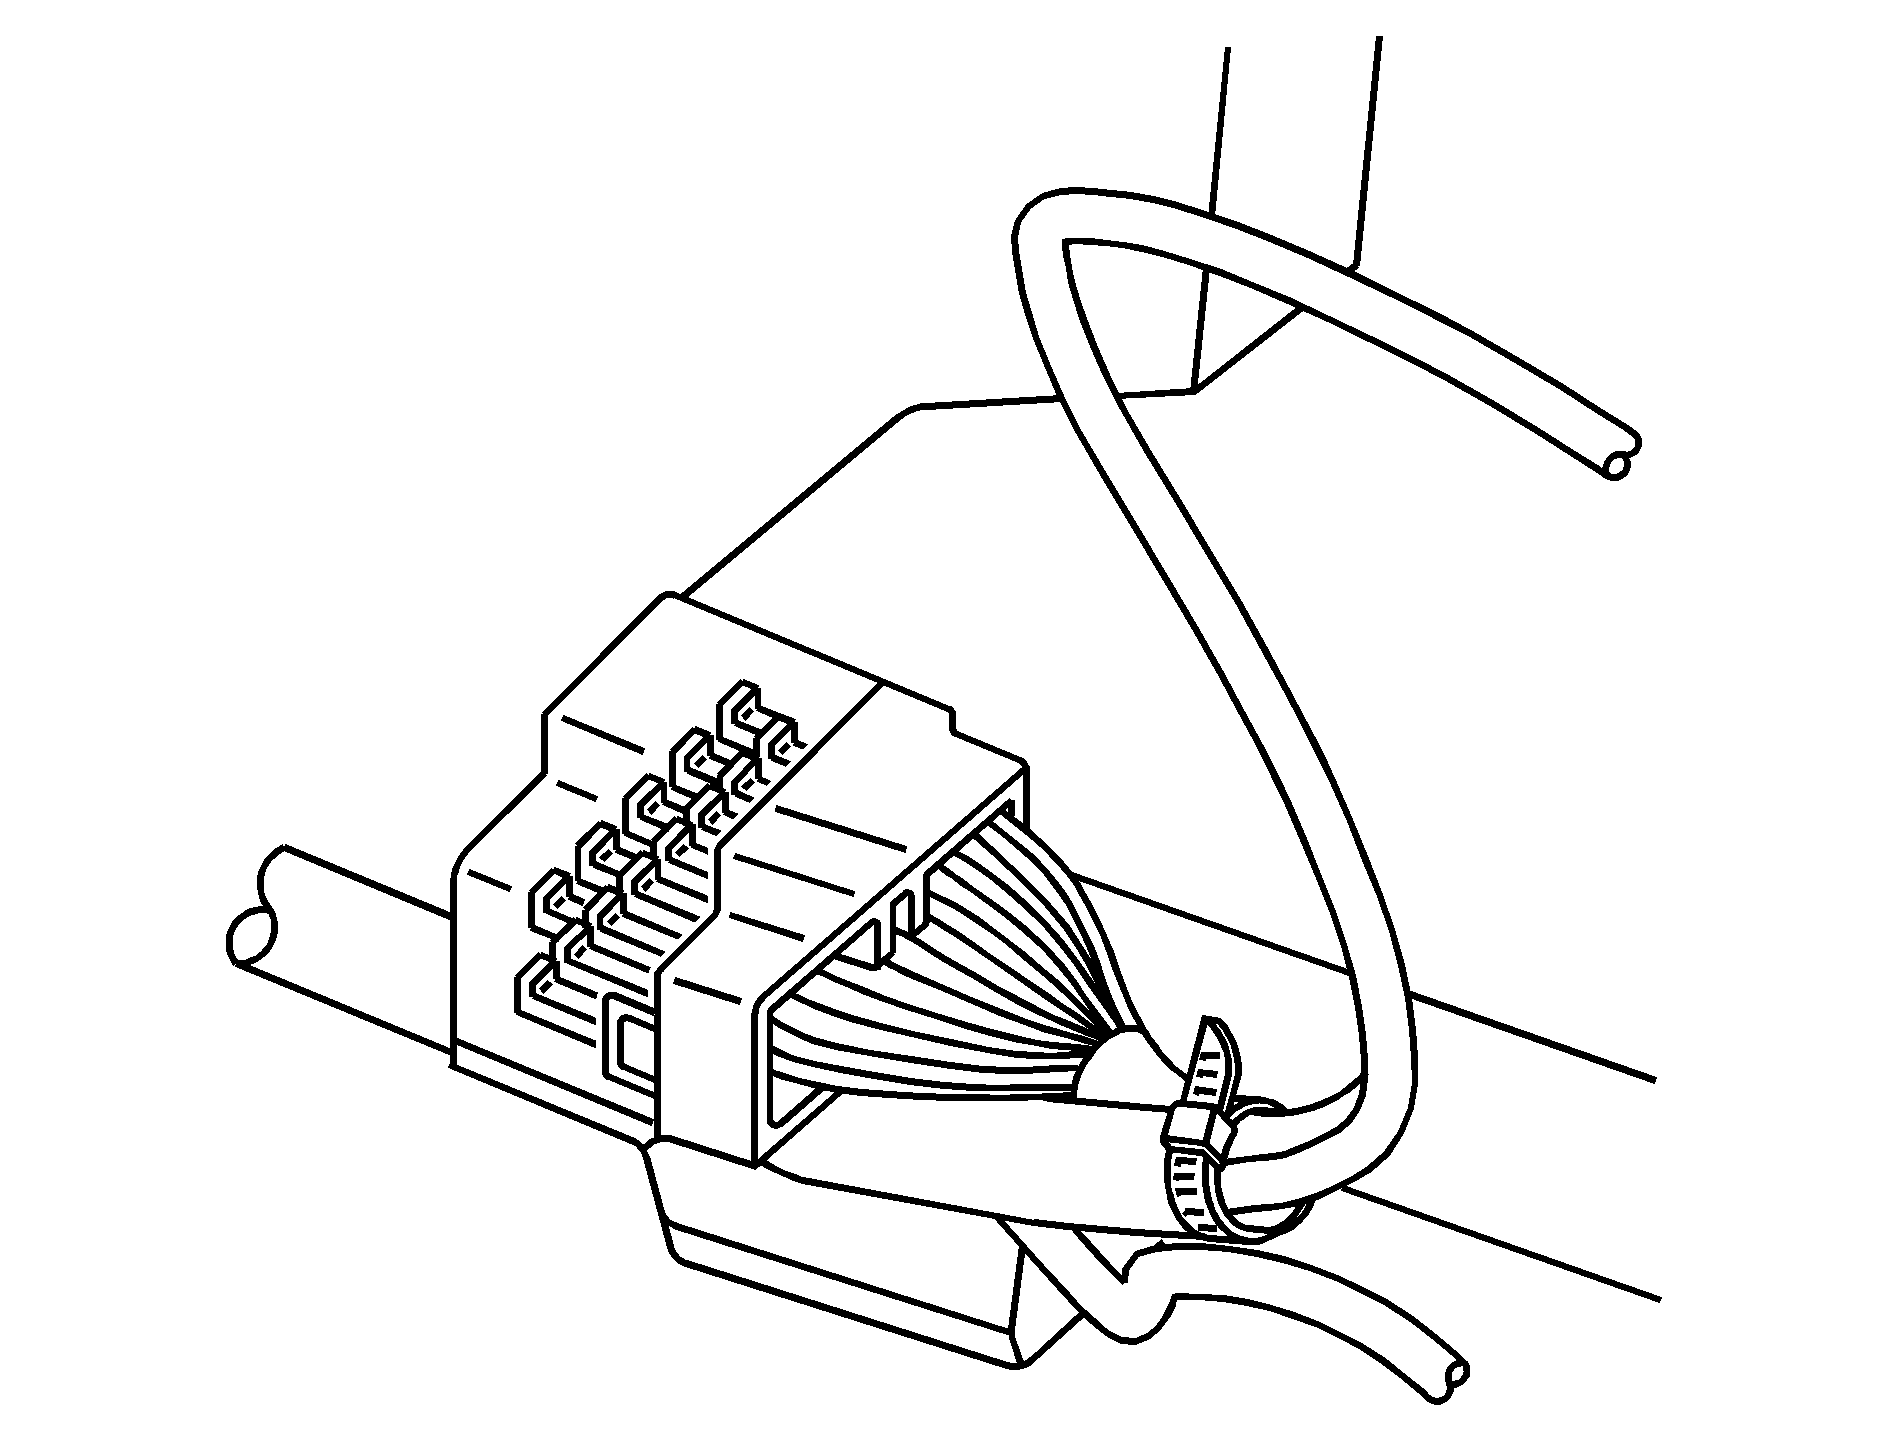
- Cut the installed lamp harness wires to the length required for the hole location used on your vehicle. Strip the wire ends, add terminals and push the terminals into a connector.
- With the emergency roof panel lamp switch off, complete the connection with the main emergency roof panel lamp wiring harness. Push excess wire through the roof panel hole.
- Reconnect the negative (-) battery cable to the battery and torque to 12.5 lb-ft. (17 N·m).
- Move the emergency roof panel lamp switch to on to test the roof lamp. Seal with silicone sealer to prevent water leakage.
- Reset the clock time and radio pushbuttons as desired.
The maximum rated load of the light bar power supply is 21 amps. Your equipment requirements must not exceed 21 amps.
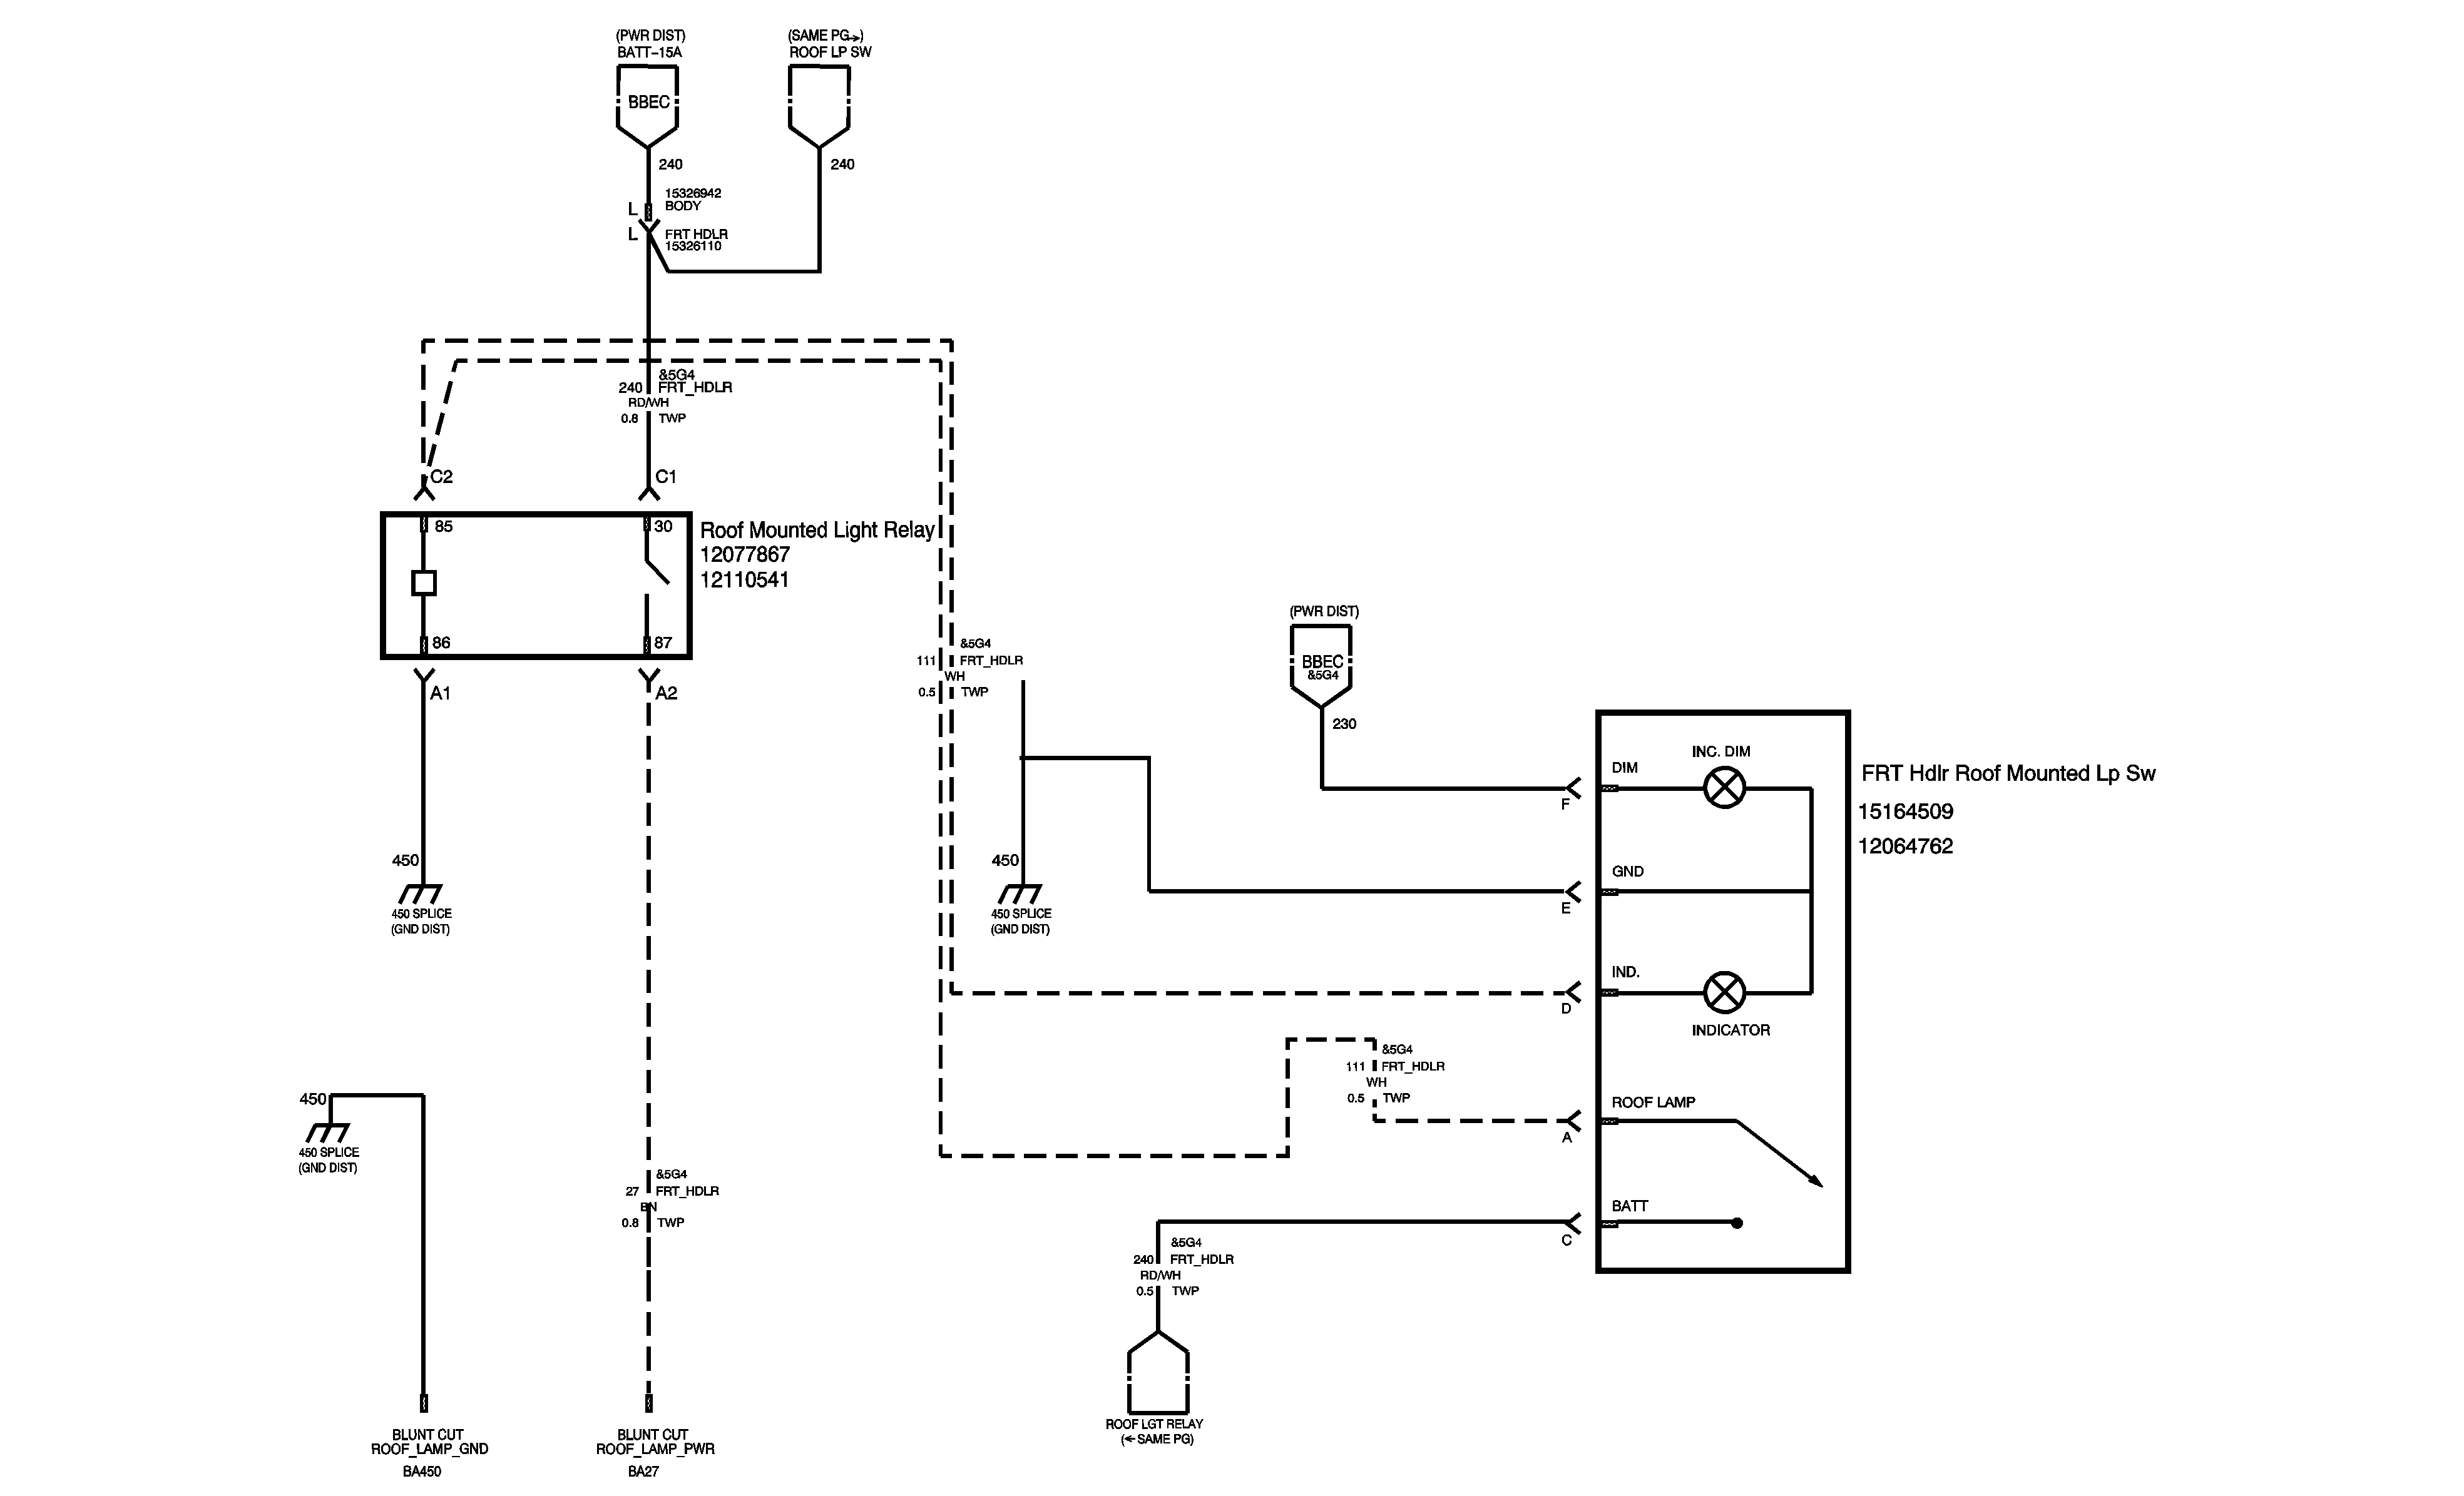
Installation Instructions -- LED Compatible Flasher Module
- Remove the connector from the flasher module installed in the vehicle.
- Unclip the module from the mag beam.
- Clip the new module to the mag beam.
- Reinstall the connector from step 1 above.