For 1990-2009 cars only
Removal Procedure
- Raise and suitably support the vehicle. Refer to Lifting and Jacking the Vehicle .
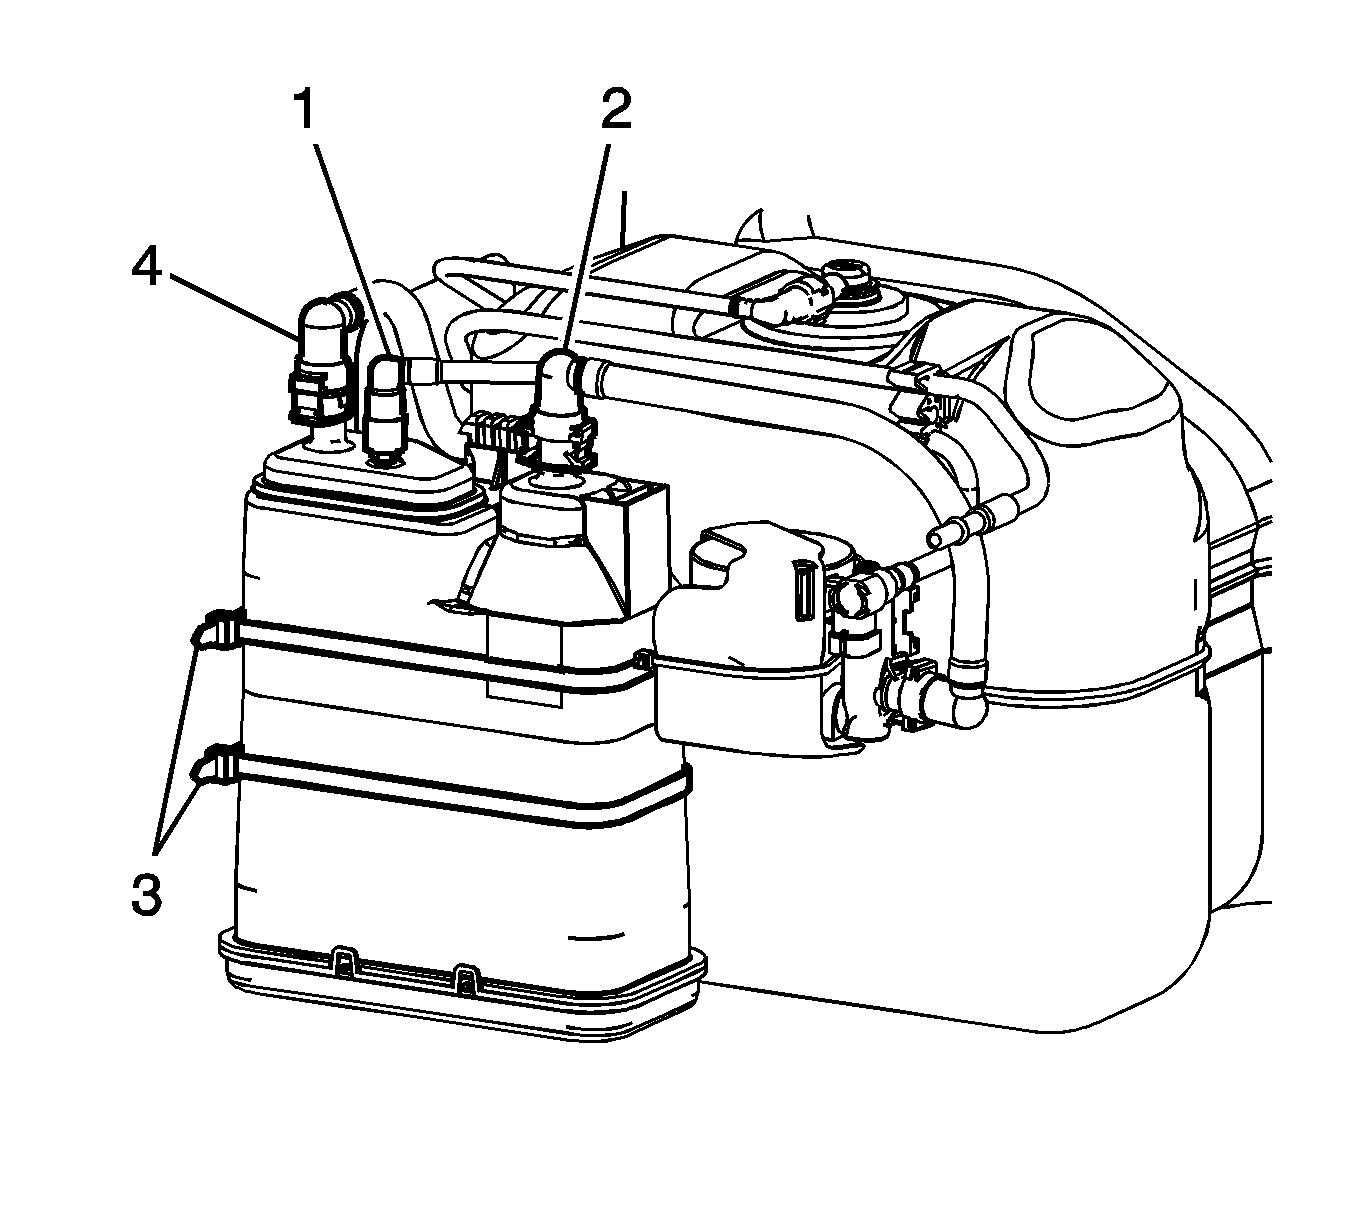
- Disconnect the evaporative emission (EVAP) canister purge pipe quick connect fitting (1) from the EVAP canister. Refer to Plastic Collar Quick Connect Fitting Service .
- Disconnect the EVAP canister vent pipe quick connect fitting (2) from the EVAP canister. Refer to Plastic Collar Quick Connect Fitting Service .
- Disconnect the EVAP pipe quick connect fitting (4) from the EVAP canister. Refer to Plastic Collar Quick Connect Fitting Service .
- Cut the tie straps (3) securing the EVAP canister to the EVAP canister bracket.
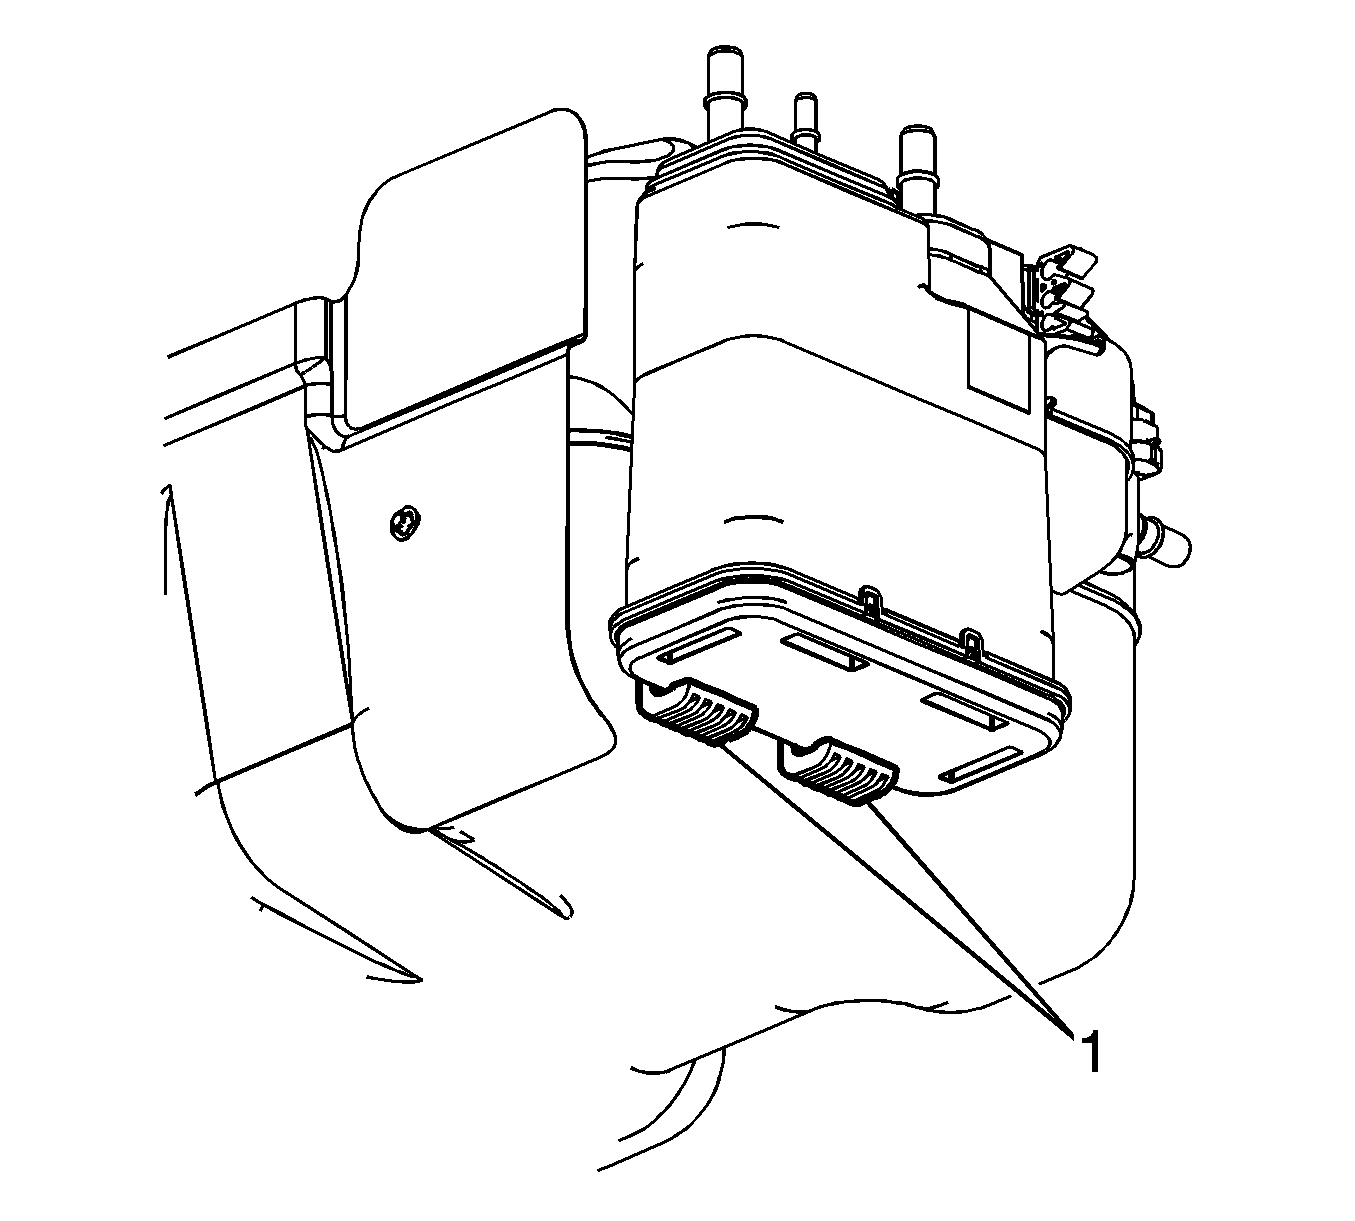
- Using a flat bladed tool, disengage the EVAP canister retainers (1).
- Rotate the bottom of the EVAP canister (2) away from the fuel tank and pull the canister down, in order to remove the top of the canister from the upper retainer (1).
Installation Procedure
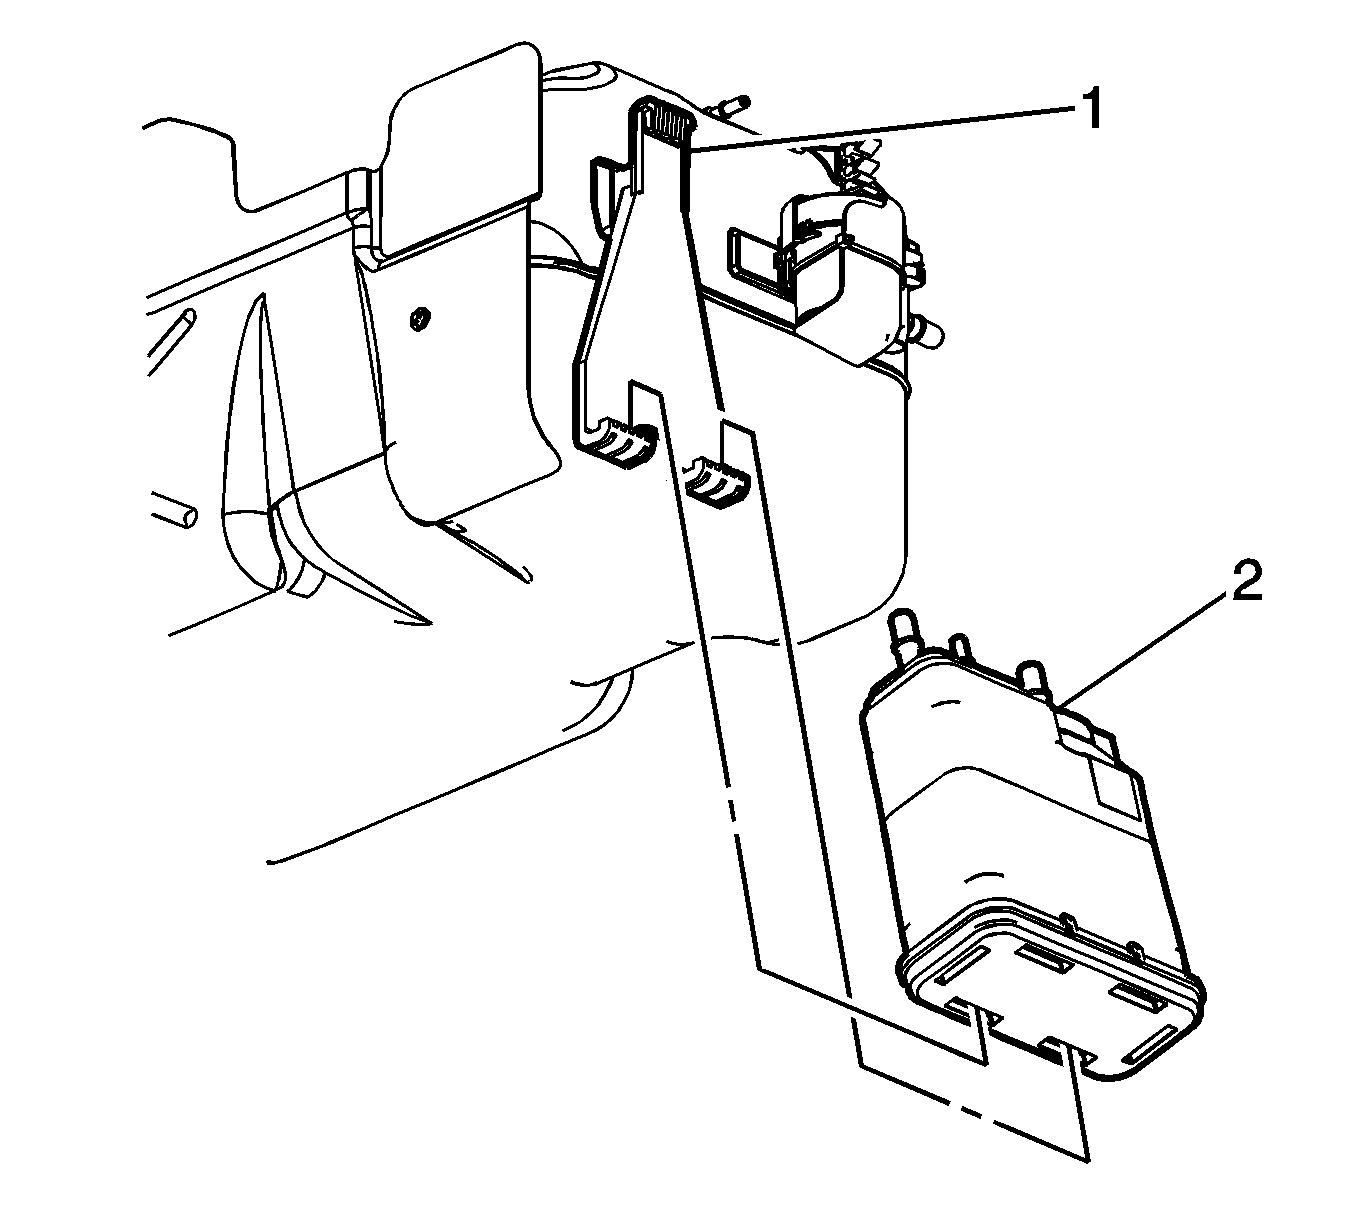
- Insert the top opening on the EVAP canister (2) onto the upper retainer (1) and rotate the bottom of the canister towards the fuel tank.
- Using a flat bladed tool, engage the EVAP canister to the retainers (1).
- Install NEW tie straps (3) securing the EVAP canister to the EVAP canister bracket.
- Connect the EVAP pipe quick connect fitting (4) to the EVAP canister. Refer to Plastic Collar Quick Connect Fitting Service .
- Connect the EVAP canister vent pipe quick connect fitting (2) to the EVAP canister. Refer to Plastic Collar Quick Connect Fitting Service .
- Connect the EVAP canister purge pipe quick connect fitting (1) to the EVAP canister. Refer to Plastic Collar Quick Connect Fitting Service .
- Lower the vehicle.
