Various Rear Sliding Door Conditions (Adjustments/Repair Procedures)

| Subject: | Various Rear Sliding Door Conditions (Adjustments/Repair Procedures) |
| Models: | 2003-2007 Chevrolet Express |
| 2003-2007 GMC Savana |
| with Rear Sliding Door (RPO YA2) |
Rear Sliding Door Index
Condition | Refer to Condition |
|---|---|
Sliding Door Misaligned, Not Flush at the Rear Quarter Panel or Front Door | 1 |
Sliding Door May Not Open When Using the Inside Door Handle | 2 |
Sliding Door Ramps UP or Sticks at the Rear | 3 |
Sliding Door Ramps UP or Sticks at the Front | 4 |
Inside Sliding Door Handle Feels Locked and Will Not Open, But Will Open Using Outside Handle | 5 |
Sliding Door May Not Open When Using the Outside Handle | 6 |
Sliding Door is Hard to Close | 1, 3 & 4 |
Sliding Door is Hard to Open | 1, 2, 3, 4 & 6 |
Condition 1
The sliding door may be misaligned, not flush with the rear quarter panel or front door.
Cause
There may be several causes for a misaligned sliding door which are listed below:
| • | If the door is tilted forward and down or up and back, the front lower roller may be out of adjustment. |
| • | If the door is inboard or outboard at the top front corner or lower rear corner, the top roller may out of adjustment. |
| • | If the door is too far forward or rearward and the gaps are parallel, the center roller may be out of adjustment. |
| • | If the rear door is too far in or out at the rear quarter panel, the rear striker may be out of adjustment. |
| • | If the door is too far in or out at the front door area, the front striker may be out of adjustment. |
Correction
Important: The original position of the component being adjusted should be marked prior to adjusting. This may help reference the beginning point and show how much adjustment was made.
Inspect/Adjust the door strikers, door wedge guide and rollers as needed.
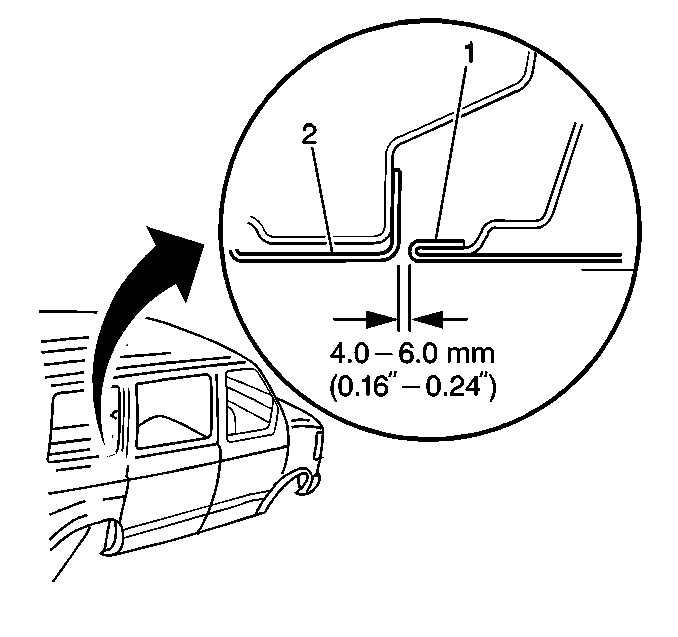
- Inspect the rear sliding door front and rear gaps. The ideal gap should be between 4-6 mm (0.16-0.24 in).
- Inspect the rear sliding door to body line fits at the rear quarter and the front door.
- Inspect the rear sliding door for flushness to the rear quarter panel or inwards 1 to 2 mm (0.039 to 0.078 in).
- Adjust the door strikers, door wedge guide and rollers as needed. Refer to Sliding Rear Door Adjustment in SI.
- Verify that the body lines at the rear quarter and the front door line up with the rear sliding door.
- Verify that the door opens and closes properly after making any adjustments.

Tip
The striker has a tendency to move or rotate when tightening the bolts. The top striker bolt should be snugged first while holding the striker in position.
Condition 2
The sliding door may not open using the inside door handle.
Cause
There may be several causes for the inside sliding door handle not opening the door which are listed below:
| • | The door handle lock rod may not be adjusted correctly or disconnected from the retaining clip. |
| • | The handles, latches, lock rods and retaining clips may be loose or damaged. |
Correction
Replace any damaged components and adjust the sliding door handle lock rod linkage using the steps below:
Important: Verify that the child safety lock is not engaged prior to performing any repairs for this condition.
- Verify that the door is in the unlock position.
- Using the outside handle, open the rear sliding door about a foot to access the rear latch from outside the van.
- Lock the rear latch to the closed position with a pen or screwdriver.
- Remove the inside door handle. Refer to Sliding Door Inside Handle Replacement in SI.
- Remove the inside door handle bezel.
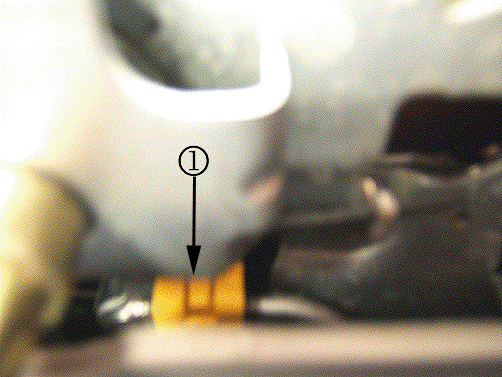
- A yellow clip should be visible and accessible from inside the door.
- Open the yellow clip (1) with a small screwdriver.
- Using a pair of needle nose pliers, pull the lock rod toward the front of the vehicle.
- Engage the lock rod linkage (threaded part) back into the yellow clip.
- Close the yellow clip around the lock rod linkage threads.
- Install the inside door handle without the retaining clip.
- Cycle the door handle to release the rear latch and inspect the lock rod for proper adjustments.
- If the rear latch does not release after adjustment, perform the following additional steps:
- Open and close the sliding door three times using the inside door handle.
- Install the inside door bezel and handle. Refer to Sliding Door Inside Handle Replacement in SI.
Important: The handle is held on with a metal retaining clip which will be reused.

Important: The lock rod should not contact the metal structure of the handle or the latch.
| • | Remove the interior sliding door trim panel. Refer to Sliding Rear Side Door Trim Panel Replacement in SI. |
| • | Inspect and replace any broken or damaged components. Refer to SI for further information when replacing any broken components. |
| • | Verify proper operation of the door when opening and closing using the inside and outside handles. |
| • | Install the interior sliding door trim panel. Refer to Sliding Rear Side Door Trim Panel Replacement in SI. |
Condition 3
The sliding door may ramp up or stick at the rear.
Cause
The rear door striker may be adjusted too far in, out, up, down or improperly shimmed.
Correction
Center the rear striker to the door latch following the steps below:
- Mark the original striker position with a pencil or masking tape.
- Slightly loosen the striker bolts a quarter of a turn.
- Slowly push the door closed while holding the outside door handle in the open position.
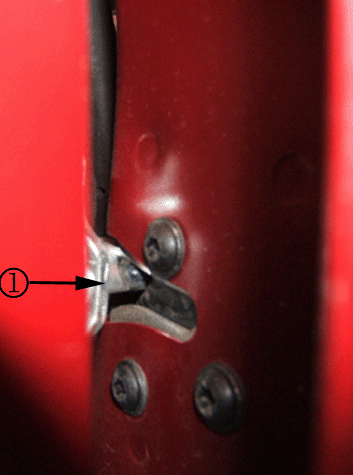
- The striker (1) should center itself inside the latch assembly.
- Open the door and see how much the striker has moved.
- Tighten the striker bolts.
- Cycle the door to the open and closed position several times while verifying the following :
- Adjust the door striker assembly. Refer to Rear Side Door Latch Striker Adjustment in SI.
- Tighten the striker bolts.
- Remove any tape or marks from the striker area.
- Verify the condition has been fixed.
Important: Do not allow the latch to lock onto the striker. The outside door handle should not be released the entire time when centering the striker.

Tip
The top striker bolt should be snugged first while holding the striker in position. The striker has a tendency to move or rotate when tightening the bolts.
| Important: Open the door slightly and visually inspect that the striker is centered inside the latch assembly with a flashlight. |
| • | Verify the striker centered in the latch assembly. |
| • | Inspect the door for flushness at the rear quarter panel and the front door. |
| • | Ensure that the latches fully lock on the striker when the door is closed. |
| • | Ensure that the latch fully releases when the door is open. |
Important: The striker may need a shim added or removed at this point.
Tighten
Tighten the bolts to 24 N·m (18 lb ft).
Condition 4
The sliding door may ramp up or stick at the front.
Cause
The front door striker may be adjusted to far in, out, up, down or improperly shimmed.
Correction
Center the front striker to the front door latch using the steps above in Correction 3.
Condition 5
The inside sliding door handle feels locked and will not open the door, but the door will open using the outside door handle.
Cause

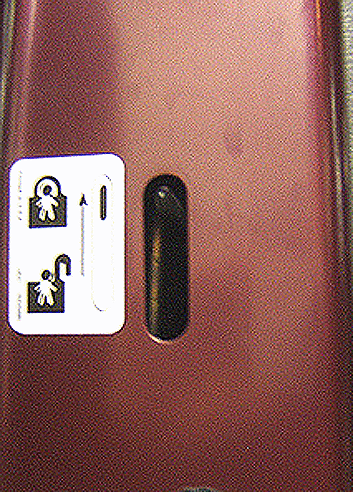
The child safety lock may be engaged as shown in the above graphic.
Correction
Disengage the child safety lock and educate the customer on the operation of the child safety lock.
Condition 6
The sliding door may not open when using the outside handle.
Cause
There may be several causes relating to why the sliding door may not open when using the outside handle which are listed below:
| • | The main spring for the front latch assembly may be separated or wrapped around the inside handle. |
| • | The lock rods may become loose or disconnected from the rear latch. |
| • | The rear lock rod may be out of adjustment. |
Correction
Inspect, replace any broken components and adjust the rear lock rod if necessary.
- Open the rear sliding door using inside door handle.
- Remove the interior sliding door trim panel. Refer to Sliding Rear Side Door Trim Panel Replacement in SI.
- Inspect and replace any broken components. Refer to SI for further information when replacing any broken components.
- Make adjustments to the rear lock rod if needed.
- Close and open the sliding door several times using the outside handle to verify proper adjustment.
- Install the interior sliding door trim panel. Refer to Sliding Rear Side Door Trim Panel Replacement in SI.
| • | Open the lock rod retaining clip. |
| • | Remove the lock rod from the retaining clip. |
| • | Pull the lock rod with slight tension to remove any slack in lock rod. |
| • | Engage the lock rod (threaded part) back into the retaining clip. |
| • | Close the retaining clip around the threads on the lock rod. |
Warranty Information
For vehicles repaired under warranty, use:
Labor Operation | Description | Labor Time |
|---|---|---|
B5000 | Door Assembly, Sliding Or Swing Out-Sliding-Right - Align | Use Published Labor Operation Time |
B4996 | Rod, Sliding Or Swing Out Door Inside Locking - R&R Or Replace | Use Published Labor Operation Time |
B4380 | Locator or Wedge, Front/Rear/Sliding Door - Adjust Or Replace | Use Published Labor Operation Time |
B4379 | Striker, Front/Rear/Swing-Out Or Sliding Doors - Adjust Or Replace | Use Published Labor Operation Time |
