For 1990-2009 cars only
Radiator Outlet Hose Replacement LR4, LM7, LQ4
Tools Required
J 38185 Hose Clamp Pliers
Removal Procedure
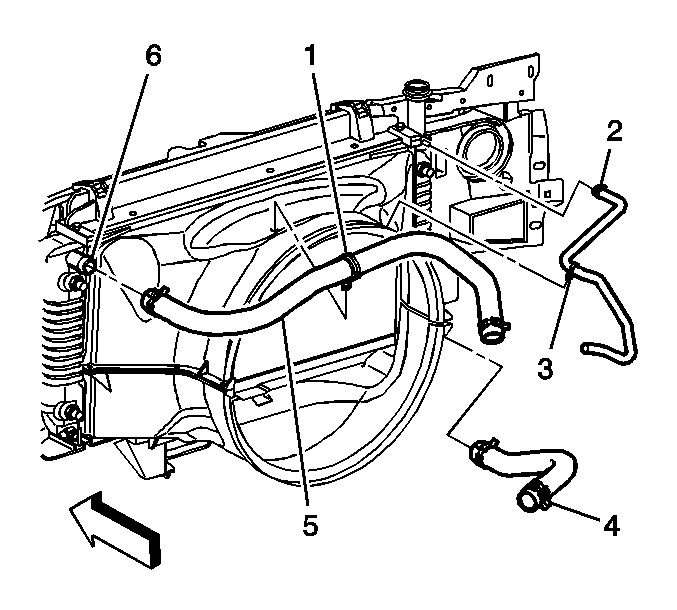
- Drain the cooling system. Refer to Cooling System Draining and Filling .
- Remove the clamp at the radiator outlet using the J 38185 .
- Remove the radiator outlet hose clamp at the engine using the J 38185 .
- Remove the radiator outlet hose clamp at the coolant recovery reservoir using the J 38185 .
- Remove the radiator outlet hose from the coolant recovery reservoir.
- Remove the radiator outlet hose from the radiator.
- Remove the radiator outlet hose from the engine.
- Remove the radiator outlet hose (4).
Installation Procedure
- Install the radiator outlet hose (4).
- Install the radiator outlet hose to the engine.
- Install the radiator outlet hose to the radiator.
- Install the radiator outlet hose to the coolant recovery reservoir.
- Install the radiator outlet hose clamp to the coolant recovery reservoir using the J 38185 .
- Install the radiator outlet hose clamp to the engine using the J 38185 .
- Install the radiator outlet clamp to the radiator outlet using the J 38185 .
- Fill the cooling system. Refer to Cooling System Draining and Filling .

Radiator Outlet Hose Replacement LLY
Removal Procedure
Tools Required
J 38185 Hose Clamp Pliers
- Drain the cooling system. Refer to Cooling System Draining and Filling .
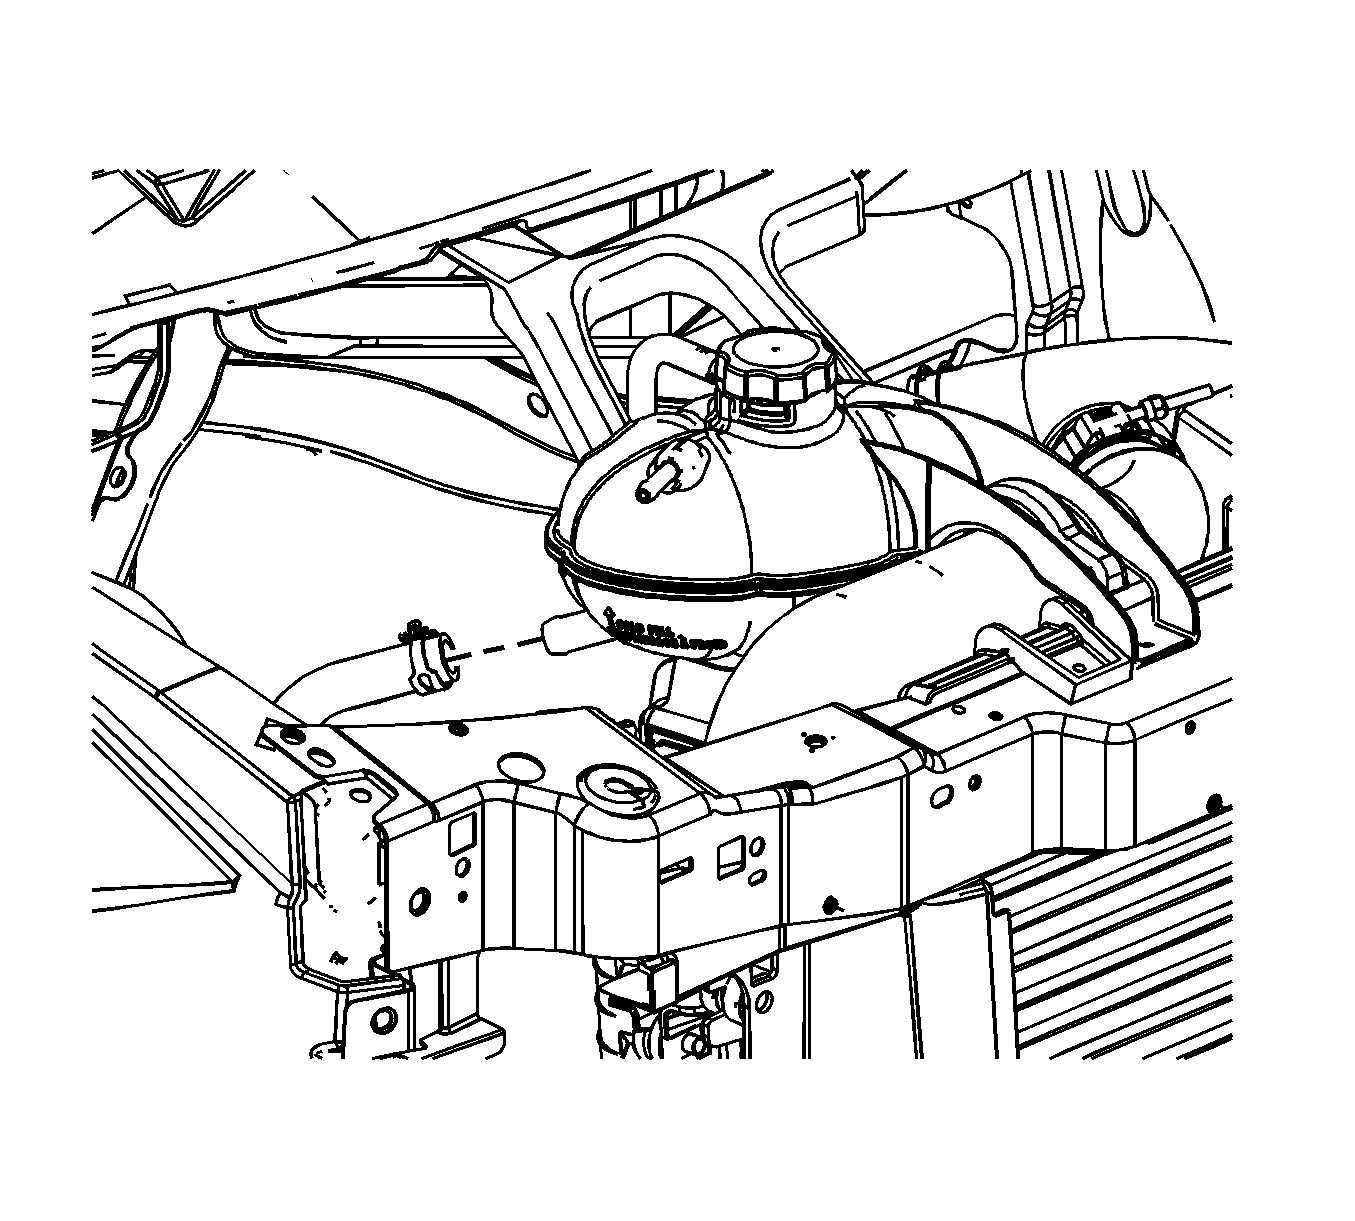
- Using J 38185 , reposition the radiator outlet hose clamp at the surge tank.
- Remove the radiator outlet hose from the surge tank.
- Raise and support the vehicle. Refer to Lifting and Jacking the Vehicle .
- Remove push pin from the small inner wheel panel and position aside.
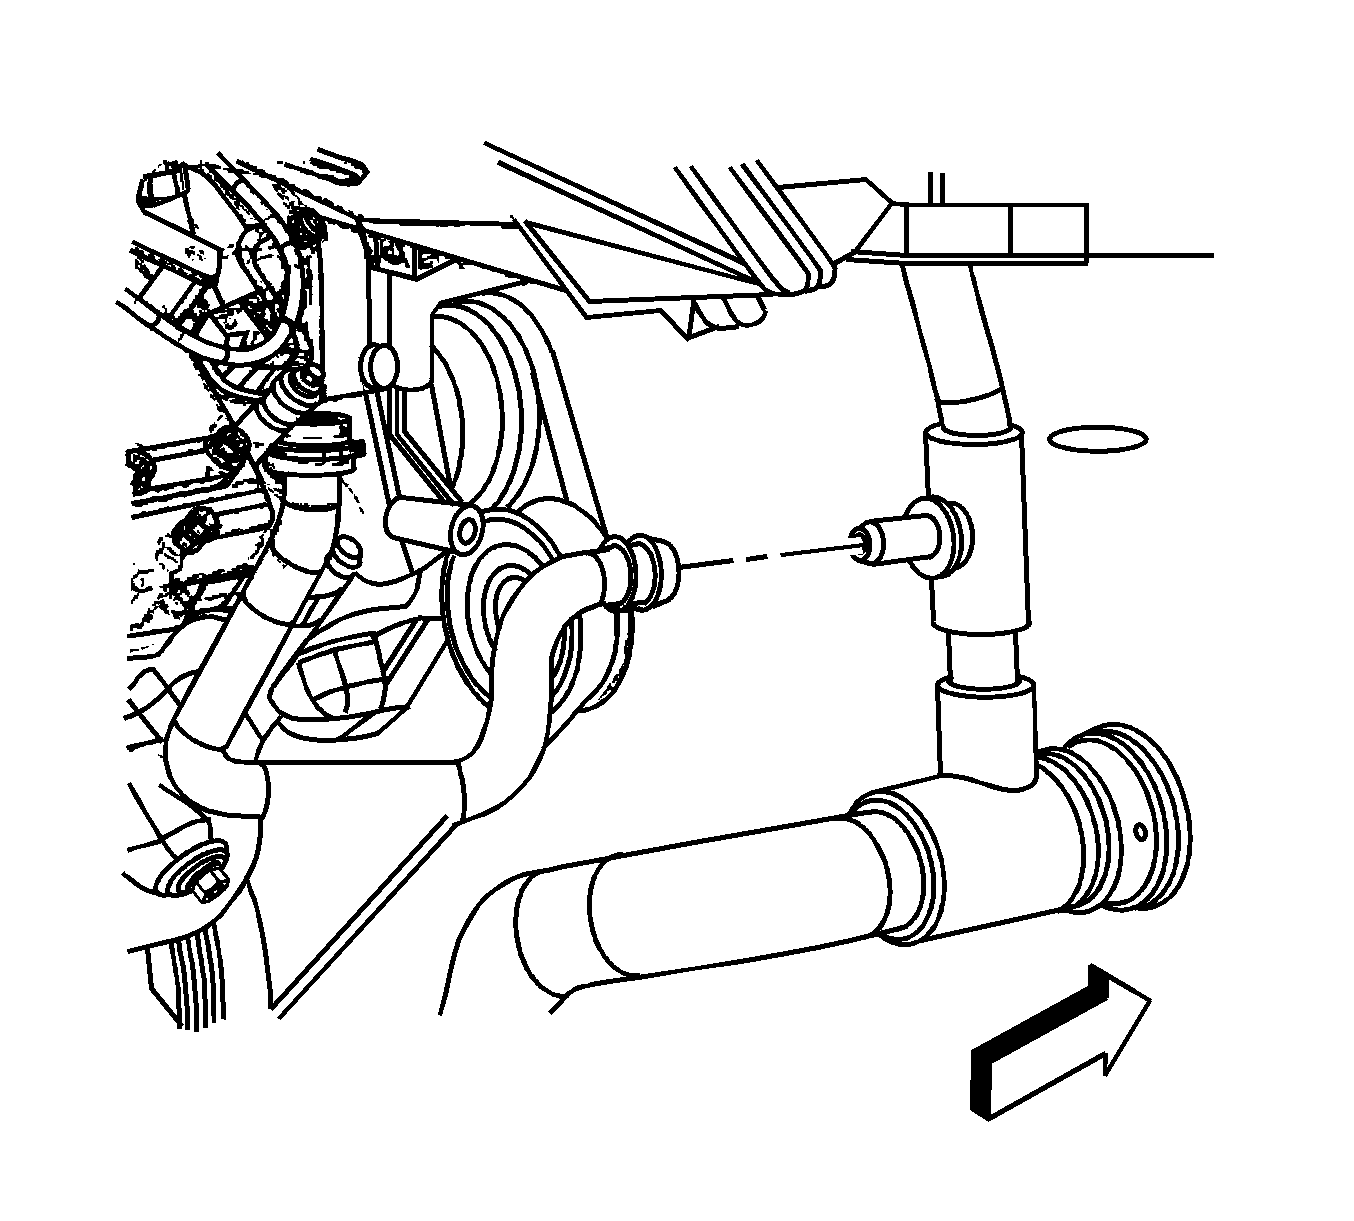
- Using J 38185 , reposition the heater hose to radiator outlet hose clamp.
- Remove the heater hose from the radiator outlet hose.
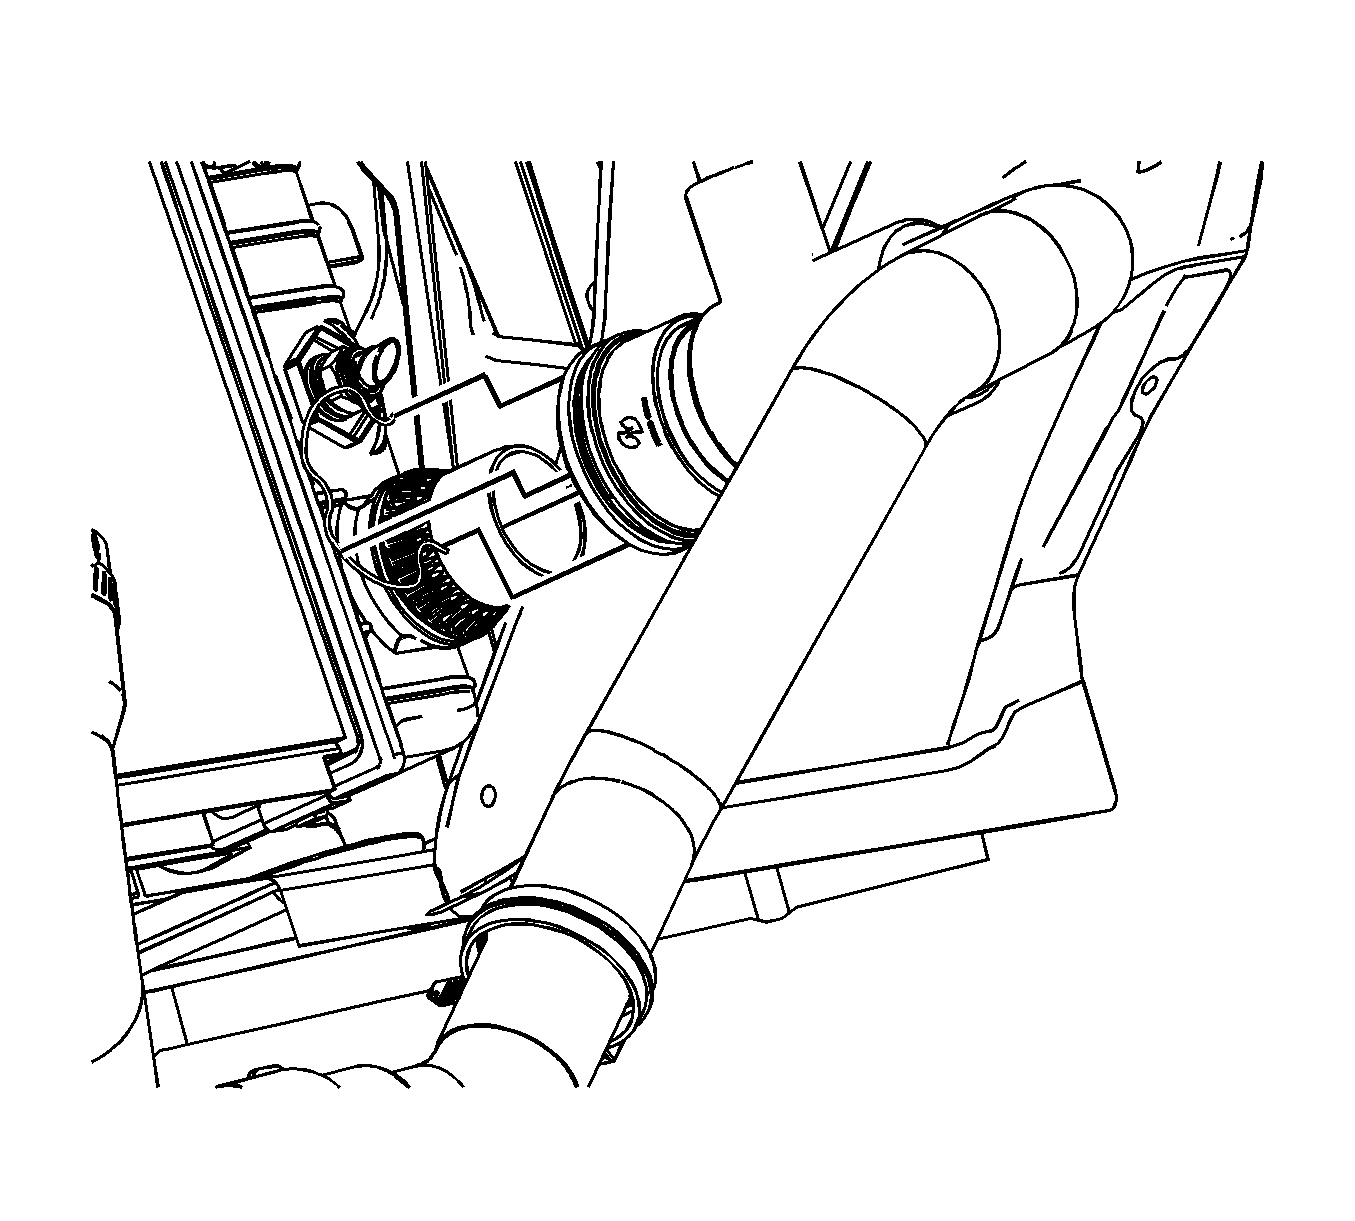
- Remove the radiator outlet hose to radiator retaining clip.
- Remove the radiator outlet hose from the radiator.
- Loosen the clamp on the radiator outlet hose to engine.
- Remove the radiator outlet hose from the engine.
- Remove the radiator outlet hose from the vehicle.
Caution: To avoid being burned, do not remove the radiator cap or surge tank cap while the engine is hot. The cooling system will release scalding fluid and steam under pressure if radiator cap or surge tank cap is removed while the engine and radiator are still hot.
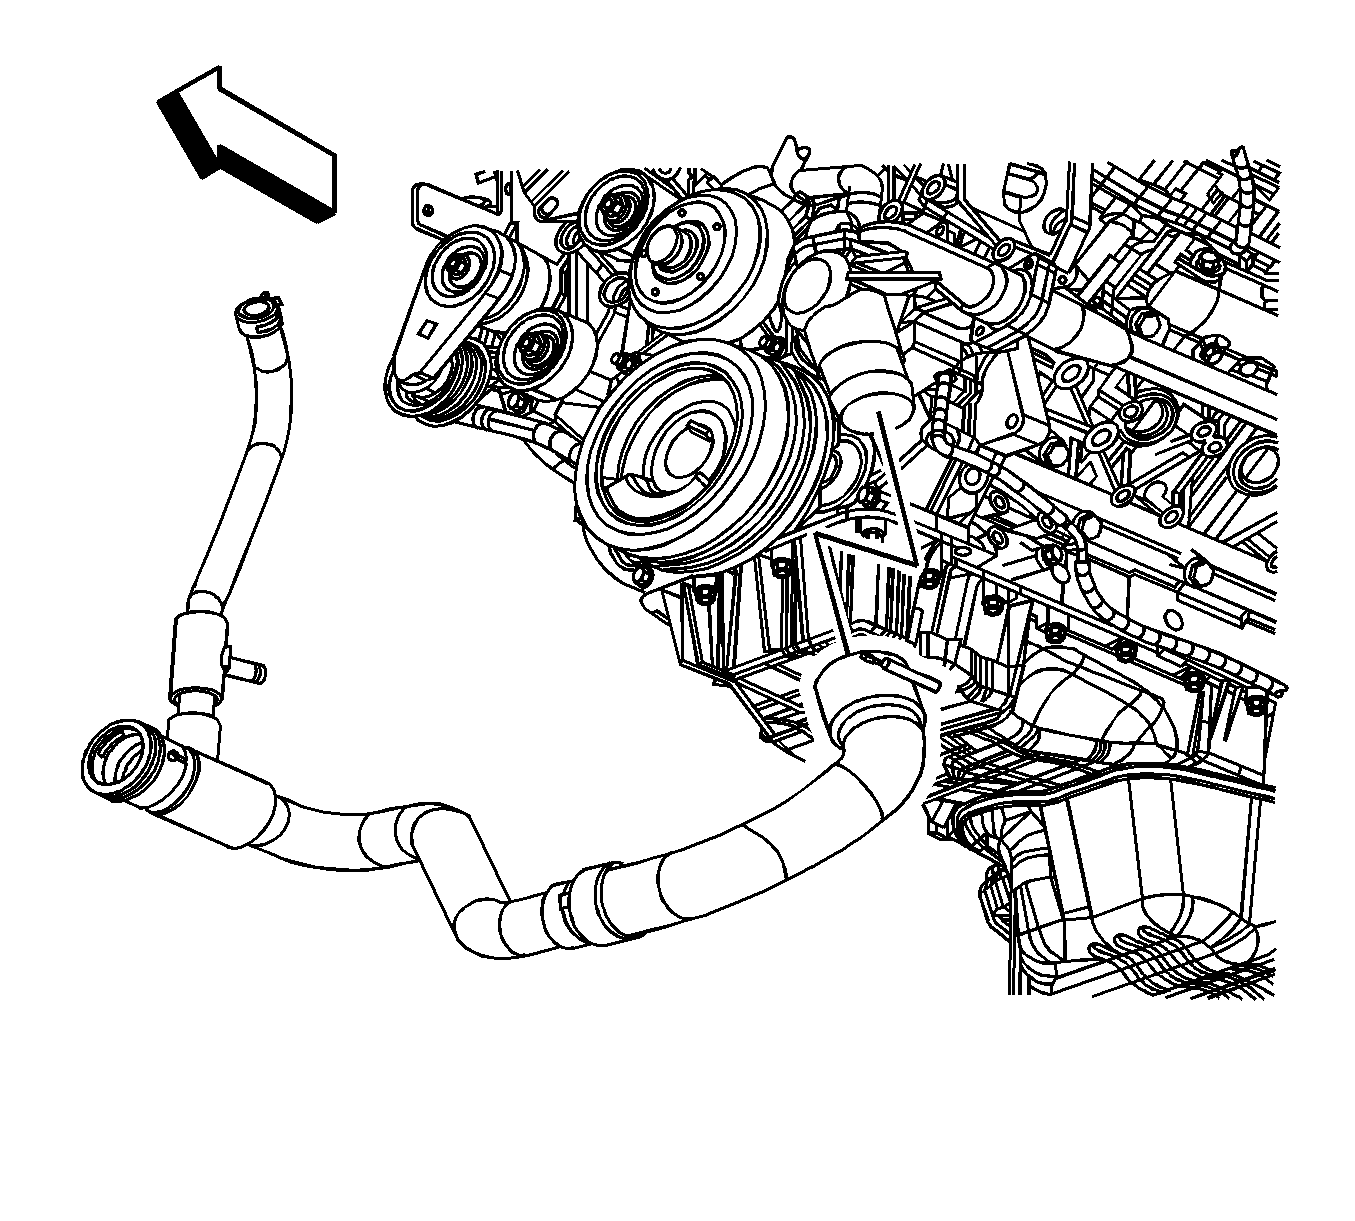
Installation Procedure
- Install the radiator outlet hose to the engine.
- Tighten the clamp on the radiator outlet hose to engine.
- Install the radiator outlet hose to the radiator.
- Install the heater hose to the radiator outlet hose.
- Using J 38185 , reposition the heater hose to radiator outlet hose clamp.
- Install wheelhouse panel.
- Lower the vehicle.
- Install the radiator outlet hose to the surge tank.
- Using J 38185 , reposition the radiator outlet hose clamp at the surge tank.
- Fill the cooling system. Refer to Cooling System Draining and Filling .
- Leak test the cooling system. Refer to Cooling System Leak Testing

Important: Lubricate the inside diameters of the hoses with clean coolant prior to installation.
Notice: Refer to Component Fastener Tightening Notice in the Preface section.
Tighten
Tighten the clamp to 5 N·m (44 lb in).

Important: Ensure the radiator retaining clip seats firmly into the groove in the radiator.


