Center Intake Manifold Replacement LLY, LBZ
Removal Procedure
- Remove the turbocharger. Refer to Turbocharger Replacement .
- Loosen the connector bracket bolt and nut.
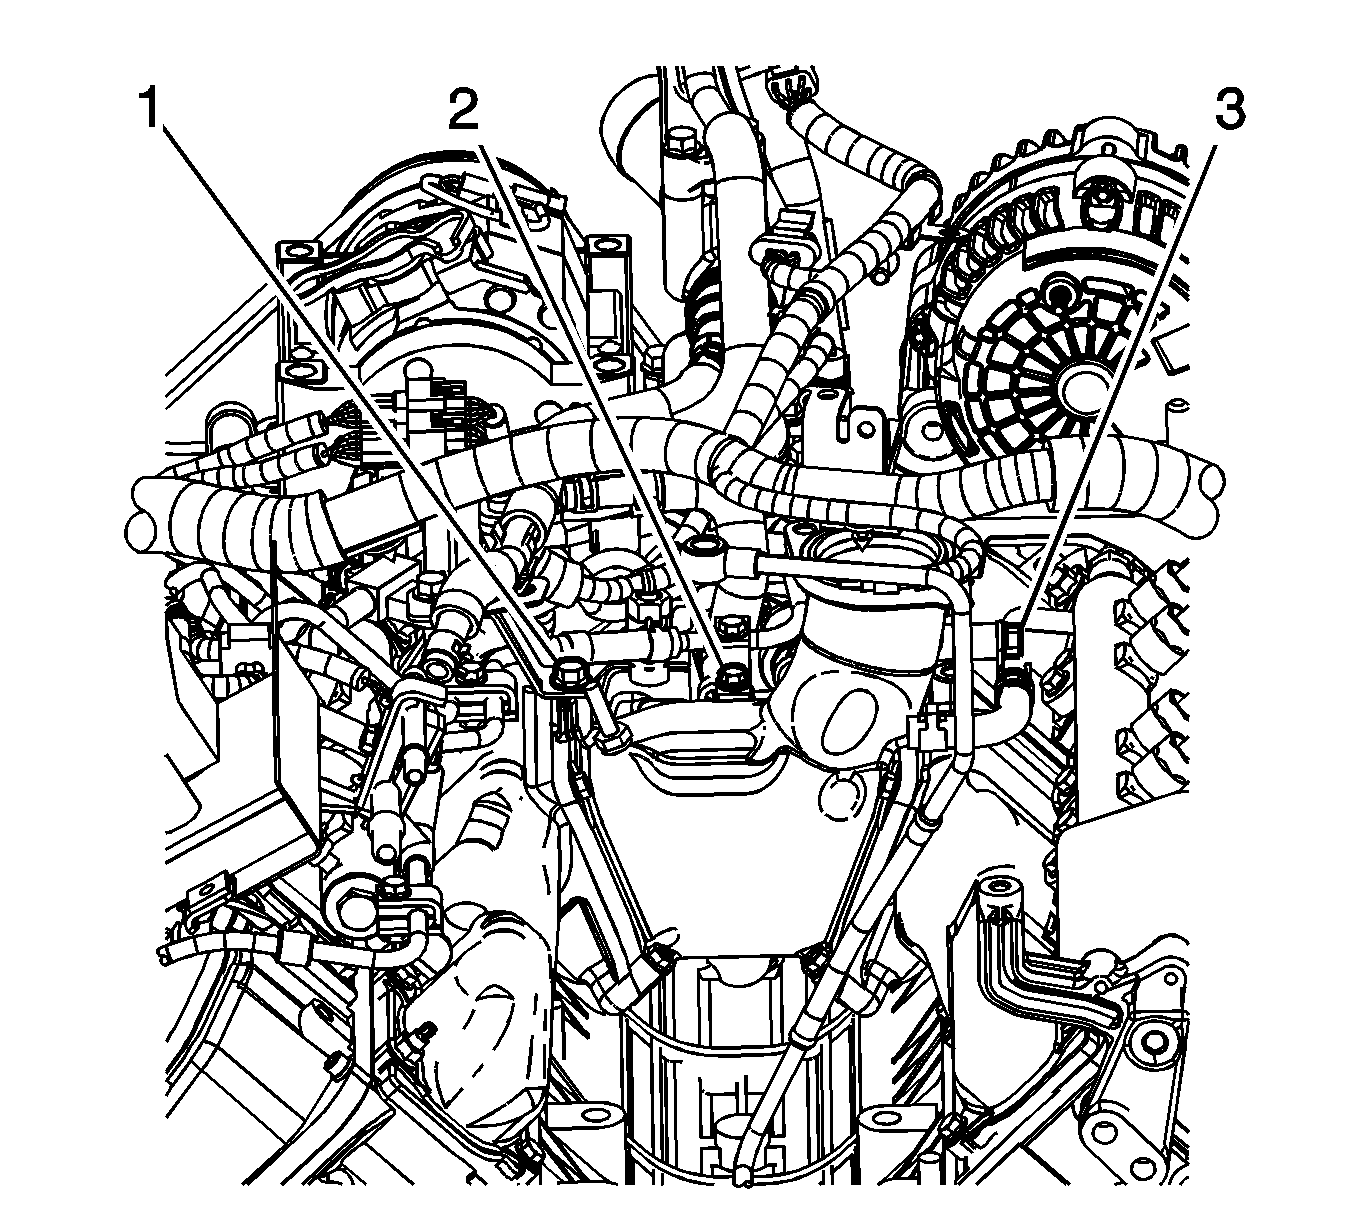
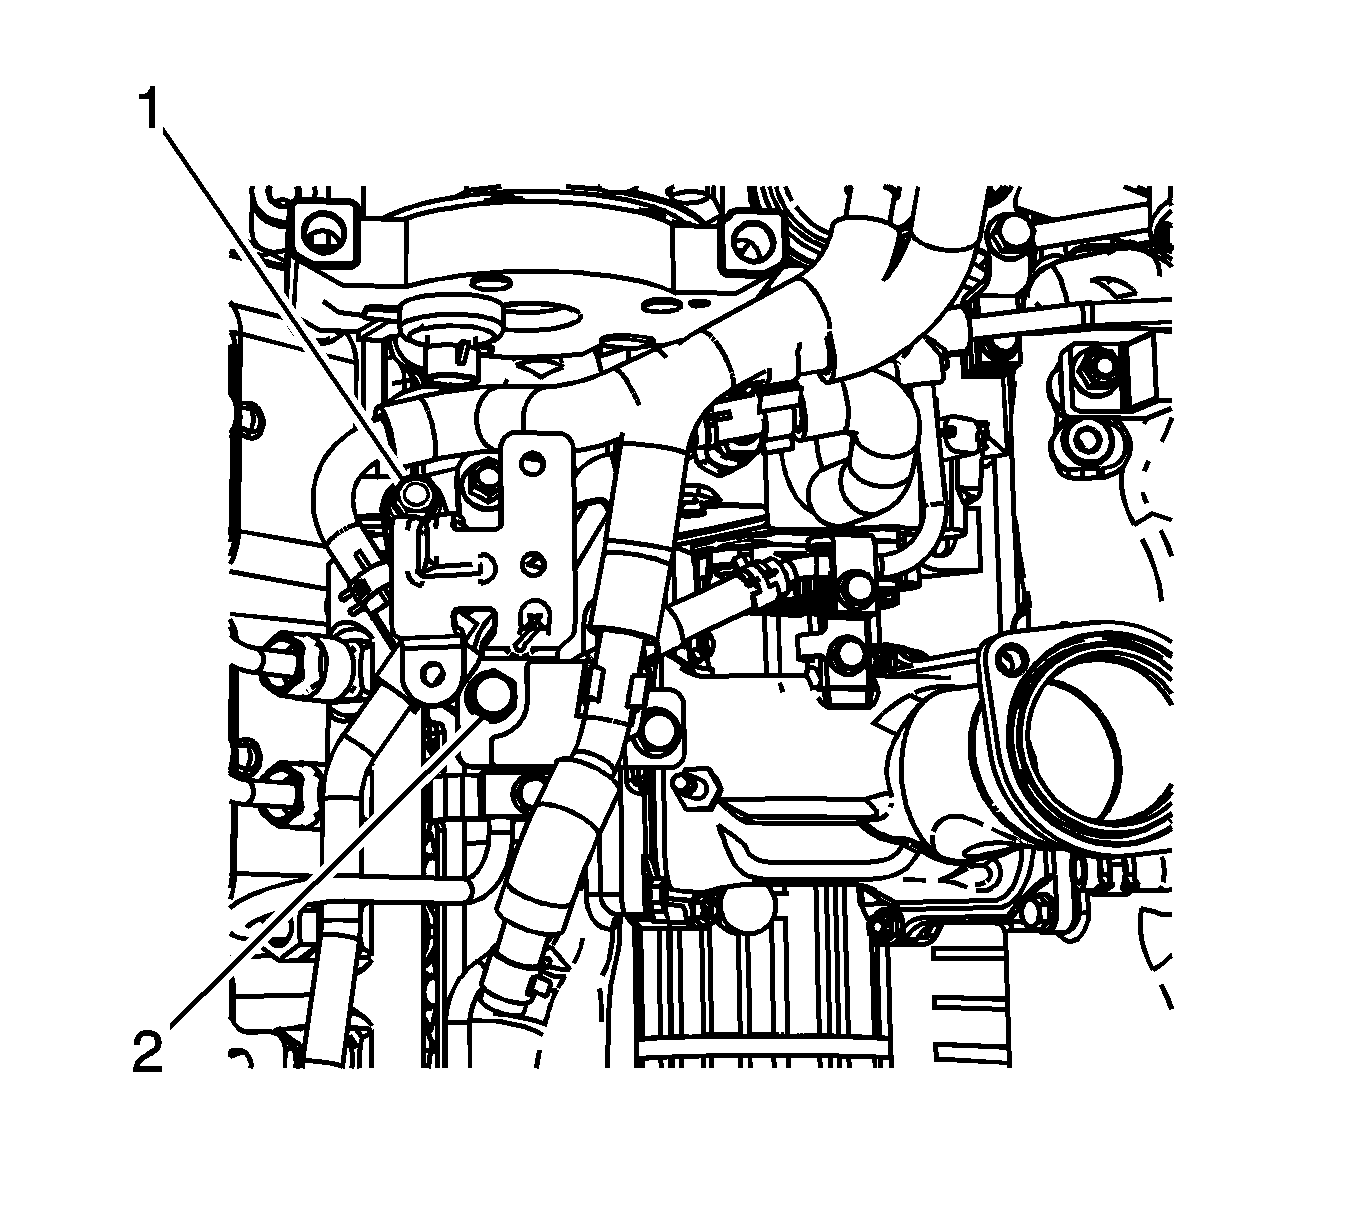
- Remove the connector bracket bolt (1).
- Remove the fuel rail clamp bolt (2).
- Remove the connector bracket bolt (2) and nut (1), and reposition the bracket.
- Disconnect the engine wiring harness electrical connector from the intake air temperature (IAT) sensor No. 2. Refer to Intake Air Temperature (IAT) Sensor 2 Replacement .
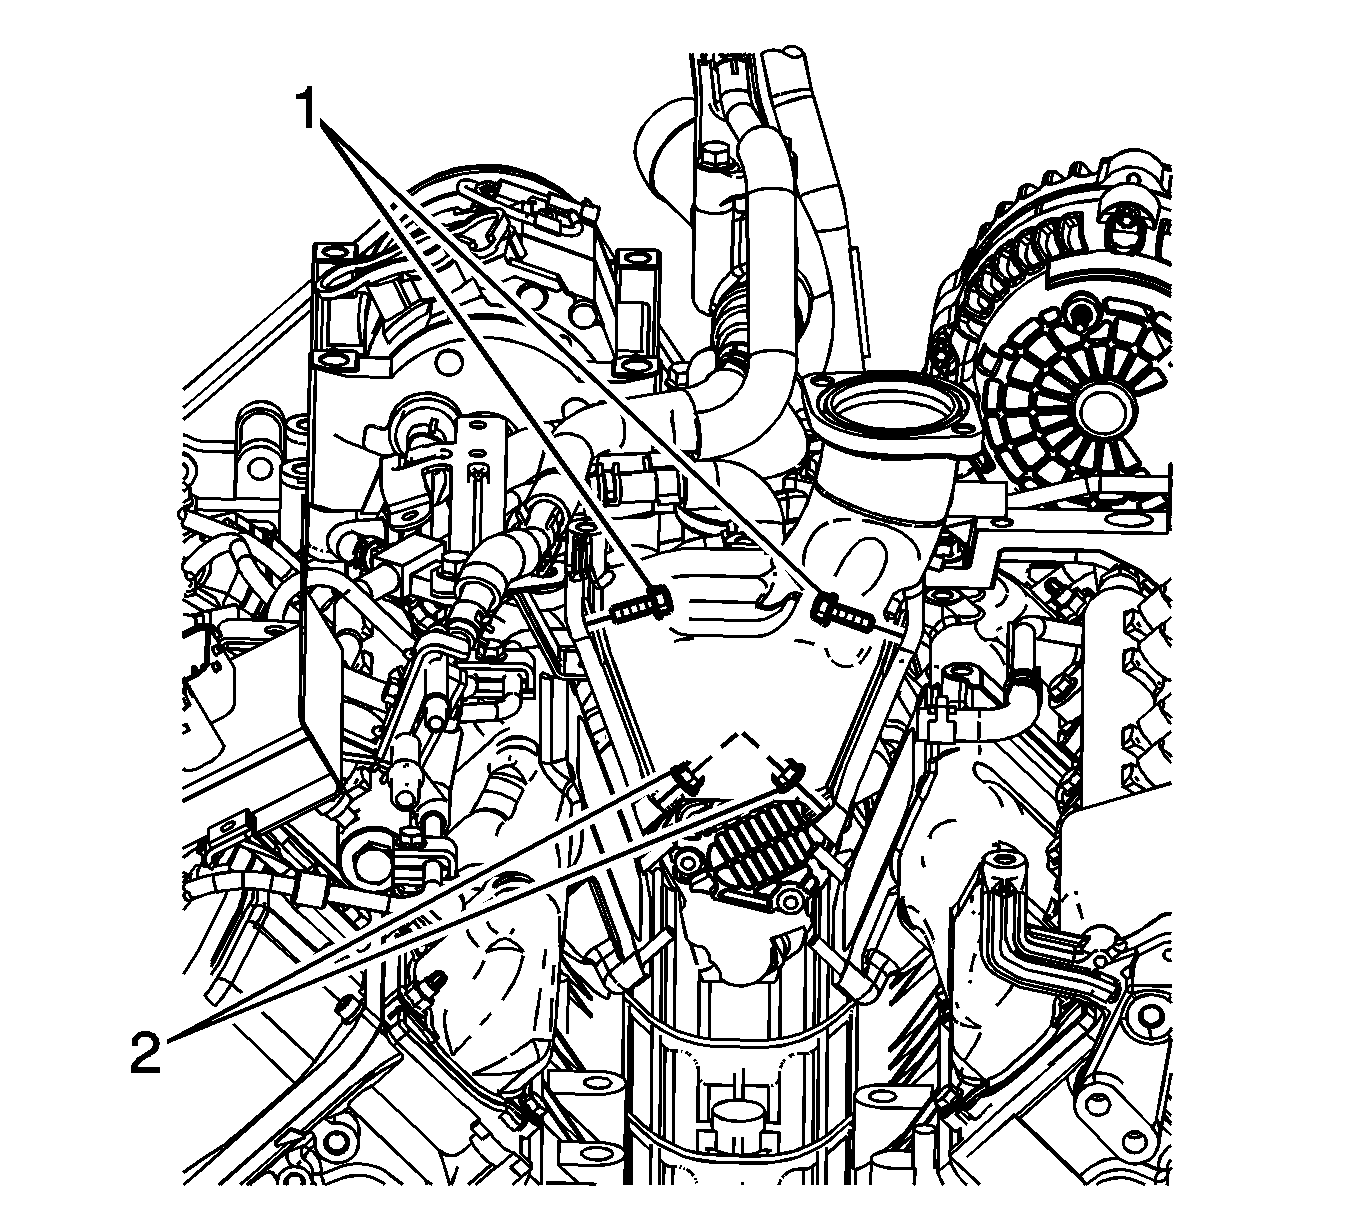
- Remove the center intake manifold 4 bolts (1).
- Remove the center intake manifold 2 nuts (2) and 2 bolts.
- Remove the center intake manifold.
- Remove and discard the center intake manifold gaskets.
- If replacing the center intake manifold, remove the IAT sensor.


Installation Procedure
- If the center intake manifold was replaced, install the IAT sensor No. 2.
- Install NEW center intake manifold gaskets to the intake.
- Install the center intake manifold.
- Install the center intake manifold lower 2 nuts (2) and 2 bolts.
- Install the center intake manifold upper 4 bolts (1).
- Connect the engine wiring harness electrical connector to the IAT sensor No. 2. Refer to Intake Air Temperature (IAT) Sensor 2 Replacement .
- Position the connector bracket and install the bolt (2) and nut (1).
- Install the fuel rail clamp bolt (2).
- Install the connector bracket bolt (1).
- Install the turbocharger. Refer to Turbocharger Replacement .
Notice: Refer to Fastener Notice in the Preface section.

Tighten
Tighten the sensor to 25 N·m (18 lb ft).
Important: The center intake manifold lower nuts MUST be installed and tightened first.
Tighten
Tighten the nuts to 10 N·m (89 lb in).
Tighten
Tighten the bolts to 10 N·m (89 lb in).

Tighten
Tighten the bolts to 15 N·m (11 lb ft).

Tighten
Tighten the bolt to 25 N·m (18 lb ft).
Tighten
Tighten the bolts to 15 N·m (11 lb ft).
Center Intake Manifold Replacement LMM
Removal Procedure
- Remove the turbocharger. Refer to Turbocharger Replacement .
- Loosen the connector bracket bolt and nut.
- Remove the connector bracket bolt (1).
- Remove the fuel rail clamp bolt (2).
- Remove the connector bracket bolt (2) and nut (1), and reposition the bracket.
- Disconnect the engine wiring harness electrical connector from the intake air temperature (IAT) sensor No. 2. Refer to Intake Air Temperature (IAT) Sensor 2 Replacement .
- Remove the center intake manifold 4 bolts (1).
- Remove the center intake manifold 2 nuts (2) and 2 bolts.
- Remove the center intake manifold.
- Remove and discard the center intake manifold gaskets.
- If replacing the center intake manifold, remove the IAT sensor.


Installation Procedure
- If the center intake manifold was replaced, install the IAT sensor No. 2.
- Install NEW center intake manifold gaskets to the intake.
- Install the center intake manifold.
- Install the center intake manifold lower 2 nuts (2) and 2 bolts.
- Install the center intake manifold upper 4 bolts (1).
- Connect the engine wiring harness electrical connector to the IAT sensor No. 2. Refer to Intake Air Temperature (IAT) Sensor 2 Replacement.
- Position the connector bracket and install the bolt (2) and nut (1).
- Install the fuel rail clamp bolt (2).
- Install the connector bracket bolt (1).
- Install the turbocharger. Refer to Turbocharger Replacement .
Notice: Refer to Fastener Notice in the Preface section.

Tighten
Tighten the sensor to 25 N·m (18 lb ft).
Important: The center intake manifold lower nuts MUST be installed and tightened first.
Tighten
Tighten the nuts to 10 N·m (89 lb in).
Tighten
Tighten the bolts to 10 N·m (89 lb in).

Tighten
Tighten the bolts to 15 N·m (11 lb ft).

Tighten
Tighten the bolt to 25 N·m (18 lb ft).
Tighten
Tighten the bolts to 15 N·m (11 lb ft).
