Crankshaft Rear Oil Seal Replacement 4.8L, 5.3L, and 6.0L Engines
Tools Required
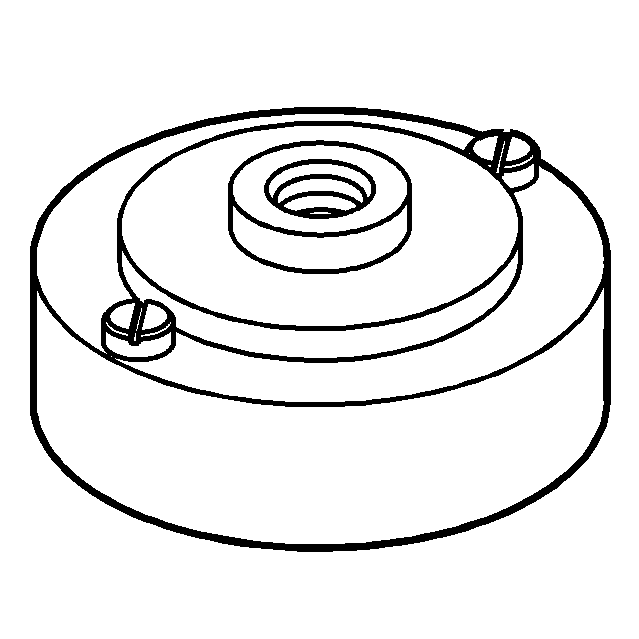
J 41479 Crankshaft Rear Oil Seal Installer
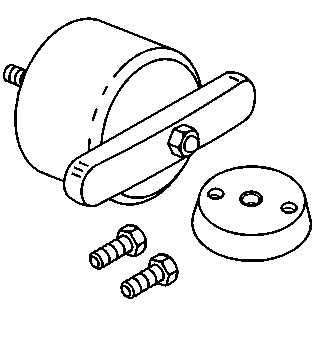
Removal Procedure
- Remove the engine flywheel. Refer to Engine Flywheel Replacement .
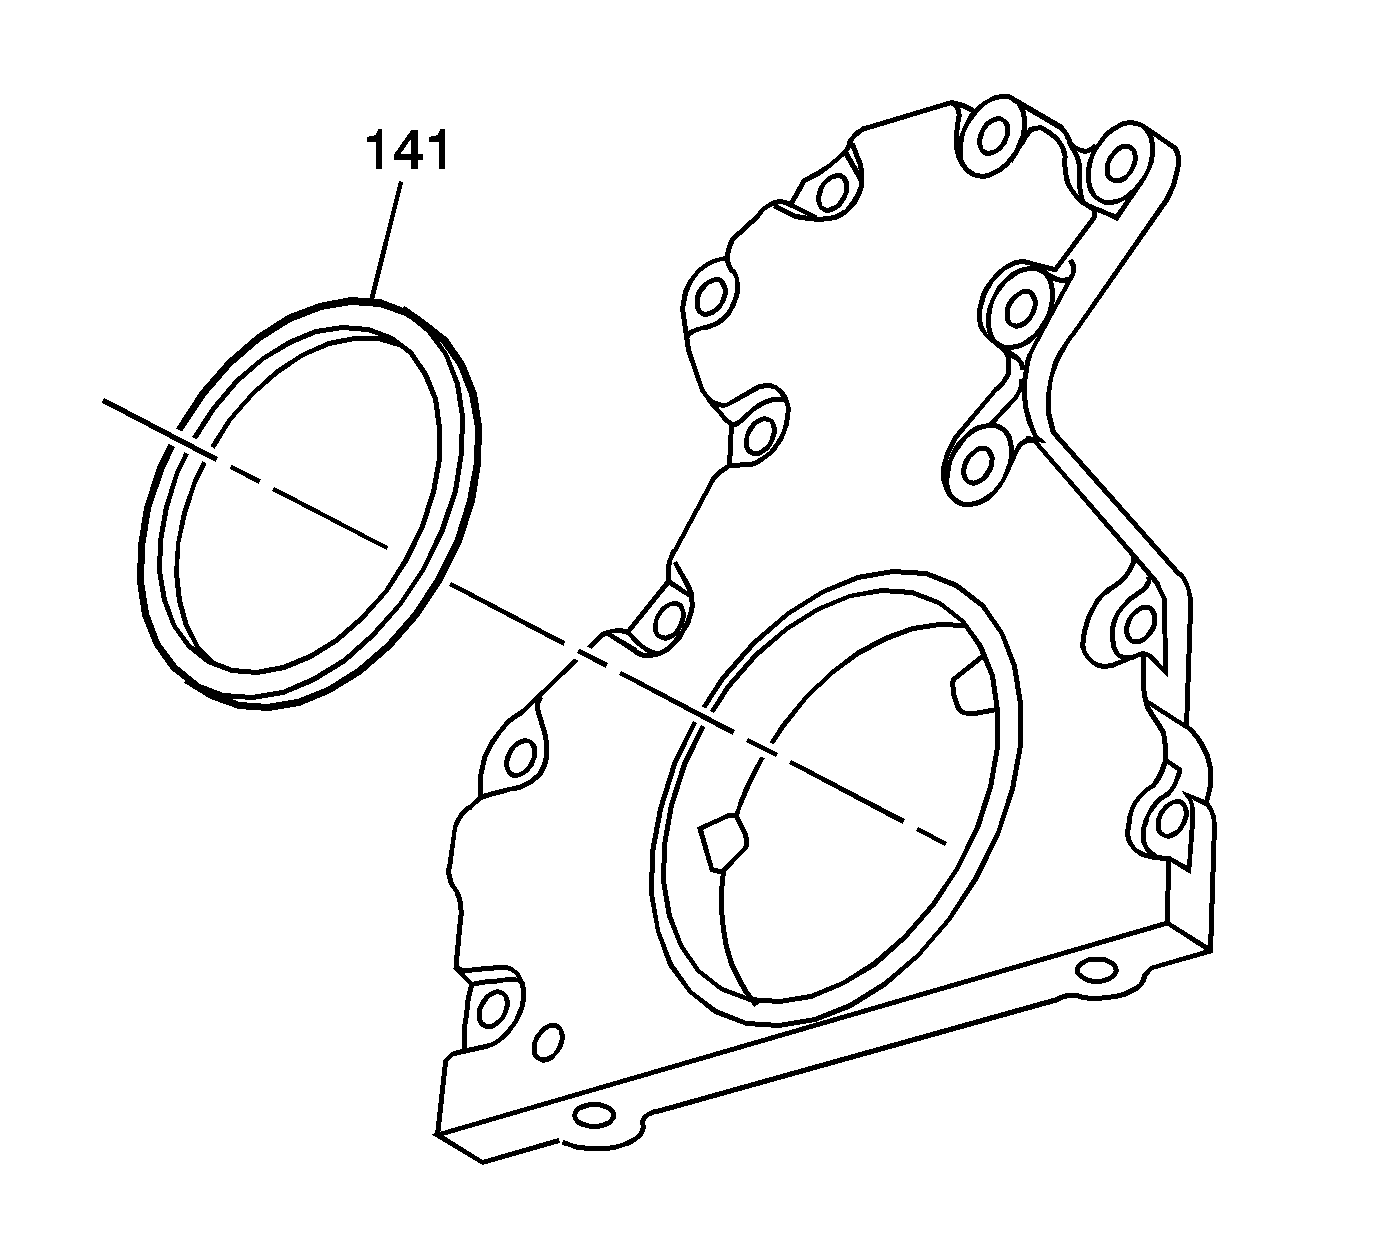
- Remove the crankshaft rear oil seal (141) from the rear housing.
Installation Procedure
Important:
• The flywheel spacer (if applicable) must be removed prior to oil seal installation. • Do not lubricate the oil seal inside diameter (ID) or the crankshaft surface. • Do not reuse the crankshaft rear oil seal. Install a NEW oil seal.
- Lubricate the outside diameter (OD) of the oil seal with clean engine oil.
- Inspect the seal and identify the THIS SIDE OUT markings for proper orientation.
- Lubricate the rear housing oil seal bore with clean engine oil.
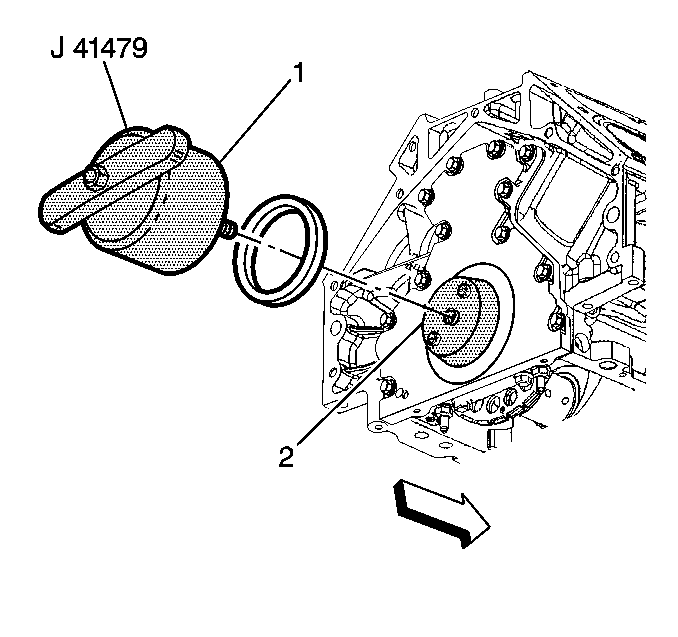
- Install the J 41479 tapered cone (2) and bolts onto the rear of the crankshaft.
- Tighten the bolts until snug. Do not overtighten.
- Install the rear oil seal onto the tapered cone (2) and push the seal to the rear cover bore. Install the oil seal with the markings THIS SIDE OUT facing away from the engine.
- Thread the J 41479 threaded rod into the tapered cone until the tool (1) contacts the oil seal.
- Align the oil seal into the tool (1).
- Rotate the handle of the tool (1) clockwise until the seal enters the rear cover and bottoms into the cover bore.
- Remove the J 41479 .
- Install the engine flywheel. Refer to Engine Flywheel Replacement .
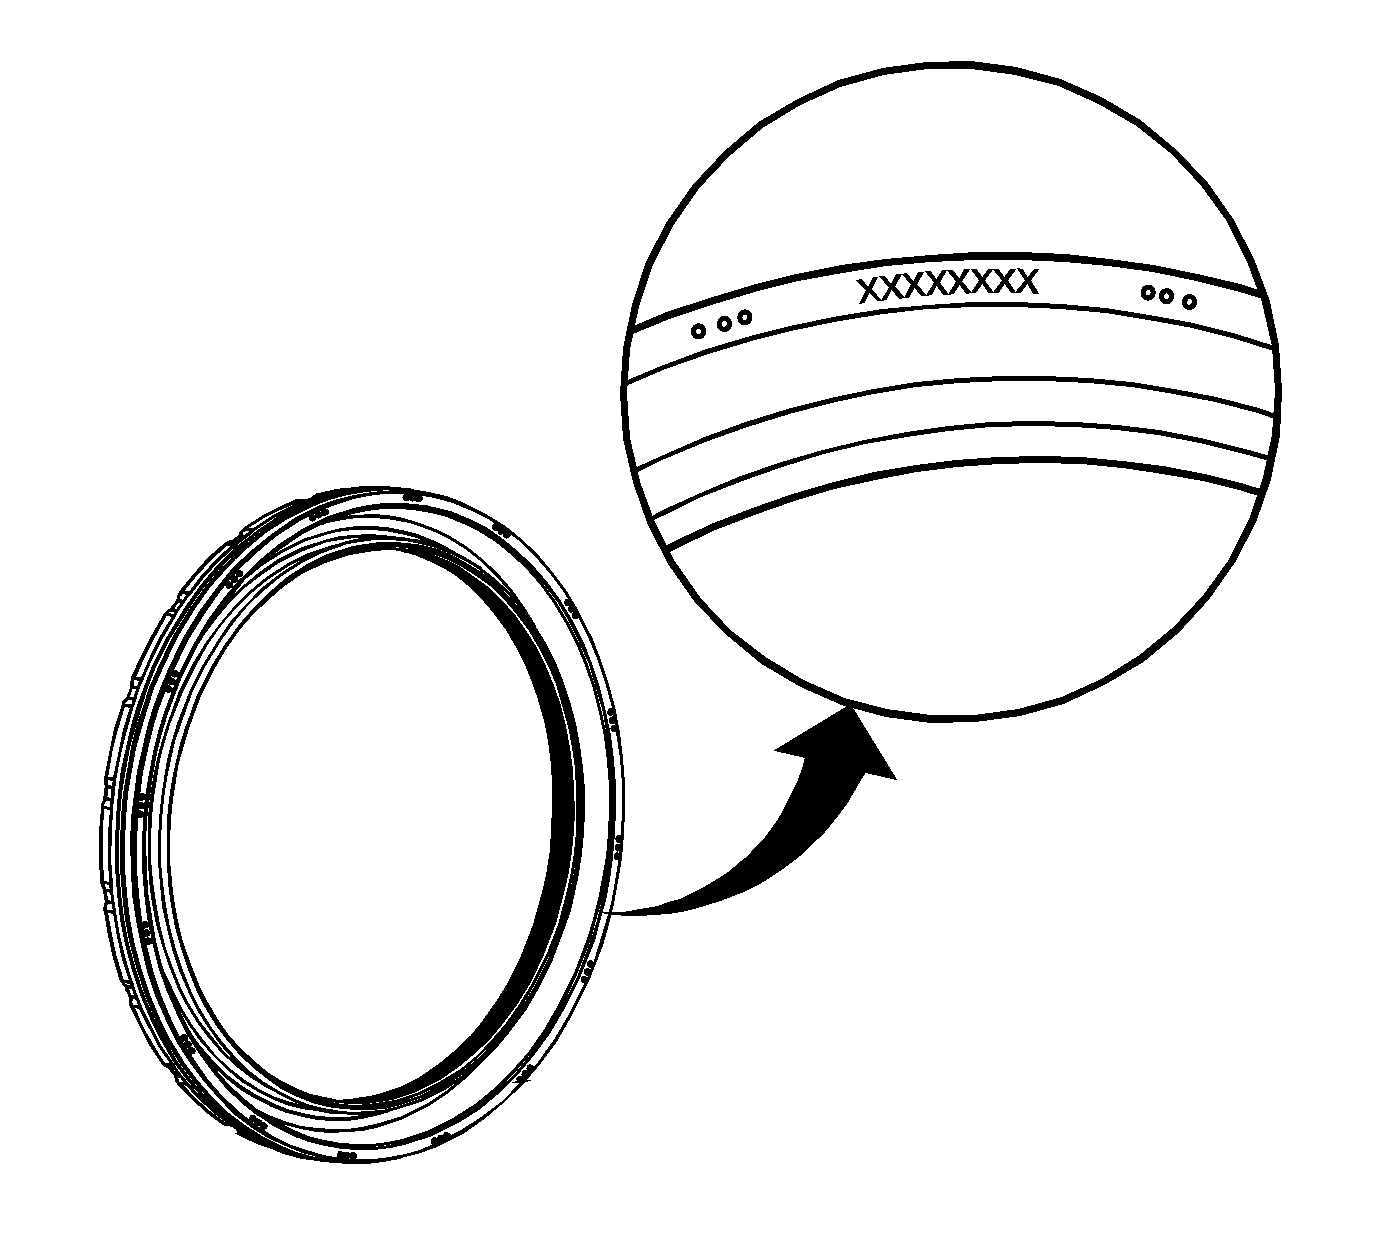
Important: Note the installation direction of the oil seal. The new design oil seal is a reverse lip type seal. For proper orientation, THIS SIDE OUT has been marked on the seal.
Crankshaft Rear Oil Seal Replacement 5.3L Engine w/RPO HP2
Tools Required
| • | J 41479 Crankshaft Rear Oil Seal Installer |
| • | J 41479-2A Crankshaft Rear Oil Seal Installation Guide |
Removal Procedure
- Remove the torque converter locator bushing. Refer to Torque Converter Locator Bushing Replacement .
- Remove the crankshaft rear oil seal (141) from the rear cover.
Installation Procedure
Important:
• The flywheel spacer, if applicable, must be removed prior to oil seal installation. • Do not lubricate the oil seal inside diameter (ID) or the crankshaft surface. • Do not reuse the crankshaft rear oil seal. Install a NEW oil seal.
- Lubricate the outside diameter (OD) of the oil seal with clean engine oil.
- Inspect the seal and identify the THIS SIDE OUT markings for proper orientation.
- Lubricate the rear housing oil seal bore with clean engine oil.
- Install the J 41479 tapered cone (2) and bolts onto the rear of the crankshaft.
- Tighten the bolts until snug. Do not overtighten.
- Install the rear oil seal onto the tapered cone (2) and push the seal to the rear cover bore. Install the oil seal with the markings THIS SIDE OUT facing away from the engine.
- Thread the J 41479 threaded rod into the tapered cone until the tool (1) contacts the oil seal.
- Align the oil seal into the tool (1).
- Rotate the handle of the tool (1) clockwise until the seal enters the rear cover and bottoms into the cover bore.
- Remove the J 41479 .
- Install the torque converter locator bushing. Refer to Torque Converter Locator Bushing Replacement .
Important: Note the installation direction of the oil seal. The new design oil seal is a reverse lip type seal. For proper orientation, THIS SIDE OUT has been marked on the seal.
