For 1990-2009 cars only
Shift Lever Replacement With Tow/Haul Switch
Removal Procedure
- Remove the trim covers. Refer to Steering Column Trim Covers Replacement .
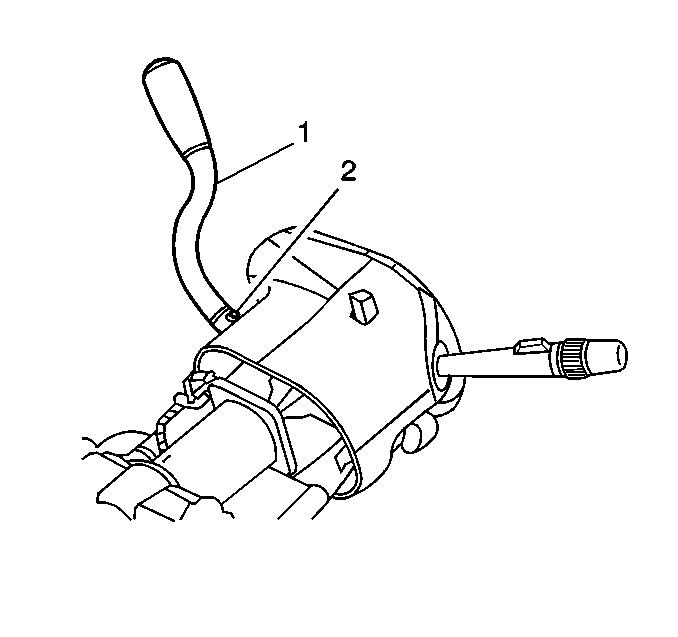
- Roll back the seal on the shift lever (1) until the TORX® head shift lever screw (2) is exposed.
- Remove the TORX® head shift lever screw (2).
- Remove the knee bolster. Refer to Knee Bolster Replacement .
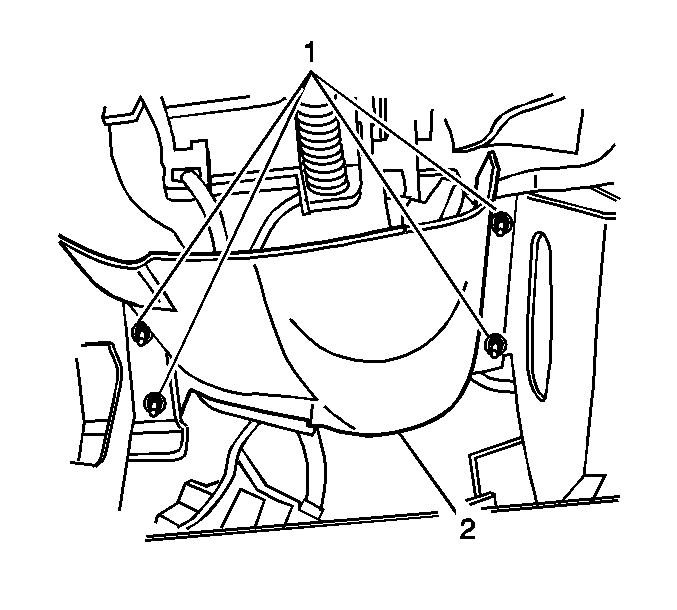
- Remove the nuts (1) from the knee bolster deflector bracket.
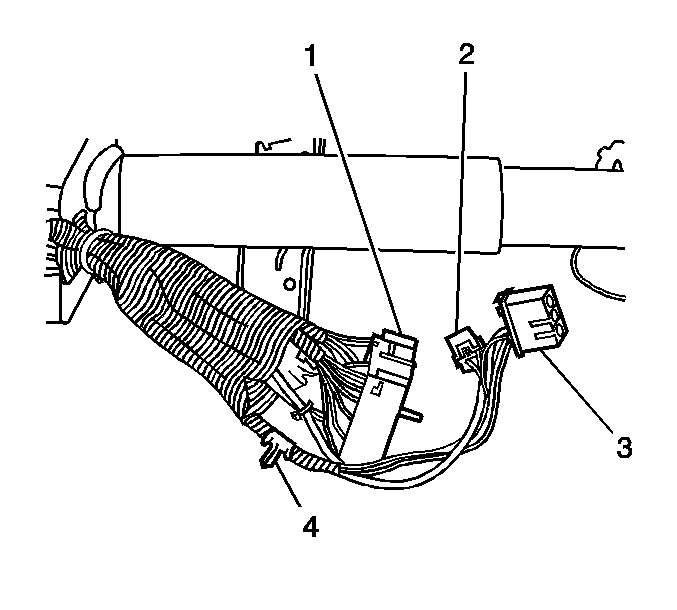
- Remove the wiring harness retaining pin (4) from the instrument panel.
- Remove the wire straps and open the harness insulation to gain access to the electrical wiring.
- Remove the wiring from the electrical connector.
- Remove the shift lever.


Notice: During removal of the steering column the wire harness retaining clip must be removed and reinstalled after installing the steering column or damage may occur to the wire harness.
Installation Procedure
- Install the shift lever (1).
- Connect the shifter electrical connector.
- Install the wire straps to the harness.
- Install the harness retaining pin (4) to the instrument panel.
- Install the knee bolster deflector bracket and nuts (1).
- Install the knee bolster. Refer to Knee Bolster Replacement .
- Install the TORX® head shift lever screw.
- Roll the seal over the TORX® head shift lever screw.
- Install the 2 TORX® head screws to the lower column trim cover.
- Install the trim covers. Refer to Steering Column Trim Covers Replacement .


Notice: Refer to Fastener Notice in the Preface section.

Tighten
Tighten the nuts to 9 N·m (80 lb in).
Tighten
Tighten the screw to 20 N·m (15 lb ft).
