For 1990-2009 cars only
Generator Battery Positive and Negative Cable Replacement 5.3L Engine w/RPO HP2
Removal Procedure
- Remove the passenger side front fender. Refer to Front Fender Replacement - Right Side .
- Remove the generator control module (GCM). Refer to Generator Control Module Replacement .
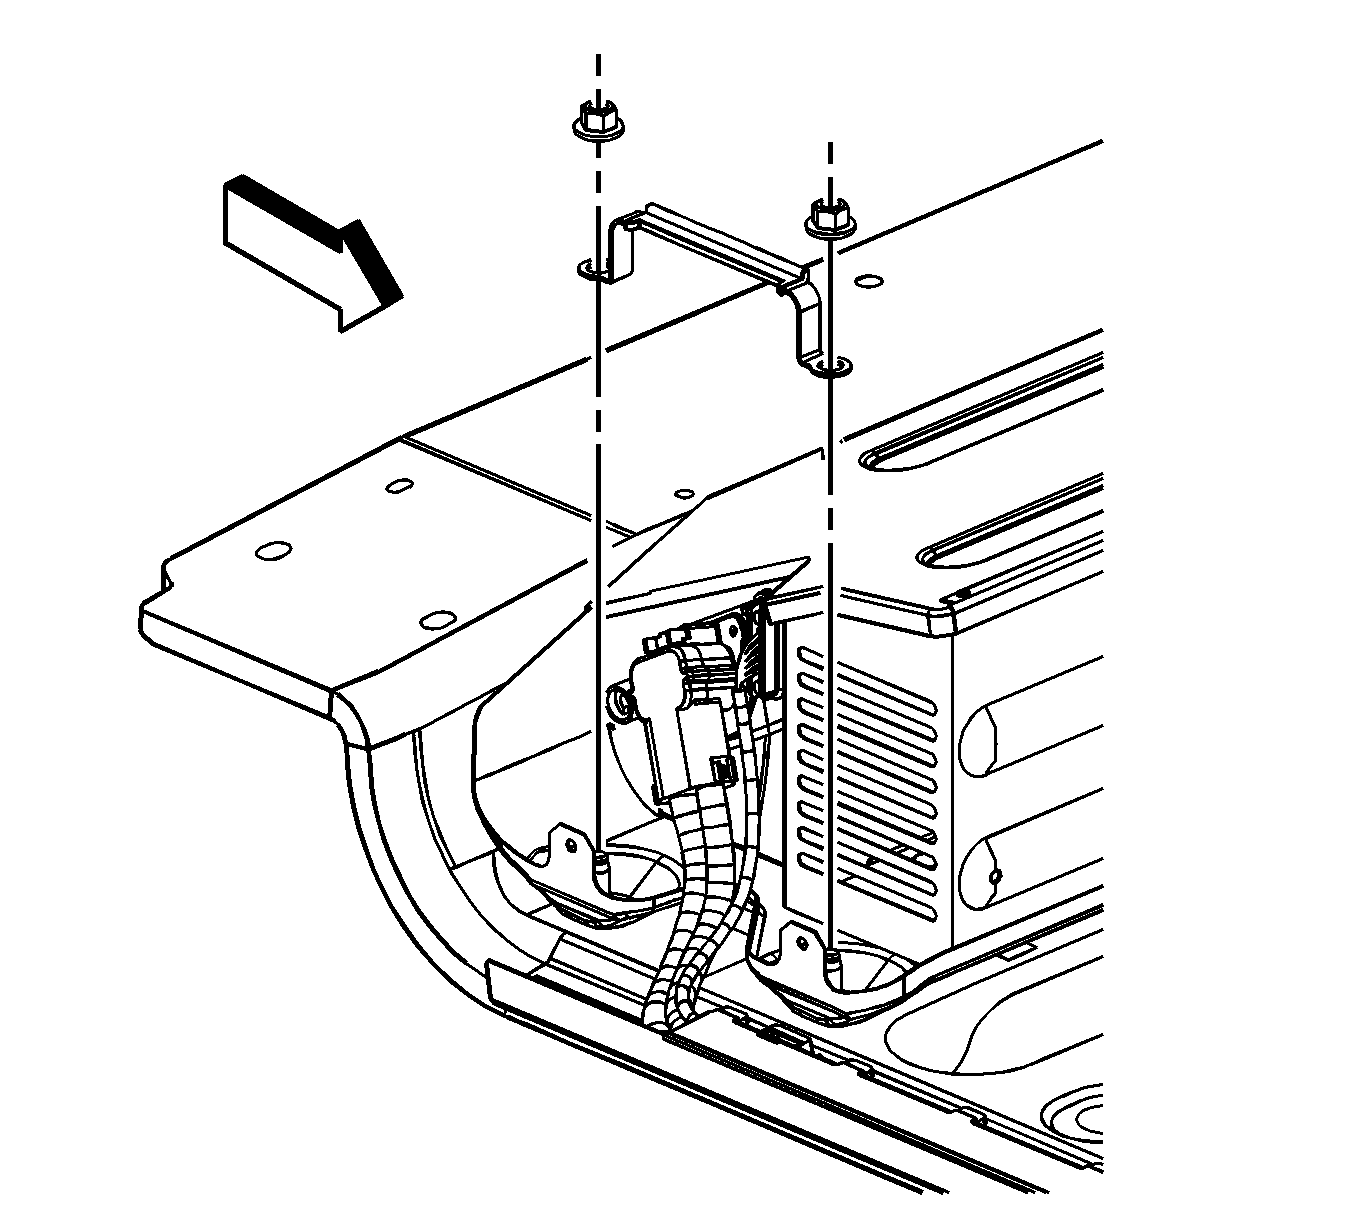
- Remove the GCM bracket nuts and bolt.
- Remove the GCM bracket.
- Remove the heating, ventilation and air conditioning (HVAC) module. Refer to HVAC Module Assembly Replacement .
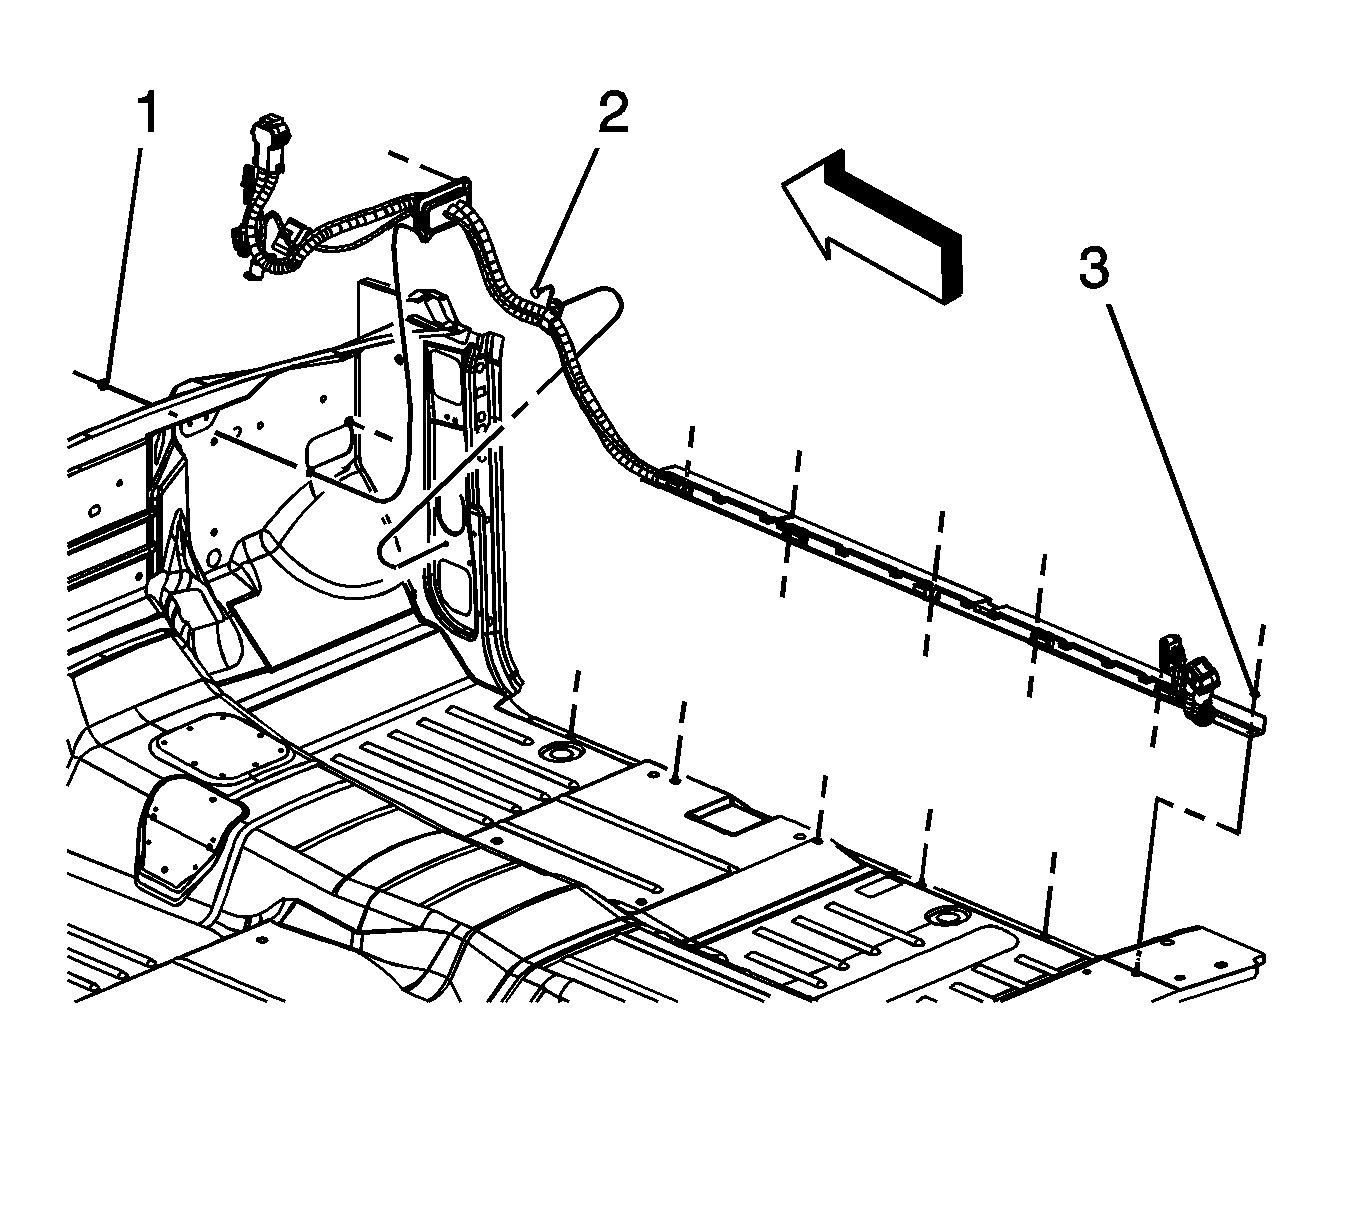
- Remove the 42-volt positive/negative cable grommet nuts (1) from the front of dash.
- Push the 42-volt positive/negative cable grommet through the front of dash.
- Remove the hinge pillar trim. Refer to Body Hinge Pillar Trim Panel Replacement .
- Remove the 42-volt positive/negative cable clip (2) from at the right cowl panel.
- Remove the door sill plate. Refer to Front Side Door Sill Plate Replacement .
- Reposition the carpet.
- Remove the 42-volt positive/negative cable channel rear nut (3).
- Disengage the 42-volt positive/negative cable channel from the studs on the floor.
- Remove the 42-volt positive/negative cable retainer nuts, and retainer.
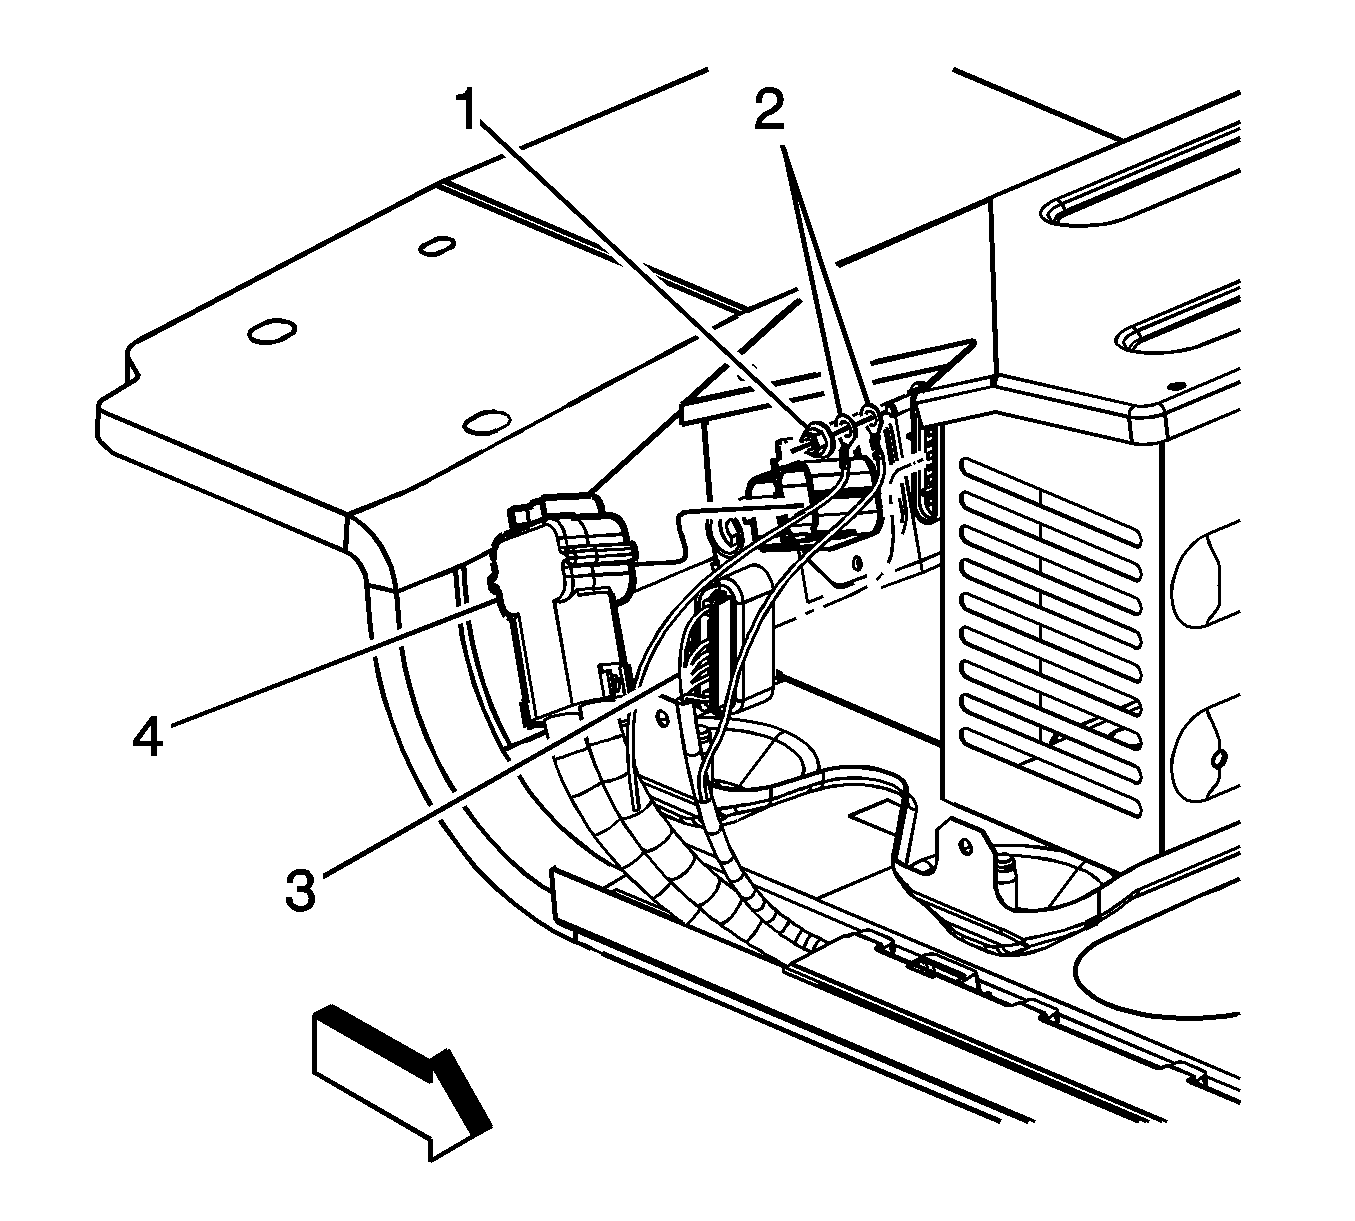
- Disconnect the 42-volt positive/negative cable electrical connector (4).
- Disconnect the 120-volt AC electrical connector (3).
- Remove the ground strap nut (1).
- Remove the ground straps from the stud (2).
- Remove the 42-volt positive/negative cable.


Installation Procedure
- Install the 42-volt positive/negative cable.
- Install the ground straps from the stud (2).
- Install the ground strap nut (1).
- Connect the 120-volt AC electrical connector (3).
- Connect the 42-volt positive/negative cable electrical connector (4).
- Install the 42-volt positive/negative cable retainer and nuts.
- Engage the 42-volt positive/negative cable channel to the studs on the floor.
- Install the 42-volt positive/negative cable channel rear nut (3).
- Position the carpet.
- Install the door sill plate. Refer to Front Side Door Sill Plate Replacement .
- Install the 42-volt positive/negative cable clip (2) at the right cowl panel.
- Push the 42-volt positive/negative cable grommet through the front of dash.
- Install the hinge pillar trim. Refer to Body Hinge Pillar Trim Panel Replacement .
- Install the 42-volt positive/negative cable grommet nuts (1) to the front of dash.
- Install the HVAC module. Refer to HVAC Module Assembly Replacement .
- Install the GCM bracket.
- Install the GCM bracket nuts and bolt.
- Install the GCM. Refer to Generator Control Module Replacement .
- Install the passenger side front fender. Refer to Front Fender Replacement - Right Side .

Notice: Refer to Fastener Notice in the Preface section.
Tighten
Tighten the nut to 10 N·m (89 lb in).

Tighten
Tighten the nuts to 20 N·m (15 lb ft).

Tighten
Tighten the nuts to 10 N·m (89 lb in).
Tighten
Tighten the nuts to 20 N·m (15 lb ft).
Tighten
| • | Tighten the bolt to 9 N·m (80 lb in). |
| • | Tighten the nuts to 25 N·m (18 lb ft). |
