For 1990-2009 cars only
Removal Procedure
- Disconnect the negative battery cable. Refer to Battery Negative Cable Disconnection and Connection.
- Disable the SIR system. Refer to SIR Disabling and Enabling.
- Lower the hush and knee bolster. Refer to Knee Bolster Replacement.
- Remove the steering column trim covers. Refer to Steering Column Trim Covers Replacement .
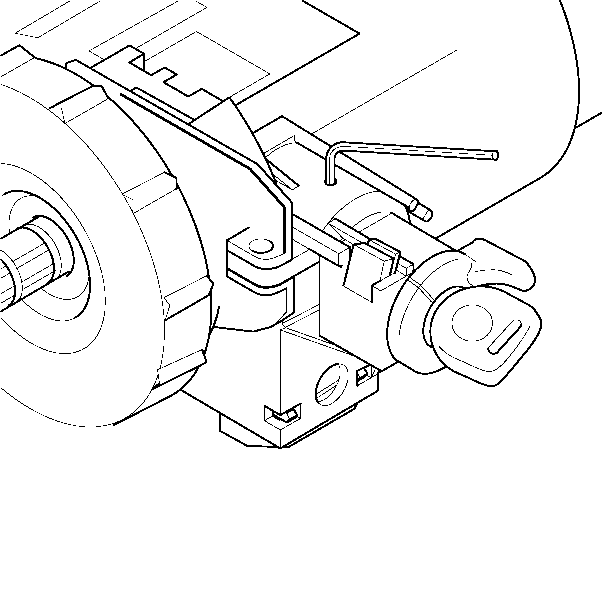
- With the key installed, turn the key to the RUN position.
- Install an allen wrench into the hole on top of the lock cylinder housing.
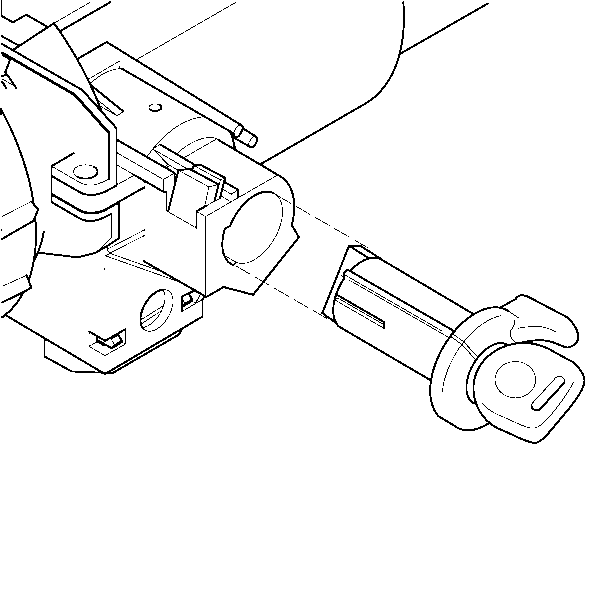
- Slide the lock cylinder out of the lock cylinder housing.
Caution: Refer to SIR Caution in the Preface section.

Push down on the allen wrench to release the tab on the lock cylinder inside the lock cylinder housing.

Installation Procedure
- Install the key into the lock cylinder.
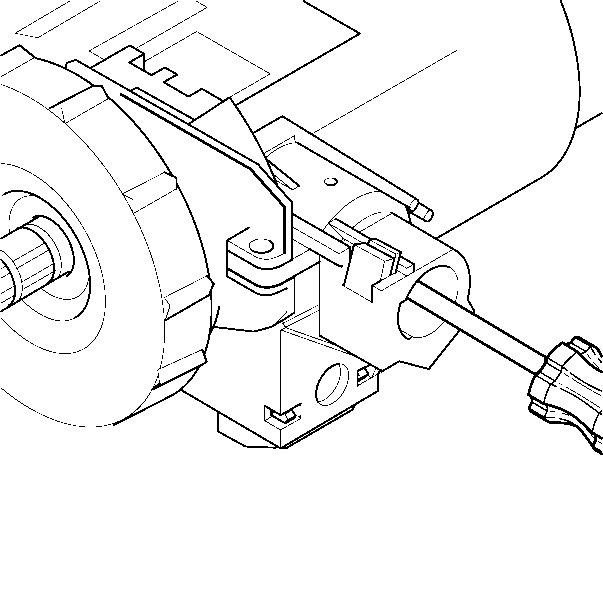
- Use a screwdriver to rotate the lock cylinder housing gear clockwise to the start position - allowing it to spring return into the RUN position.
- Align the lock cylinder and install into the lock cylinder housing.
- Install the steering column trim covers. Refer to Steering Column Trim Covers Replacement .
- Install the hush and knee bolster. Refer to Knee Bolster Replacement.
- Enable the SIR system. Refer to SIR Disabling and Enabling.
- Connect the negative battery cable. Refer to Battery Negative Cable Disconnection and Connection .

Important: The gears between the ignition switch and the lock cylinder housing must be in the correct position. Failure to do so will cause a misalignment of the gears in the ignition switch and the lock cylinder housing, which may result in a NO START or BATTERY DRAIN.

