Removal Procedure
- Remove the air cleaner outlet resonator. Refer to Air Cleaner Outlet Resonator Replacement .
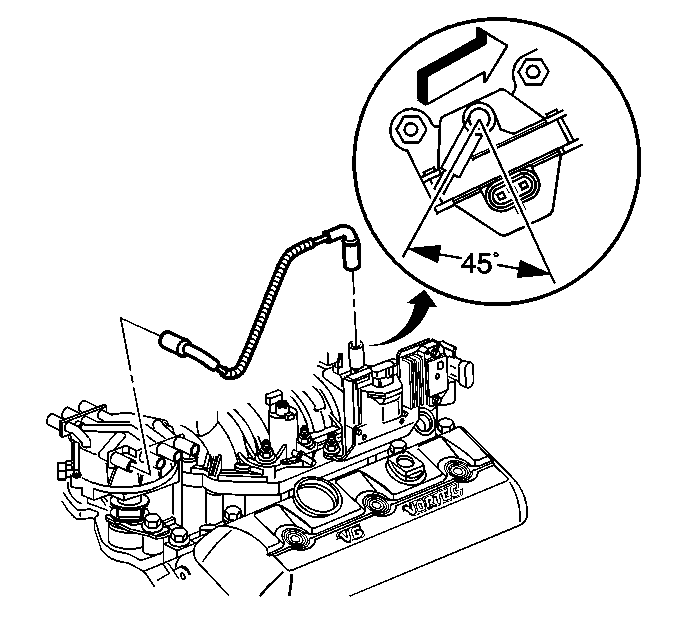
- Remove the ignition coil wire from the ignition coil and distributor cap.
- Disconnect the following electrical connectors:
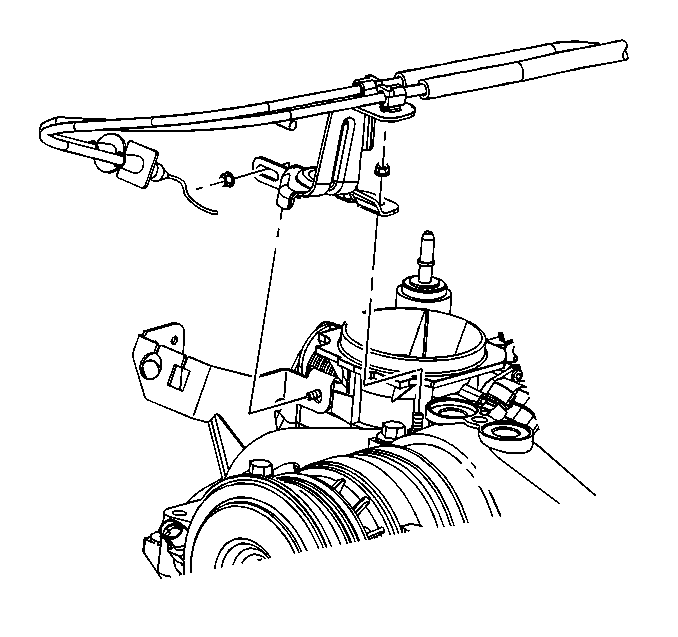
- Remove the accelerator cable slug from the throttle lever.
- Remove the cruise control cable from the throttle lever.
- Remove the accelerator cable from the engine bracket.
- Remove the cruise control cable from the engine bracket.
- Remove the accelerator control cable bracket nuts.
- Remove the accelerator control cable bracket with cables attached, from the throttle body.
- Position and secure the bracket and cables out of the way.
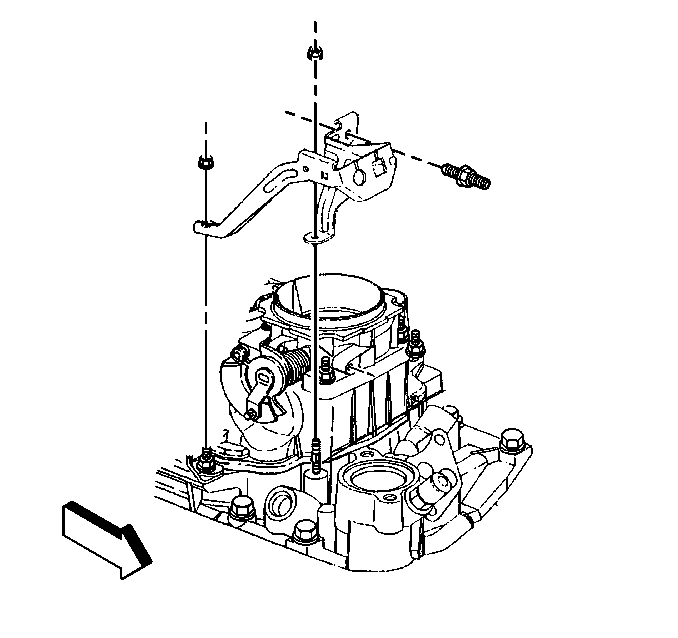
- Remove the accelerator cable bracket nuts and stud.
- Remove the accelerator cable bracket.
- Remove the ignition coil bracket studs.
- Remove the ignition coil and bracket.
- Remove the ignition coil bolts/nuts.
- Remove the ignition coil from the brackets.
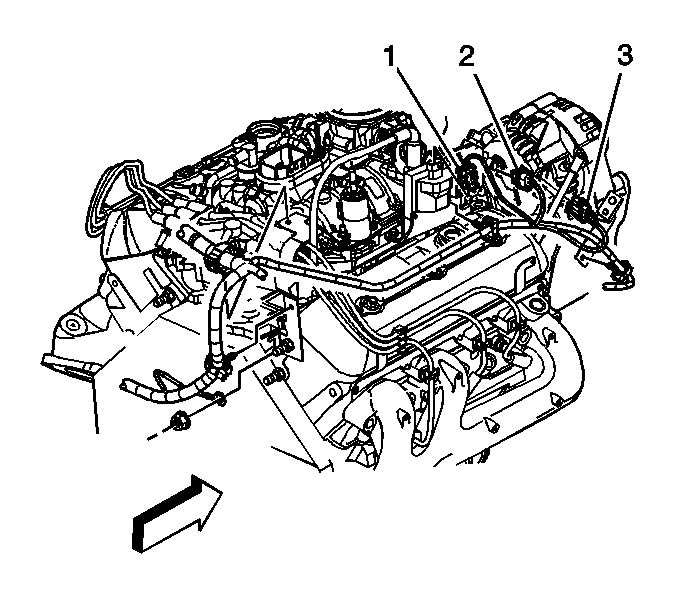
| • | Ignition coil (1) |
| • | Ignition coil driver (2) |
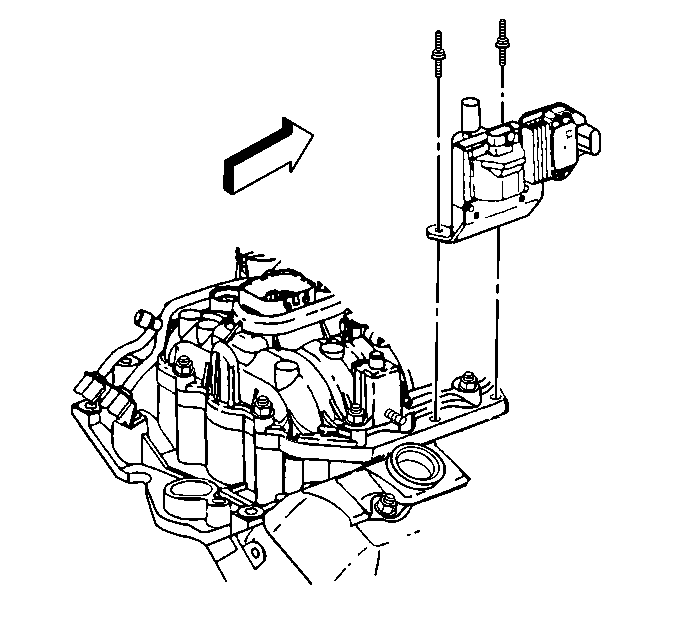
Installation Procedure
- Install the brackets to either side of the ignition coil.
- Install the ignition coil bolts/nuts.
- Place the ignition coil and bracket into position.
- Install the ignition coil bracket studs.
- Install the accelerator cable bracket.
- Install the accelerator cable bracket nuts and stud.
- Position the bracket and cables.
- Install the accelerator control cable bracket with cables attached, to the throttle body.
- Install the accelerator control cable bracket nuts.
- Install the accelerator cable to the engine bracket.
- Install the cruise control cable to the engine bracket.
- Install the cruise control cable to the throttle lever.
- Install the accelerator cable slug to the throttle lever.
- Connect the following electrical connectors:
- Install the ignition coil wire to the ignition coil and distributor cap.
- Install the air cleaner outlet resonator. Refer to Air Cleaner Outlet Resonator Replacement .

Notice: Use the correct fastener in the correct location. Replacement fasteners must be the correct part number for that application. Fasteners requiring replacement or fasteners requiring the use of thread locking compound or sealant are identified in the service procedure. Do not use paints, lubricants, or corrosion inhibitors on fasteners or fastener joint surfaces unless specified. These coatings affect fastener torque and joint clamping force and may damage the fastener. Use the correct tightening sequence and specifications when installing fasteners in order to avoid damage to parts and systems.
Tighten
Tighten the bolts/nuts to 3.5 N·m (31 lb in).
Tighten
Tighten the studs to 11 N·m (97 lb in).

Tighten
Tighten the nuts/stud to 12 N·m (106 lb in).

Tighten
Tighten the nuts to 10 N·m (89 lb in).

| • | Ignition coil (1) |
| • | Ignition coil driver (2) |

Important: The coil wire nipple must be positioned such that it is between 35 and 60 degrees aft of perpendicular as referenced from the engine centerline on the outboard side of the coil.
