Charged Air Cooler Hoses/Pipes Replacement Driver Side
Removal Procedure
- Remove the left wheelhouse panel. Refer to Wheelhouse Panel Replacement.
- Loosen the left charged air cooler inlet duct connector to turbocharger clamp (1).
- Remove the left charged air cooler inlet duct connector (4) from the turbocharger.
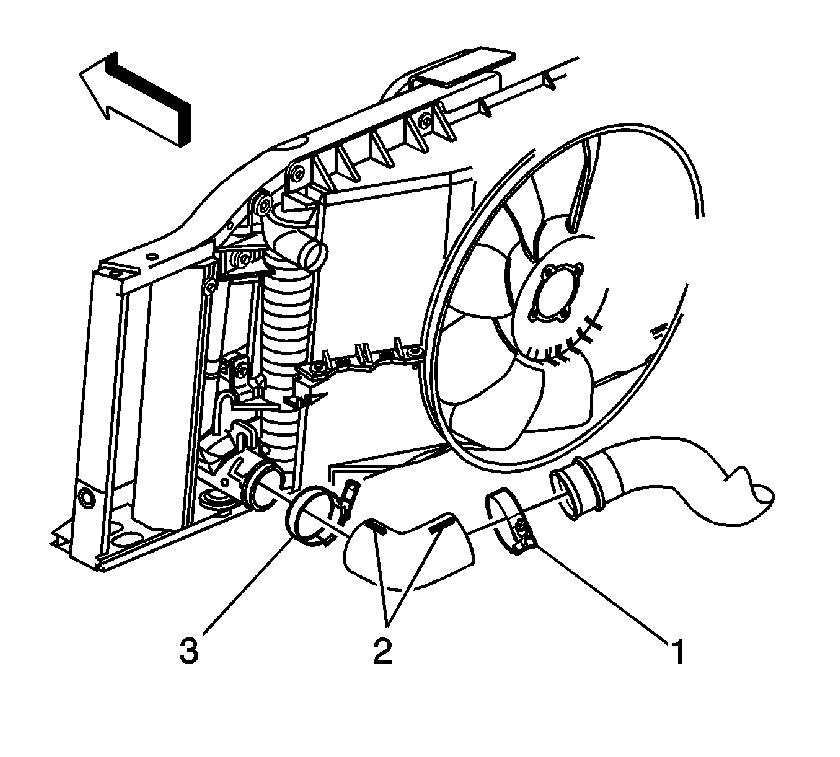
- Working through the left wheelhouse, loosen the charged air cooler inlet duct clamp (3) at the charged air cooler.
- Remove the left charged air cooler inlet duct.
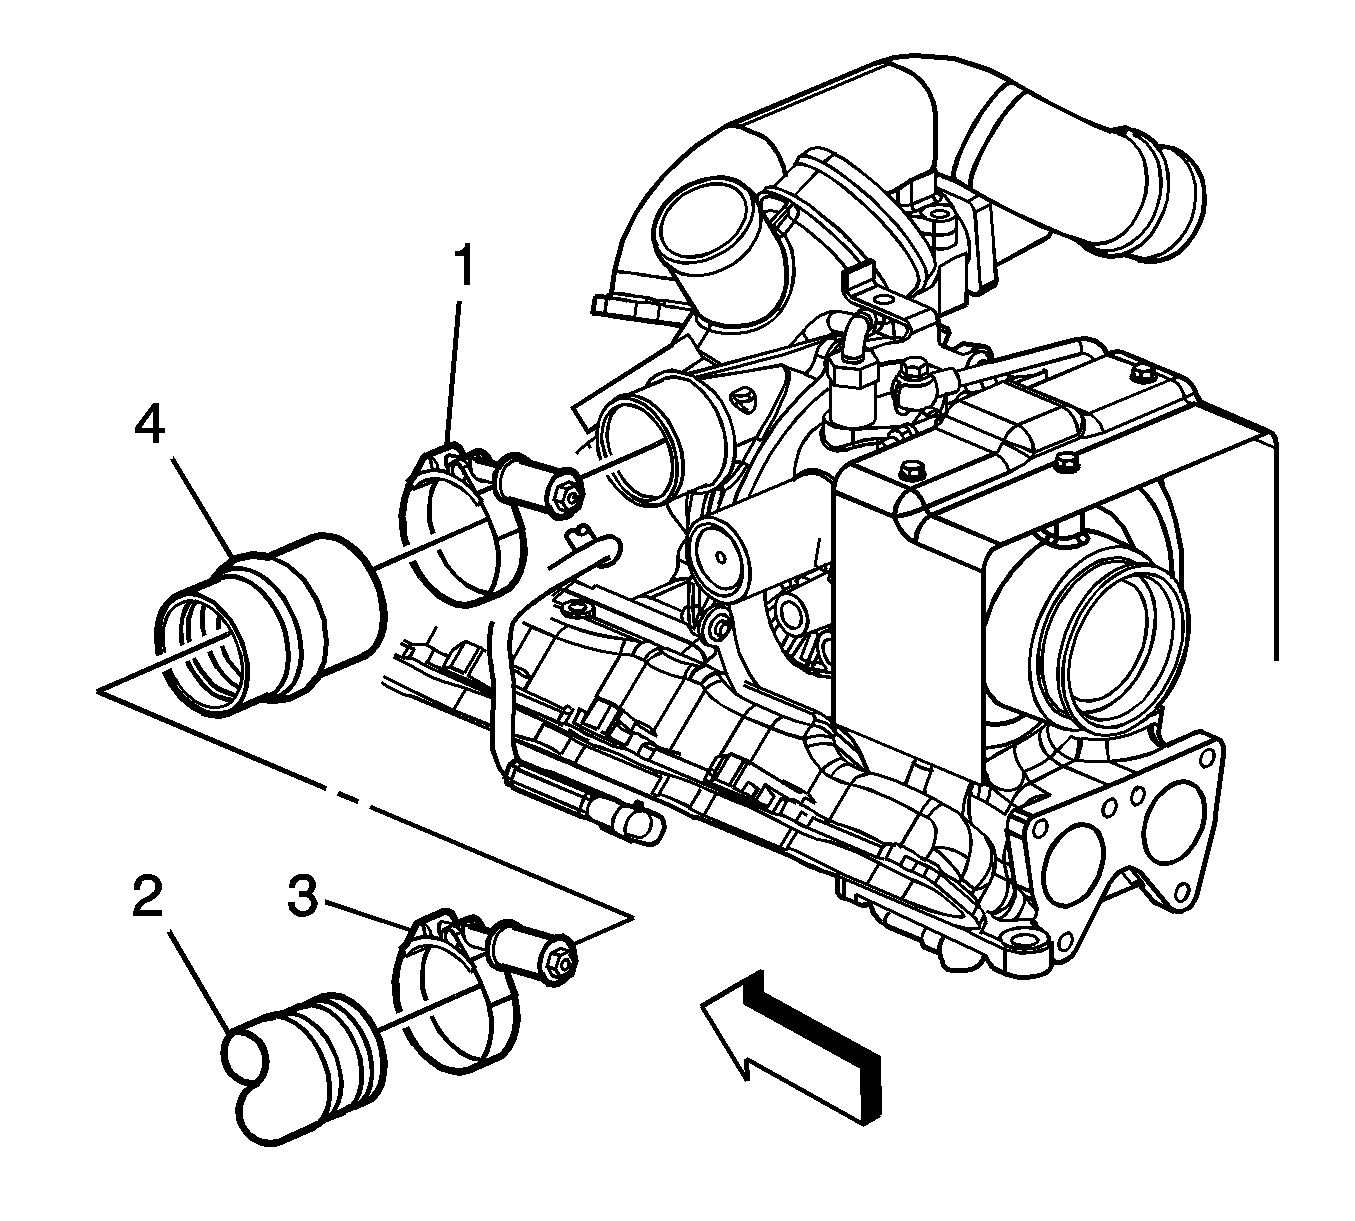
Important: After removing the charged air cooler duct, cover the turbocharger opening with tape in order to prevent entry of objects.
Important: Do not use a screwdriver or other tool to pry the hose loose. The hose can be torn or damaged. Loosen the hose by twisting.
Installation Procedure
- Working through the left wheelhouse, install the charged air cooler inlet duct.
- Hand tighten the left charged air cooler inlet duct clamp (3) at the charged air cooler.
- Install the left charged air cooler outlet duct to the intake.
- Tighten the charged air cooler outlet duct to intake hose clamps.
- Install the left wheelhouse panel. Refer to Wheelhouse Panel Replacement.

Important: Do not over tighten the charged air cooler pipe clamps. If the clamp is overtightened, the pipe may become distorted allowing separation of the hose from the pipe. Make sure the charged air cooler pipe/hoses are properly orientated.
Notice: Refer to Fastener Notice in the Preface section.
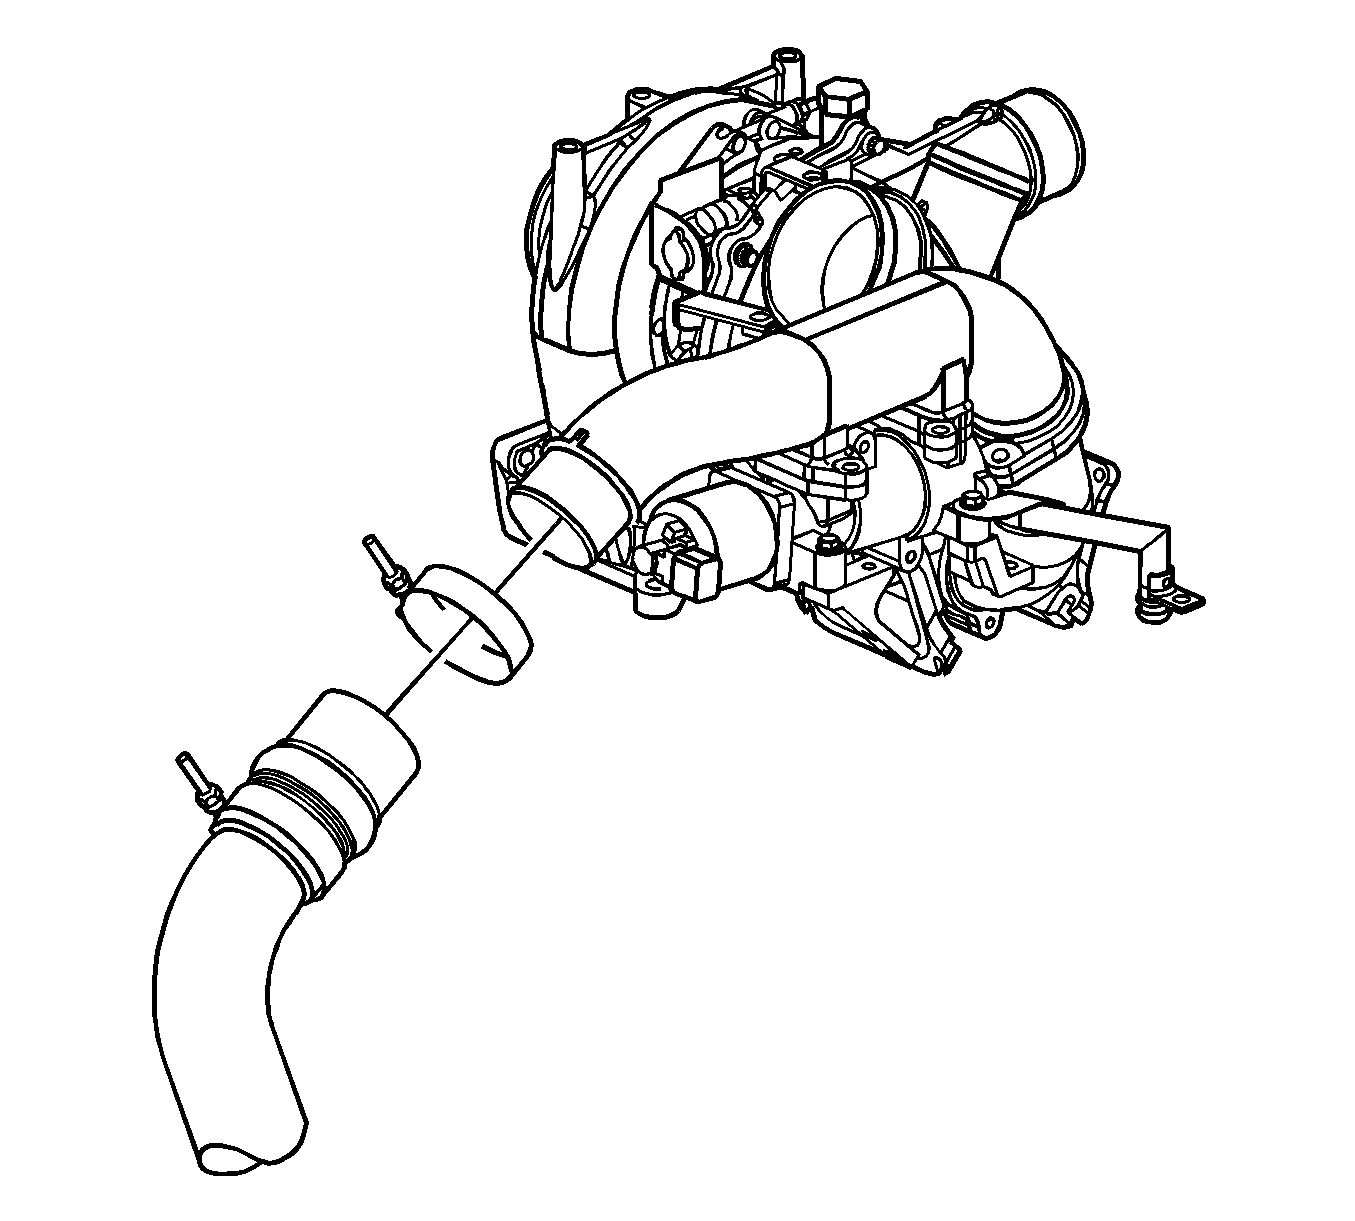
Important: Do not over tighten the charged air cooler pipe clamps. If the clamp is overtightened, the pipe may become distorted allowing separation of the hose from the pipe. Make sure the charged air cooler pipe/hoses are properly orientated.
Tighten
Tighten the clamps to 8 N·m (70 lb in).
Charged Air Cooler Hoses/Pipes Replacement Passenger Side
Removal Procedure
- Remove the right wheelhouse panel. Refer to Wheelhouse Panel Replacement .
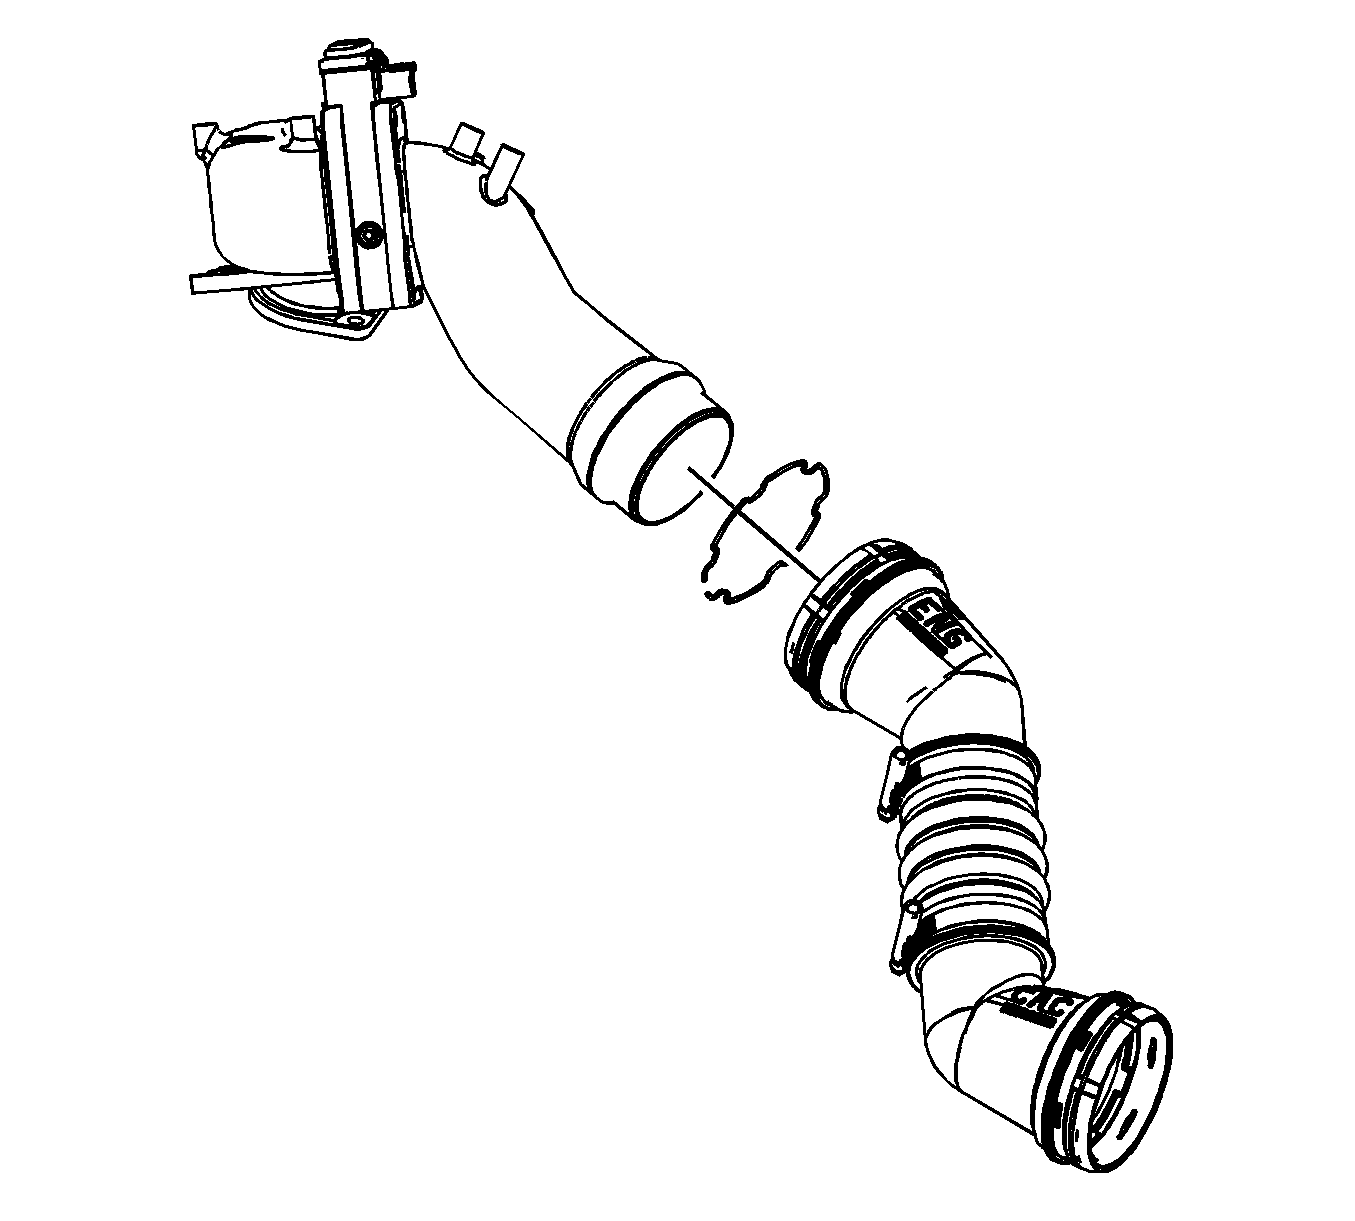
- Using a pick or a small flat-bladed screwdriver, remove and discard the quick connect fitting clip from the charged air cooler outlet duct.
- Remove the charged air cooler outlet duct from the intake.
- Working through the right wheelhouse, Using the pick or a small flat-bladed screwdriver, remove and discard the quick connect fitting clip from the charged air cooler outlet duct.
- Remove the charged air cooler outlet duct from the charged air cooler.
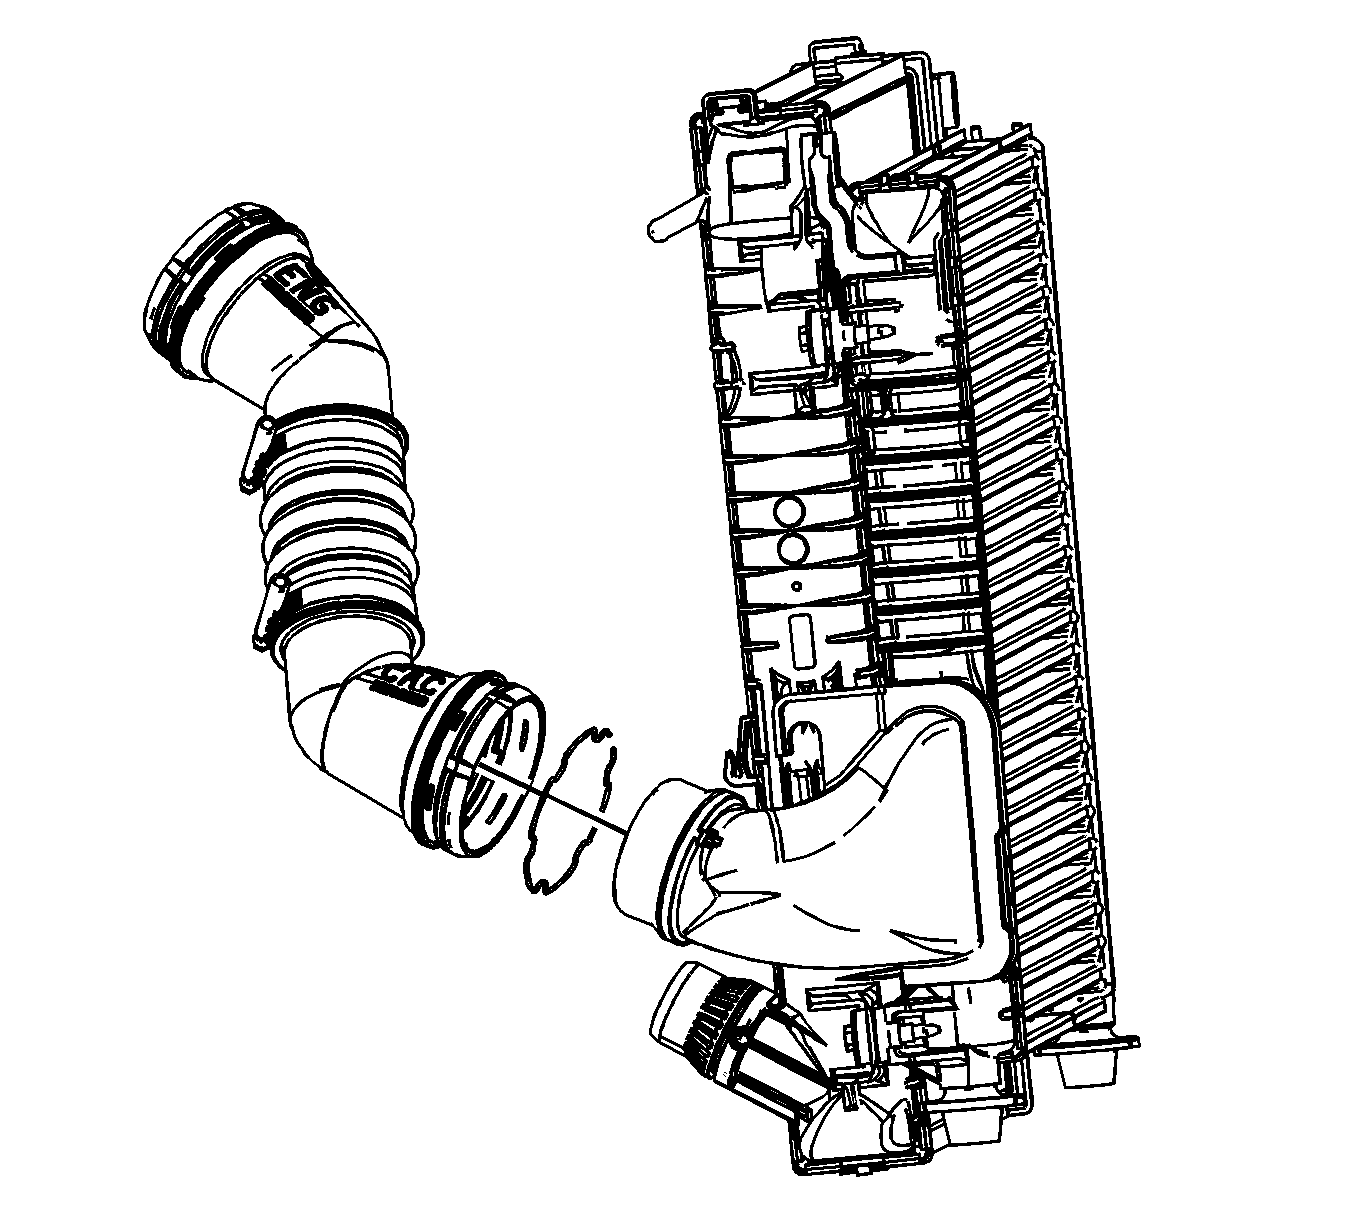
Installation Procedure
- Install NEW quick connect fitting clips to the charged air cooler.
- Working through the right wheelhouse, install the charged air cooler outlet duct to the charged air cooler.
- Install the charged air cooler outlet duct to the intake.
- Install the right wheelhouse panel. Refer to Wheelhouse Panel Replacement .


