For 1990-2009 cars only
Removal Procedure
Important: An 8-digit identification number is located on the fuel rail. Refer to this identification number when servicing or when part replacement is required.
- Remove the air cleaner outlet duct. Refer to Air Cleaner Resonator Outlet Duct Replacement .
- Relieve the fuel system pressure. Refer to Fuel Pressure Relief .
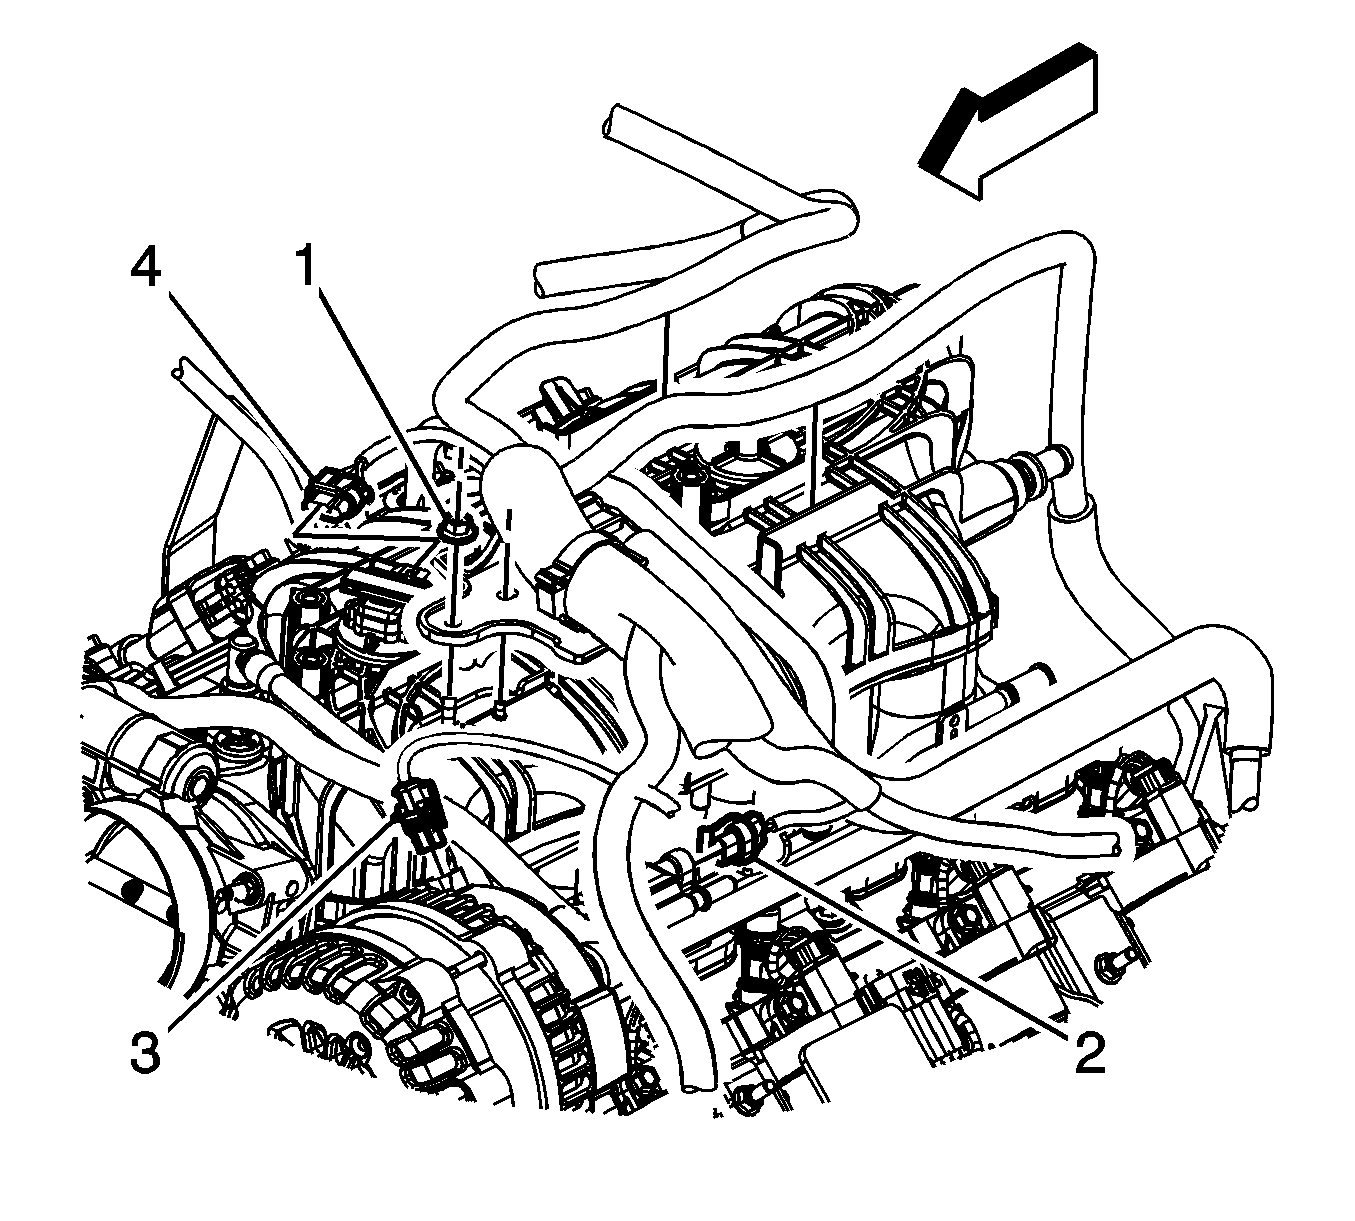
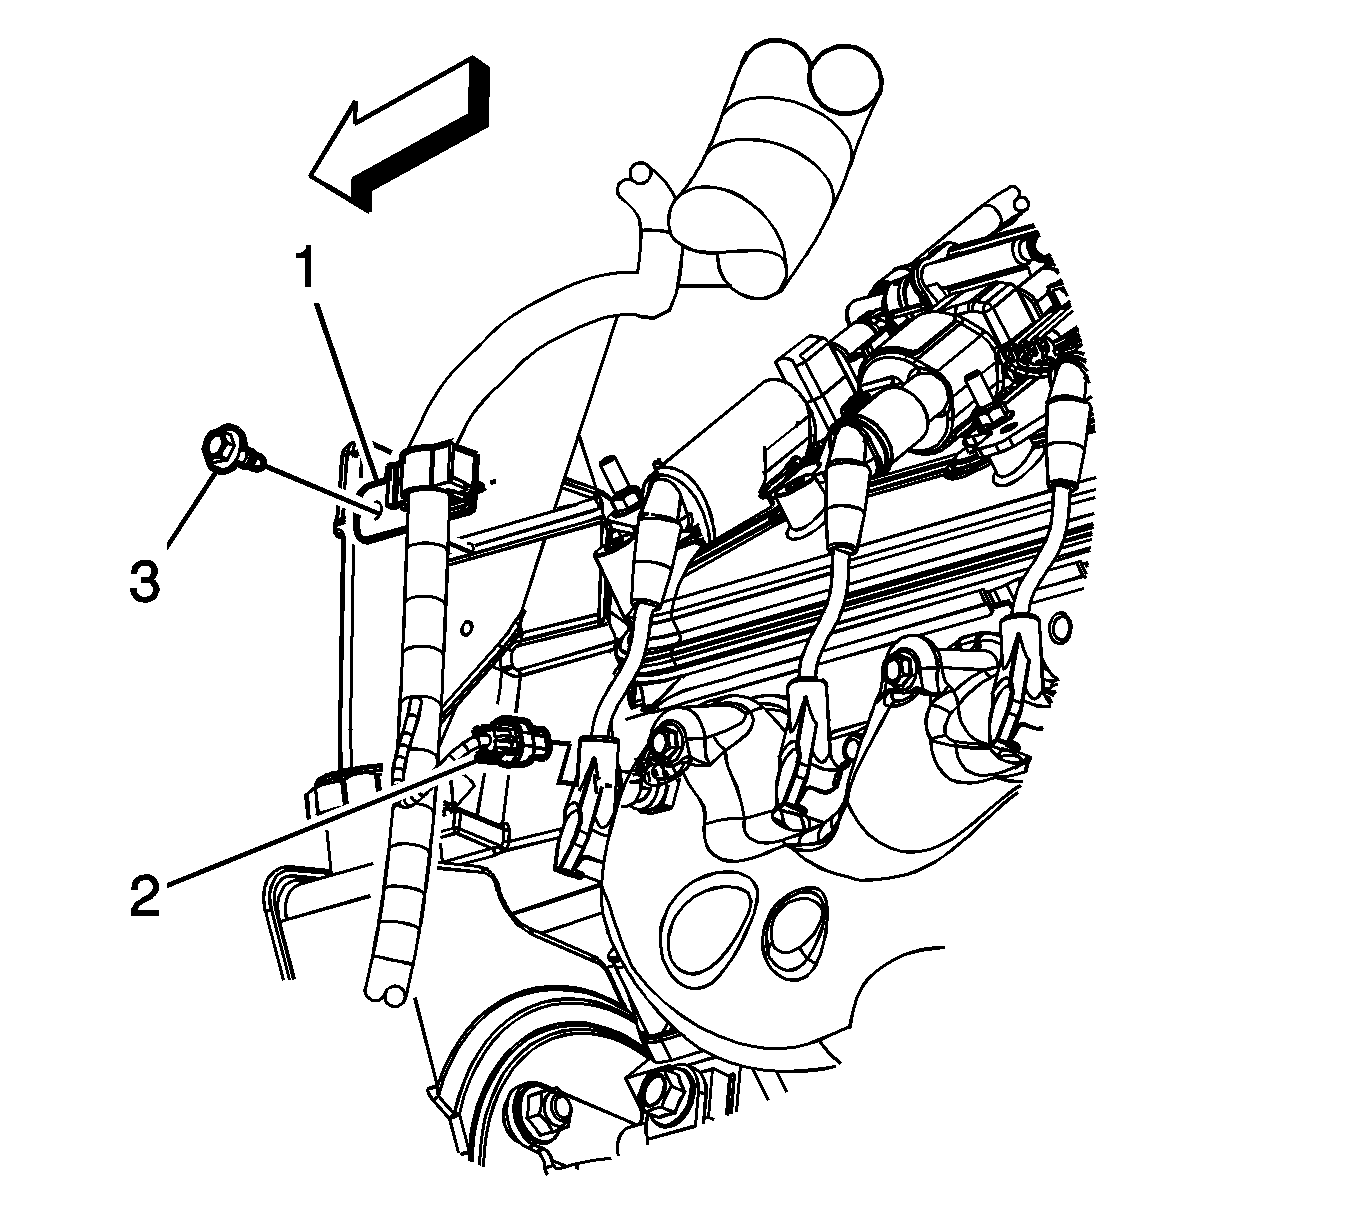
- Remove the engine wiring harness bracket nut (1).
- Disconnect the engine wiring harness electrical connector (2) from the evaporative emission (EVAP) purge solenoid.
- Disconnect the engine wiring harness electrical connector (3) from the generator.
- Disconnect the engine wiring harness electrical connector (4) from the manifold absolute pressure (MAP) sensor.
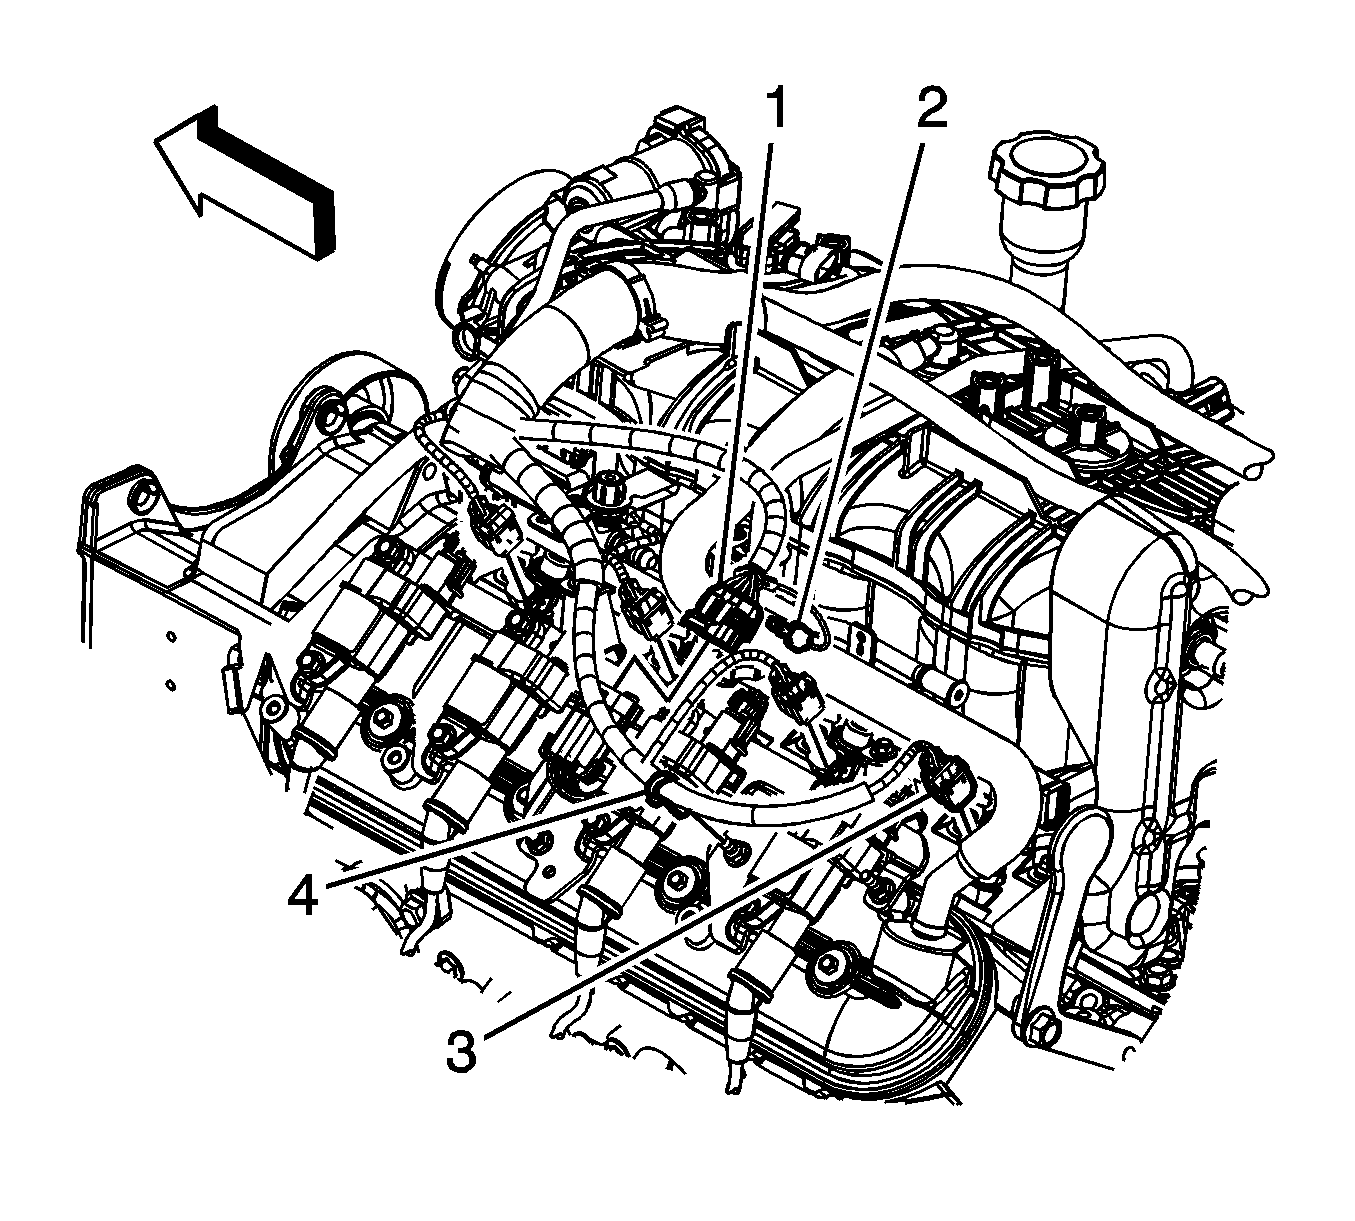
- Remove the connector position assurance (CPA) retainer (2).
- Disconnect the engine wiring harness electrical connector (1) from the ignition coil main electrical connector.
- Disconnect the engine wiring harness electrical connectors (3) from the fuel injectors, perform the following:
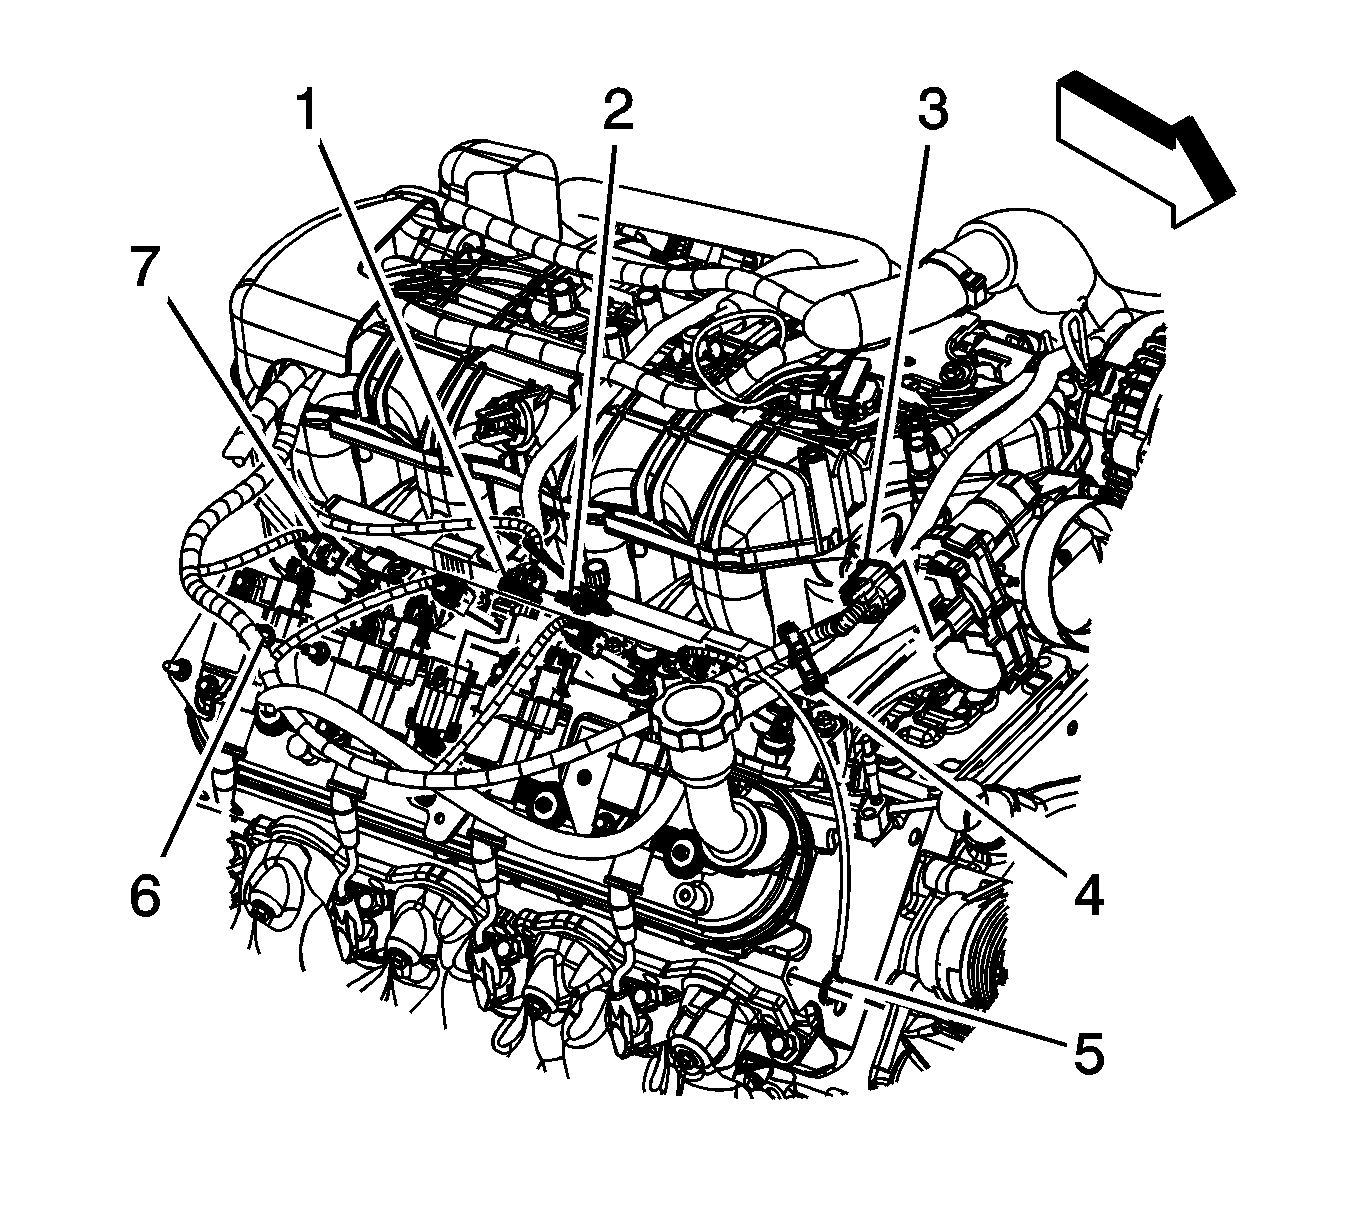
- Remove the CPA retainer (2).
- Disconnect the engine wiring harness electrical connector (1) from the ignition coil main electrical connector.
- Disconnect the engine wiring harness electrical connector (3) from the electronic throttle control.
- Disconnect the engine wiring harness electrical connectors (7) from the fuel injectors, perform the following:
- Remove the engine wiring harness clip (4) from the generator battery jumper cable.
- Remove the engine wiring harness clip (6) from the ignition coil bracket stud.
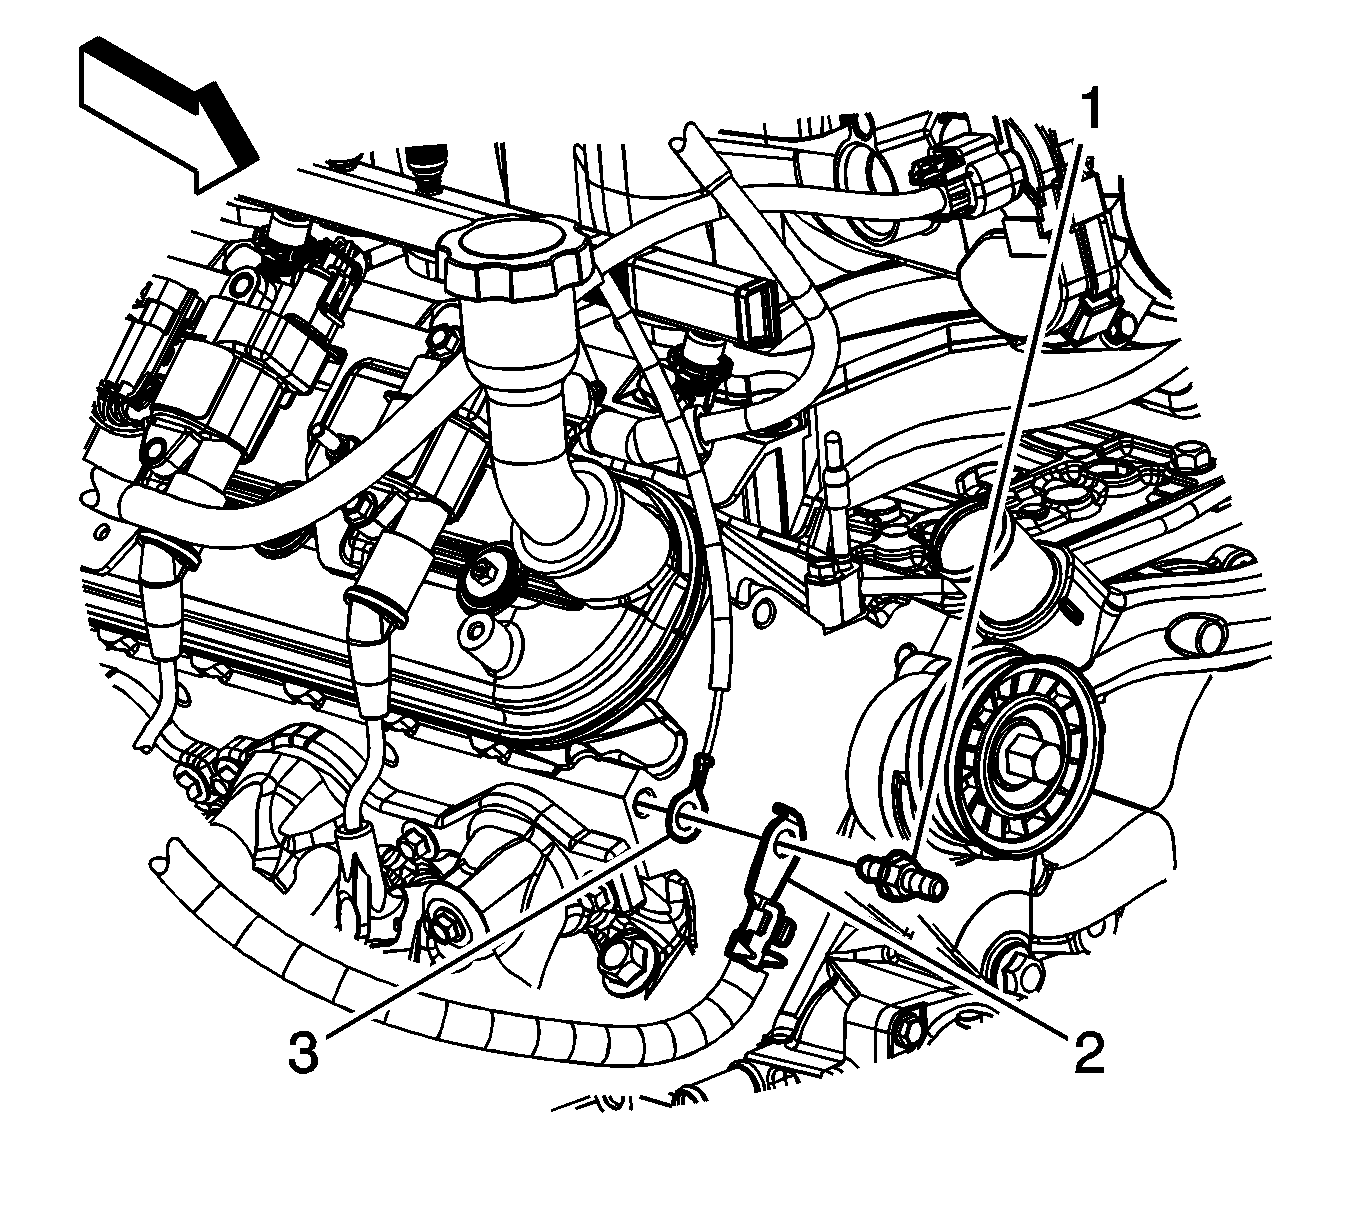
- Remove the negative battery cable stud (1) from the right cylinder head.
- Remove the negative battery cable terminal (2) and engine wiring harness ground terminal (3) from the cylinder head.
- Remove the engine wiring harness clip bolt (3) from the generator bracket.
- Gather the branches of the engine wiring harness and reposition the aside.
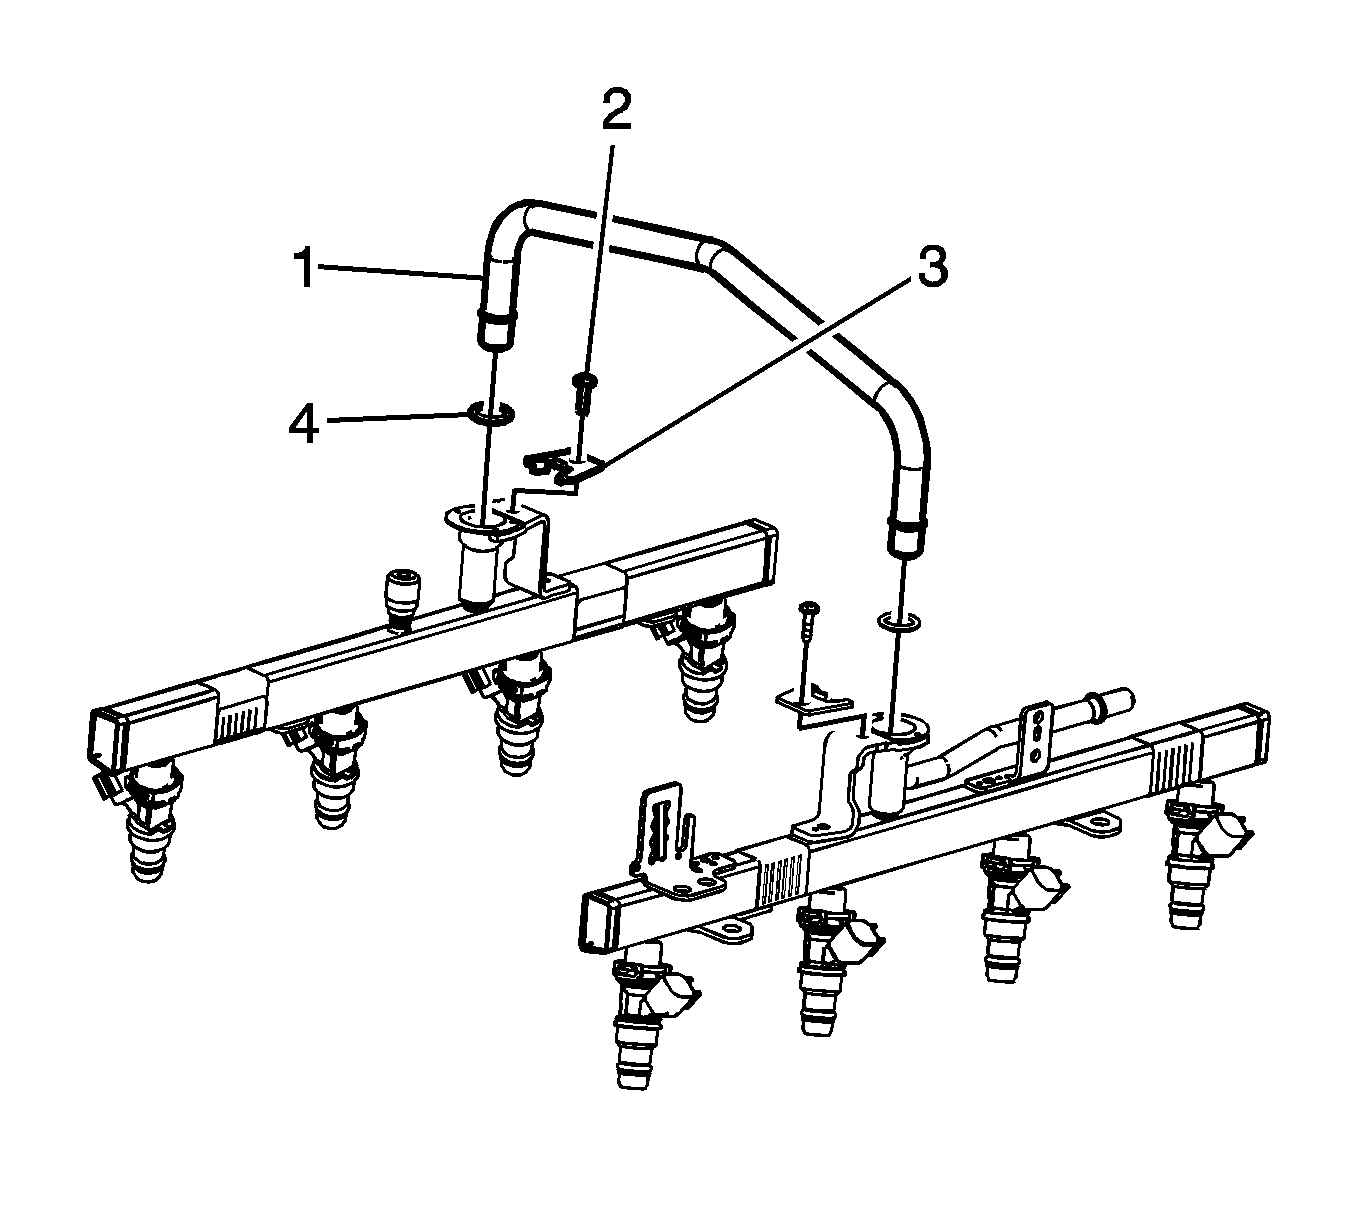
- Remove the fuel rail crossover pipe retainer screws (2).
- Remove the fuel rail crossover pipe retainers (3).
- Remove the fuel rail crossover pipe (1) from the fuel rails.
- Remove and discard the fuel rail crossover pipe O-ring seals (4).
| 9.1. | Mark the connectors to their corresponding injectors to ensure correct reassembly. |
| 9.2. | Pull the CPA retainer on the connector up 1 click. |
| 9.3. | Push the tab on the connector in. |
| 9.4. | Disconnect the fuel injector electrical connector. |
| 13.1. | Mark the connectors to their corresponding injectors to ensure correct reassembly. |
| 13.2. | Pull the CPA retainer on the connector up 1 click. |
| 13.3. | Push the tab on the connector in. |
| 13.4. | Disconnect the fuel injector electrical connector. |
Installation Procedure
- Lubricate the NEW fuel rail crossover pipe O-ring seals with clean engine oil.
- Install NEW fuel rail crossover pipe O-ring seals (4) onto the crossover pipe.
- Install the fuel rail crossover pipe (1) into the fuel rails.
- Install the fuel rail crossover pipe retainers (3).
- Install the fuel rail crossover pipe retainer screws (2).
- Gather the branches of the engine wiring harness and position over the top of the engine.
- Position the engine wiring harness clip to the generator bracket and install the clip bolt (3).
- Position the negative battery cable terminal (2) and engine wiring harness ground terminal (3) to the right cylinder head.
- Install the negative battery cable stud (1) to the cylinder head.
- Connect the engine wiring harness electrical connector (1) to the ignition coil main electrical connector.
- Install the CPA retainer (2).
- Connect the engine wiring harness electrical connector (3) to the electronic throttle control.
- Connect the engine wiring harness electrical connectors (7) to the fuel injectors, perform the following:
- Install the engine wiring harness clip (4) to the generator battery jumper cable.
- Install the engine wiring harness clip (6) to the ignition coil bracket stud.
- Connect the engine wiring harness electrical connector (1) to the ignition coil main electrical connector.
- Install the CPA retainer (2).
- Connect the engine wiring harness electrical connectors (3) to the fuel injectors, perform the following:
- Connect the engine wiring harness electrical connector (4) to the MAP sensor.
- Connect the engine wiring harness electrical connector (3) to the generator.
- Connect the engine wiring harness electrical connector (2) to the EVAP purge solenoid.
- Install the engine wiring harness bracket nut (1).
- Connect the negative battery cable. Refer to Battery Negative Cable Disconnection and Connection .
- Use the following procedure in order to inspect for leaks:
- Install the air cleaner outlet duct. Refer to Air Cleaner Resonator Outlet Duct Replacement .

Notice: Refer to Fastener Notice in the Preface section.
Tighten
Tighten the screws to 3.8 N·m (34 lb in).

Tighten
Tighten the bolt to 9 N·m (80 lb in).

Tighten
Tighten the stud to 25 N·m (18 lb ft).

| 13.1. | Ensure that the CPA retainer is pulled out 1 click. |
| 13.2. | Connect the electrical connectors to their corresponding injectors. |
| 13.3. | Push the CPA retainer in 1 click. |
| 13.4. | Ensure that the connector is secured. |

| 18.1. | Ensure that the CPA retainer is pulled out 1 click. |
| 18.2. | Connect the electrical connectors to their corresponding injectors. |
| 18.3. | Push the CPA retainer in 1 click. |
| 18.4. | Ensure that the connector is secured. |

Tighten
Tighten the nut to 5 N·m (44 lb in).
| 24.1. | Turn the ignition ON, with the engine OFF for 2 seconds. |
| 24.2. | Turn the ignition OFF for 10 seconds. |
| 24.3. | Turn the ignition ON, with the engine OFF. |
| 24.4. | Inspect for leaks. |
