Oil Pump, Screen, and Crankshaft Oil Deflector Replacement Except LH6, LMG, LY2 and LY5
Removal Procedure
- Remove the oil pan. Refer to Oil Pan Replacement.
- Remove the engine front cover. Refer to Engine Front Cover Replacement.
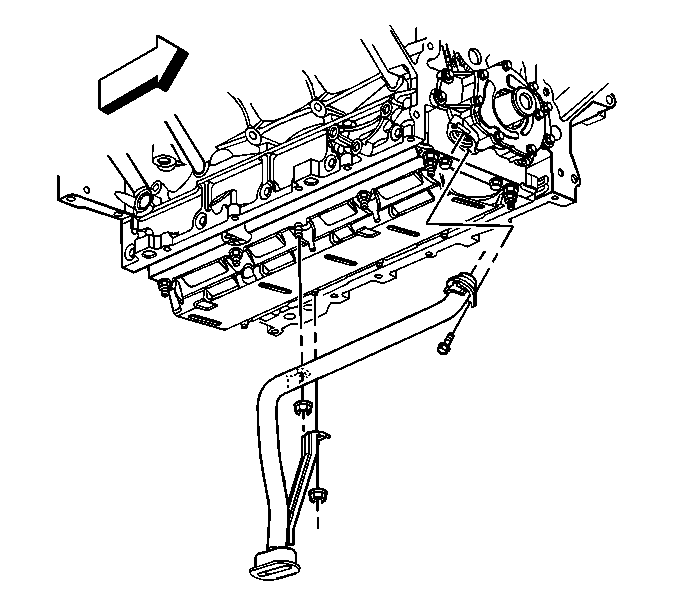
- Remove the oil pump screen bolt and nuts.
- Remove the oil pump screen with O-ring seal.
- Remove the O-ring seal from the pump screen.
- Discard the O-ring seal.
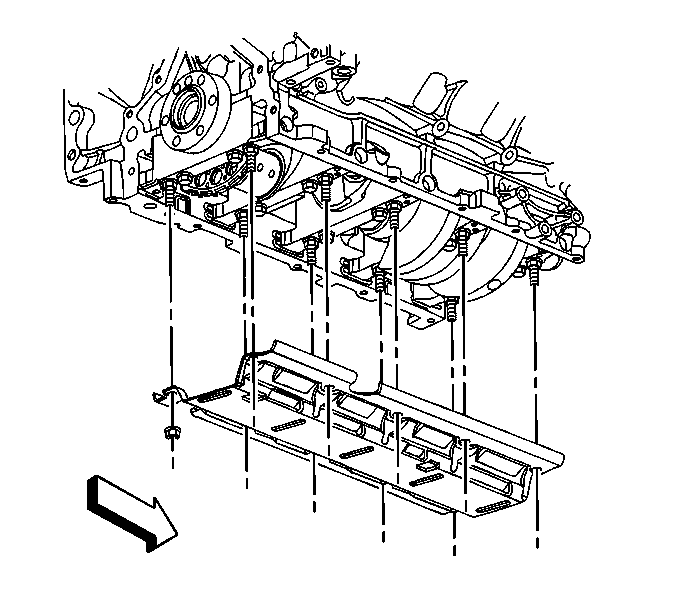
- Remove the remaining crankshaft oil deflector nuts.
- Remove the crankshaft oil deflector.
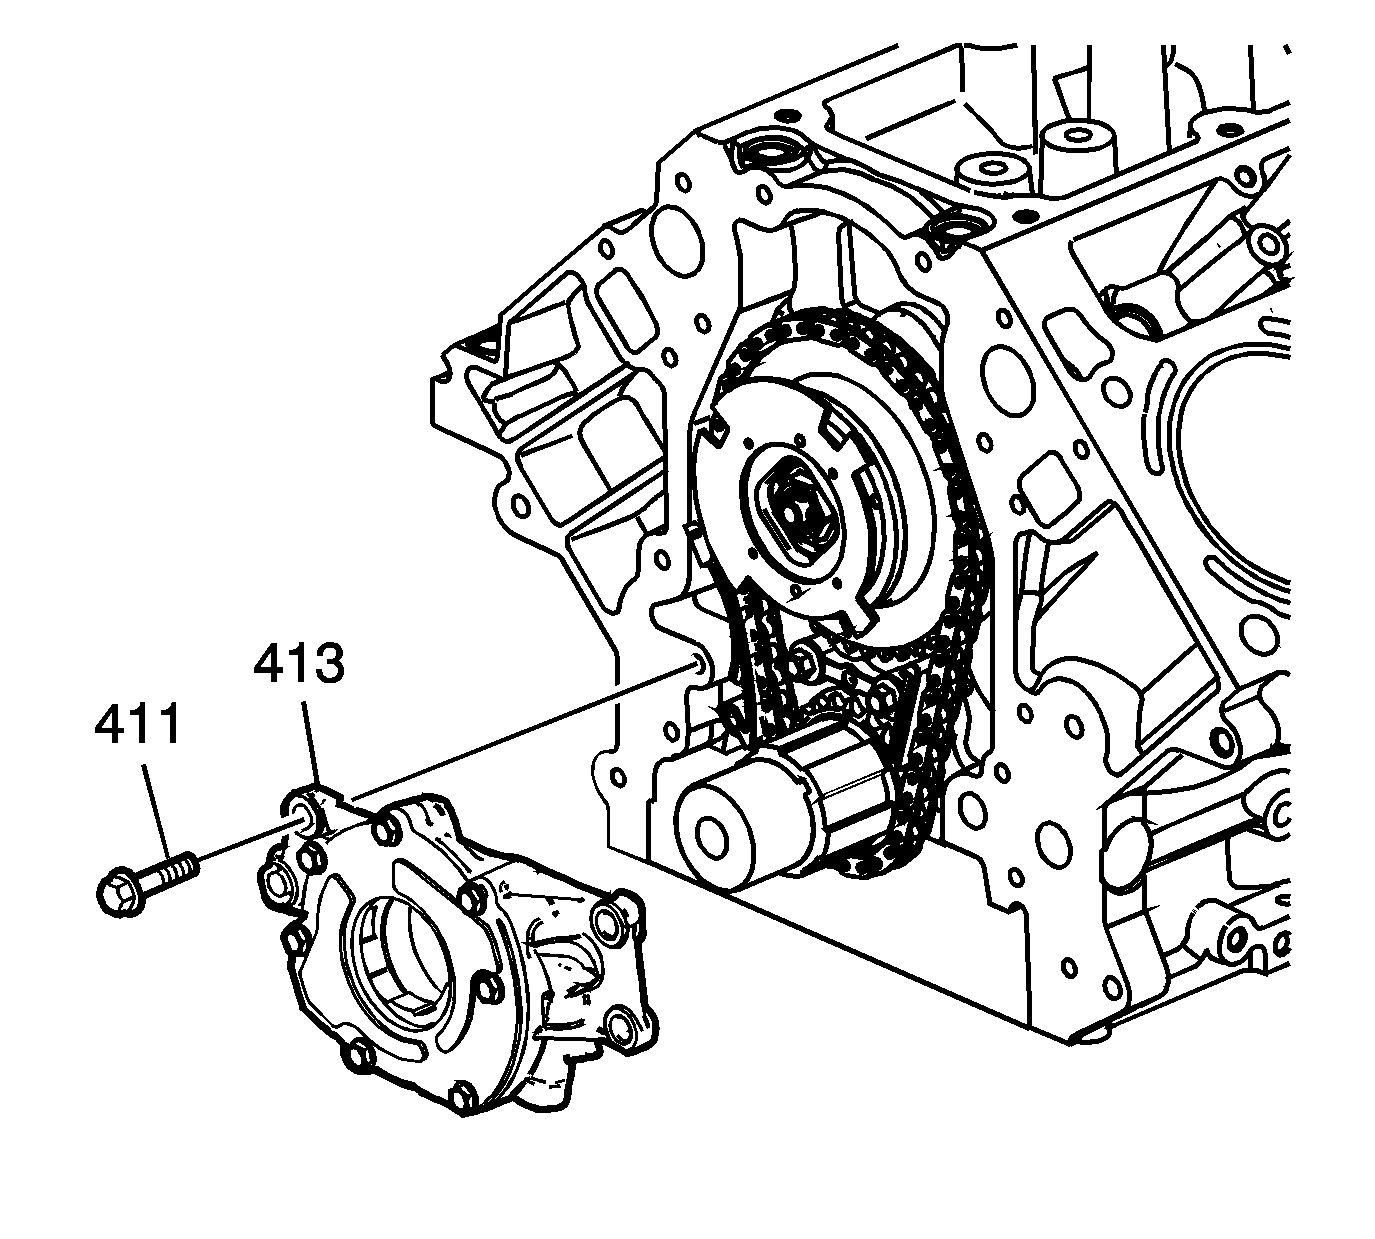
- Remove the oil pump bolts (411).
- Remove the oil pump (413)


Important: Do not allow dirt or debris to enter the oil pump assembly, cap end as necessary.
Installation Procedure
Important: Inspect the engine block oil galley passages. These areas must be free and clear of debris or restrictions.
- Align the splined surfaces of the crankshaft sprocket and the oil pump drive gear and install the oil pump (413).
- Install the oil pump (413) onto the crankshaft sprocket until the pump housing contacts the face of the engine block.
- Install the oil pump bolts (411).
- Position the crankshaft oil deflector and install the nuts until snug.
- Lubricate a NEW oil pump screen O-ring seal with clean engine oil.
- Install the NEW O-ring seal onto the oil pump screen.
- Align the oil pump screen mounting brackets with the correct crankshaft bearing cap studs.
- Install the oil pump screen.
- Install the oil pump screen bolt and nuts.
- Tighten the bolt to 12 N·m (106 lb in).
- Tighten the nuts to 25 N·m (18 lb ft).
- Install the engine front cover. Refer to Engine Front Cover Replacement.
- Install the oil pan. Refer to Oil Pan Replacement.

Notice: Use the correct fastener in the correct location. Replacement fasteners must be the correct part number for that application. Fasteners requiring replacement or fasteners requiring the use of thread locking compound or sealant are identified in the service procedure. Do not use paints, lubricants, or corrosion inhibitors on fasteners or fastener joint surfaces unless specified. These coatings affect fastener torque and joint clamping force and may damage the fastener. Use the correct tightening sequence and specifications when installing fasteners in order to avoid damage to parts and systems.
Tighten
Tighten the bolts to 25 N·m (18 lb ft).


Important: Push the oil pump screen tube completely into the oil pump prior to tightening the bolt. Do not allow the bolt to pull the tube into the pump.
Tighten
Oil Pump, Screen, and Crankshaft Oil Deflector Replacement LH6, LMG, LY2 and LY5
Removal Procedure
- Remove the oil pan. Refer to Oil Pan Replacement .
- Remove the engine front cover. Refer to Engine Front Cover Replacement .
- Remove the oil pump screen bolt and nuts.
- Remove the oil pump screen with O-ring seal.
- Remove the O-ring seal from the pump screen.
- Discard the O-ring seal.
- Remove the remaining crankshaft oil deflector nuts.
- Remove the crankshaft oil deflector.
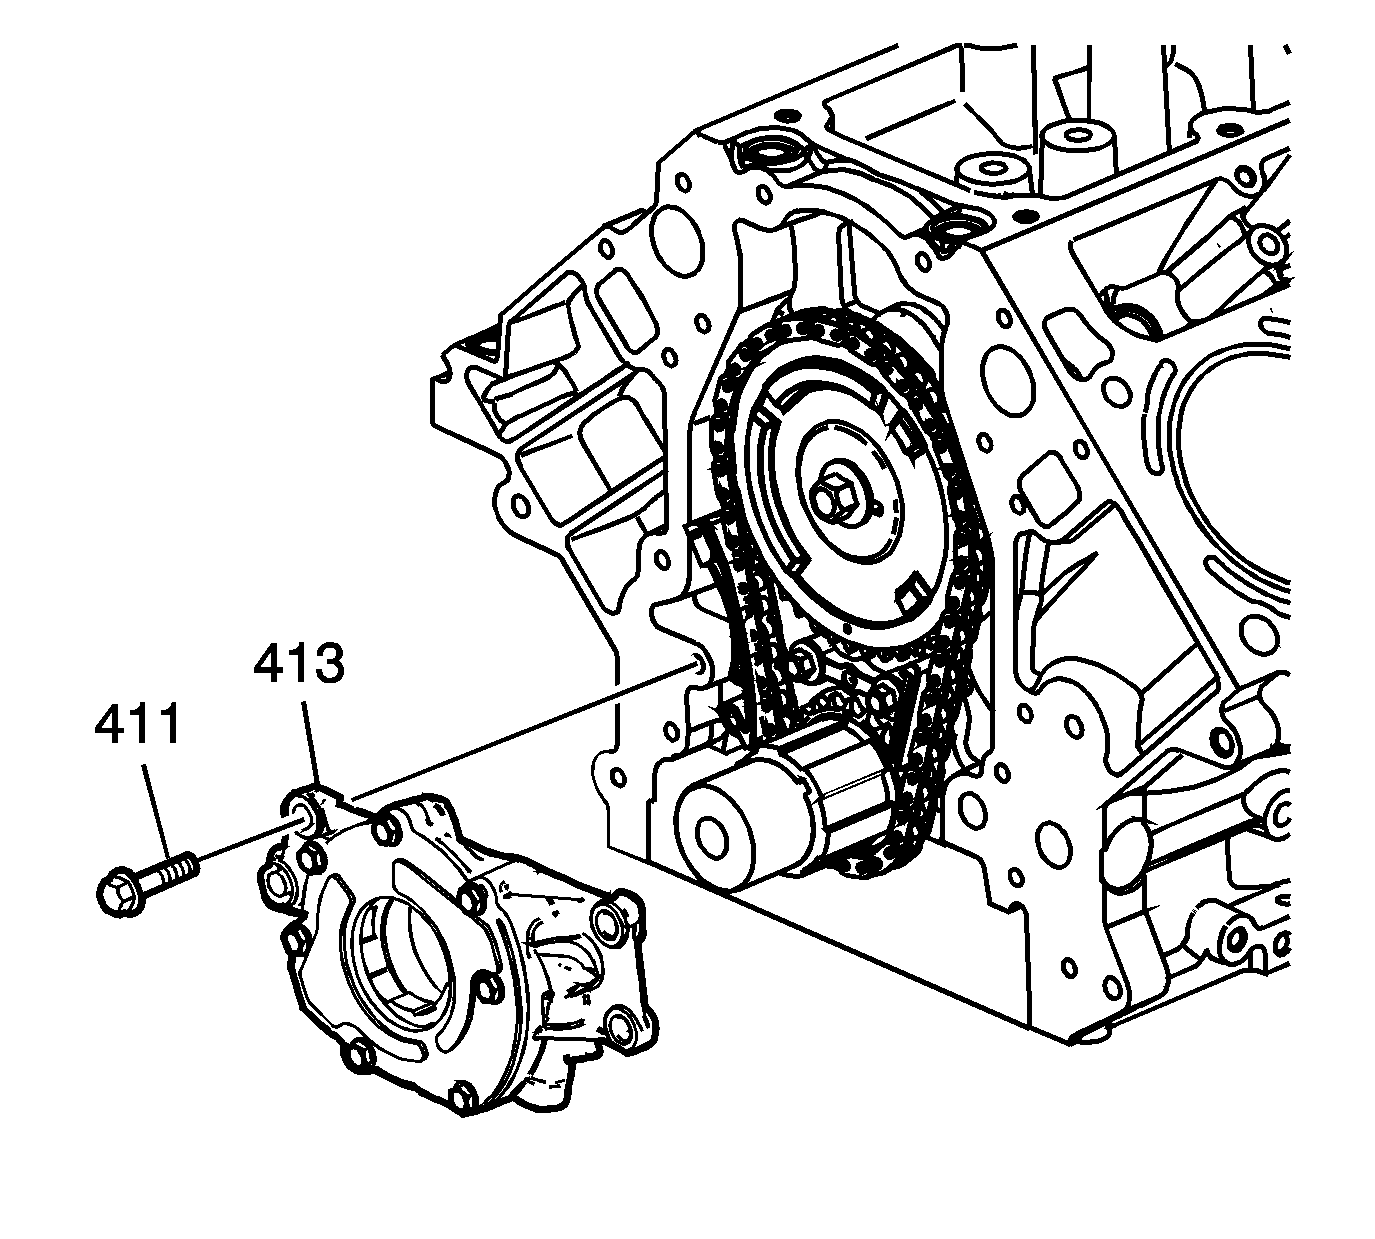
- Remove the oil pump bolts (411).
- Remove the oil pump (413).


Important: Do not allow dirt or debris to enter the oil pump assembly, cap end as necessary.
Installation Procedure
Important: Inspect the engine block oil galley passages. These areas must be free and clear of debris or restrictions.
- Align the splined surfaces of the crankshaft sprocket and the oil pump drive gear and install the oil pump (413).
- Install the oil pump (413) onto the crankshaft sprocket until the pump housing contacts the face of the engine block.
- Install the oil pump bolts (411).
- Position the crankshaft oil deflector and install the nuts until snug.
- Lubricate a NEW oil pump screen O-ring seal with clean engine oil.
- Install the NEW O-ring seal onto the oil pump screen.
- Align the oil pump screen mounting brackets with the correct crankshaft bearing cap studs.
- Install the oil pump screen.
- Install the oil pump screen bolt and nuts.
- Tighten the bolt to 12 N·m (106 lb in).
- Tighten the nuts to 25 N·m (18 lb ft).
- Install the engine front cover. Refer to Engine Front Cover Replacement .
- Install the oil pan. Refer to Oil Pan Replacement .

Notice: Use the correct fastener in the correct location. Replacement fasteners must be the correct part number for that application. Fasteners requiring replacement or fasteners requiring the use of thread locking compound or sealant are identified in the service procedure. Do not use paints, lubricants, or corrosion inhibitors on fasteners or fastener joint surfaces unless specified. These coatings affect fastener torque and joint clamping force and may damage the fastener. Use the correct tightening sequence and specifications when installing fasteners in order to avoid damage to parts and systems.
Tighten
Tighten the bolts to 25 N·m (18 lb ft).


Important: Push the oil pump screen tube completely into the oil pump prior to tightening the bolt. Do not allow the bolt to pull the tube into the pump.
Tighten
