For 1990-2009 cars only
Removal Procedure
- Remove the transfer case shield, if equipped. Refer to Transfer Case Shield Replacement.
- Remove the front propeller shaft. Refer to Front Propeller Shaft Replacement.
- Remove the rear propeller shaft. Refer to One-Piece Propeller Shaft Replacement or Two-Piece Propeller Shaft Replacement.
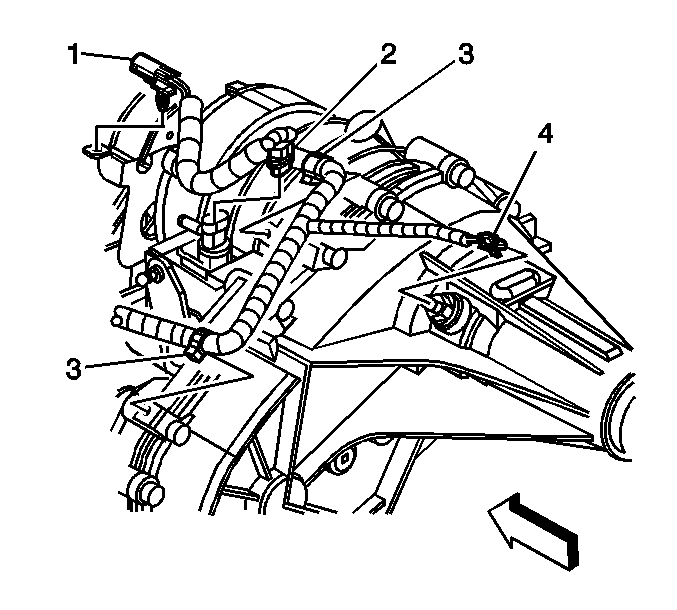
- Remove the in-line to engine harness electrical connector (1) from the bracket.
- Disconnect the gear indicator switch electrical connector (2).
- Disconnect the speed sensor electrical connector (4).
- Remove the harness clips (3) from the transfer case.
- Reposition the harness.
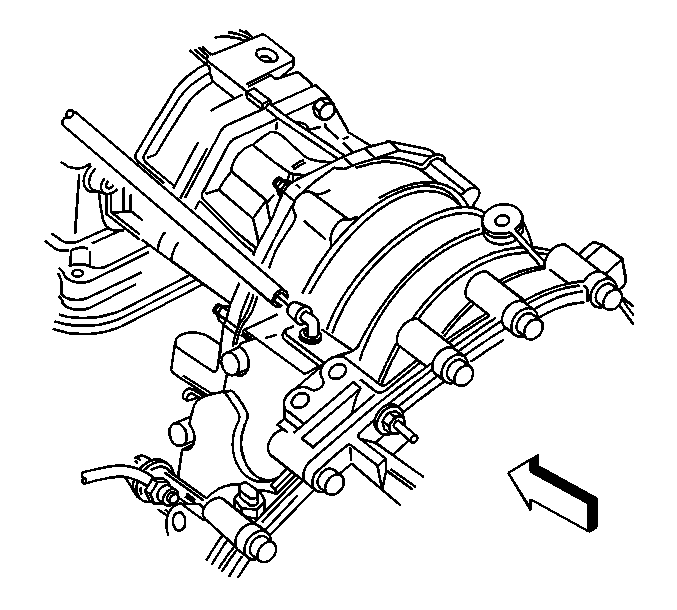
- Remove the vent hose.
- Remove the control rod. Refer to Transfer Case Control Rod Replacement.
- Support the transmission with a suitable transmission jack stand.
- Support the transfer case with a suitable jack stand.
- Remove the crossmember. Refer to Transmission Support Crossmember Replacement.
- Remove the transmission mount. Refer to Transmission Mount Replacement for the 4L60-E/4L65-E/4L70-E automatic transmission , or Transmission Mount Replacement for the 6L50/6L80/6L90 automatic transmission.
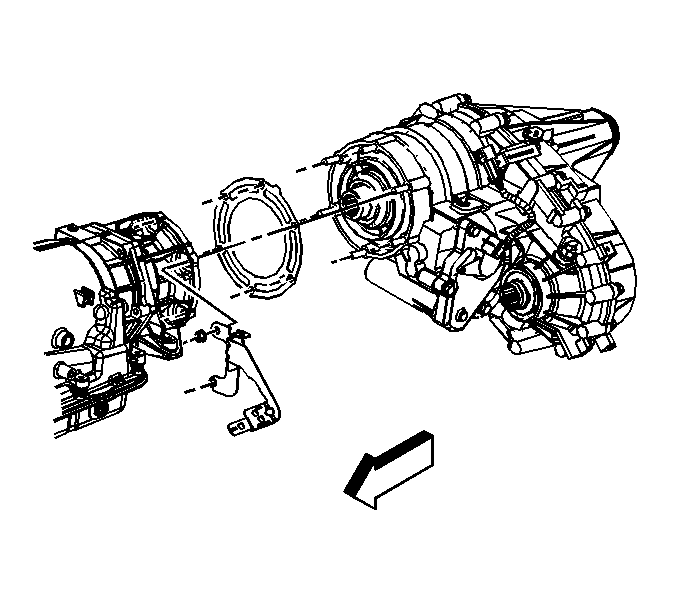
- Remove the shift control switch harness bracket.
- Remove the transfer case adapter nuts.
- Separate the transfer case from the transmission by moving the transfer case straight back toward the rear of the vehicle.
- Rotate the transfer case so that the front output shaft is above the torsion bar bracket.
- Rotate the transfer case (with the input shaft slightly lowered) so that the transfer case is parallel to the torsion bar bracket.
- Lower the transfer case.


Important: The following service procedure must be performed with the assistance from another technician.

Installation Procedure
- Apply GM /P/N 12345879 (Canadian P/N 10953511) or equivalent lubricant meeting GM Specification 9985830 to the input shaft splines.
- Raise the transfer case into position (the transfer case should be parallel to the torsion bar bracket).
- Rotate the transfer case so that it is in line with the adapter.
- Install the transfer case.
- Install the shift control switch harness bracket.
- Install the transfer case adapter nuts.
- Remove the support from the transfer case.
- Install the transmission mount. Refer to Transmission Mount Replacement for the 4L60-E/4L65-E/4L70-E automatic transmission , or Transmission Mount Replacement for the 6L50/6L80/6L90 automatic transmission.
- Install the crossmember. Refer to Transmission Support Crossmember Replacement.
- Remove the transmission jack stand.
- Install the control rod. Refer to Transfer Case Control Rod Replacement.
- Install the vent hose.
- Position the harness.
- Install the harness clips (3) to the transfer case.
- Connect the speed sensor electrical connector (4).
- Connect the gear indicator switch electrical connector (2).
- Install the in-line to engine harness electrical connector (1) to the bracket.
- Install the rear propeller shaft. Refer to One-Piece Propeller Shaft Replacement or Two-Piece Propeller Shaft Replacement.
- Install the front propeller shaft. Refer to Front Propeller Shaft Replacement.
- Check the fluid level. Add fluid if necessary.
- Install the transfer case shield, if equipped. Refer to Transfer Case Speed Sensor Replacement.

Important: The following installation procedure must be performed with the assistance of another technician.
Notice: Refer to Fastener Notice in the Preface section.
Tighten
Tighten the nuts to 50 N·m (37 lb ft).


