For 1990-2009 cars only
Removal Procedure
- Remove the water outlet tube. Refer to Water Outlet Tube Replacement.
- Remove the air cleaner outlet duct. Refer to Air Cleaner Outlet Duct Replacement.
- Remove the positive crankcase ventilation (PCV) hose/pipe from the air intake pipe. Refer to Positive Crankcase Ventilation Hose/Pipe/Tube Replacement.
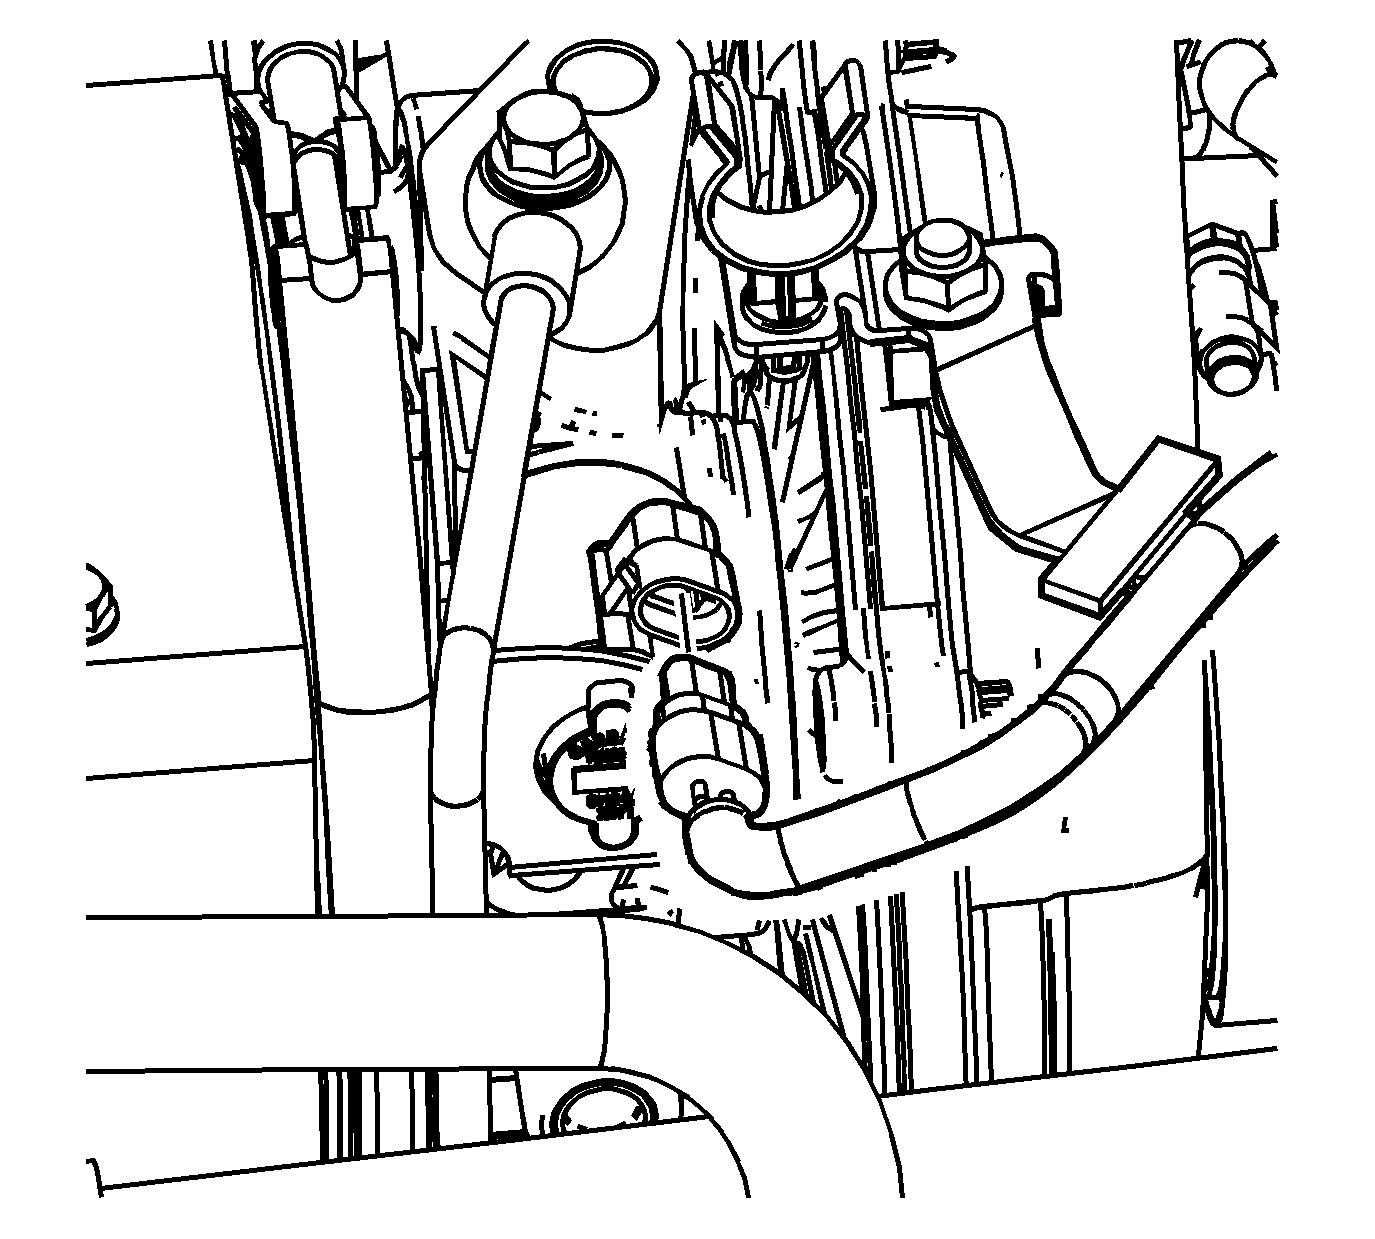
- Disconnect the engine wiring harness electrical connector from the turbocharger control solenoid valve.
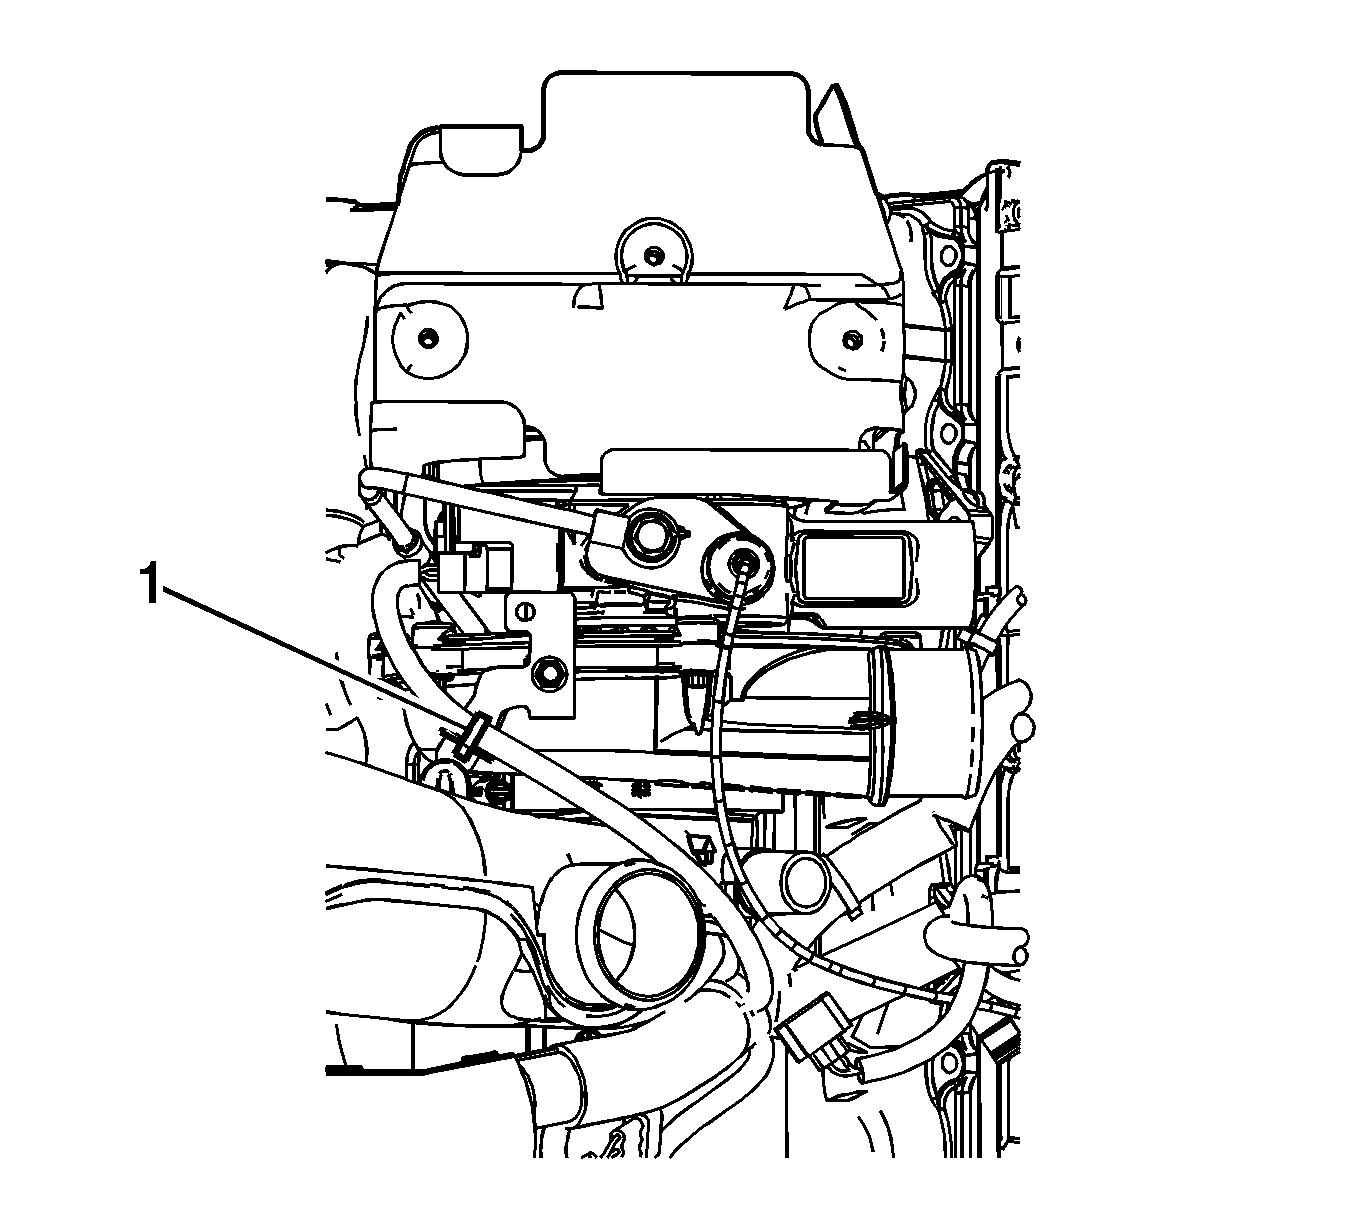
- Remove the engine wiring harness clip (1) from the bracket on the turbocharger.
- Reposition the turbocharger control solenoid valve wiring harness extension out of the way.
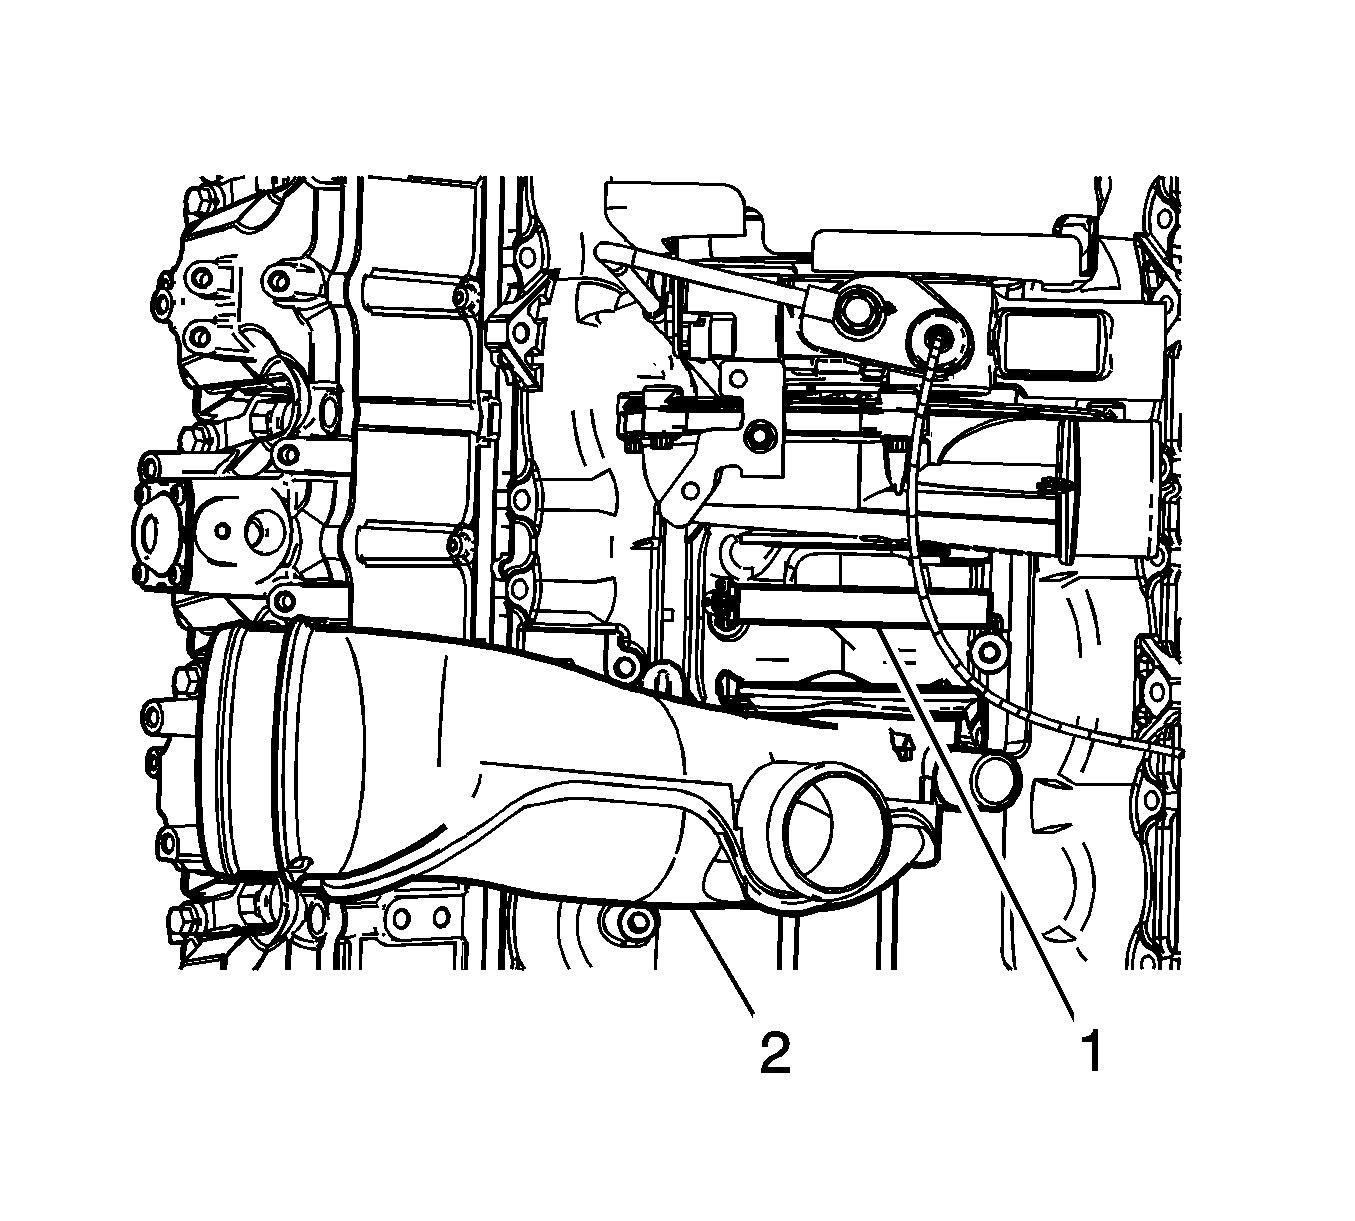
- Loosen the air intake pipe to turbocharger clamp (1).
- Remove the air intake pipe (2) from the turbocharger.

Note: It is not necessary to completely remove the PCV hose/pipe from the engine when removing the air intake pipe.


Note: The clamp for the air intake pipe uses reverse threads.
Installation Procedure
- Clean the mating surfaces on the air intake pipe and the turbocharger.
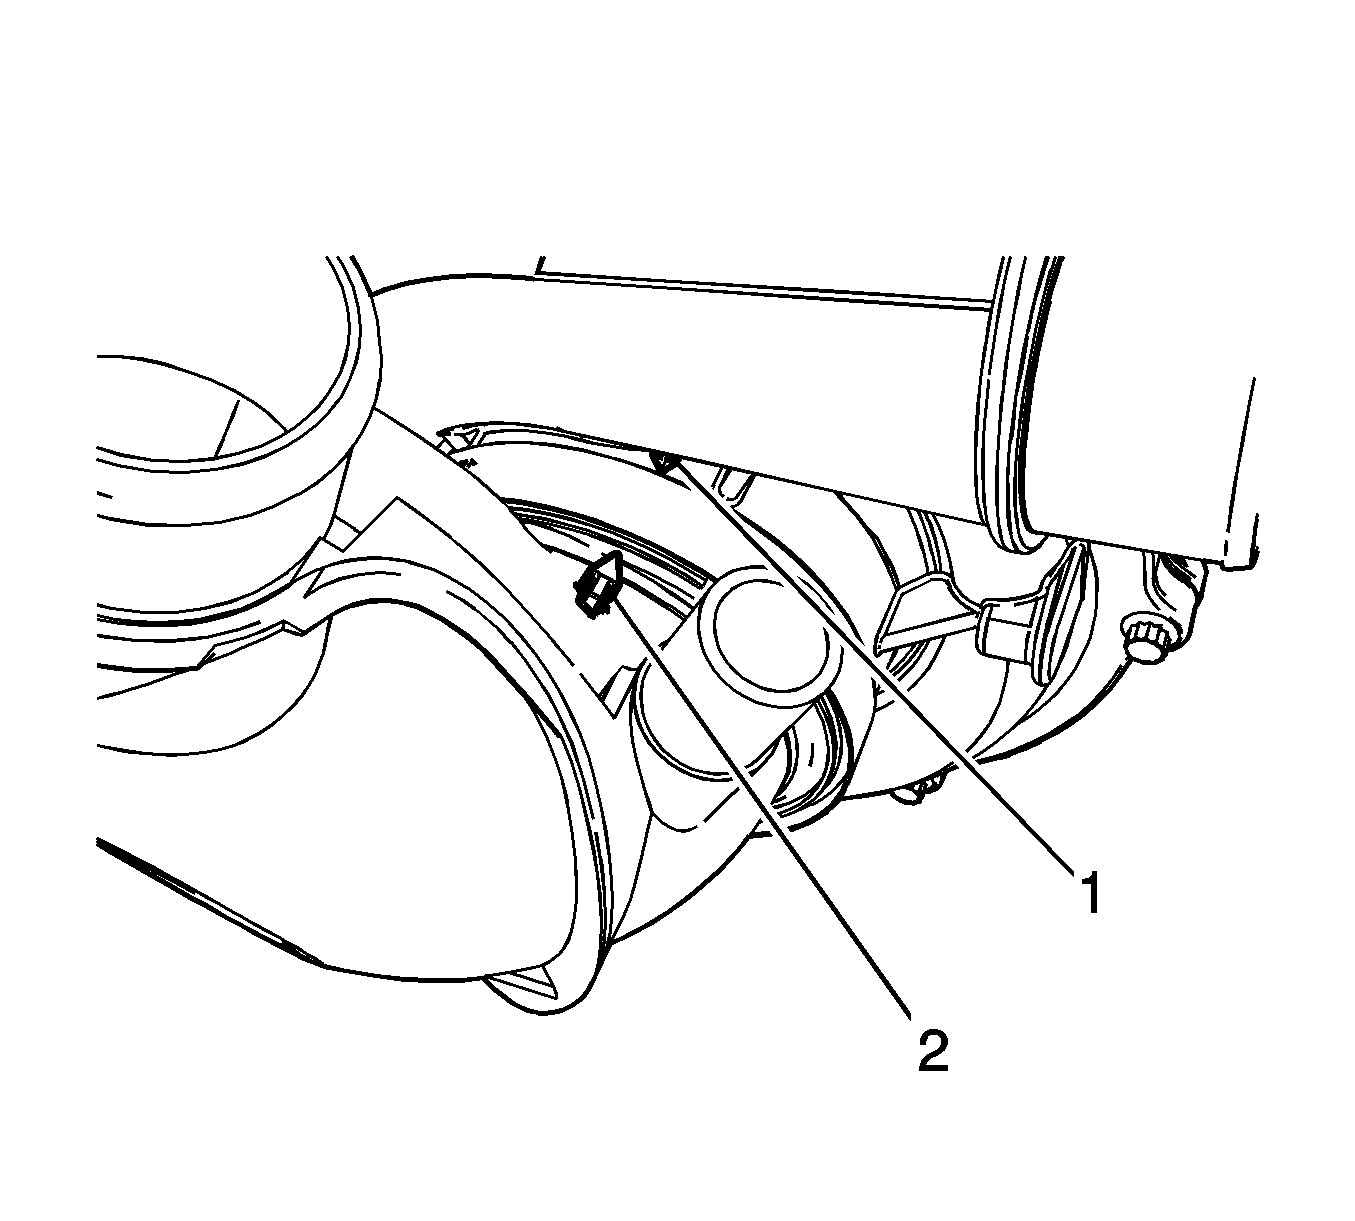
- Align the arrow (2) on the air intake pipe to the arrow (1) on the turbocharger.
- Install the air intake pipe (2) into the turbocharger.
- Tighten the air intake pipe to turbocharger clamp (1).
- Route the turbocharger control solenoid valve wiring harness extension into position.
- Install the engine wiring harness clip (1) to the bracket on the turbocharger.
- Connect the engine wiring harness electrical connector to the turbocharger control solenoid valve.
- Install the PCV hose/pipe to the air intake pipe. Refer to Positive Crankcase Ventilation Hose/Pipe/Tube Replacement.
- Install the air cleaner outlet duct. Refer to Air Cleaner Outlet Duct Replacement.
- Install the water outlet tube. Refer to Water Outlet Tube Replacement.

Caution: Refer to Fastener Caution in the Preface section.

Note: The clamp for the air intake pipe uses reverse threads.
Tighten
Tighten the clamp to 4.6 N·m (41 lb in).


