Removal Procedure
Caution: Broken engine mountings can cause misalignment of certain drive-train components. Misalignment of drive-train components causes eventual destruction of the drive-train components.
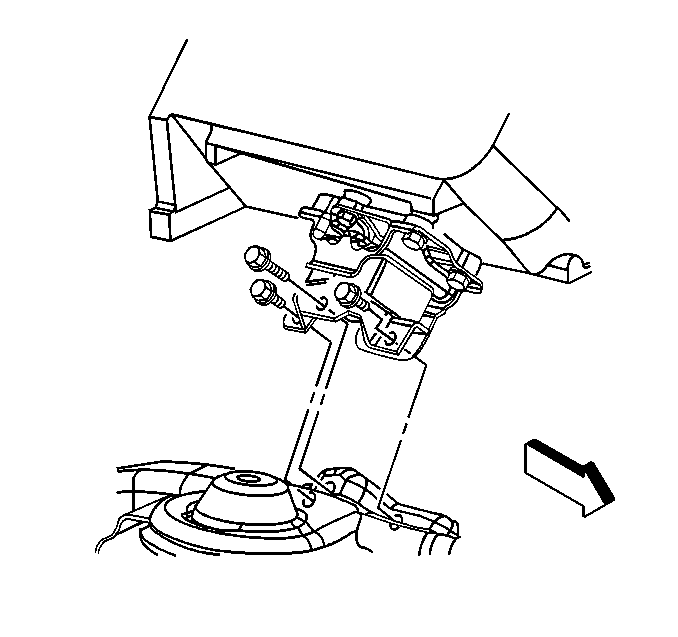
If one engine mount breaks, the rest of the engine mounts will have increased stress put on them. This could cause the rest of the engine mounts to break.- From under the hood, remove the engine mount to engine mount bracket bolts. (right side shown, left side similar).
- Raise and suitably support the vehicle. Refer to Lifting and Jacking the Vehicle.
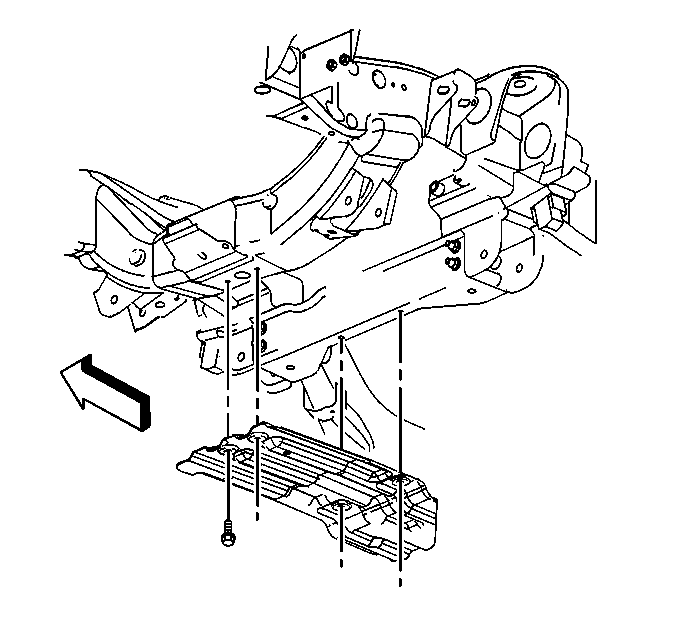
- Remove the oil pan skid plate bolts and plate.
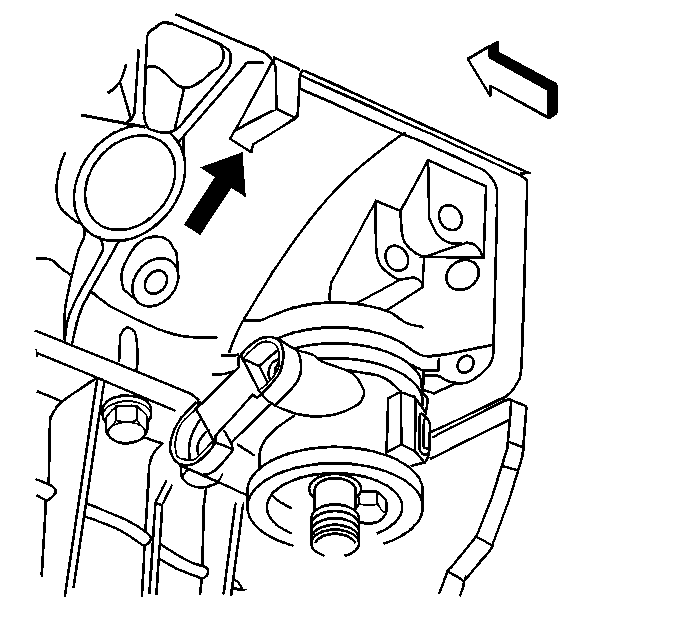
- Using an adjustable jack on the square tab at the rear of the engine block, raise the engine.
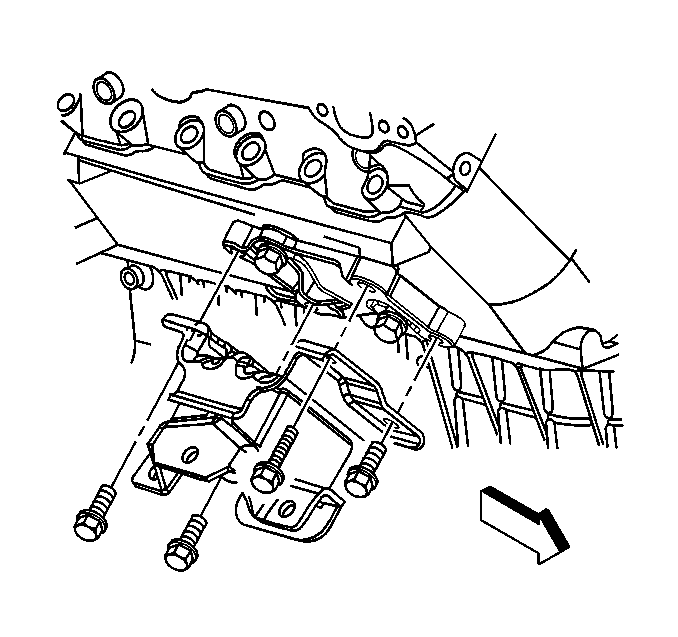
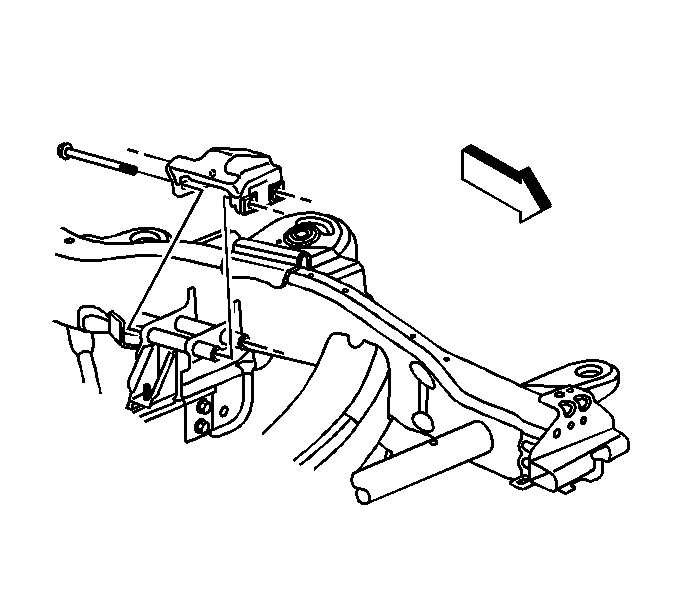
- Remove the engine mount bolts. (right side shown, left side similar).
- Remove the engine mount.
- If equipped and necessary, remove the engine mount side bracket bolts and bracket. (right side shown, left side similar).
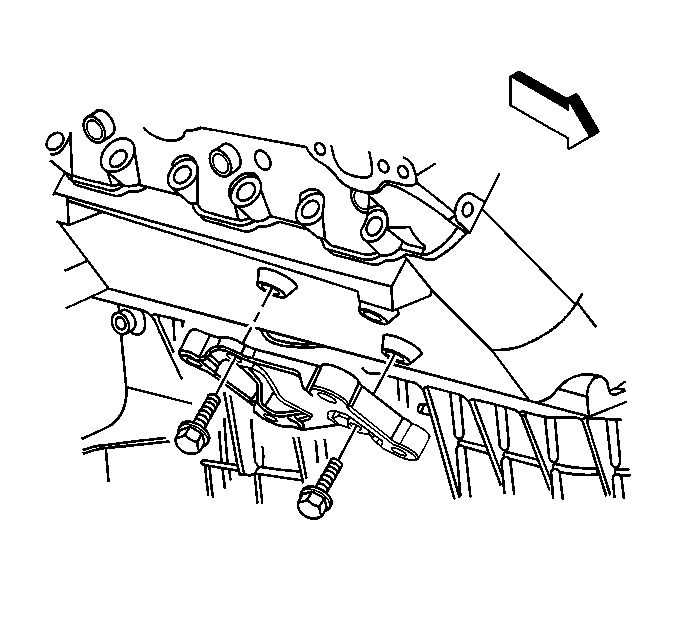
- Remove the engine mount bracket bolts.
- Remove the engine mount bracket.
Caution: When raising or supporting the engine for any reason, do not use a jack under the oil pan, any sheet metal, or the crankshaft pulley. Lifting the engine in an unapproved manner may cause component damage.
Installation Procedure
- Install the engine mount bracket.
- Perform the following procedure prior to installing the engine mount bracket bolts.
- Install the engine mount bracket bolts.
- Position the engine mount side bracket to the engine, if removed and equipped. (right side shown, left side similar).
- Install the engine mount side bracket bolts.
- Install the engine mount. (right side shown, left side similar).
- Install the engine mount bolts.
- Lower the engine.
- Install the oil pan skid plate and bolts.
- Lower the vehicle.
- Install the engine mount to engine mount bracket bolts. (right side shown, left side similar).

| 2.1. | Remove all traces of the original adhesive patch. |
| 2.2. | Clean the threads of the bolt with denatured alcohol or equivalent and allow to dry. |
| 2.3. | Apply threadlocker GM P/N 12345382 (Canadian P/N 10953489) or equivalent to the bolts. |
Caution: Refer to Fastener Caution in the Preface section.
Tighten
Tighten the engine mount bracket bolts to 75 N·m (55 lb ft).

Tighten
Tighten the engine mount side bracket bolts to 50 N·m (37 lb ft).

Tighten
Tighten the engine mount bolts to 50 N·m (37 lb ft).

Tighten
Tighten the oil pan skid plate bolts to 20 N·m (15 lb ft).

Tighten
Tighten the engine mount to engine mount bracket bolts to 65 N·m (48 lb ft).
