Special Tools
| • | J 24460-01 Cooling System Pressure Tester |
| • | GE-48494 Power Electronics Pressure Test Adapter Kit |
Removal Procedure
- Remove the drive motor generator control module from the vehicle. Refer to Drive Motor Generator Control Module Assembly Replacement.
- Remove the temporary coolant pipe caps (1).
- Drain the drive motor generator control module assembly of residual coolant by applying 30 psi regulated compressed air to the coolant inlet pipe until no coolant remains.
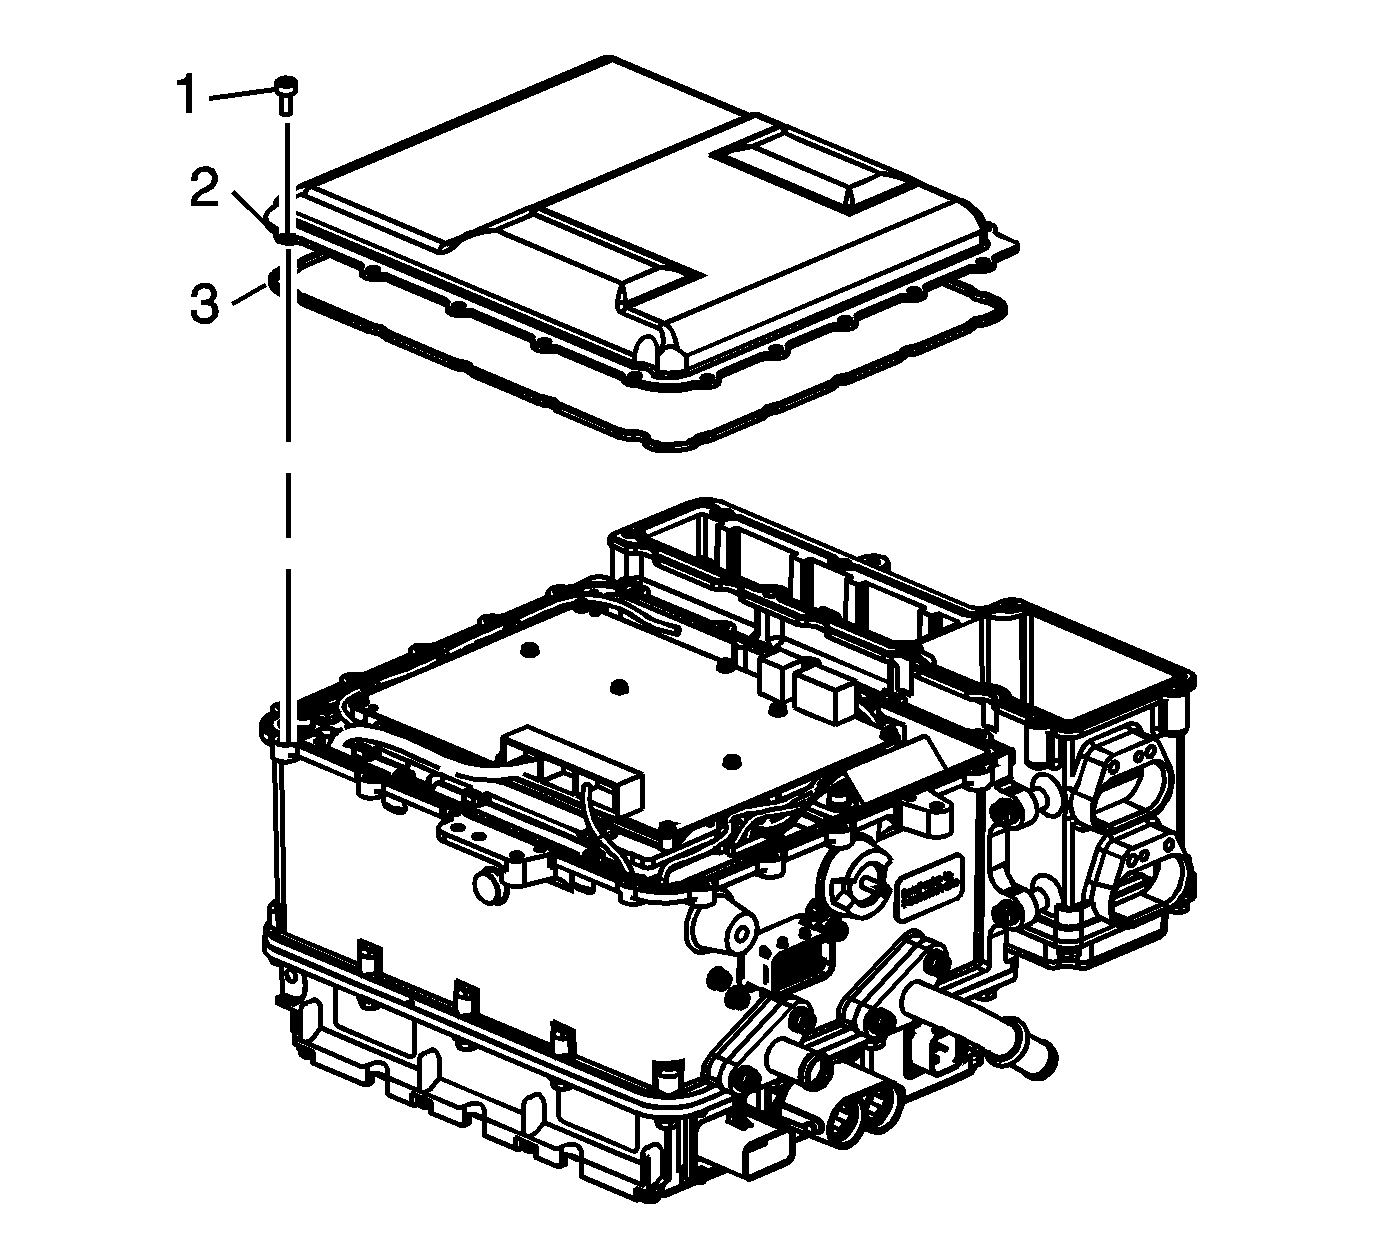
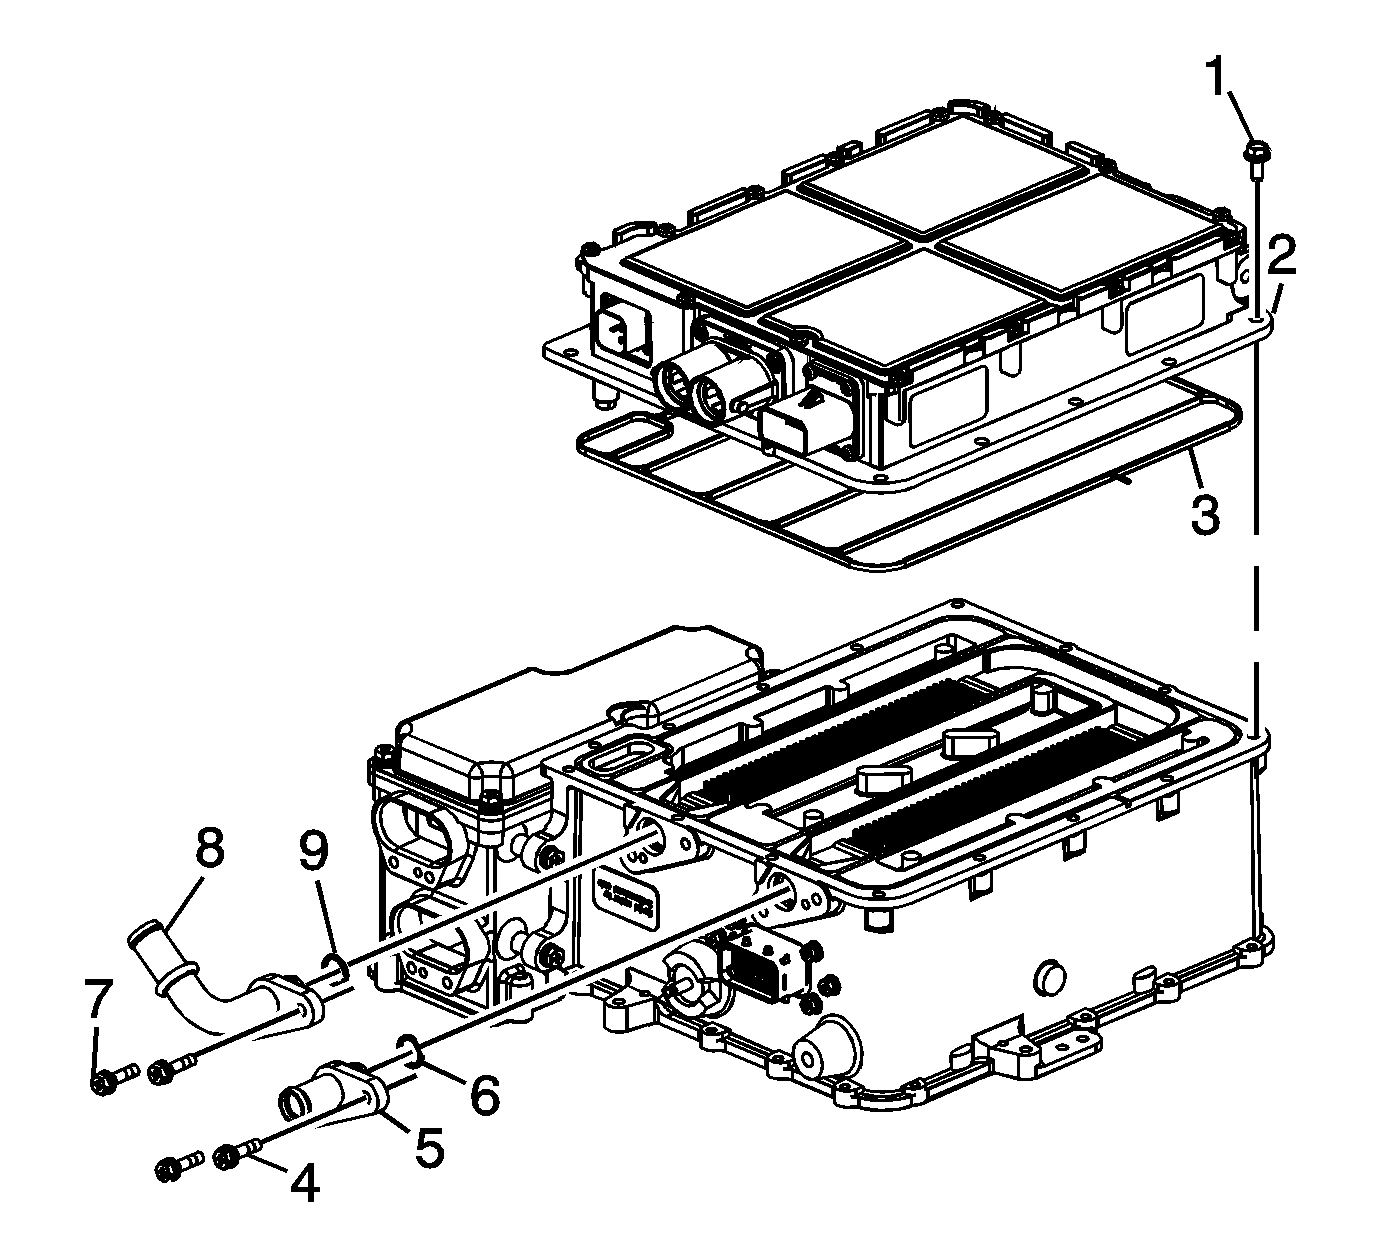
- Remove the drive motor generator power inverter control module (PIM) electronics cover fasteners (1).
- Remove the PIM electronics cover (2). Discard the cover seal (3).
- Remove the HV dc accessory DC power control module (APM) terminal fasteners (1) utilizing a magnetic socket.
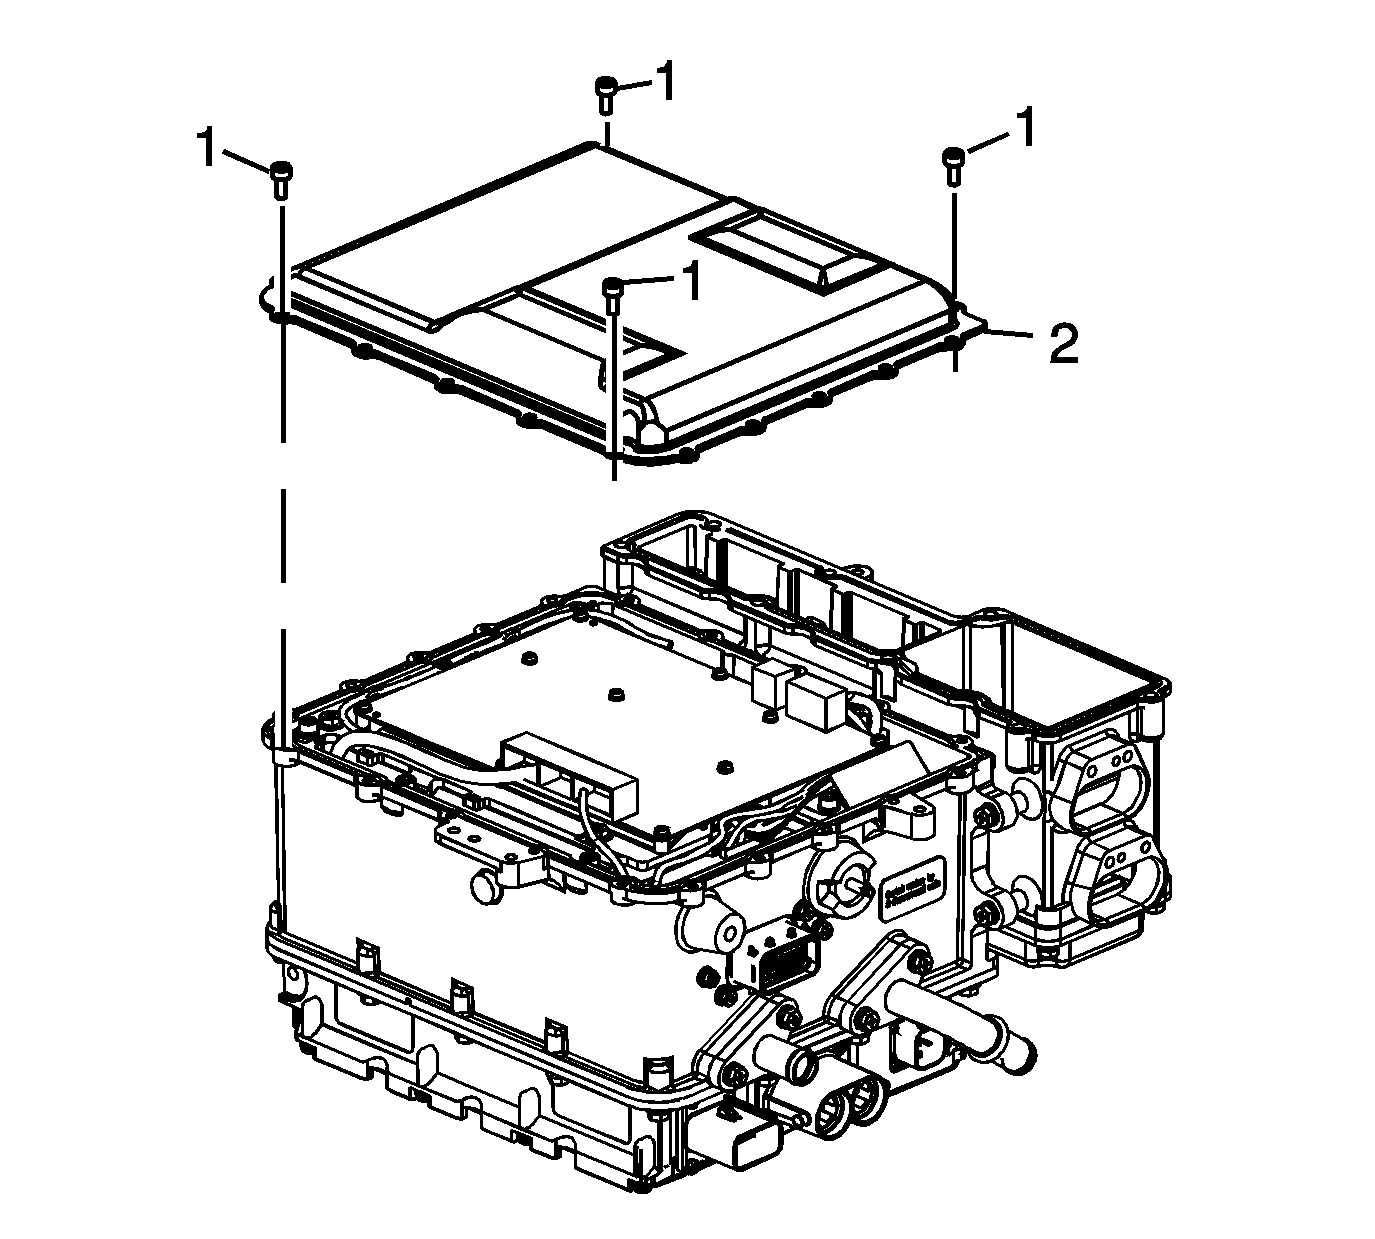
- Temporarily install the PIM electronics cover (2) with 4 finger-tightened fasteners (1).
- Rotate the drive motor generator control module assembly onto the PIM electronics cover.
- Remove the APM to PIM mounting fasteners (1).
- Remove the APM (2) and discard the coolant seal (3).
- Remove the drive motor generator power inverter coolant pipe bolts (4, 7).
- Remove the drive motor generator power inverter coolant pipes (5, 8).
- Remove and discard coolant seals (6, 9).
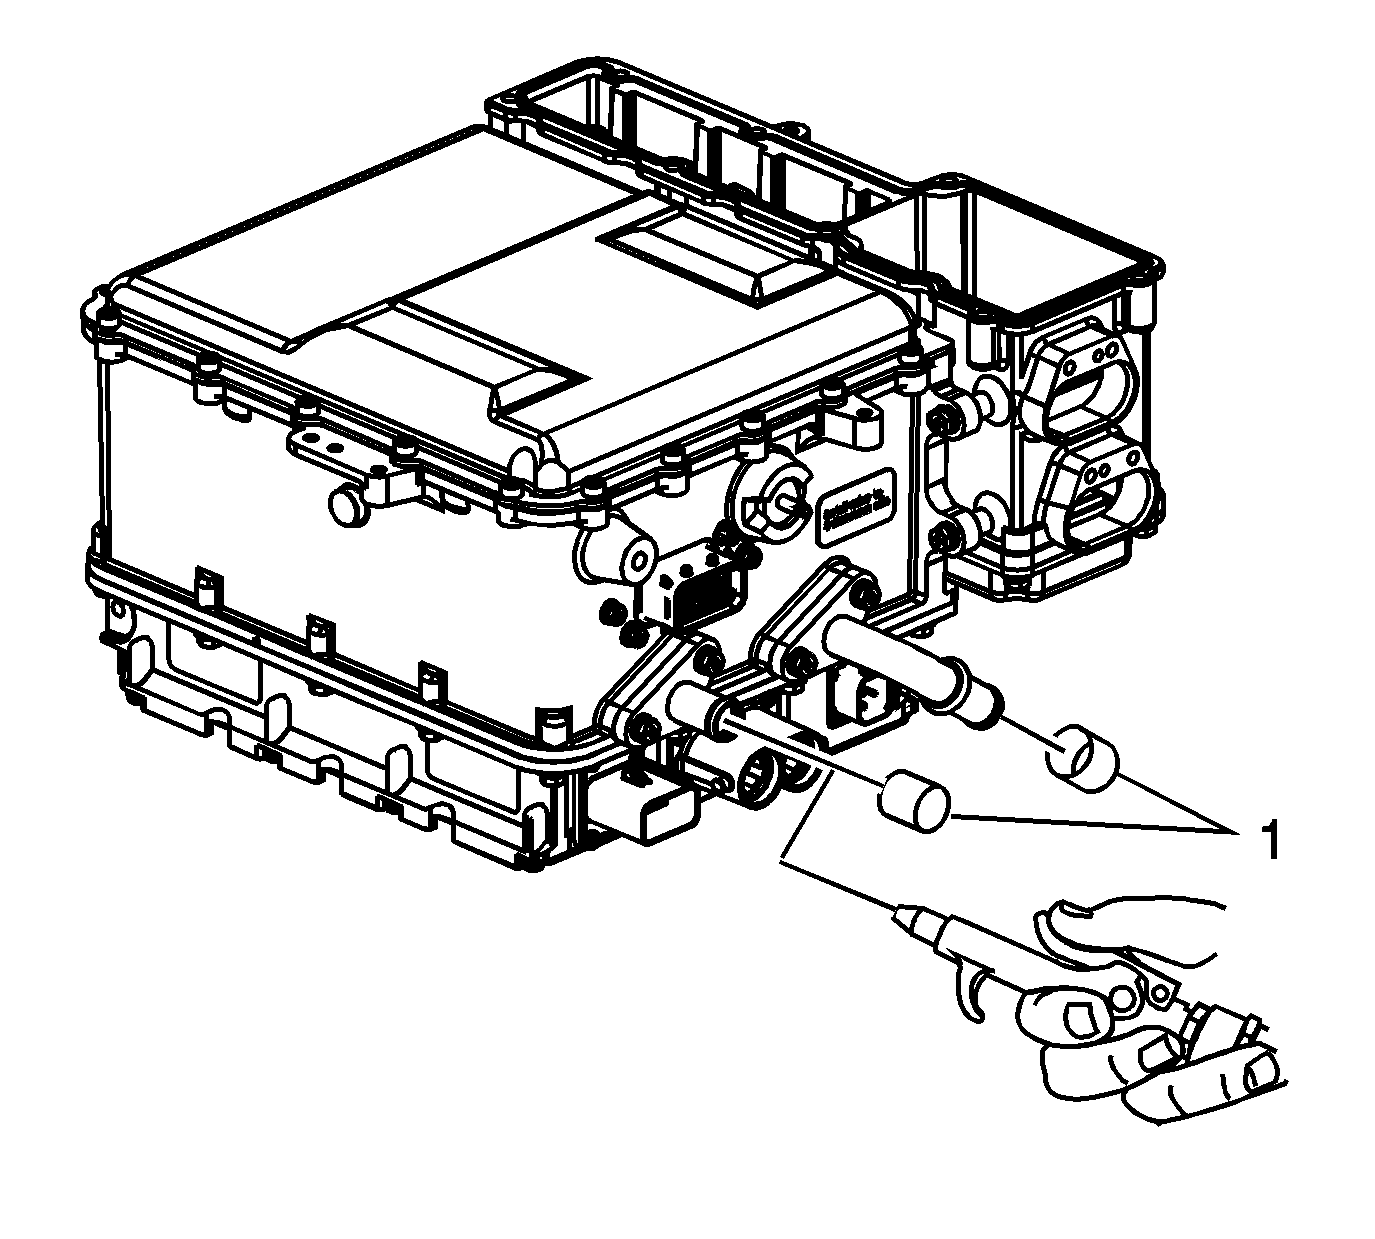
Caution: The module must be drained of all residual coolant prior to disassembly. Failure to properly drain all residual coolant may cause electronic circuit damage to occur during disassembly.
Note: Place a container under the coolant outlet pipe to capture the escaping coolant.
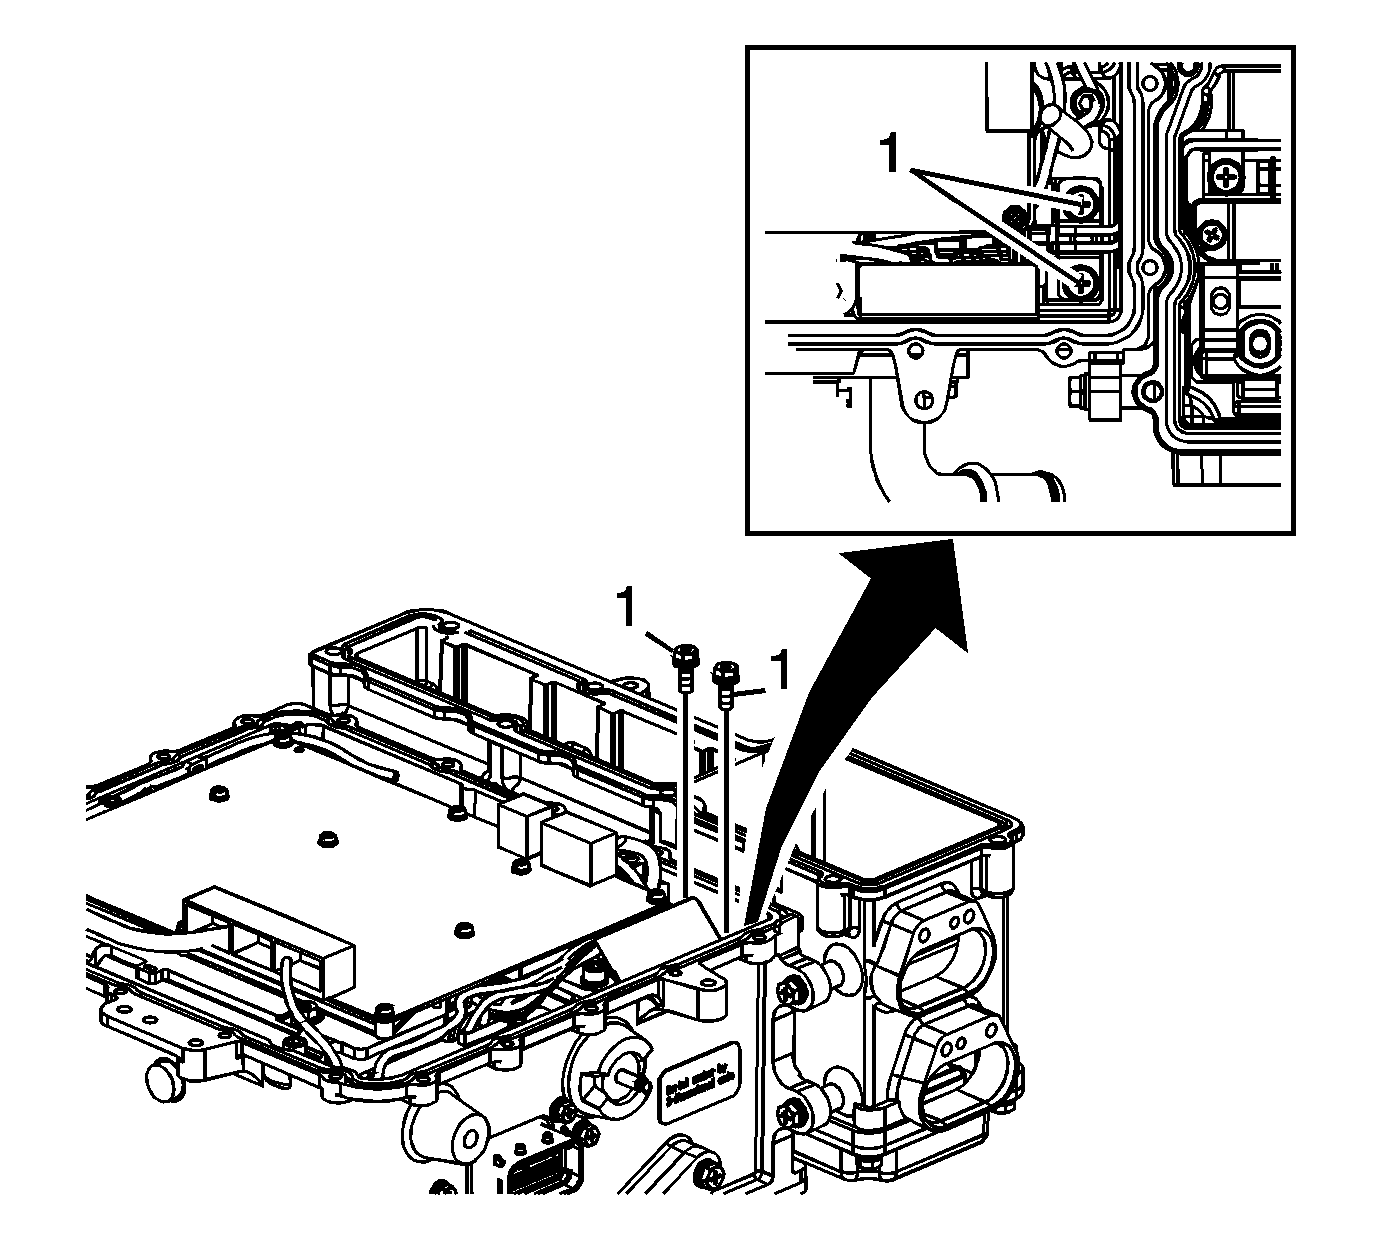
Caution: Always remove and install the High Voltage terminal fasteners with a magnet tipped socket. Never touch the exposed electronic circuit board surface or components. Dropped fasteners or physical contact may result in electronic circuit board damage.
Installation Procedure
- Install new APM coolant seal (3).
- Position the APM (2) onto the PIM ensuring the seals remain in place.
- Install the APM mounting fasteners (1). Tighten the mounting fasteners to 10 N·m (89 lb in).
- Lubricate the new seals (6, 9) with pre-mixed DEX-COOL®.
- Install new seals (6, 9) onto the drive motor generator power inverter coolant pipes (5, 8).
- Install the coolant pipes (5, 8) to the PIM assembly with bolts (4, 7). Tighten the fasteners to 5 N·m (44 lb in).
- Rotate the drive motor generator control module assembly onto the APM.
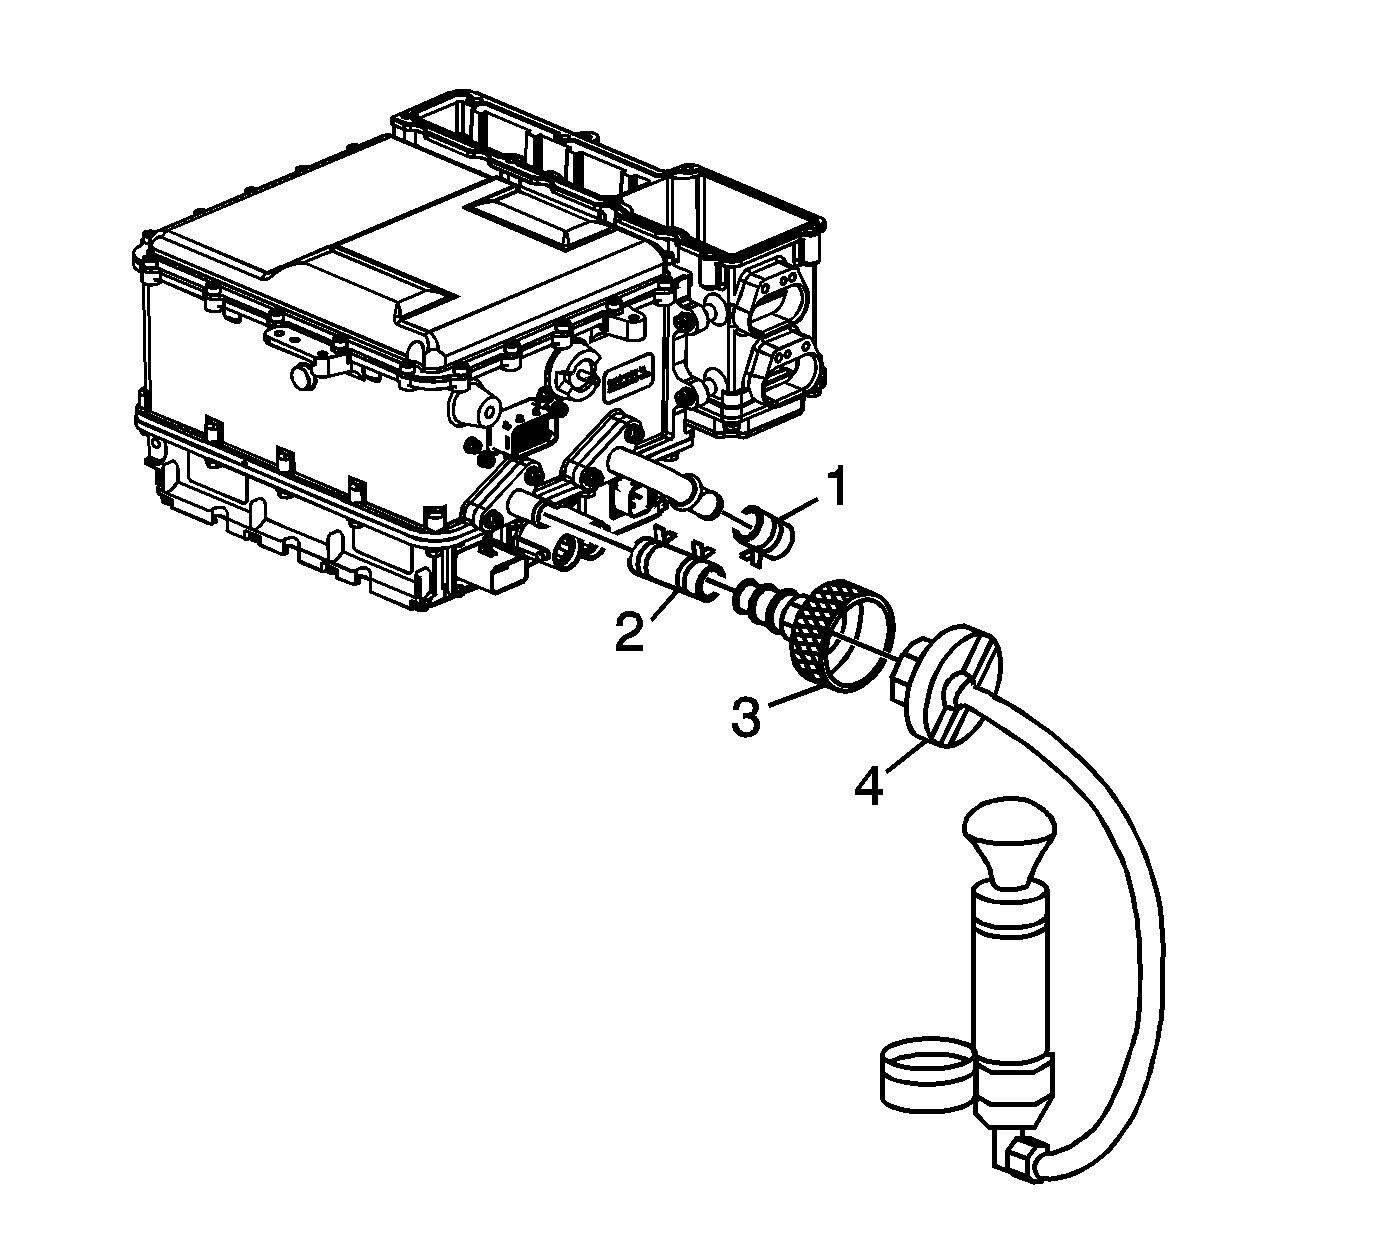
- Clamp GE-48494 adapter kit components (2, 3) to a coolant pipe.
- Plug the remaining coolant pipe with the GE-48494 adapter kit plug and clamp (1).
- Apply 20 psi (138 kPa) pressure with J 24460-01 pressure tester (4).
- Monitor the pressure tester gauge for 5 minutes and ensure that pressure remains at the specified value.
- Remove all GE-48494 adapter kit components.
- Remove the PIM cover retaining bolts (1).
- Remove the PIM electronics cover (2).
- Install the HV dc APM terminal fasteners (1) utilizing a magnetic socket. Tighten the terminal fasteners to 9 N·m (80 lb in).
- Install a new PIM cover seal (3).
- Position the PIM cover (2) onto the PIM ensuring the seal remains in place.
- Install the PIM cover fasteners (1). Tighten the fasteners to 5 N·m (44 lb in).

Caution: Refer to Fastener Caution in the Preface section.
Note: Only use pre-mixed DEX-COOL® on the coolant pipe O-ring to aid in tube installation.
| • | If the specified pressure cannot be maintained, disassemble the drive motor generator control module assembly and replace the coolant seal. |
| • | If pressure remains at the specified value, proceed to the next step. |


Caution: Always remove and install the High Voltage terminal fasteners with a magnet tipped socket. Never touch the exposed electronic circuit board surface or components. Dropped fasteners or physical contact may result in electronic circuit board damage.

