Master Cylinder Reservoir Replacement Two-mode Hybrid
Removal Procedure
Warning: Refer to Brake Fluid Irritant Warning in the Preface section.
Caution: Refer to Brake Fluid Effects on Paint and Electrical Components Caution in the Preface section.
- Turn the ignition to OFF, without pausing at ACCESSORY, and remove the ignition key.
- Wait approximately 1 to 3 minutes until the brake modulator and HPA pressure relief is complete.
- Remove the brake fluid from the brake master cylinder reservoir and discard into an approved container.
- Disconnect the brake fluid level sensor electrical connector.
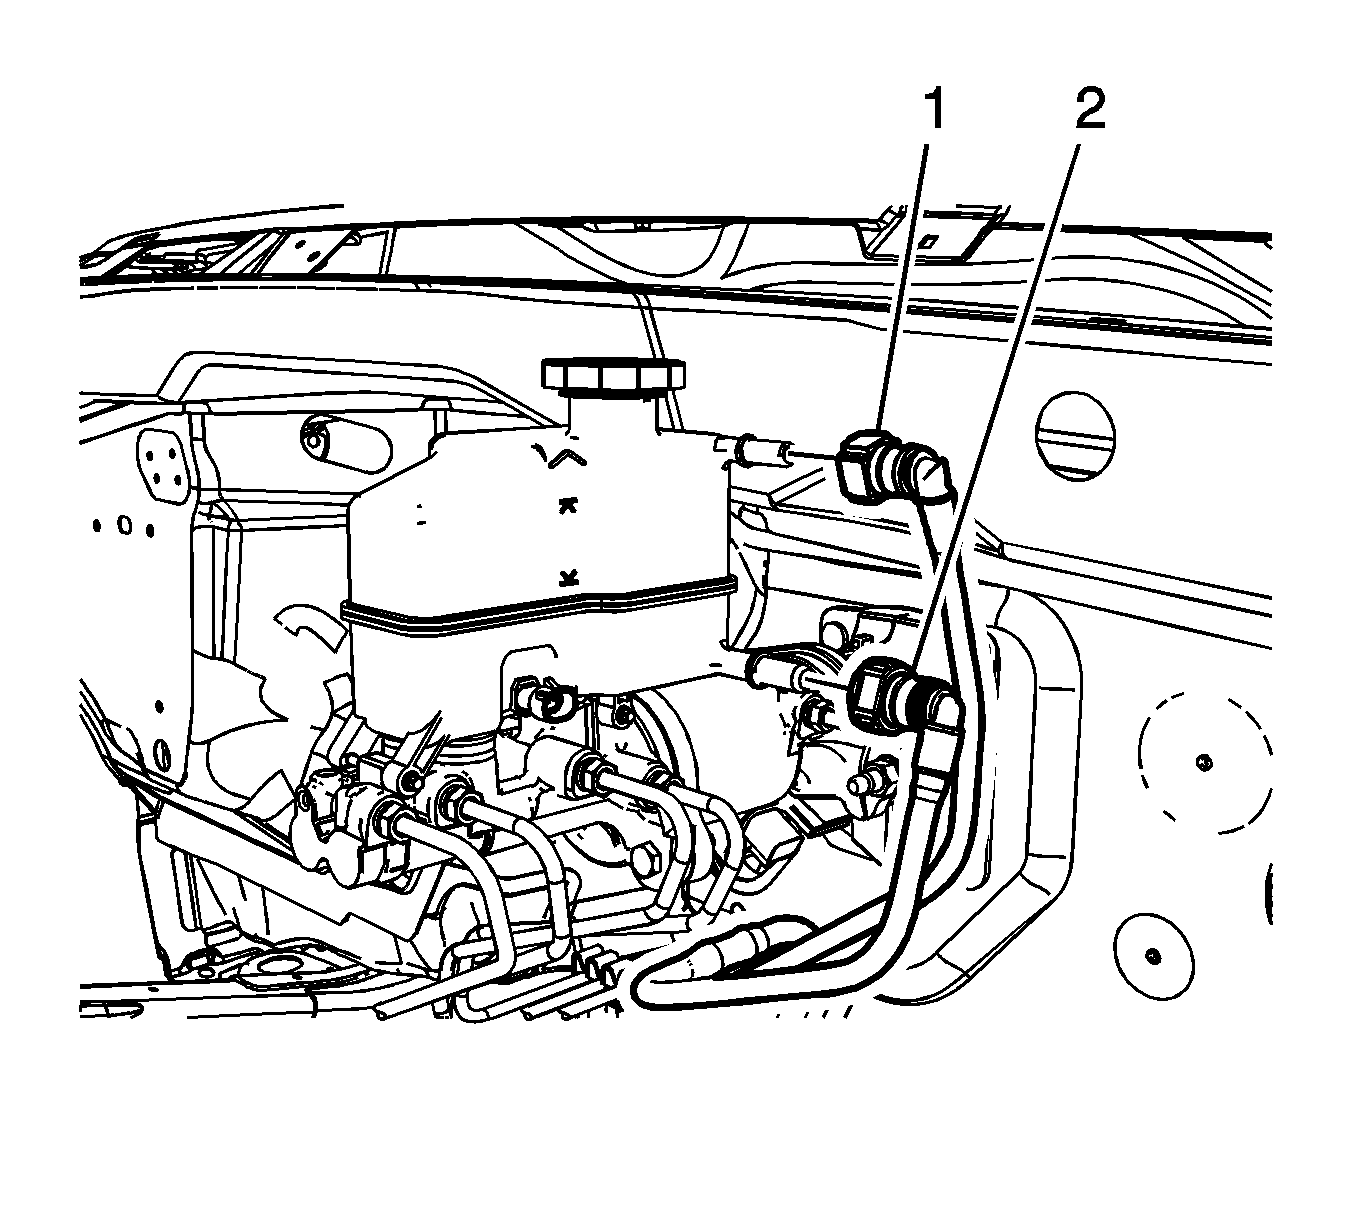
- Disconnect the brake master cylinder reservoir return hose quick connect (1) and position the hose aside.
- Disconnect the brake master cylinder reservoir supply hose quick connect (2) and position the hose aside.
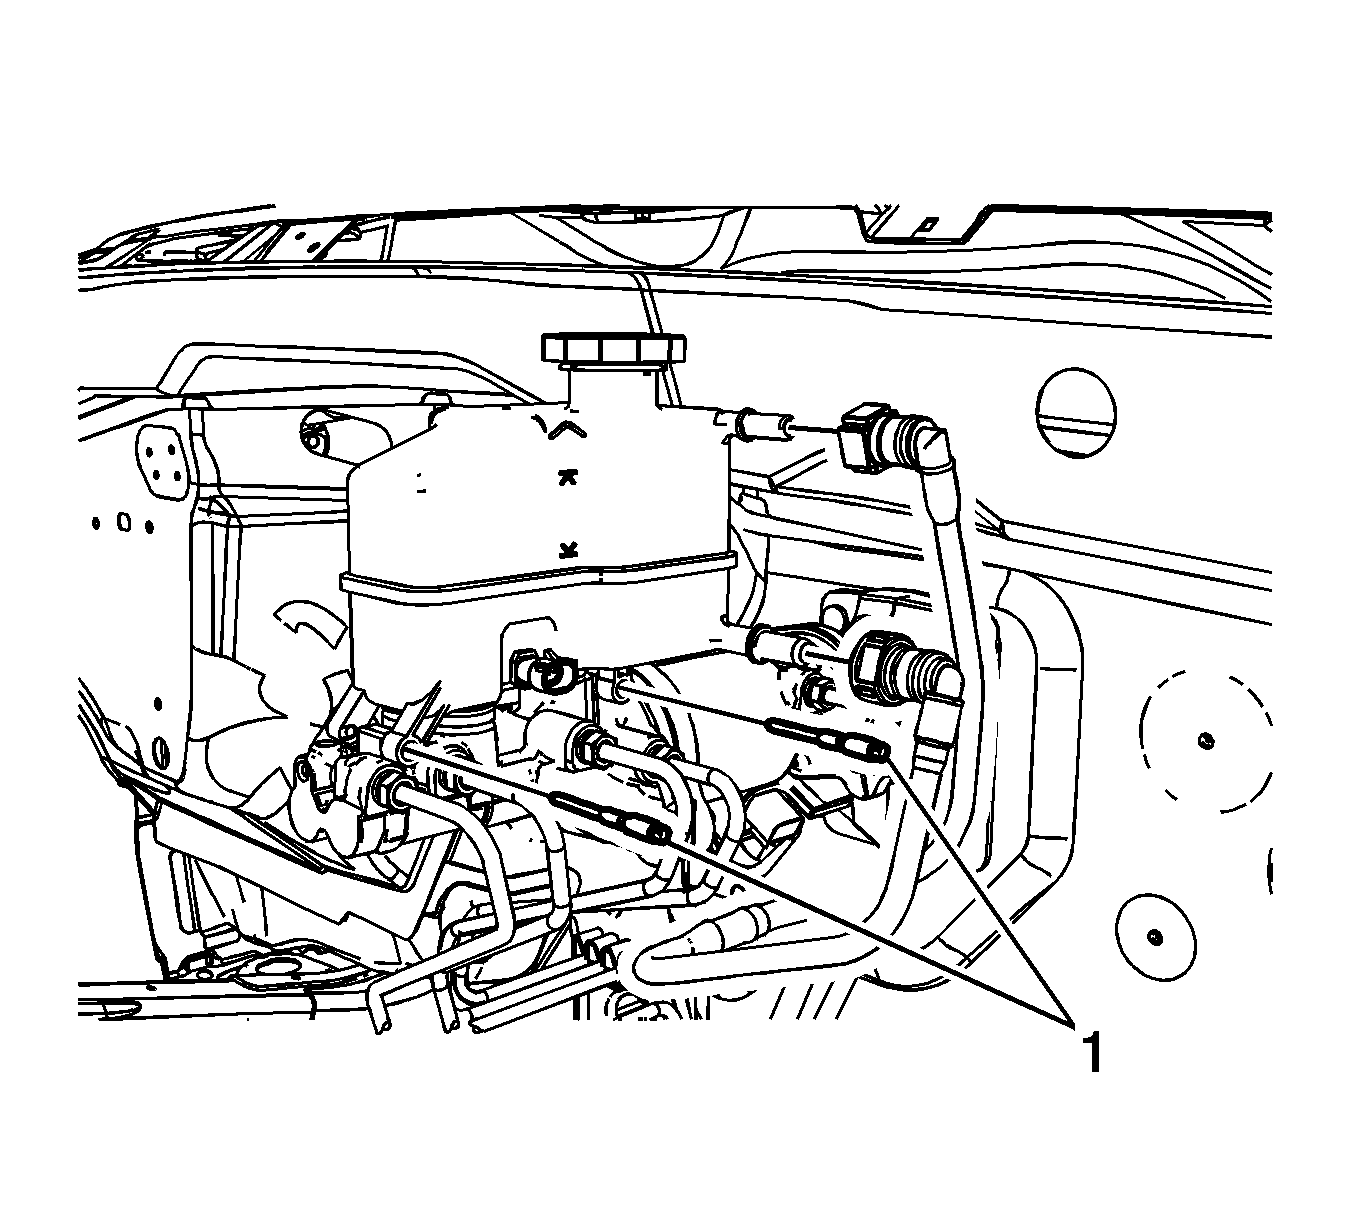
- Remove the brake master cylinder reservoir pins (1).
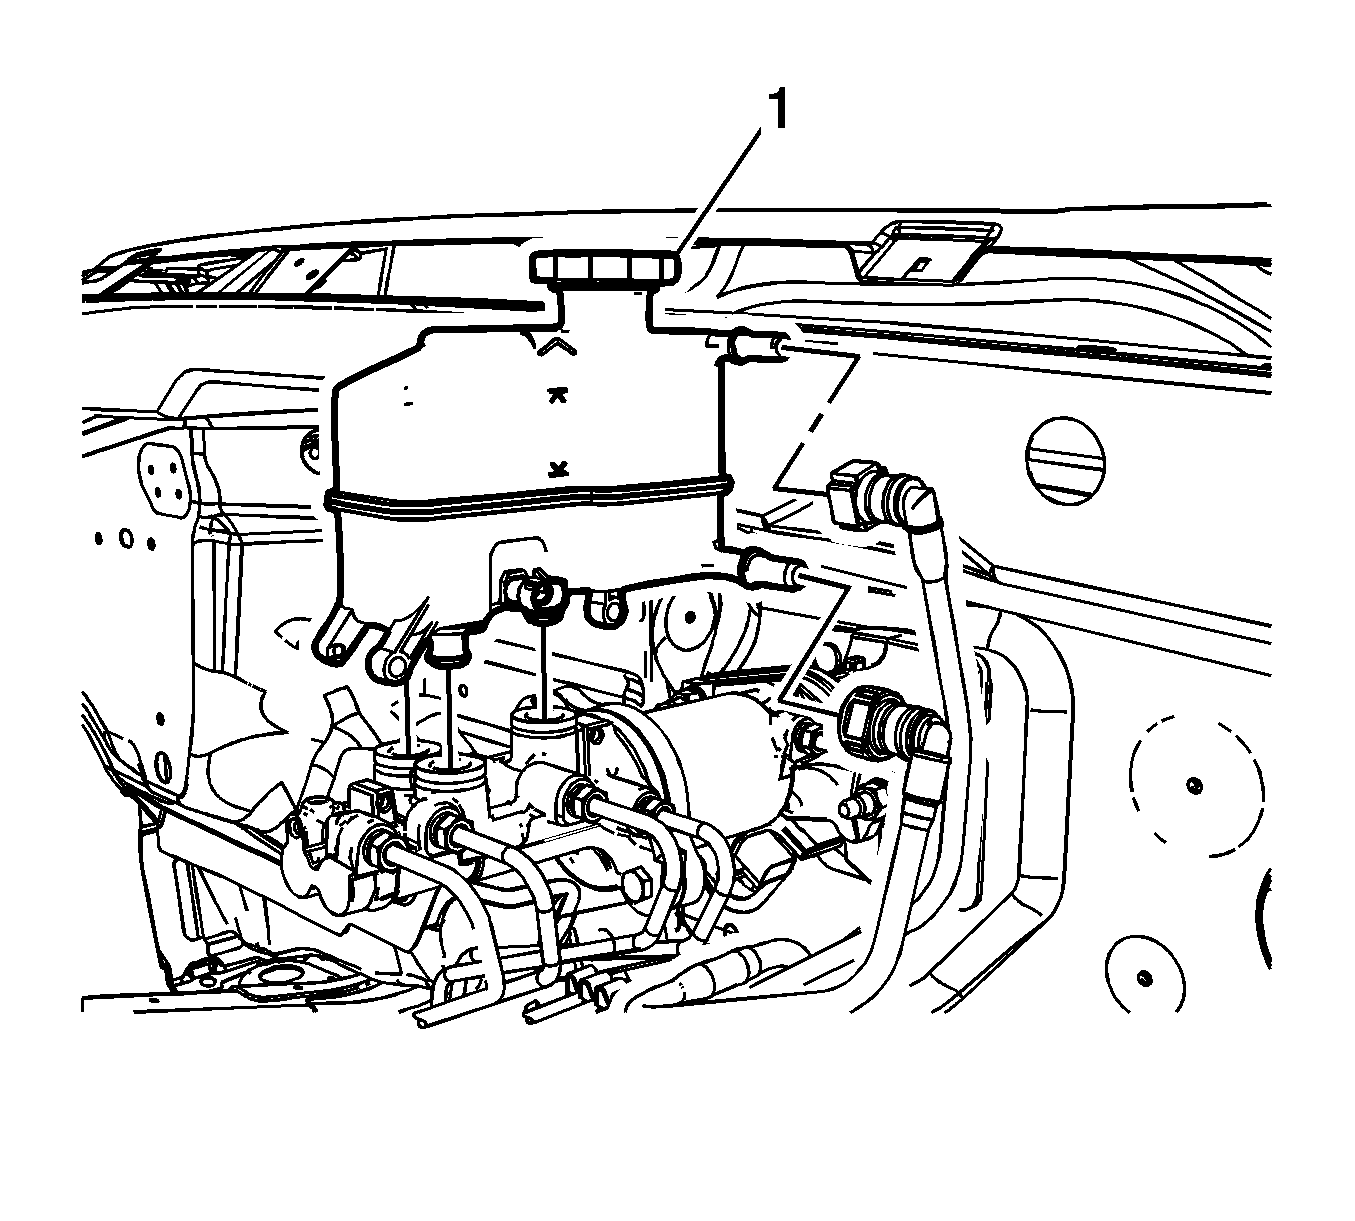
- Lift the master cylinder reservoir (1) straight up and remove the reservoir from the master cylinder.
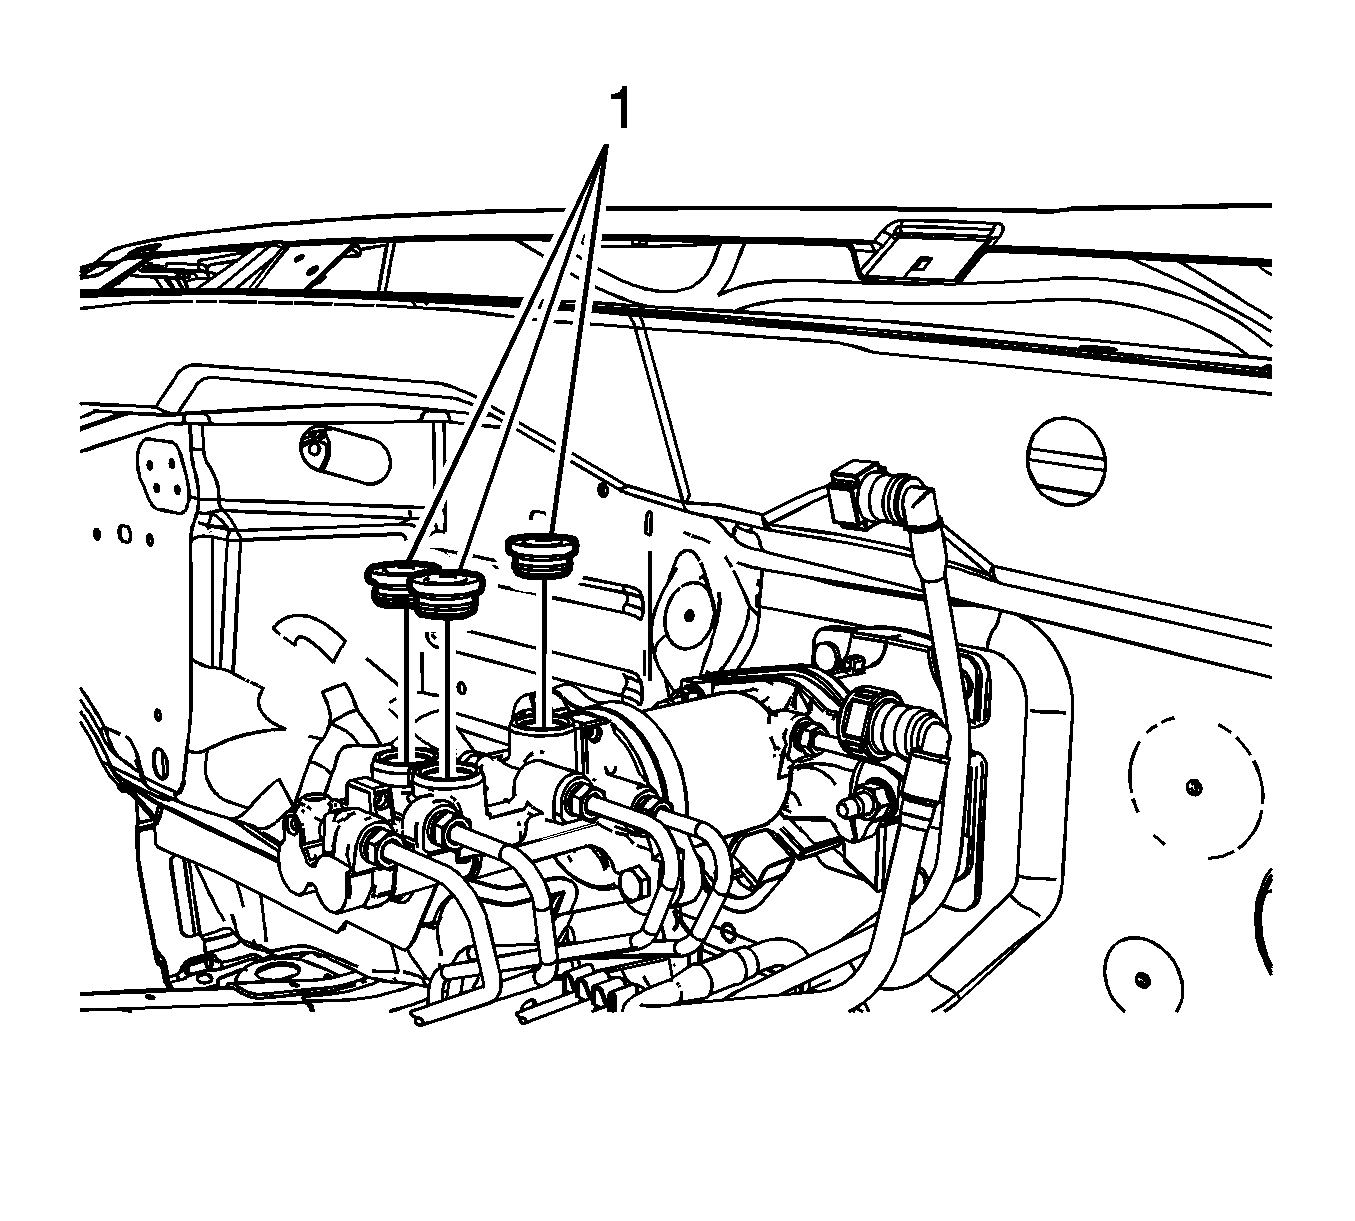
- Remove the 3 master cylinder reservoir seals (1).
Note: The ignition must be in the OFF position, without pausing at ACCESSORY, and without applying the brake pedal to ensure the brake modulator and high pressure accumulator (HPA) pressure relief occurs. This process will take approximately 1 to 3 minutes.
Note: During the pressure relief process, the fluid level in the master cylinder reservoir will rise. Do not remove the master cylinder reservoir cap during the pressure relief process.
Installation Procedure
- Install the 3 master cylinder reservoir seals (1).
- Install the master cylinder reservoir (1) to the master cylinder.
- Install the brake master cylinder reservoir pins (1) and tighten to 8 N·m (71 lb in).
- Connect the brake master cylinder reservoir return hose quick connect (1).
- Connect the brake master cylinder reservoir supply hose quick connect (2).
- Connect the brake fluid level sensor electrical connector.
- Fill the brake master cylinder reservoir. Refer to Master Cylinder Reservoir Filling.

Lubricate the master cylinder reservoir seals and the outer surface area of the reservoir-to-housing barrels with Delco Supreme 11®, GM P/N 12377967 (Canadian P/N 992667) or equivalent DOT-3 brake fluid from a clean, sealed brake fluid container.

Ensure the master cylinder reservoir is seated fully into the master cylinder by pressing the reservoir straight down into the master cylinder.
Caution: Refer to Fastener Caution in the Preface section.


Master Cylinder Reservoir Replacement JD9, JF3, JF7
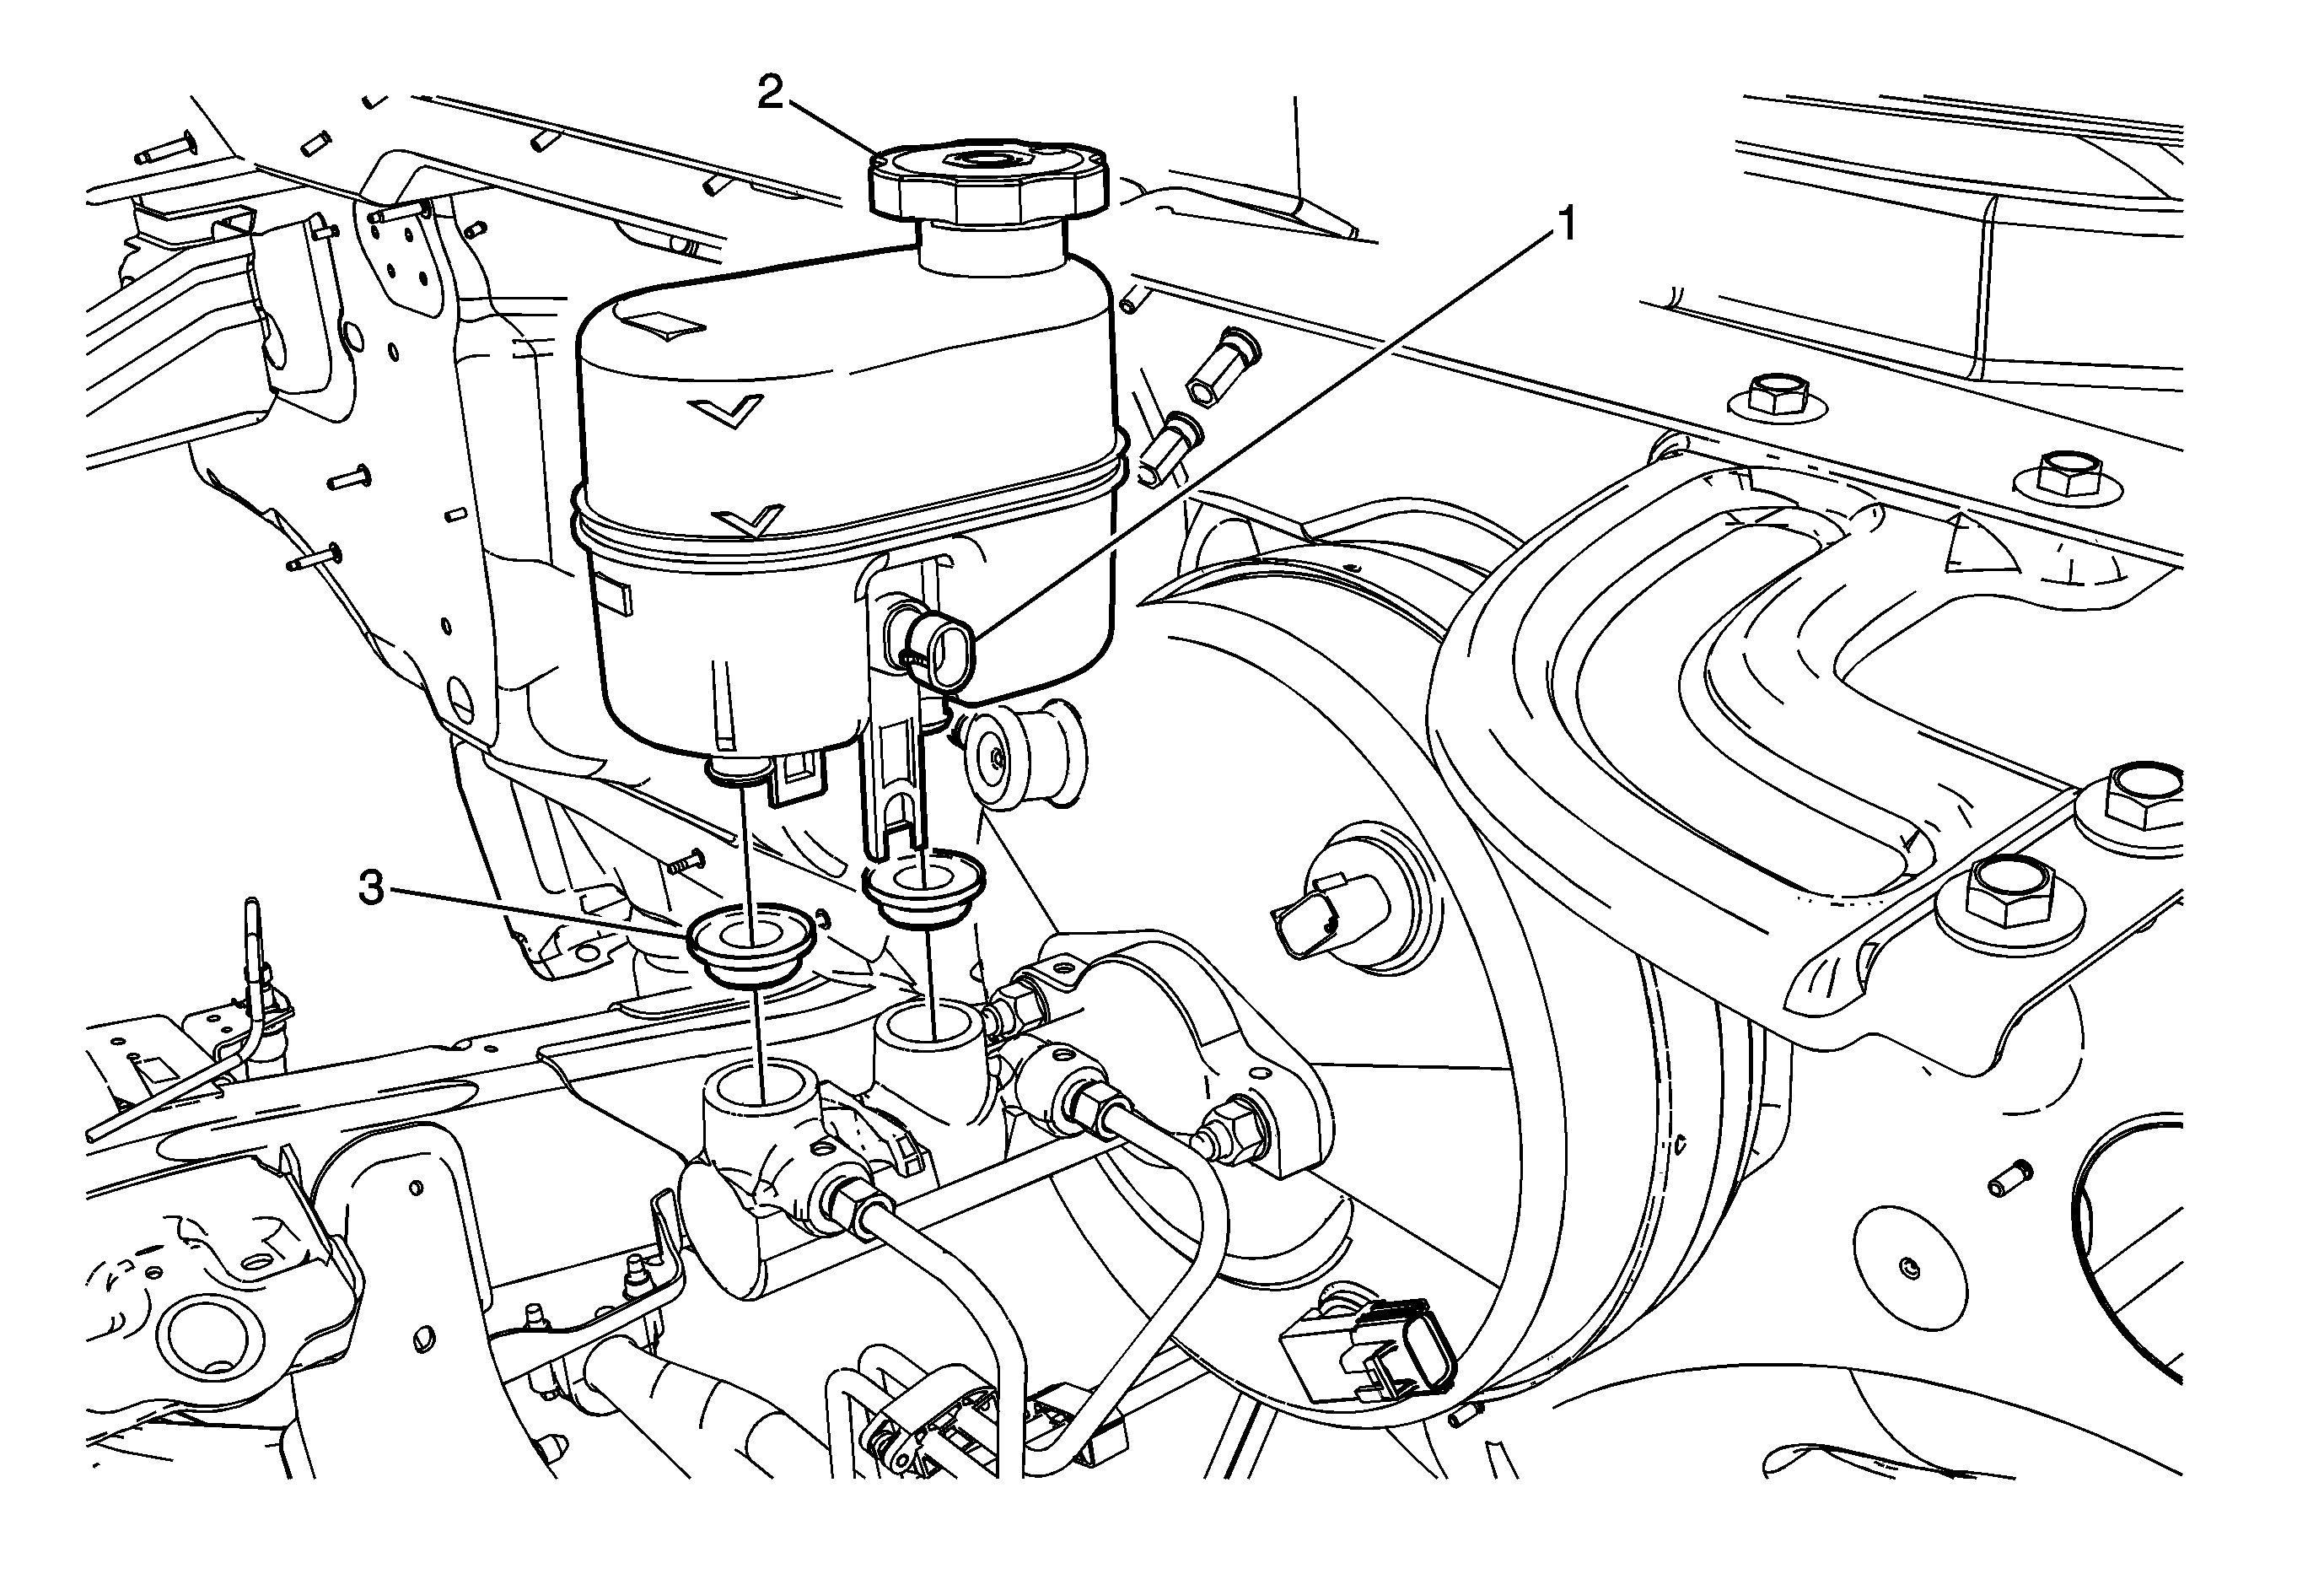
Callout | Component Name |
|---|---|
|
Warning: Refer to Brake Fluid Irritant Warning in the Preface section. Caution: Refer to Brake Fluid Effects on Paint and Electrical Components Caution in the Preface section. Preliminary Procedures
| |
1 | Master Cylinder Fluid Level Sensor Electrical Connector |
2 | Master Cylinder Reservoir ProcedureCarefully spread the 2 locking tabs and lift the master cylinder reservoir upward. |
3 | Master Cylinder Reservoir Seals (Qty: 2) Tip |
Master Cylinder Reservoir Replacement JH6, JH7
Removal Procedure
Warning: Refer to Brake Fluid Irritant Warning in the Preface section.
Caution: Refer to Brake Fluid Effects on Paint and Electrical Components Caution in the Preface section.
- Using a suitable tool, remove the brake fluid from the brake master cylinder reservoir.
- Discard the brake fluid into an approved container.
- Disconnect the brake fluid level indicator switch electrical connector.
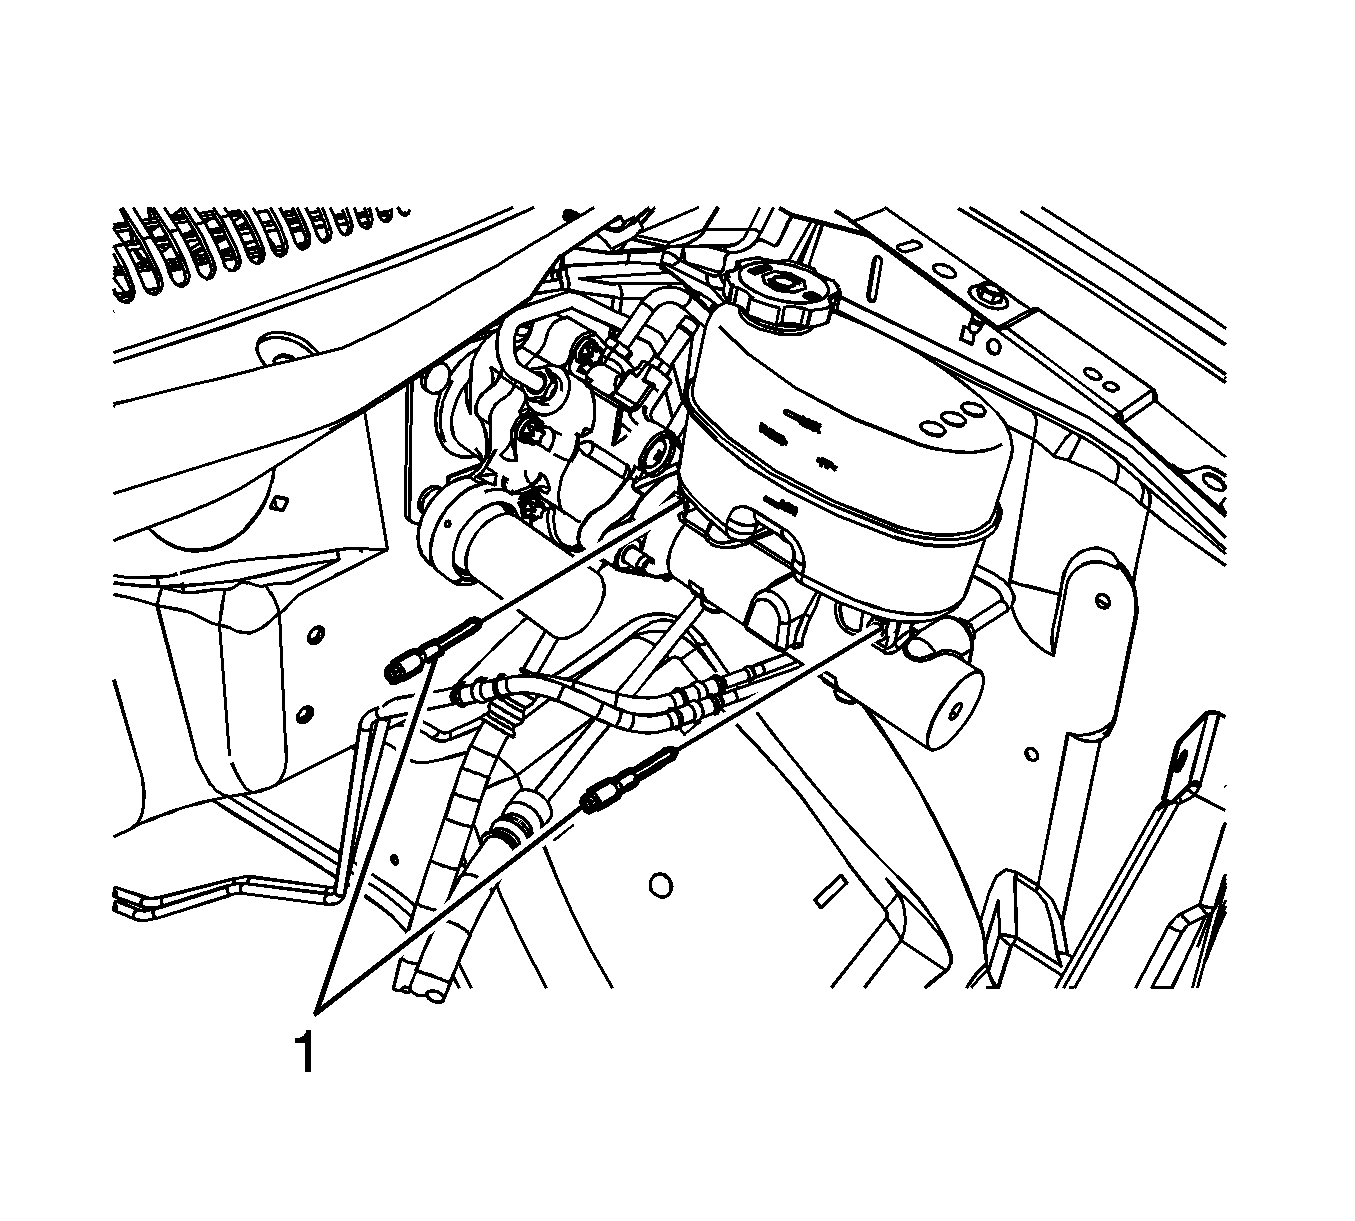
- Remove the master cylinder reservoir bolts (1).
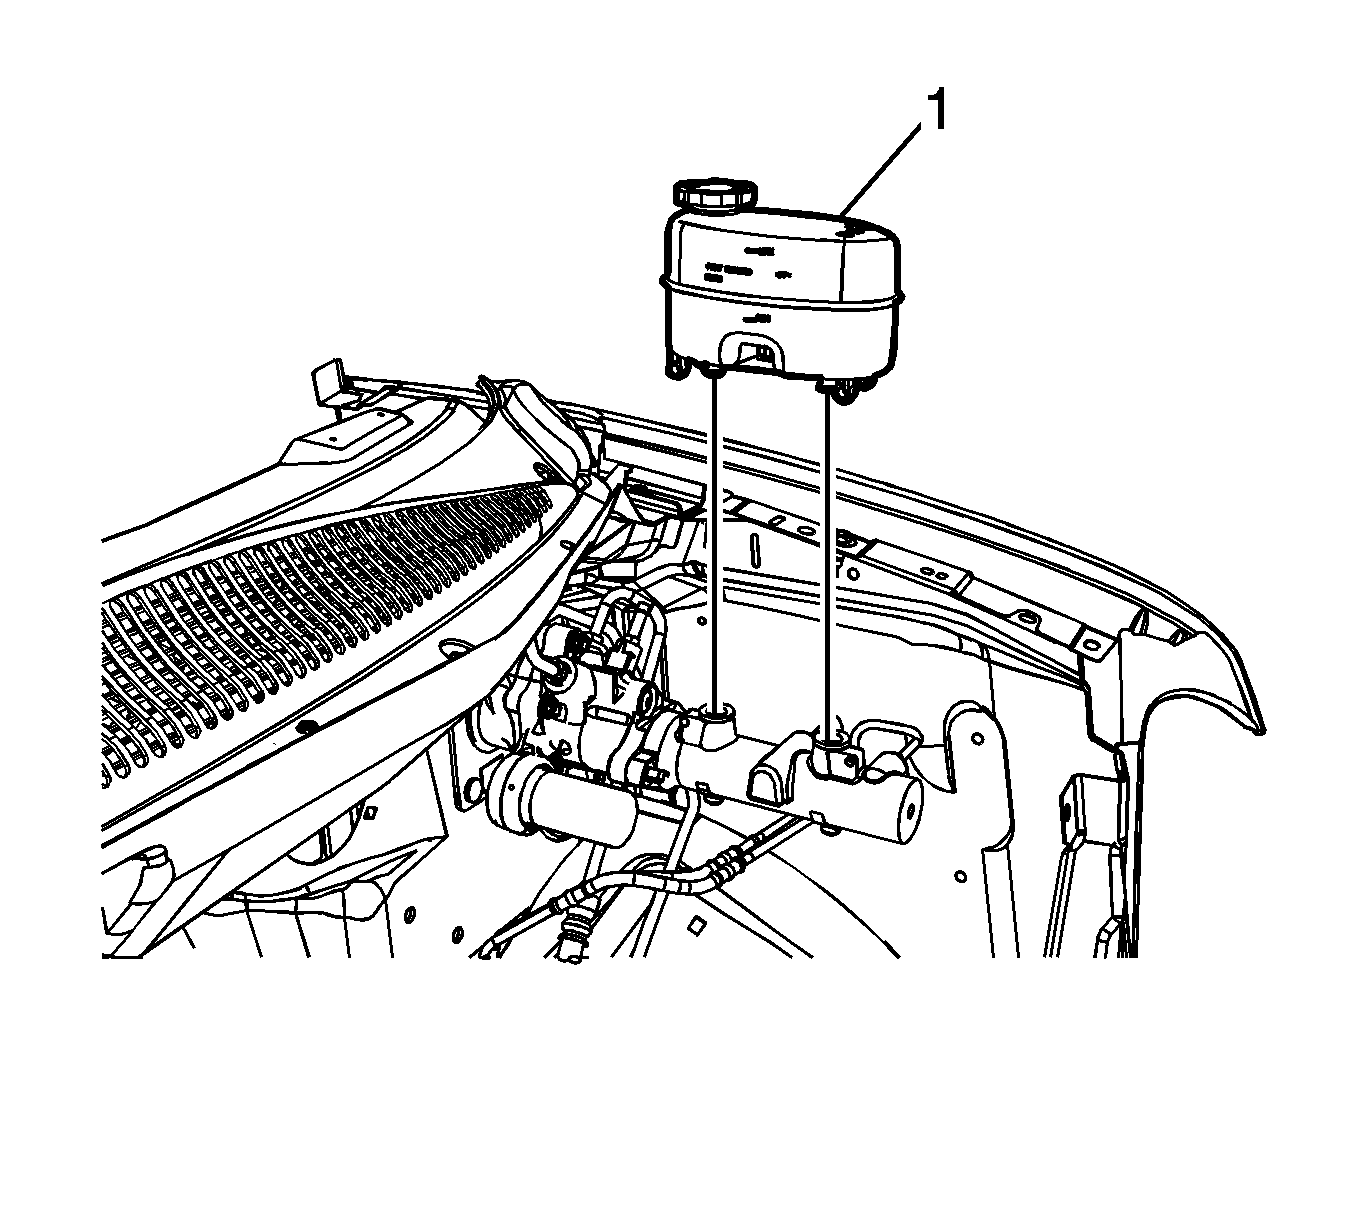
- Carefully lift the master cylinder reservoir (1) straight upward and remove the reservoir from the master cylinder.
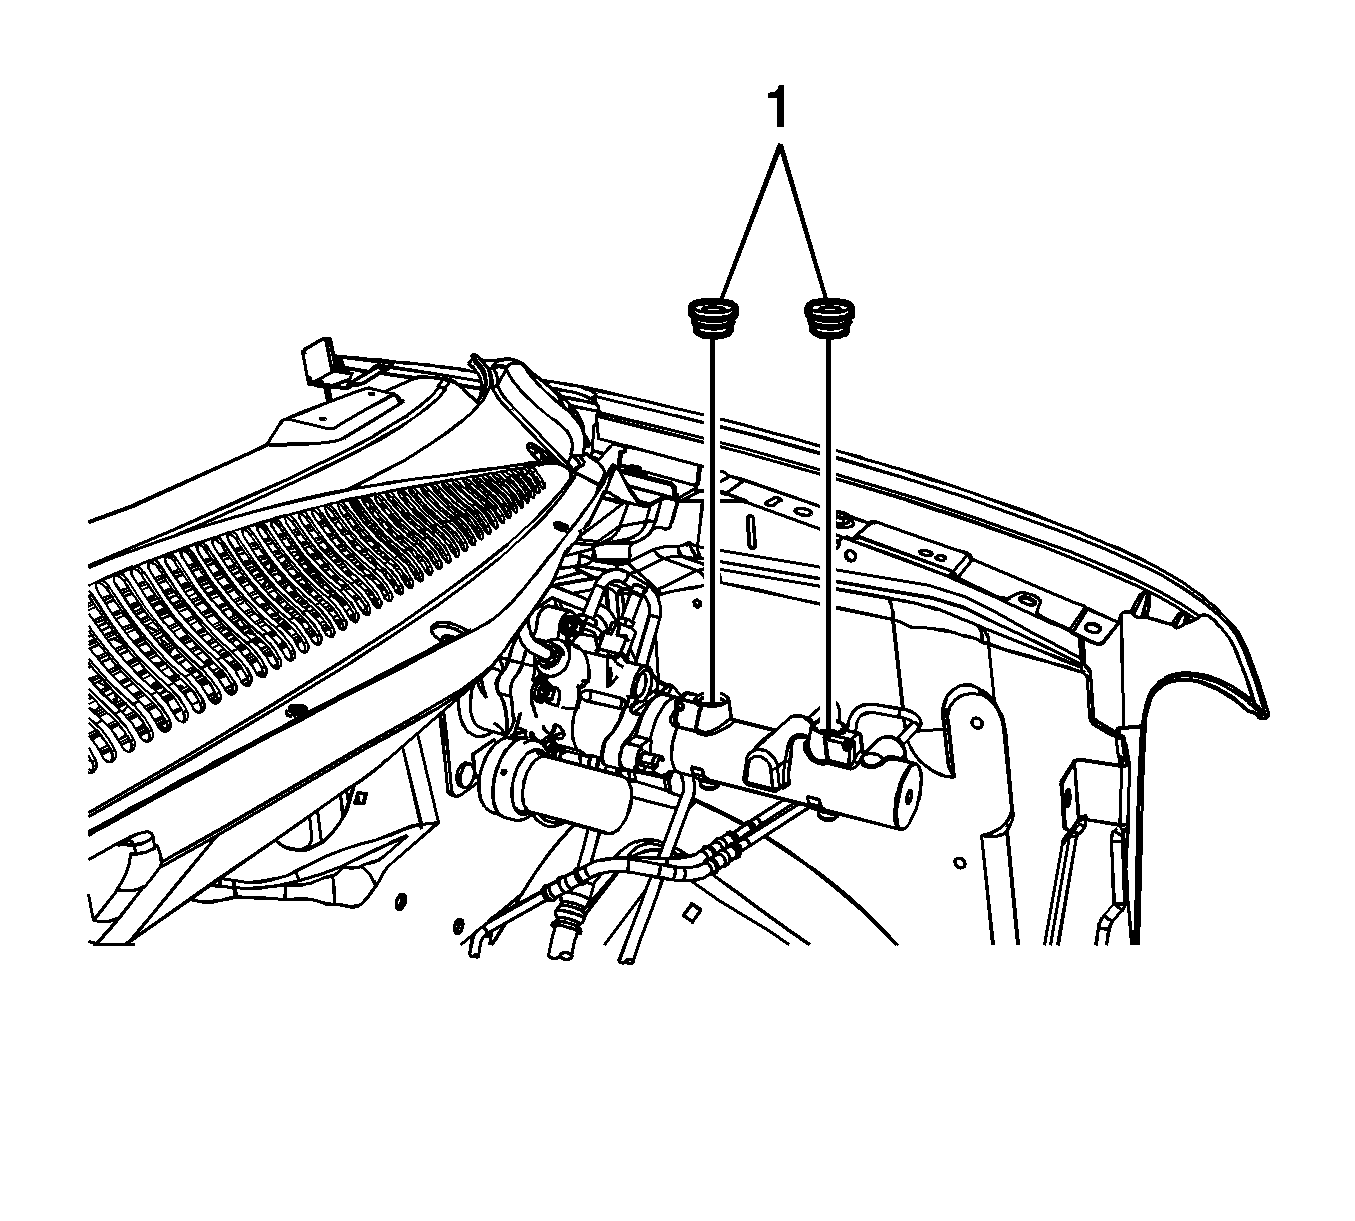
- Remove the master cylinder reservoir seals (1).
Installation Procedure
- Lubricate the master cylinder reservoir seals (1) and the outer surface area of the reservoir-to-housing barrels with GM approved brake fluid from a clean, sealed brake fluid container.
- If reinstalling the master cylinder reservoir, clean the reservoir with denatured alcohol, or equivalent and allow to dry.
- Install the master cylinder reservoir seals to the master cylinder.
- Lubricate the master cylinder reservoir-to-master cylinder barrels with GM approved brake fluid from a clean, sealed brake fluid container.
- Carefully press the master cylinder reservoir (1) straight downward and install the reservoir to the master cylinder.
- Install the master cylinder reservoir bolts (1) and tighten to 8 N·m (71 lb in).
- Connect the brake fluid level indicator switch electrical connector.
- Fill the master cylinder reservoir. Refer to Master Cylinder Reservoir Filling.

Ensure the master cylinder reservoir seals are fully seated in the master cylinder body.

Caution: Refer to Fastener Caution in the Preface section.

