For 1990-2009 cars only
Tools Required
| • | J 21177-A Drum to Brake Shoe Clearance Gage |
| • | J 42450-A Wheel Hub Resurfacing Kit |
Caution: Refer to Brake Dust Caution in the Preface section.
Important: This procedure must be performed after replacing the brake shoes or whenever the brake shoes have been removed.
- Raise and support the vehicle. Refer to Lifting and Jacking the Vehicle .
- Remove the rear tire and wheel. Refer to Tire and Wheel Removal and Installation .
- Disable the park brake cable automatic adjuster. Refer to Parking Brake Cable Adjuster Disabling .
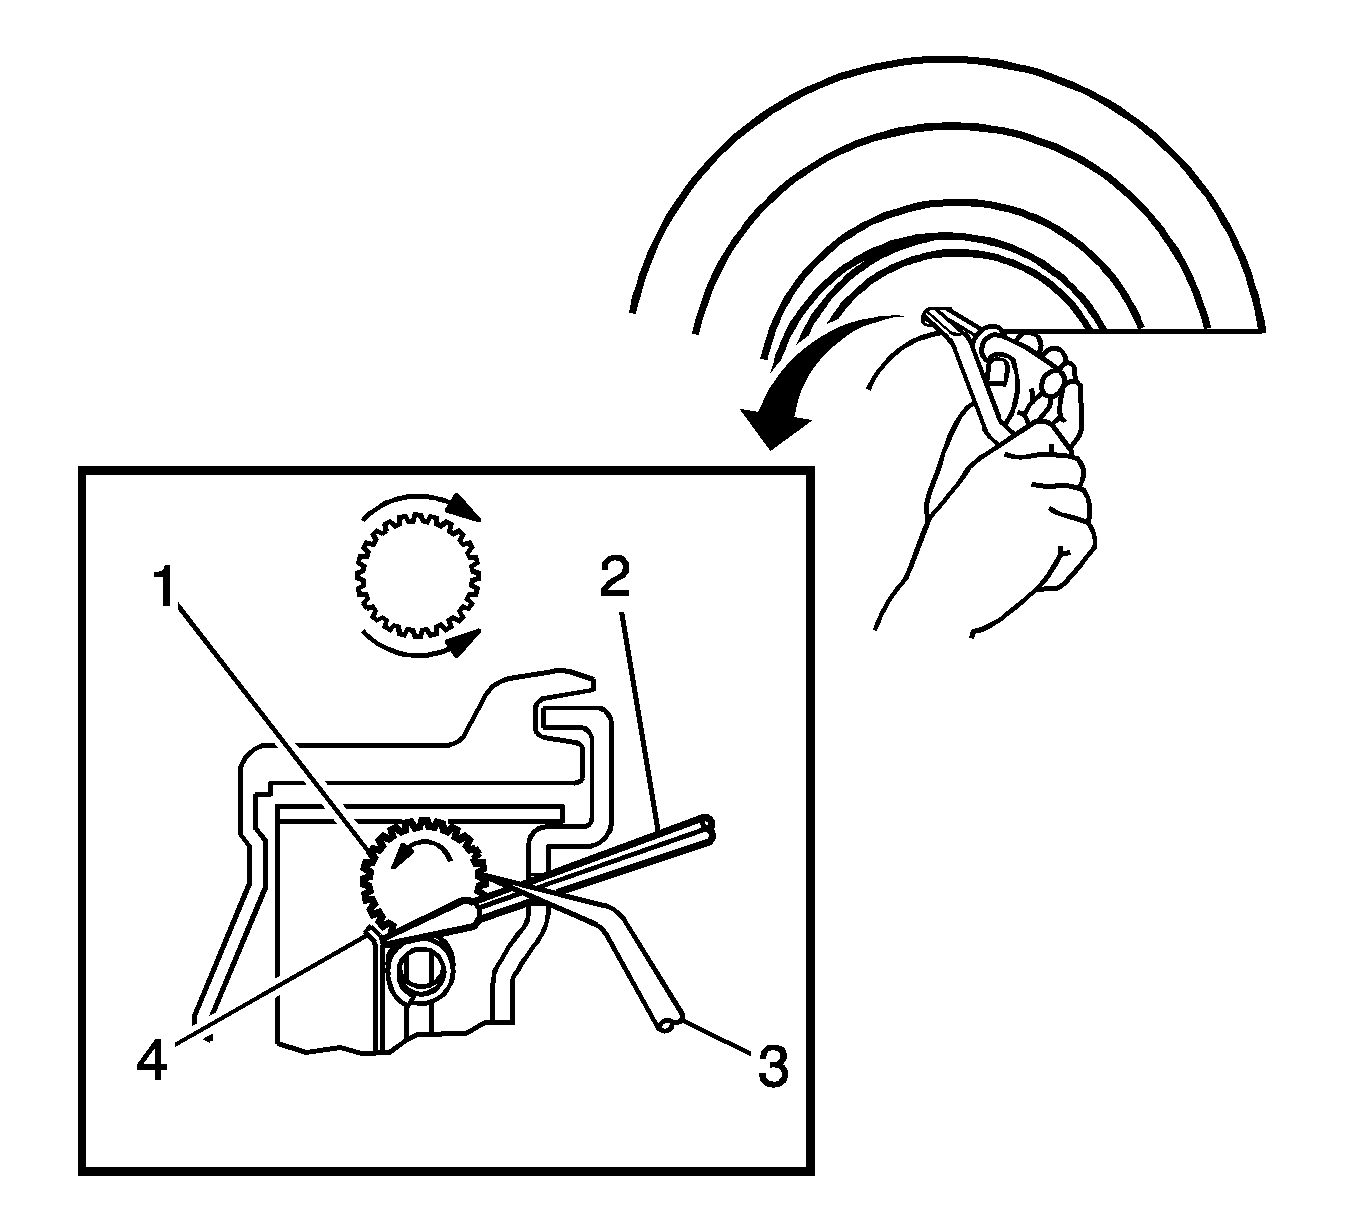
- Remove the brake shoe adjuster access plug from the backing plate.
- Insert a thin bladed tool (2) through the adjuster access hole in the backing plate until it contacts the adjuster lever (4).
- Push the adjuster lever away from the adjuster screw (1).
- Using a suitable tool (3), rotate the adjuster screw upward.
- Remove the brake drum. Refer to Brake Drum Replacement .
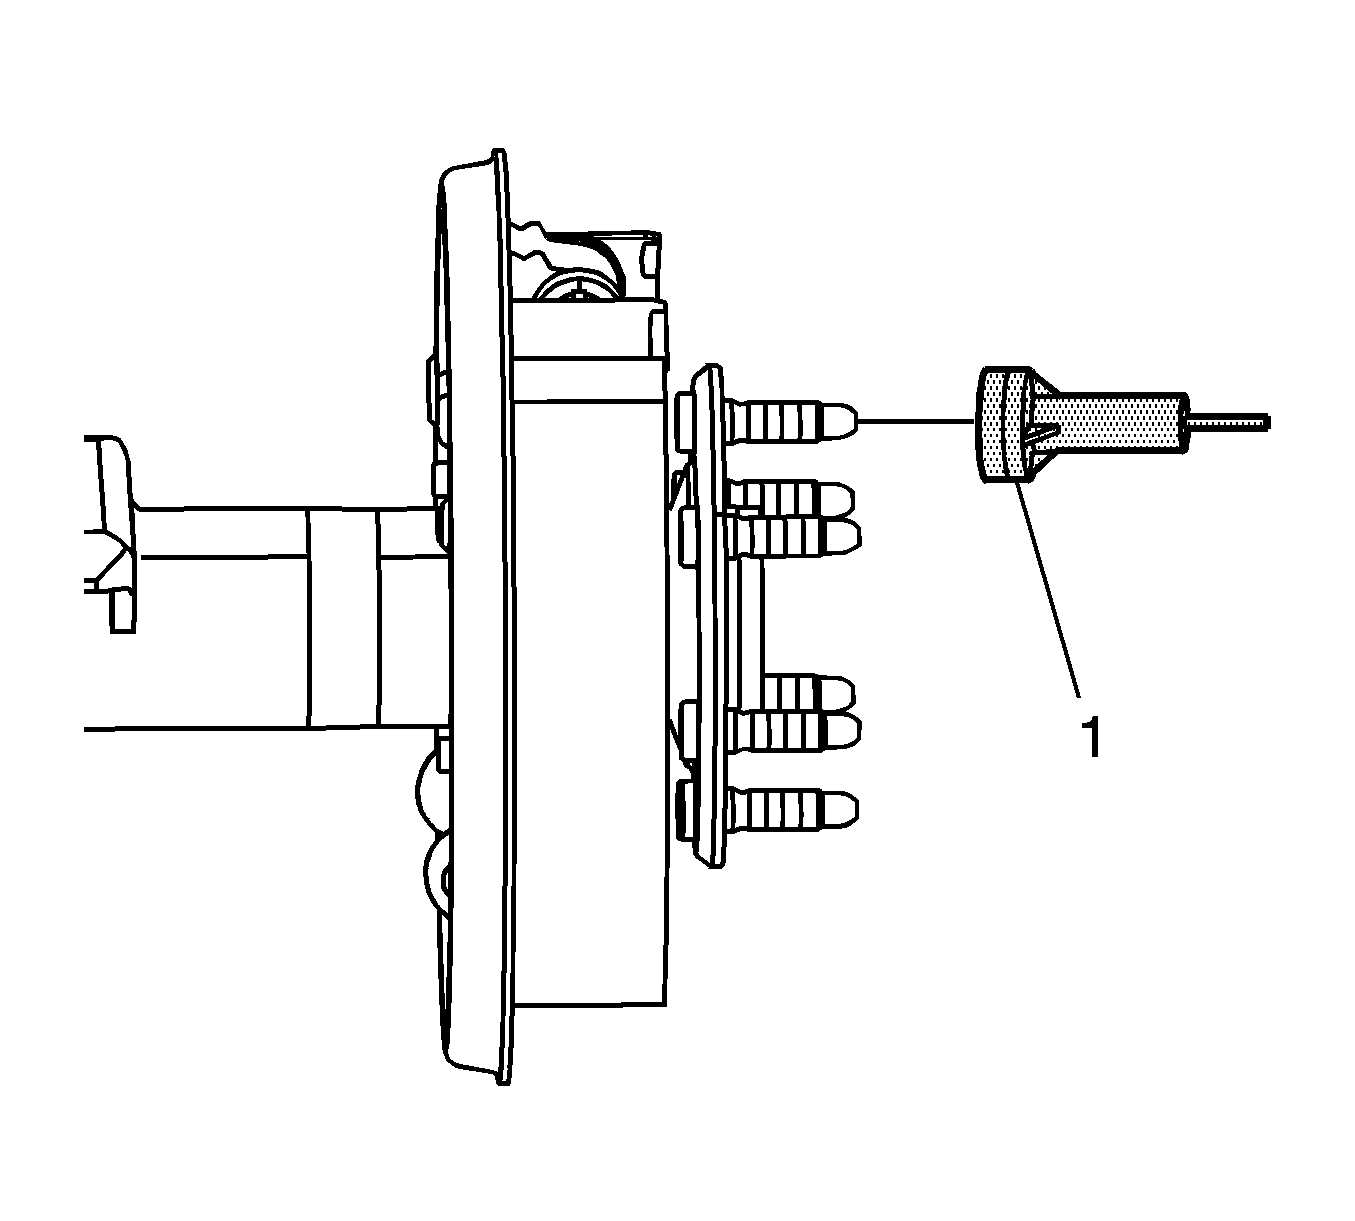
- Using the J 42450-A (1), clean the mating surface of the rear axle flange.
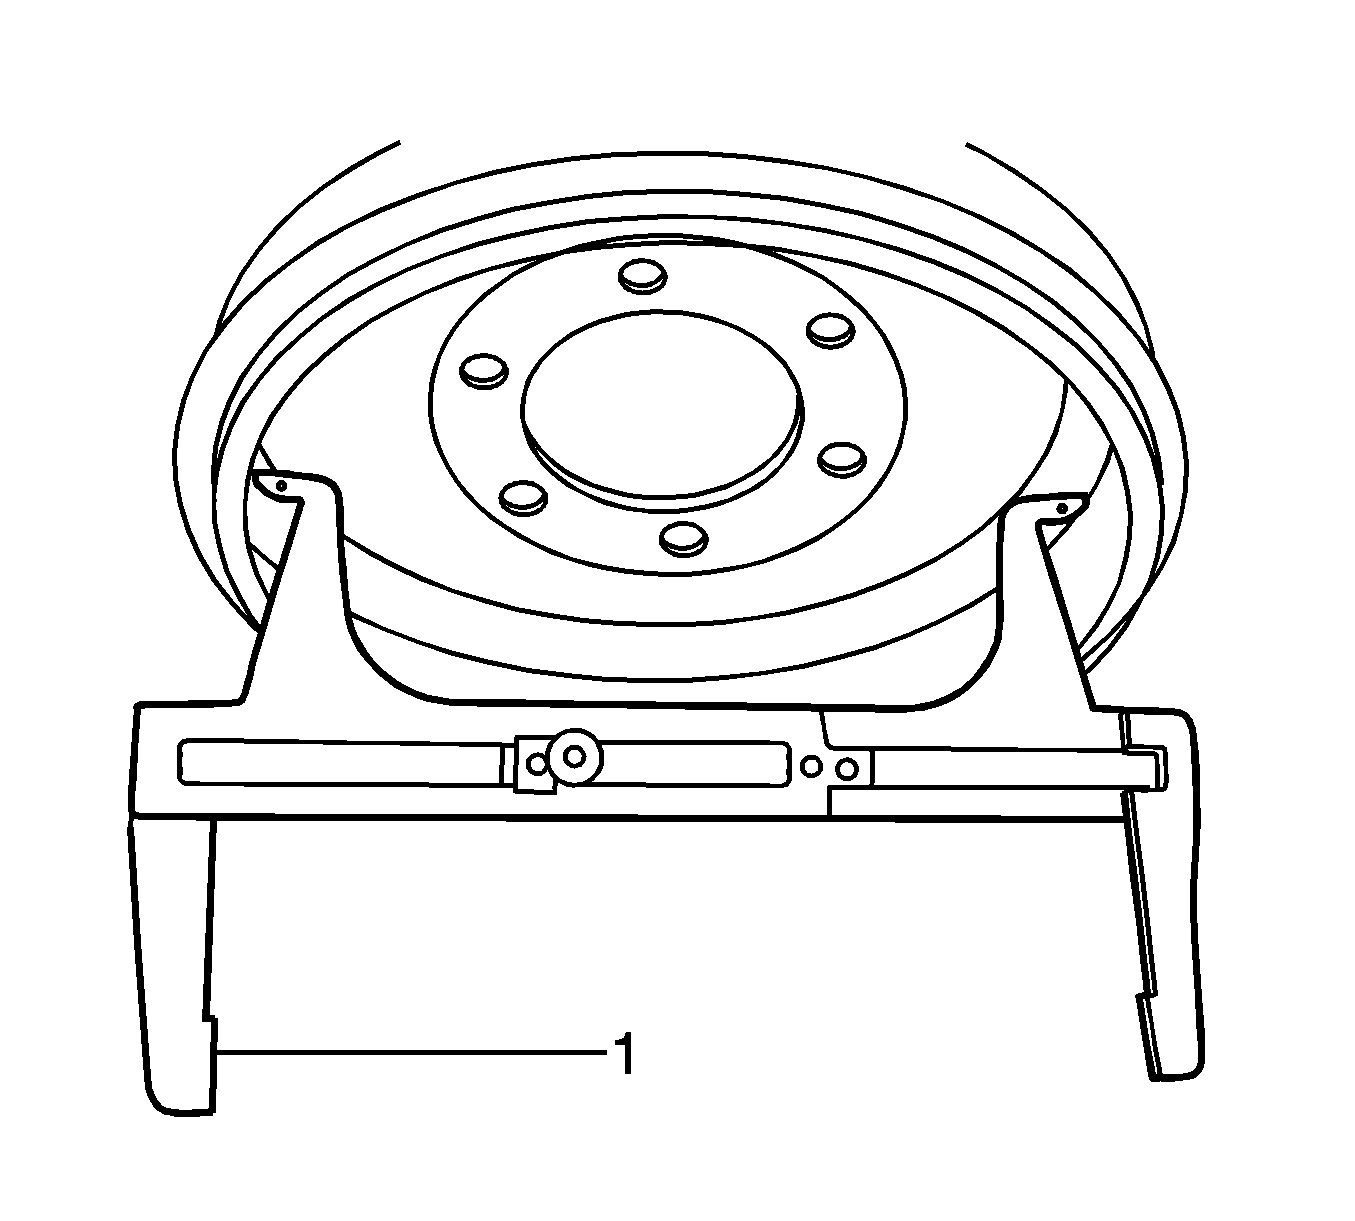
- Using the J 21177-A (1), measure the inside diameter of the brake drum.
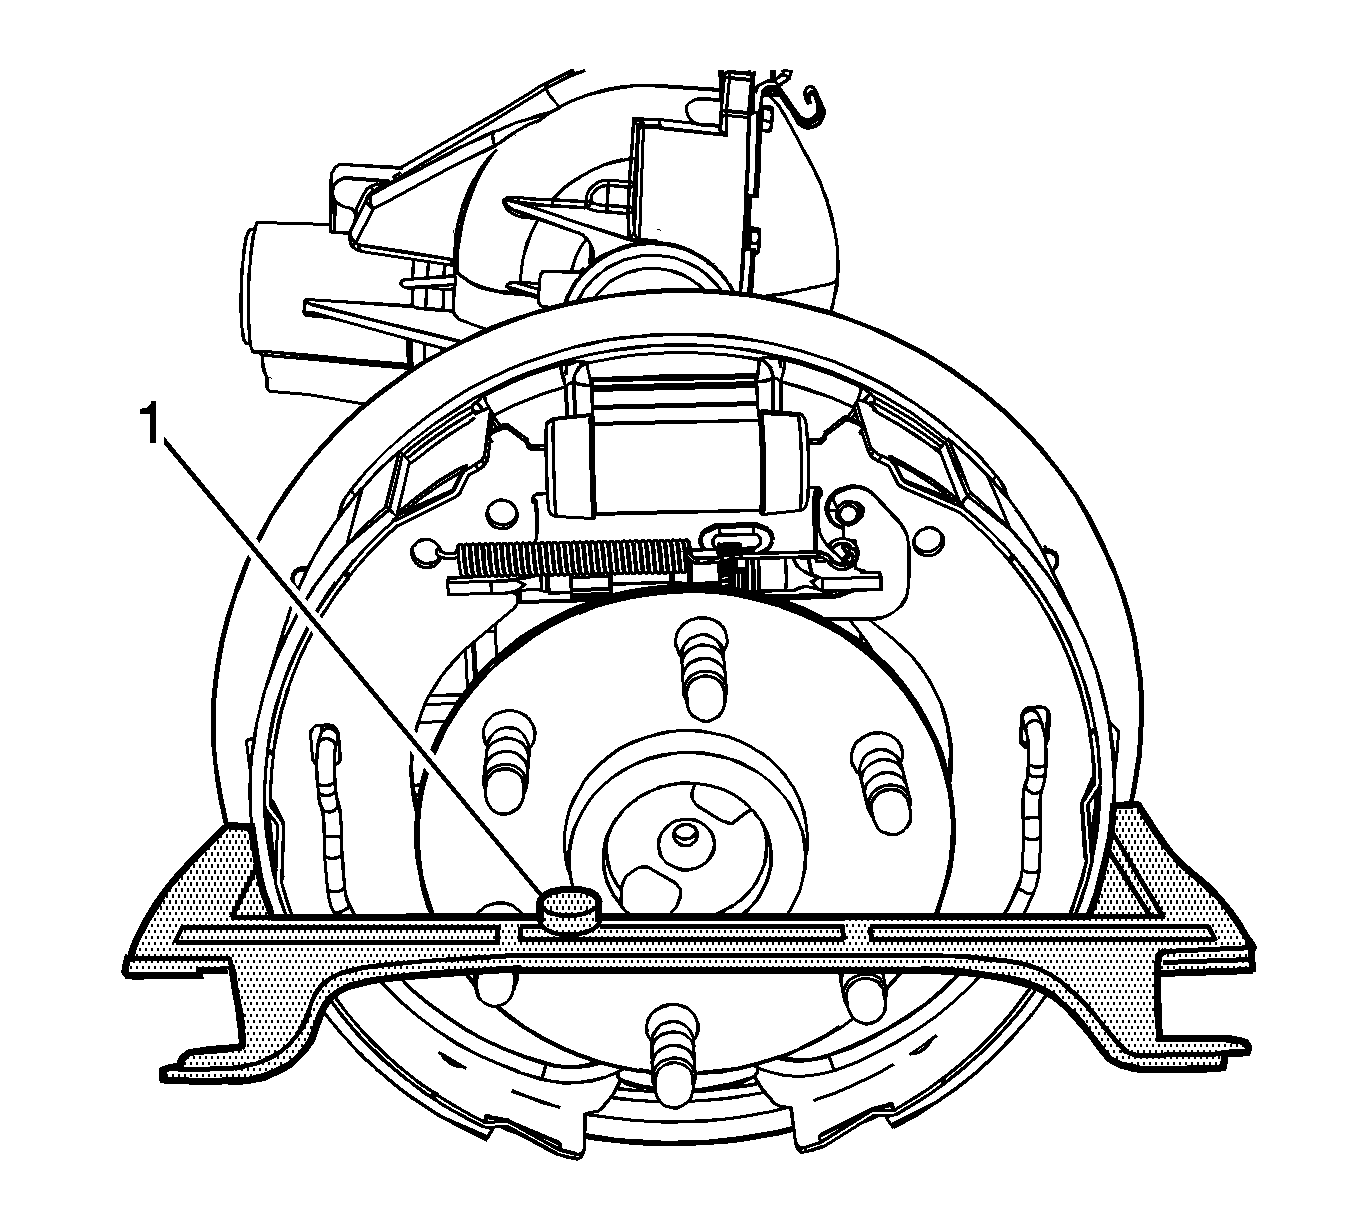
- With the set screw (1) locked, place the opposite side of the J 21177-A over the brake shoes.
- Rotate the brake shoe adjuster screw until the brake shoes just contact the J 21177-A .
- Inspect the clearance between the brake shoes and the brake drum.
- Install the brake drum. Refer to Brake Drum Replacement .
- Enable the park brake cable automatic adjuster. Refer to Parking Brake Cable Adjuster Enabling .
- If necessary, adjust the park brake cable tension. Refer to Park Brake Adjustment .
- Install the tire and wheel. Refer to Tire and Wheel Removal and Installation .
- Lower the vehicle.


Specification
Approximately 0.76 mm (0.030 in)
