Service Update for Inventory and Customer Vehicles-Missing Circuit for Optional Roof Mounted Light (Beacon)-Expires with Base Warranty

| Subject: | 07029 -- Service Update for Inventory and Customer Vehicles -- Missing Circuit for Optional Roof Mounted Light (Beacon) - Expires with Base Warranty |
| Models: | 2007 Chevrolet Silverado 1500 |
| 2007 GMC Sierra 1500 |
| with Optional Roof Mounted Light (TRW & -YE9 |
THIS SERVICE UPDATE INCLUDES VEHICLES IN DEALER INVENTORY AND CUSTOMER VEHICLES THAT RETURN FOR ANY TYPE OF SERVICE, AND WILL EXPIRE AT THE END OF THE INVOLVED VEHICLE'S NEW VEHICLE LIMITED WARRANTY PERIOD.
Purpose
This bulletin provides a service procedure to create a circuit for the optional roof mounted light on certain 2007 Chevrolet Silverado 1500 and GMC Sierra 1500 vehicles equipped with provisions for an optional roof mounted light (TRW & -YE9). On these vehicles, the circuit for the optional roof mounted light is missing.
This service procedure should be completed as soon as possible on involved vehicles currently in dealer inventory and customer vehicles that return to the dealer for any type of service during the New Vehicle Limited Warranty coverage period.
Vehicles Involved
A list of involved vehicles currently in dealer inventory is attached to the Administrative Message (GM US) or Dealer Communication (Canada) used to release this bulletin. Customer vehicles that return for service, for any reason, and are still covered under the vehicle's base warranty, and are within the VIN breakpoints provided below, should be checked for vehicle eligibility in the appropriate system listed below.
Year | Division | Model | From | Through |
|---|---|---|---|---|
2007 | Chevrolet | Silverado | 7Z522187 | 7Z531237 |
2007 | GMC | Sierra | 7Z522676 | 7Z530666 |
Important: Dealers are to confirm vehicle eligibility prior to beginning repairs by using GMVIS. Not all vehicles within the above breakpoints may be involved.
Parts Information
Parts required to complete this service update are to be obtained from General Motors Service Parts Operations (GMSPO). Please refer to your "involved vehicles listing" before ordering parts. Normal orders should be placed on a DRO = Daily Replenishment Order. In an emergency situation, parts should be ordered on a CSO = Customer Special Order.
Part Number | Description | Qty/ Vehicle |
|---|---|---|
12089190 | Splice, Sleeve (Sealed), (Blue) (14-16 Ga) | 1 |
Service Procedure
Tools Required
J 38125 Terminal Repair Kit
- Remove the instrument panel (I/P) knee bolster. Refer to Knee Bolster Replacement in SI.
- Remove the park brake release handle. Refer to Park Brake Release Handle Assembly Replacement SI.
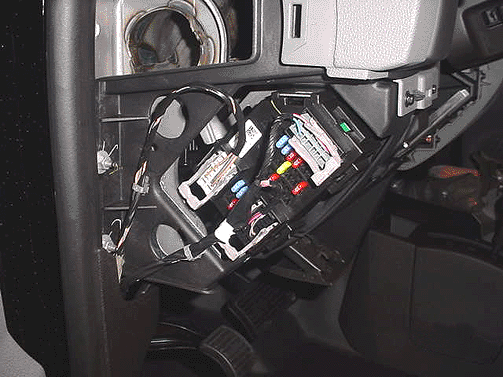
- Locate the left bussed electrical center (LBEC), which is located on the left end of the instrument panel IP.
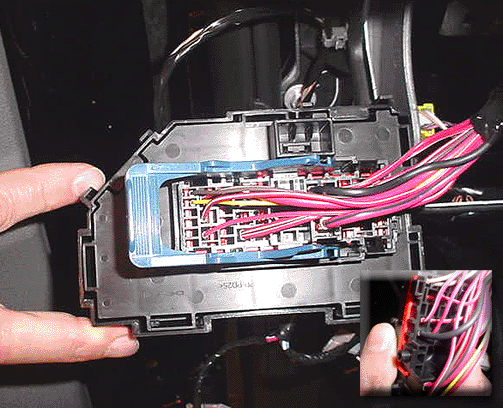
- Locate the 40-way connector X1 that is attached to the back of the LBEC.
- Disconnect the 40-way connector X1 from the LBEC.
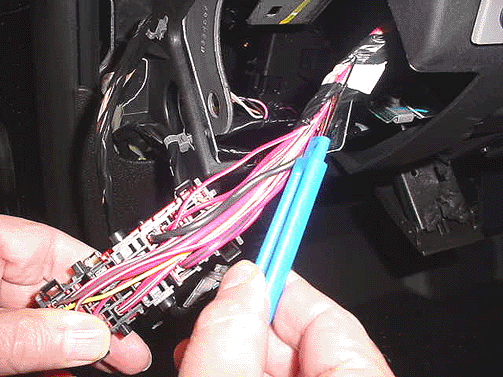
- Remove 100 mm (3.9 in) of harness tape, starting from the back of the connector, to make the repair.
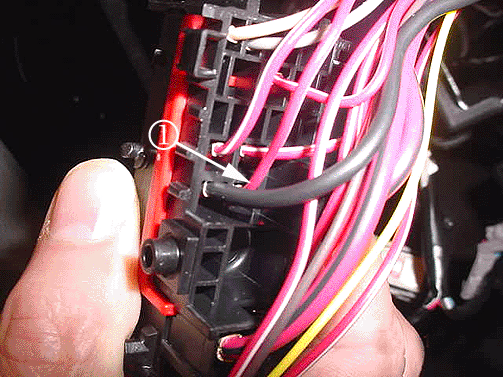
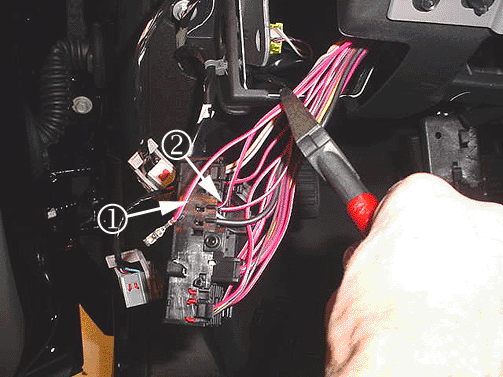
- Locate and remove the 240 circuit (red wire with white stripe) (1) from cavity E2.
- Cut off the terminal.
- Locate circuit 3040 (red wire with a white stripe) (2) located in cavity D1 of connector X1 and cut the 240 and 3040 wires 75 mm (3 in) from the back of the connector. Strip the ends of the wires.
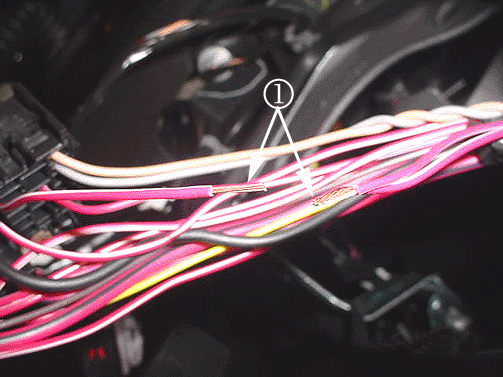
- Twist the end of circuit 3040 together with circuit 240. Connect the circuits from the side of the circuit that does not have a terminal (1).
- Using a BLUE colored crimp and seal splice sleeve PN 12089190, crimp the 240/3040 end to the 3040 end. Refer to Splicing Copper Wire Using Splice Sleeves in SI, if required.
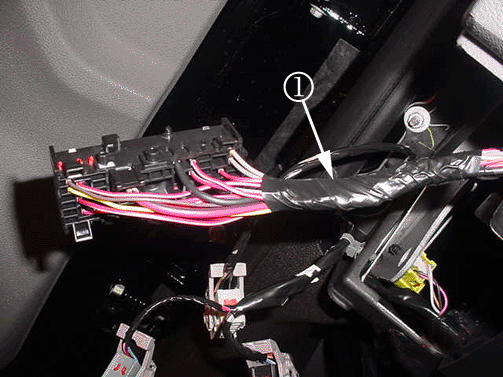
- Re-apply tape (1) to the harness.
- Plug the 40-way connector X1 back into the backside of the LBEC.
- Verify that there is power to the beacon switch by activating the switch. If the beacon switch light indicator illuminates when the switch is in the ON position and turns off when the switch is in the OFF position, the repair has been performed correctly.
- Install the instrument panel (I/P) knee bolster. Refer to Knee Bolster Replacement in SI.
- Install the park brake release handle. Refer to Park Brake Release Handle Assembly Replacement in SI.
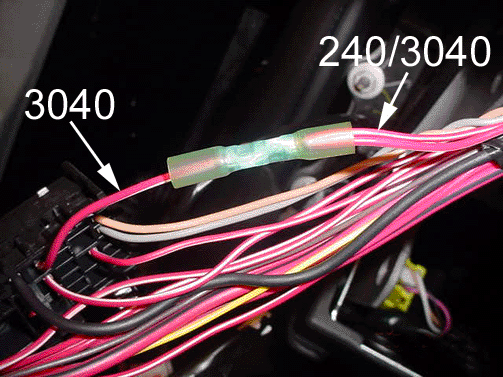
Important: Apply heat to sleeve using a hot air gun or Ultratorch. Apply heat to the center of the sleeve and continue heating for a minimum of 30 seconds. Once the glue starts to melt, slowly rotate the sleeve while applying heat evenly until hot glue is visible outside the sleeve.
Claim Information
For vehicles repaired under this service update, use:
Labor Operation | Description | Labor Time |
|---|---|---|
Y0146 | Modify Wiring | 0.6 |
