For 1990-2009 cars only
2-Way Remote Start, Door Lock, and Information Display Antenna Package Installation P/N 19131608
- Clean the areas of the front and back of the rear window lower garnish molding where the antenna will be installed and the antenna cable will be secured with a surface cleaner (50 percent isopropyl alcohol, FS-1082 Hi-flash Naptha or equivalent).
- Dry the molding thoroughly using a lint-free cloth.
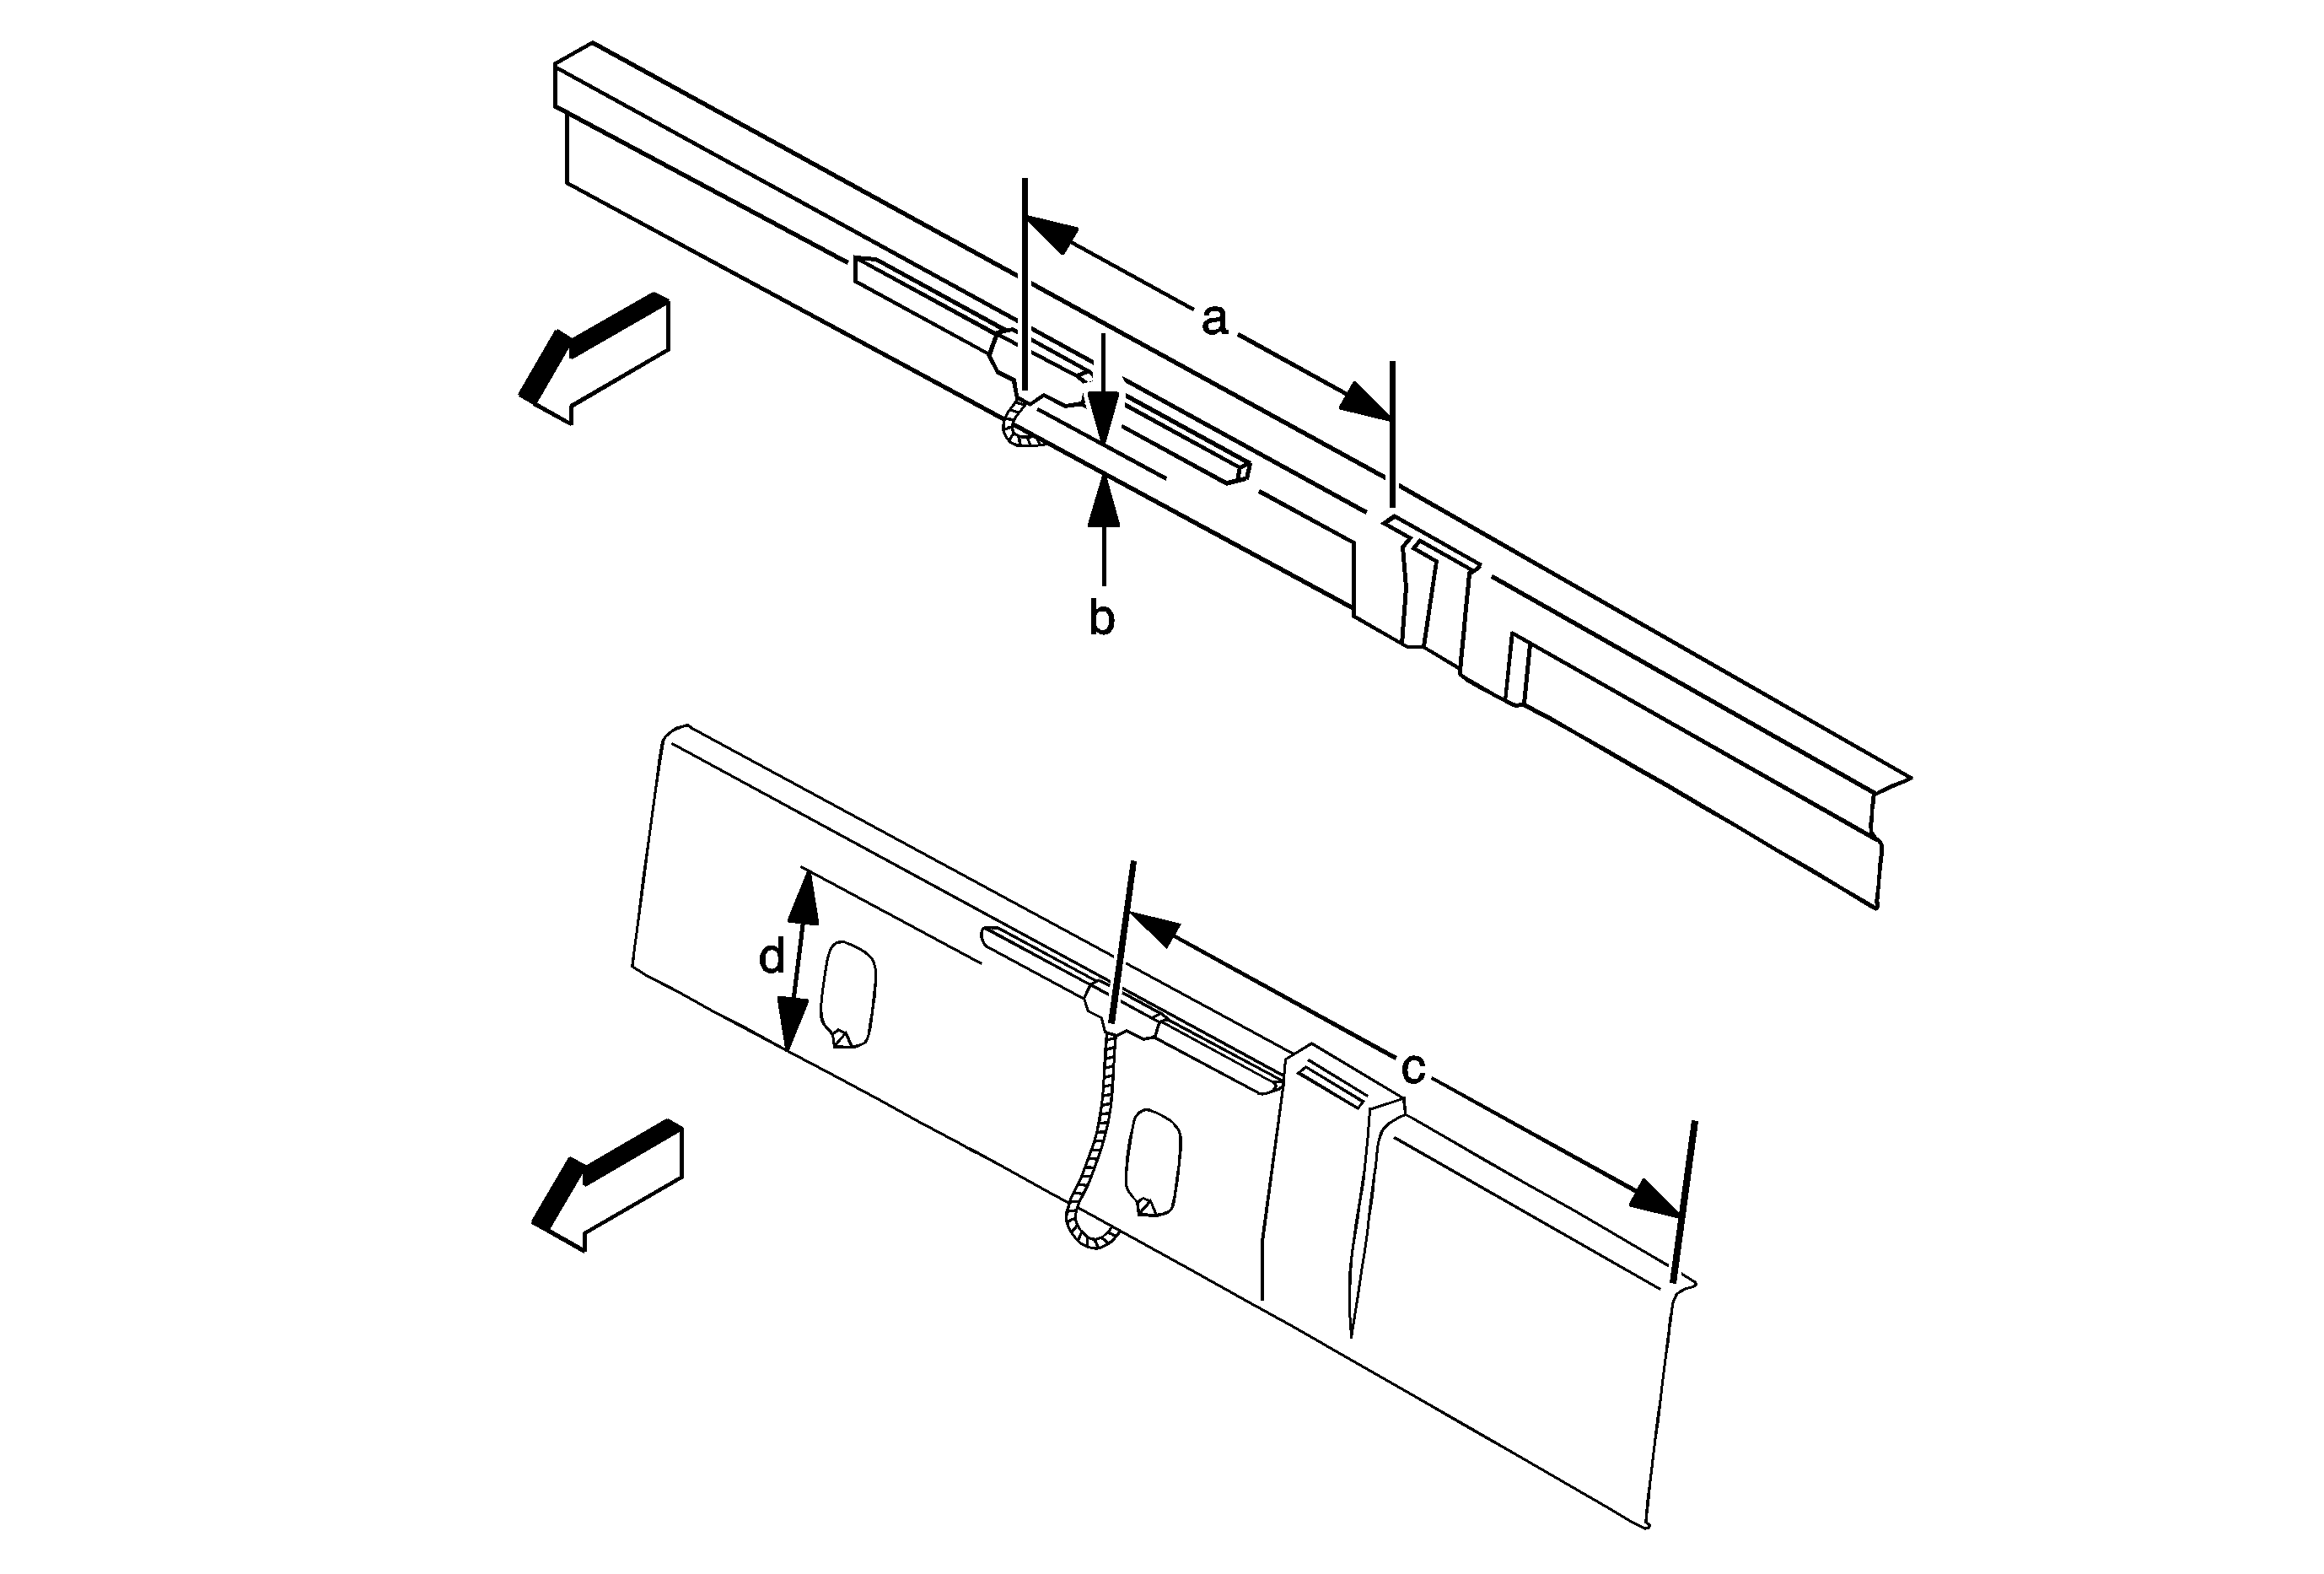
- Apply Adhesion Promoter GM P/N 12378462 (Canadian P/N 10953554) to the front and back of the rear window lower garnish molding where the antenna will be installed and the antenna cable will be secured. Follow the Glass Adhesion Promoter instructions on the product label. Use a=375 mm (14 3/4 in) and b=73 mm (2 7/8 in) for crew or extended cab trucks or c=715 mm (28 1/8 in) and d=210 mm (8 1/4 in) for regular cab trucks for the dimensions on the figure.
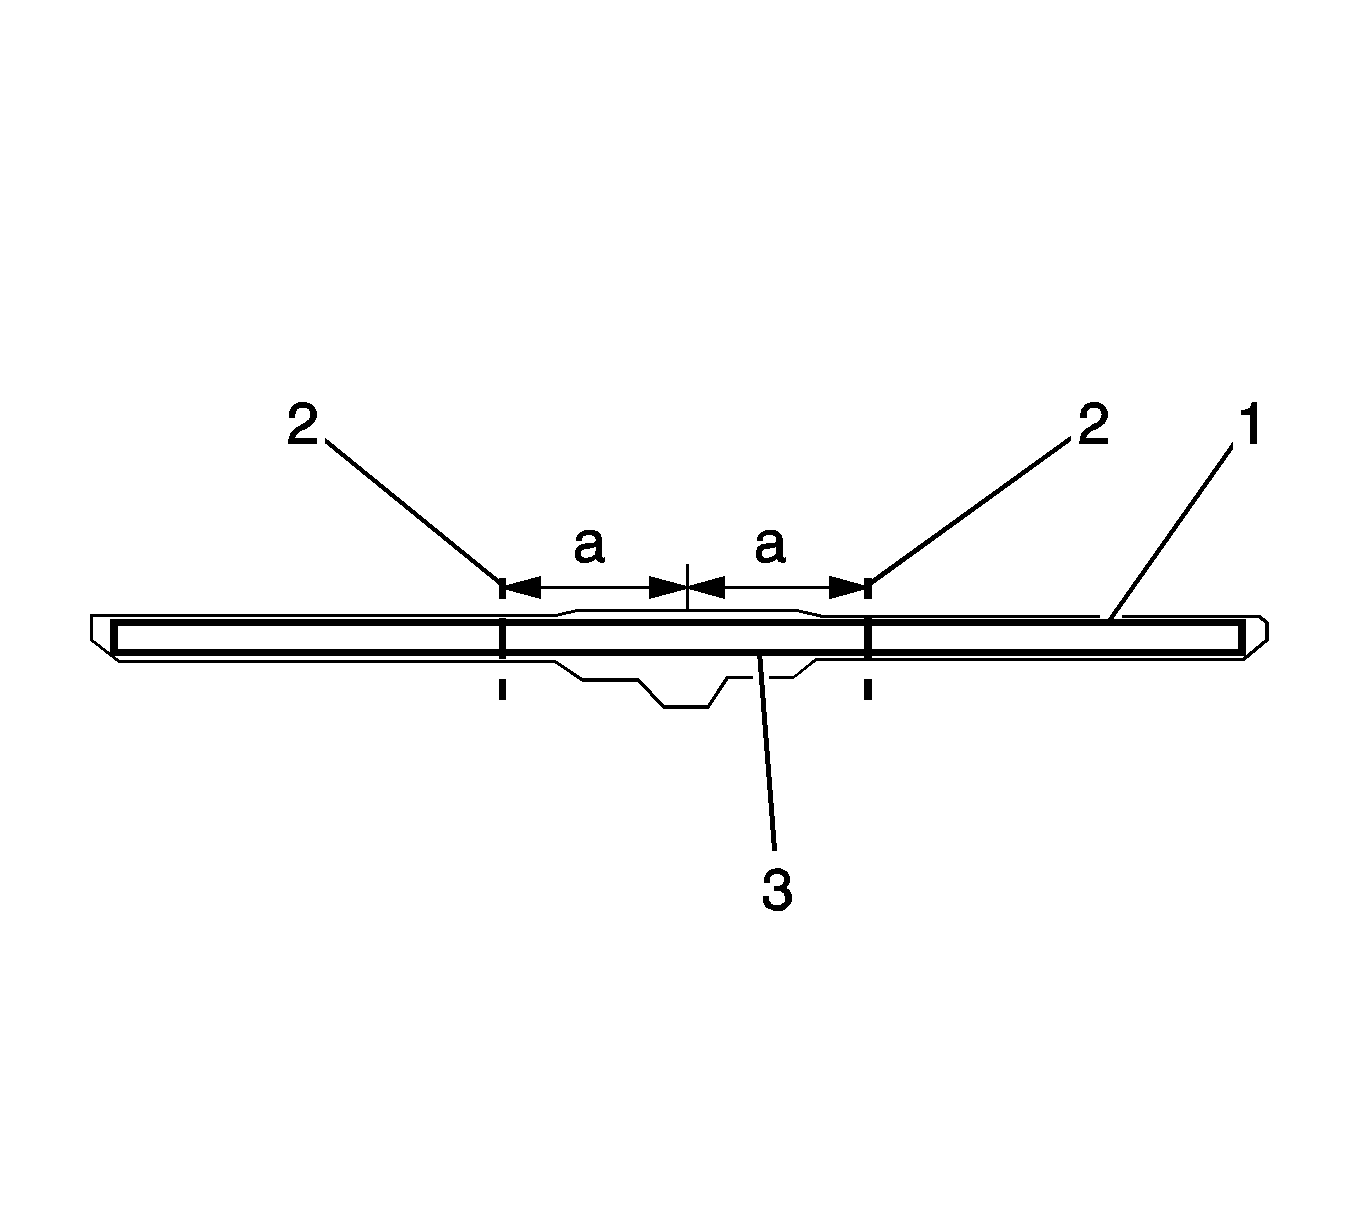
- Use a razor blade or other sharp tool to score the protective film (1) on the antenna at the locations shown (2). Use a=50 mm (2 in) from the center of the antenna to find the locations to score (2).
- Remove the center section (3) of protective film from the adhesive pad on the antenna. Leave the outer sections of protective film on the adhesive pad.
- Align the antenna according to the figure, using a=375 mm (14 3/4 in) and b=73 mm (2 7/8 in) for crew or extended cab trucks or c=715 mm (28 1/8 in) and d=210 mm (8 1/4 in) for regular cab trucks for the dimensions on the figure.
- Press firmly all along the exposed area of the adhesive pad of the antenna in order to ensure proper adhesion to the trim.
- Hold pressure on the antenna for 10-30 seconds.
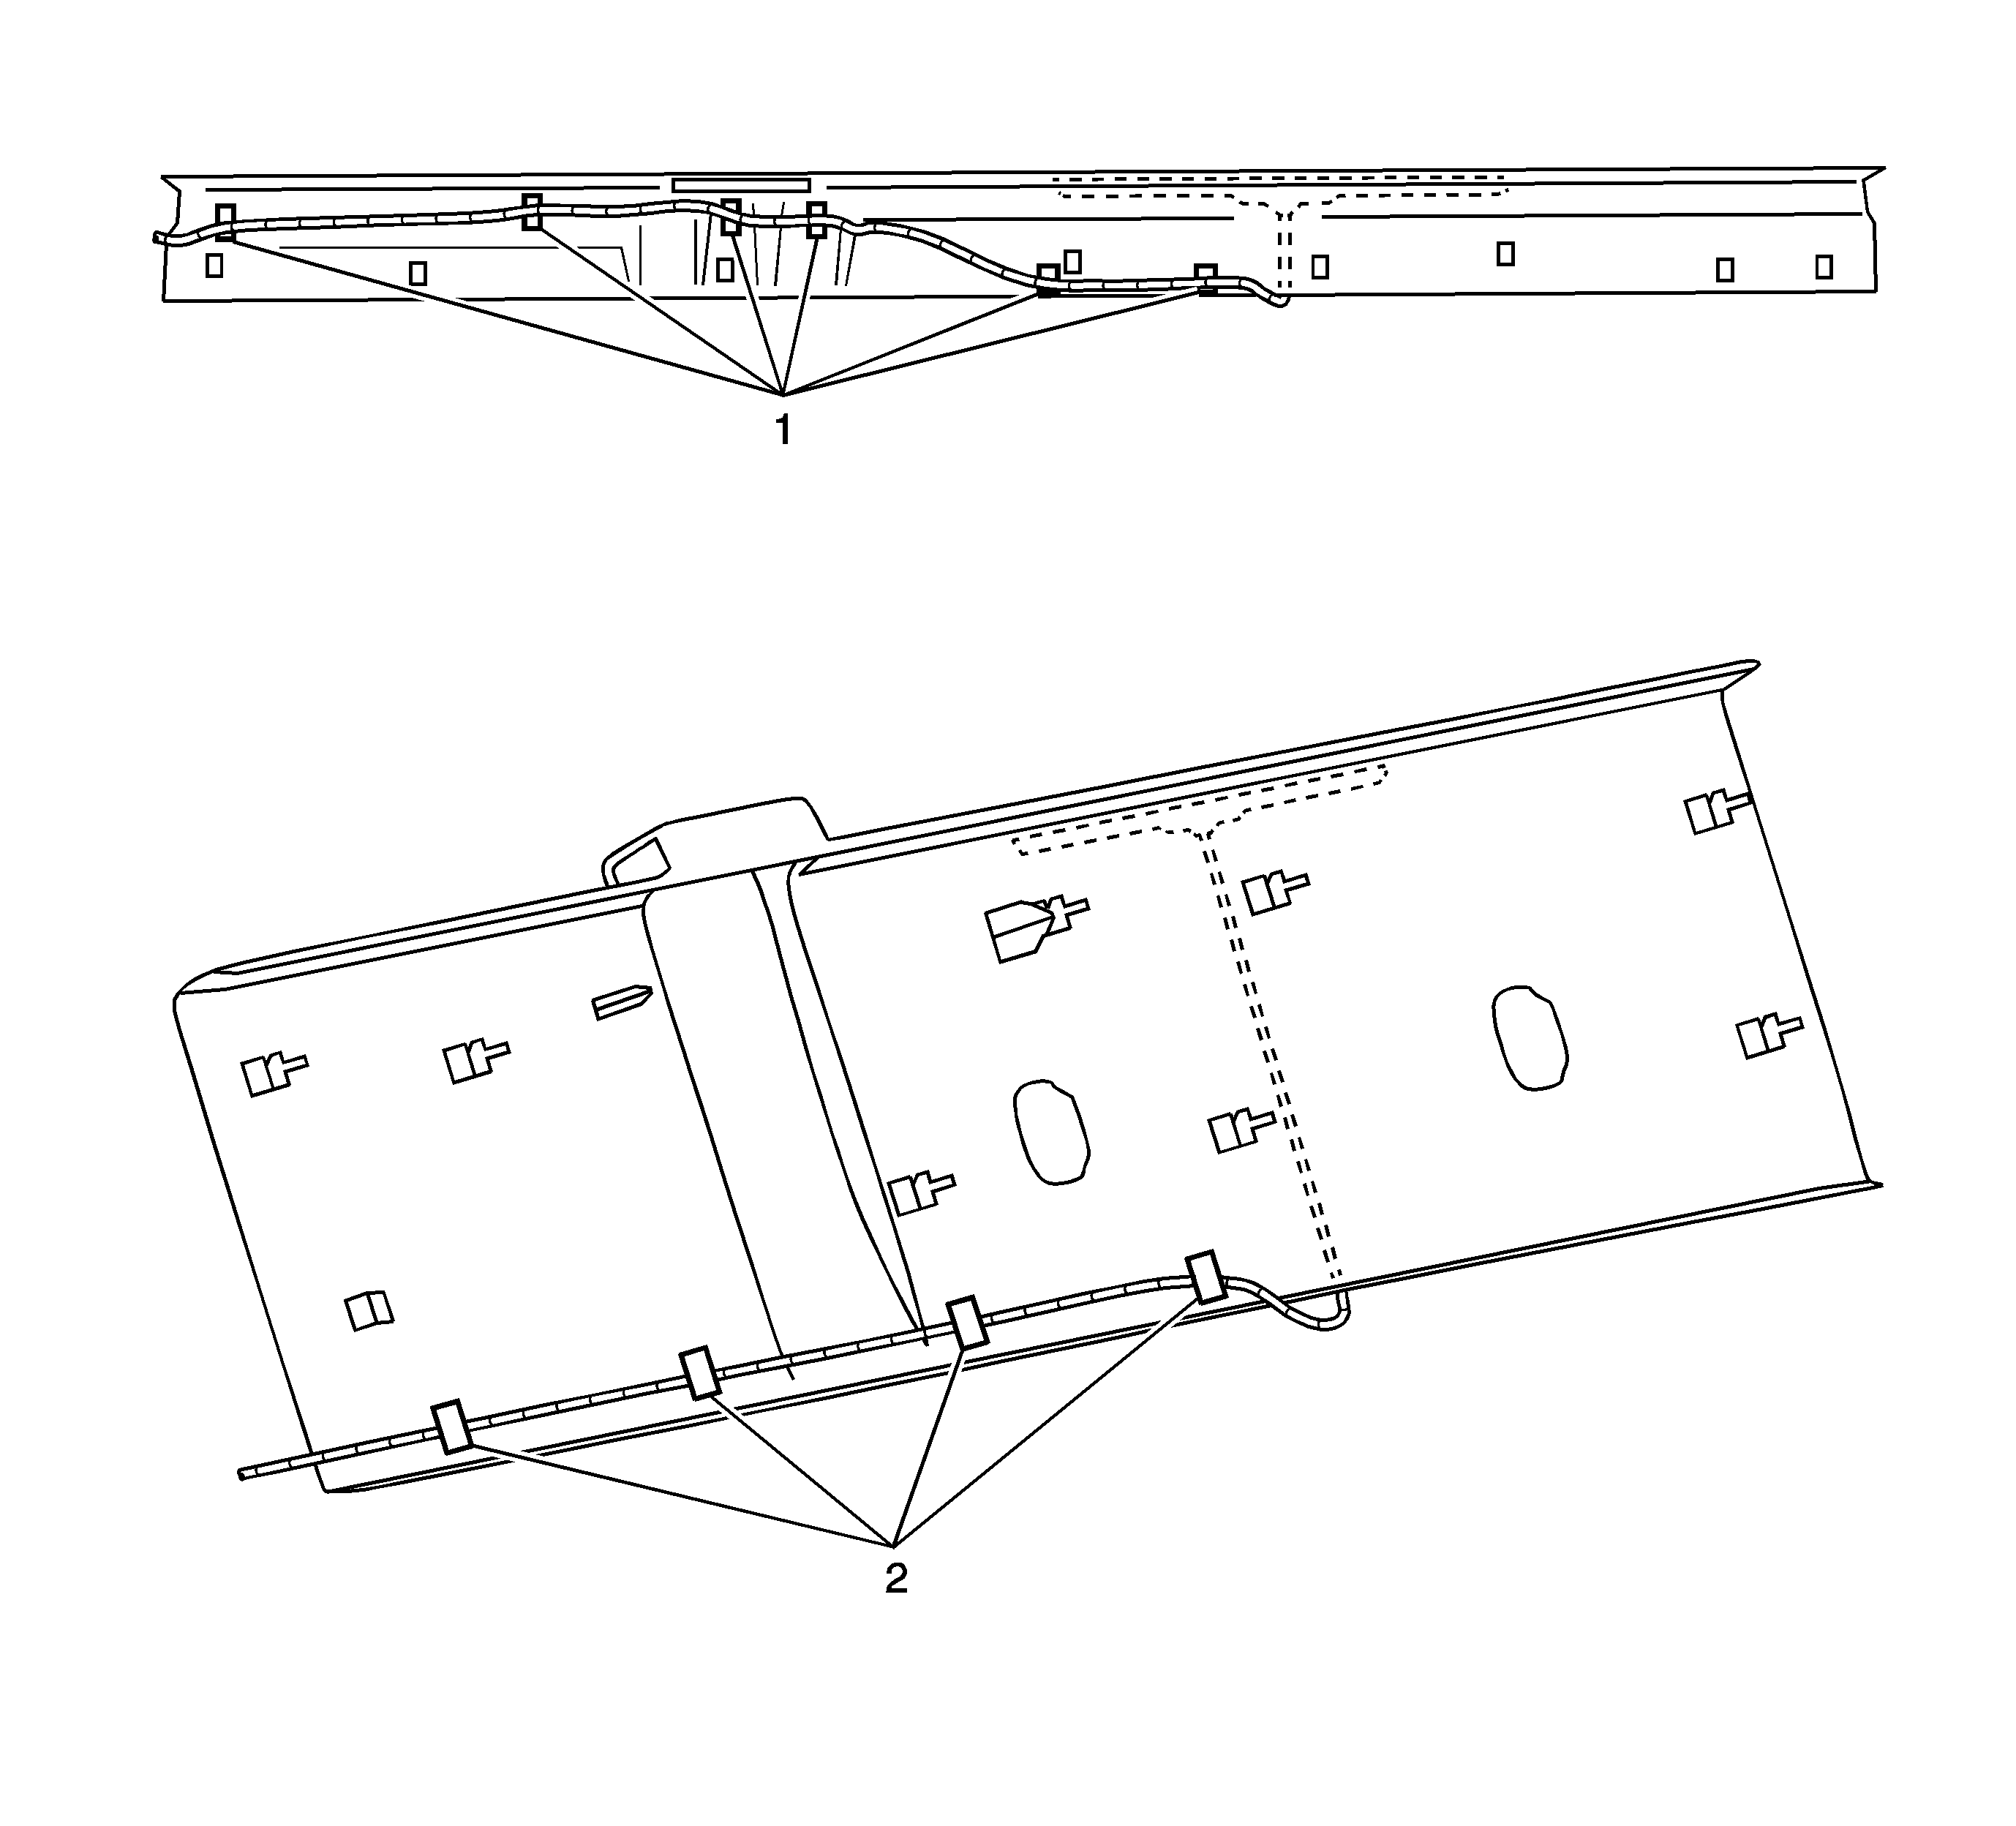
- Secure the antenna cable to the back side of the molding with six adhesive wire wraps for the crew or extended cabs (1) or four adhesive wire wraps for the regular cab (2). Route the cable at the bottom of the molding as shown. Keep the last adhesive wire wrap 2 inches from the end of the molding to allow for reinstallation of the molding.
- Partially reinstall the left body lock pillar trim panel. Do not secure yet.
- Reinstall the rear window lower garnish molding. Refer to Rear Window Lower Garnish Molding Replacement.
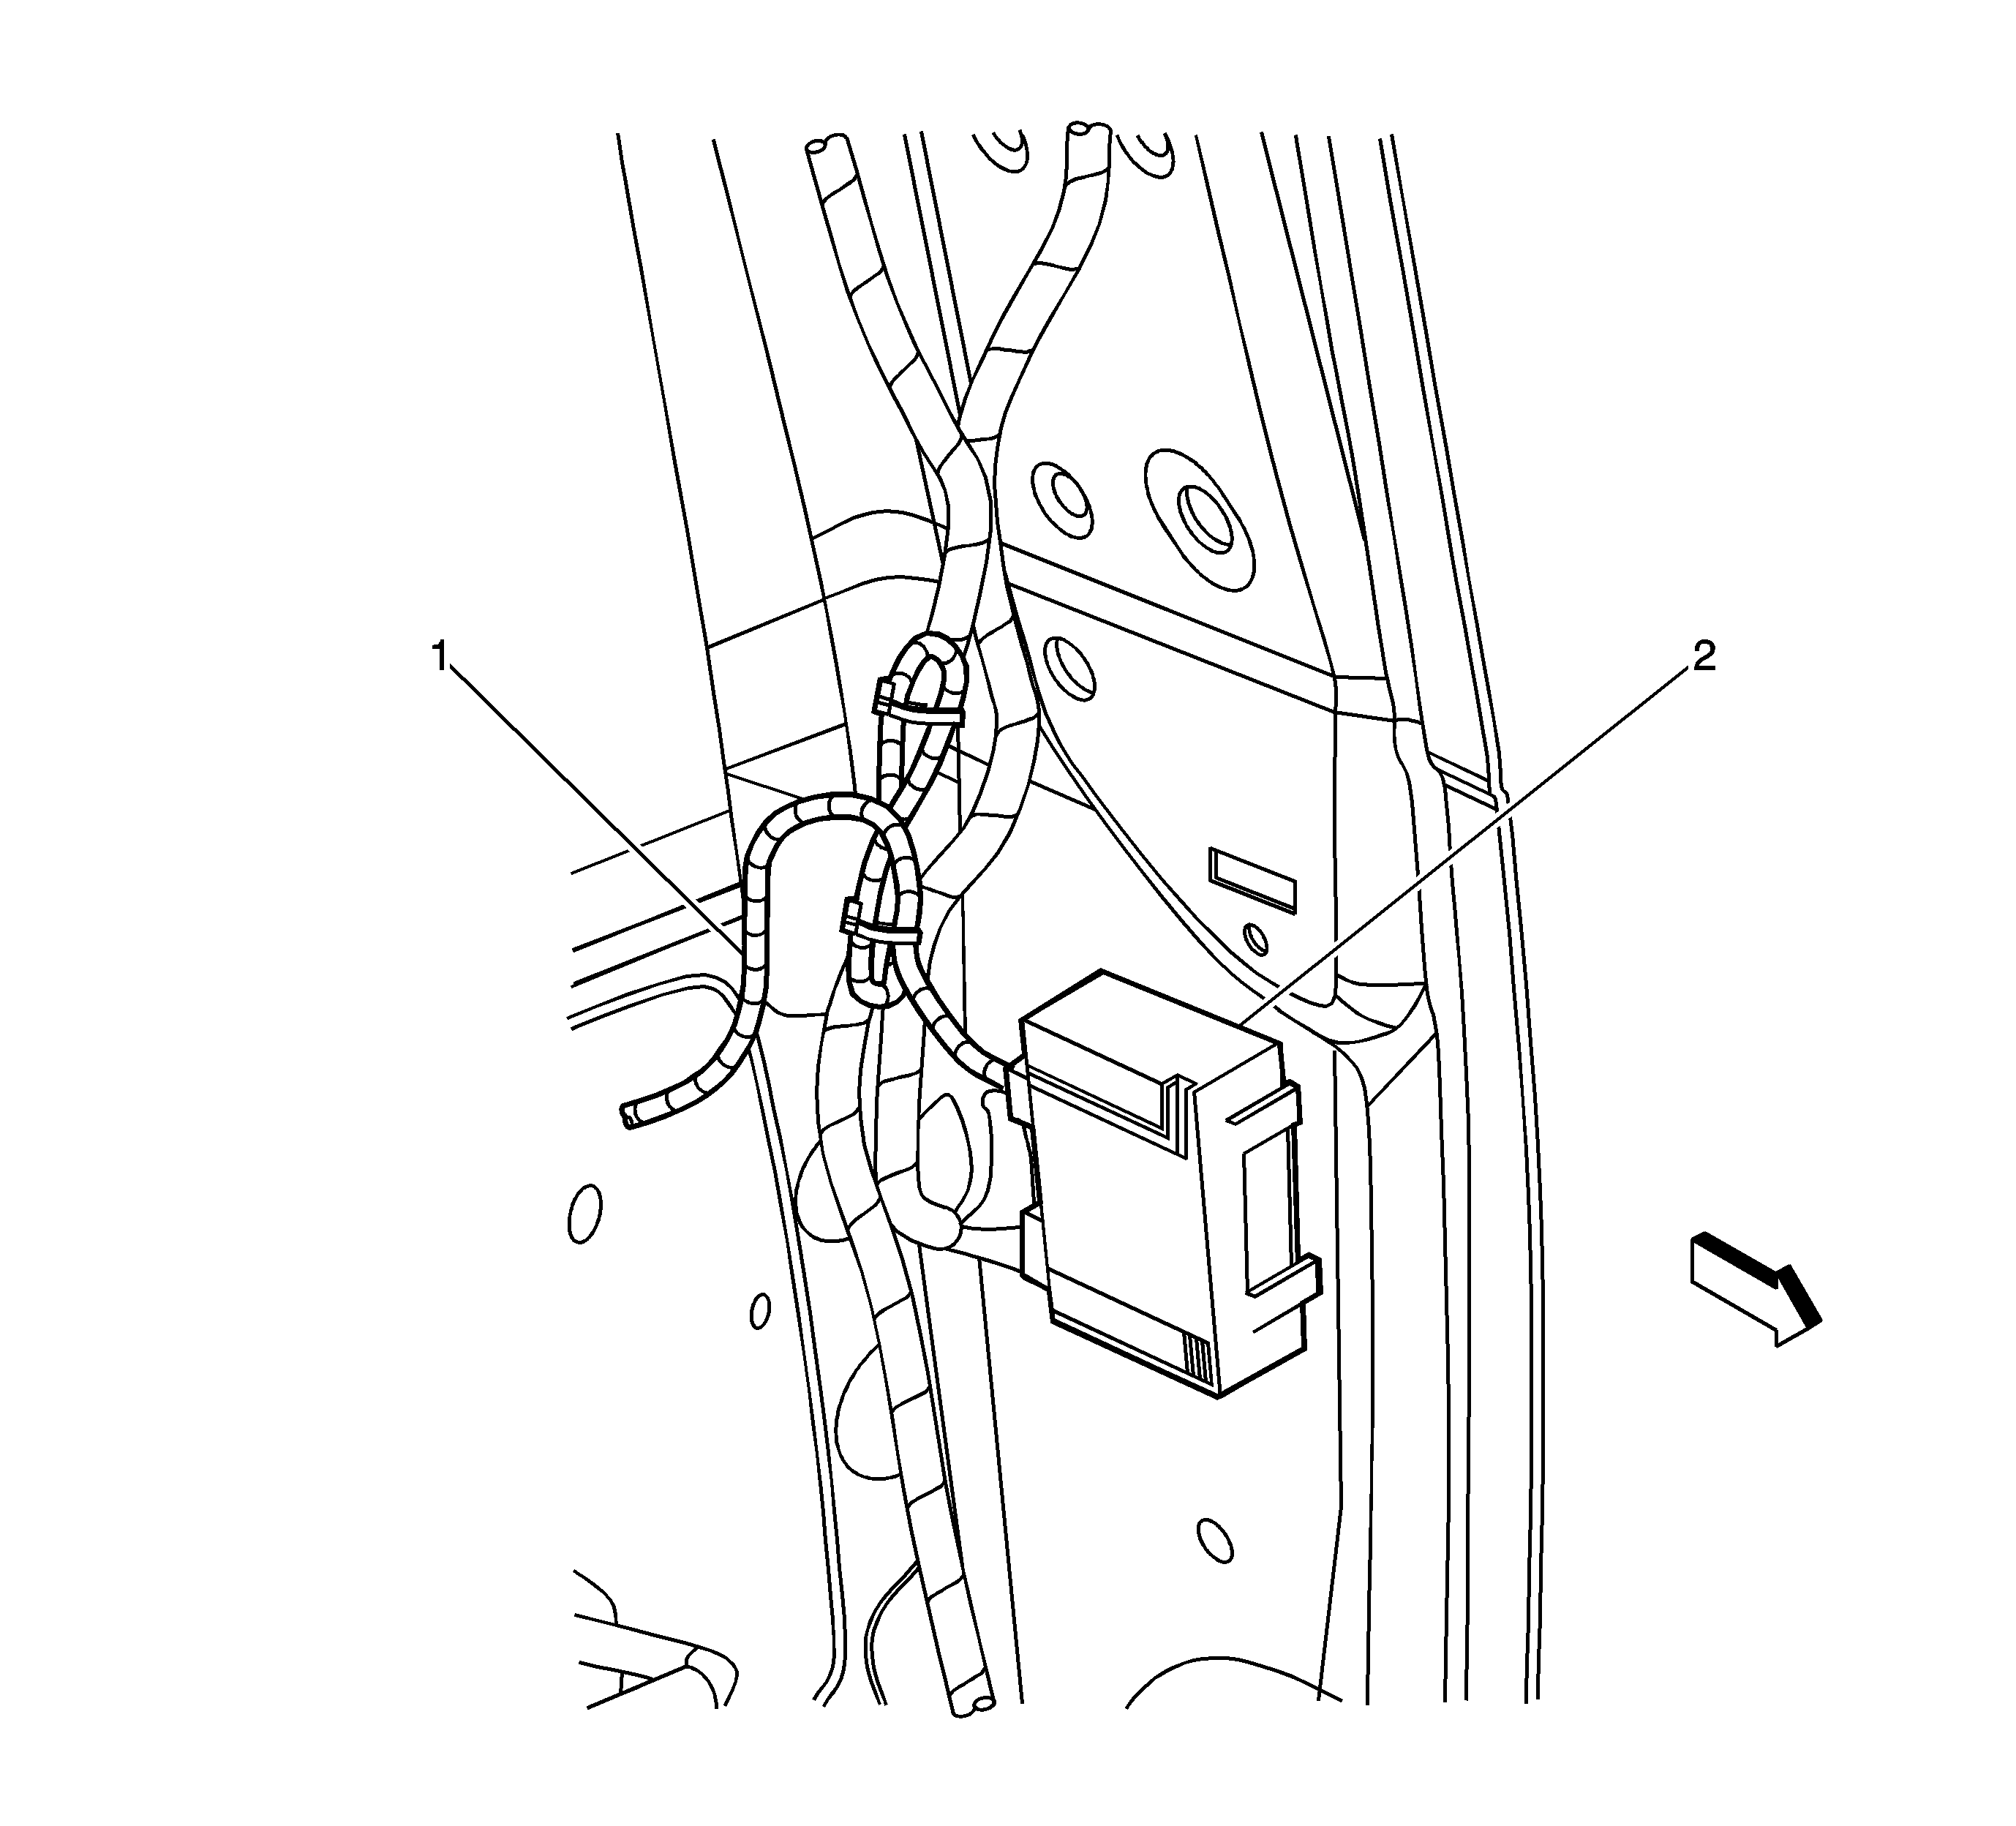
- Connect the antenna (1) to the 2-way RCDLR (2).
- Loop the excess antenna cable length into a "Figure 8" at least 100 mm (4 in) long and strap the antenna cable (1) to the main body harness with 2 tie wraps.


Important:
• The adhesion promoter must be used to assure adequate bonding of the antenna. • Mask off or protect areas before applying the adhesion promoter.


Important:
• Position the antenna according to the figure provided. A small change in placement will decrease the operating range of the system. • Do not touch the adhesive pad on the antenna.

Important: The antenna cable must be secured at the bottom of the molding (not routed behind the antenna) for the best performance of the system.

Important: Excess antenna cable length must being looped in a "Figure 8" no less than 100 mm (4 in) in length for the best performance of the system.
