For 1990-2009 cars only
Removal Procedure
- Remove the upper fan shroud. Refer to Fan Shroud Replacement .
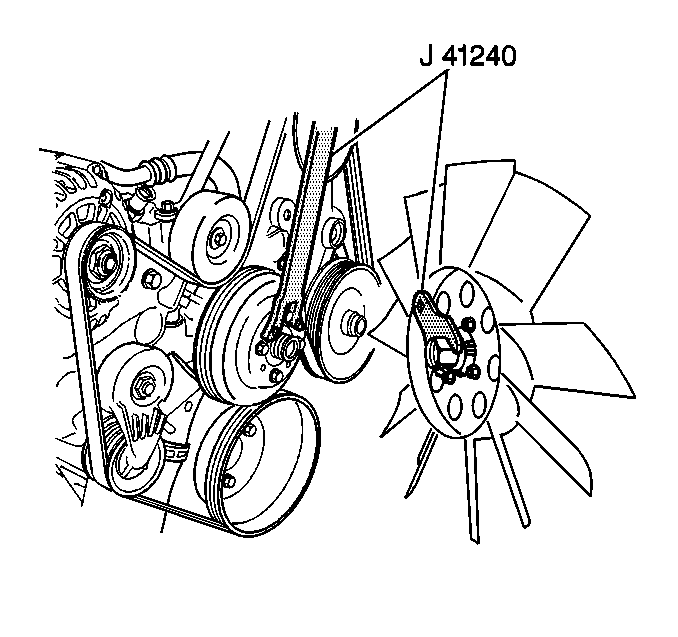
- Remove the fan clutch to the coolant pump drive pulley attaching nuts using J-41240 fan clutch wrench.
- Separate the fan clutch assembly from the coolant pump drive pulley.
- Remove the fan and the fan clutch as an assembly.
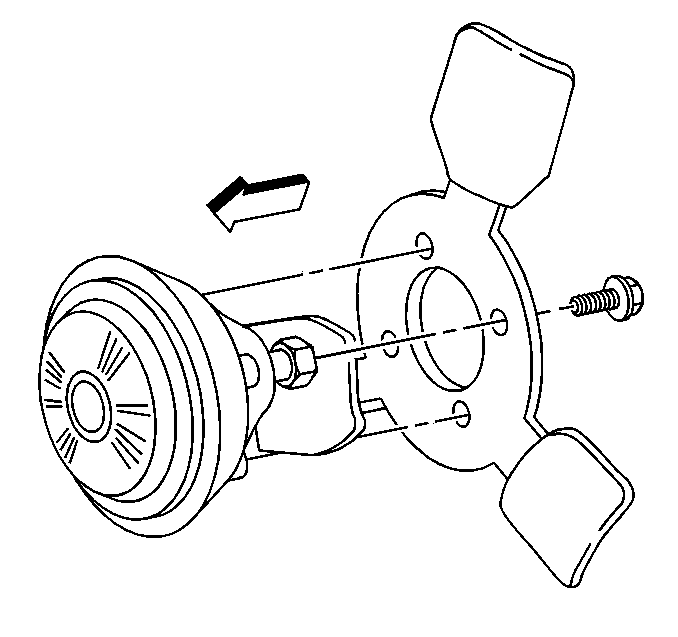
- Remove the fan-to-fan clutch mounting screws (2.2L w/o AC).
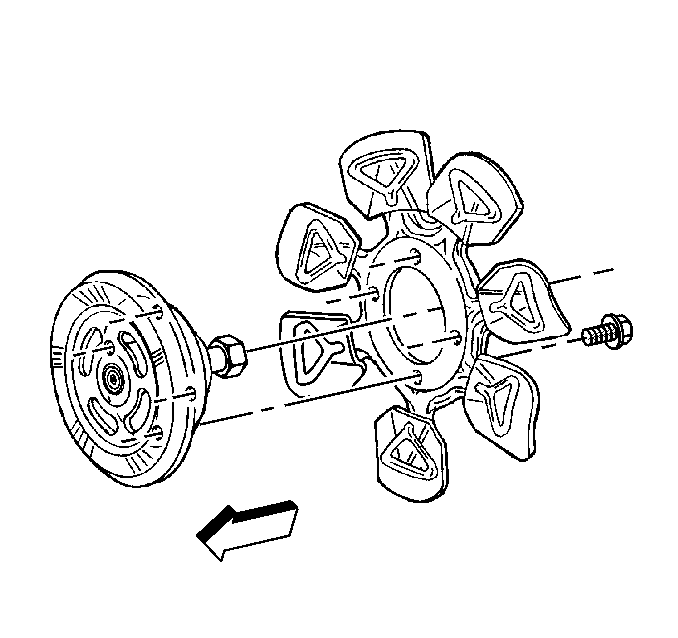
- Remove the fan to fan clutch mounting screws (4.3L all and 2.2L w/AC).
- Remove the fan from the clutch.
Caution: Do not use or attempt to repair a damaged cooling fan assembly. Replace damaged fans with new assemblies. An unbalanced cooling fan could fly apart causing personal injury and property damage.


Installation Procedure
- Install the fan to the fan clutch mounting (2.2L w/o AC).
- Install the fan to the fan clutch mounting (4.3L all and 2.2L w/AC).
- Install the upper fan shroud. Refer to Fan Shroud Replacement .
- Install the fan clutch to the coolant pump pulley using the J-41240 fan clutch wrench.
- Install the attaching nuts.
- Attach the fan to the clutch with the attaching screws.
- Refer to General Information.


Tighten
Tighten the screws to 33 N·m (24 lb ft).
Important: To maintain a balanced fan assembly, align the yellow paint mark on the fan clutch hub with the yellow paint mark on the water pump hub.
Tighten
Tighten the nuts to 24 N·m (17 lb ft).
