For 1990-2009 cars only
Removal Procedure
Tools Required
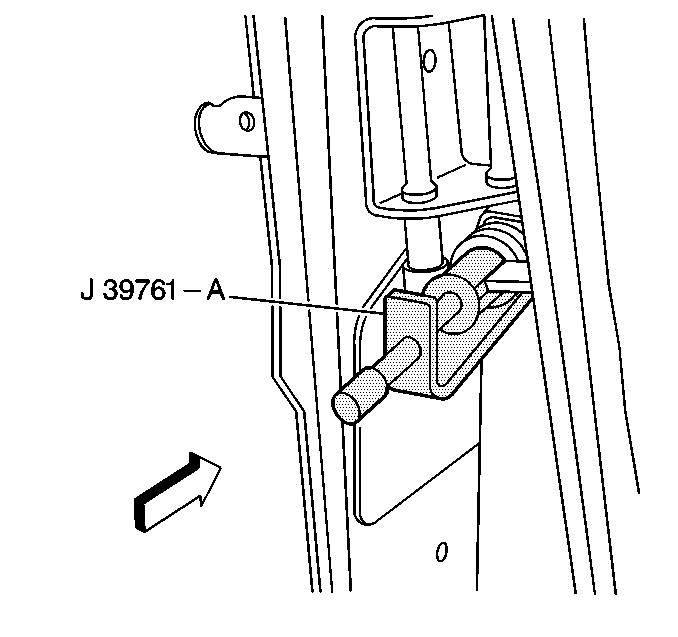
J 39761-A Rear Door Hinge Spring Tool
- Remove the body hinge pillar trim panel. Refer to Body Hinge Pillar Trim Panel Replacement - Left Side and Body Hinge Pillar Trim Panel Replacement - Right Side in Interior Trim.
- Remove the rubber grommet from the door and the B-pillar.
- Remove the cross-body wire harness connector.
- Apply cloth-backed tape to the door and the B-pillar in order to protect the door and the B-pillar from scratches.
- Use the J 39761-A in order to remove the door hinge spring.
- Remove the door hinge roller pin. Refer to Door Hinge Roller Pin Replacement .
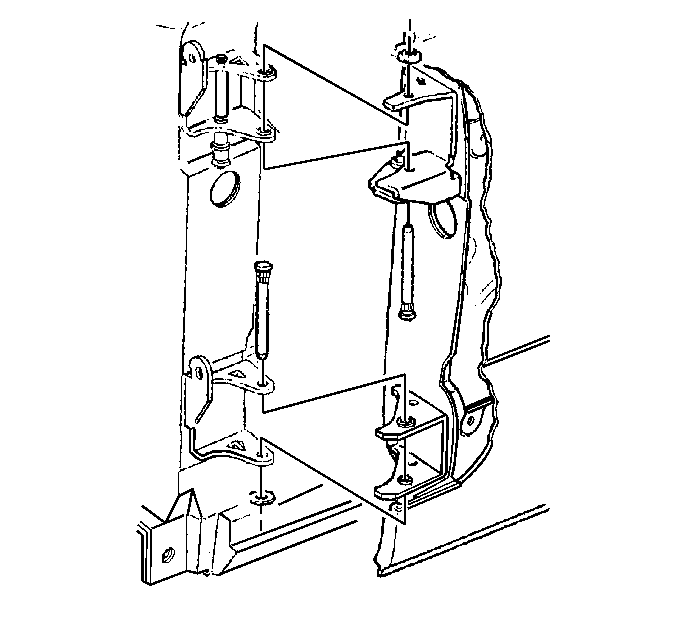
- Remove the hinge pin using a soft-faced hammer and locking pliers.
- Temporarily install a bolt through the lower hinge in order to hold the door in place.
- Remove the upper hinge pin.
- Remove the temporary bolt from the lower hinge.
- Remove the door from the vehicle.
- Remove and discard the door hinge pin bushings.


Installation Procedure
- Install the new door hinge pin bushings.
- Install the door to the vehicle.
- Temporarily install a bolt through the lower hinge in order to hold the door in place.
- Install the upper hinge pin.
- Remove the temporary bolt from the lower hinge.
- Install the lower hinge pin.
- Install the new hinge pin retainers to the hinge pins.
- Install the door hinge roller pin. Refer to Door Hinge Roller Pin Replacement .
- Use the J 39761-A in order to install the door hinge spring.
- Remove the tape from the door and the B-pillar.
- Install the cross-body wire harness connector.
- Install the rubber conduit to the door and the B-pillar.
- Install the body hinge pillar trim panel. Refer to Body Hinge Pillar Trim Panel Replacement - Left Side and Body Hinge Pillar Trim Panel Replacement - Right Side in Interior Trim.

Ensure that the pointed end of the pin is pointing upward.
Ensure that the pointed end of the pin is pointing downward.

