For 1990-2009 cars only
| Figure 1: |
Auxiliary Power Tray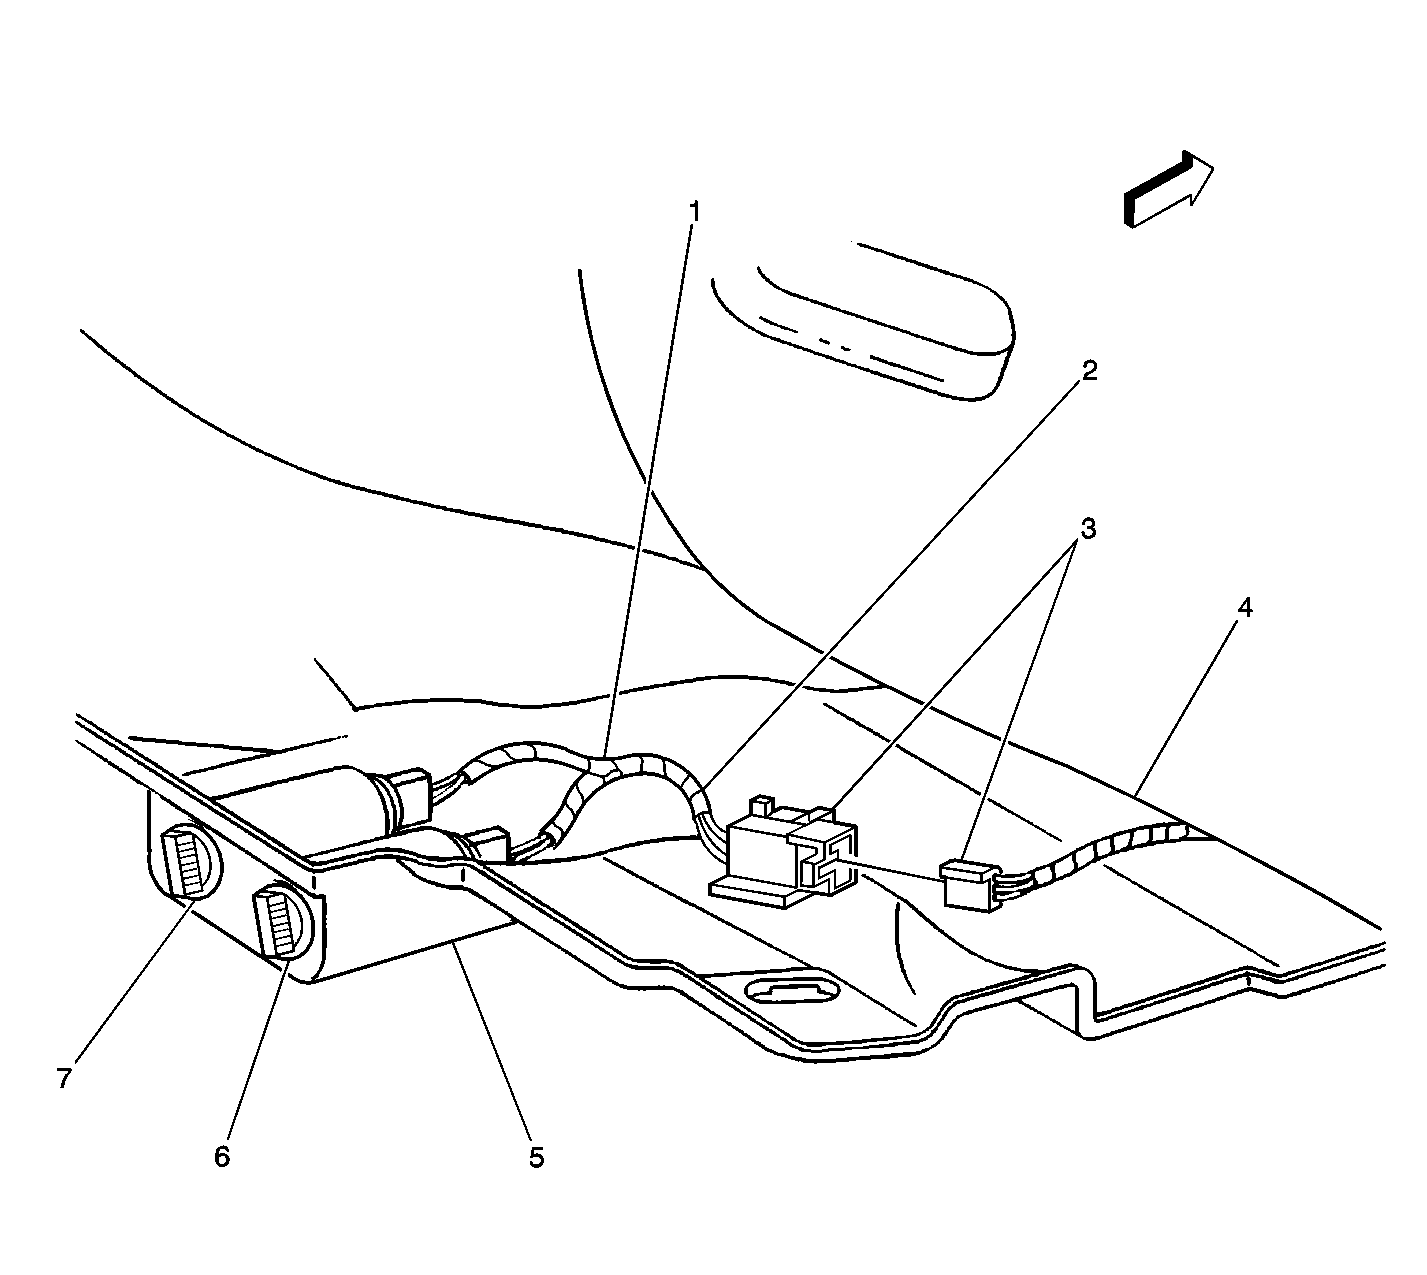
|
| Figure 2: |
Battery MegaFuse and Air Injection (AIR) Jumper Harness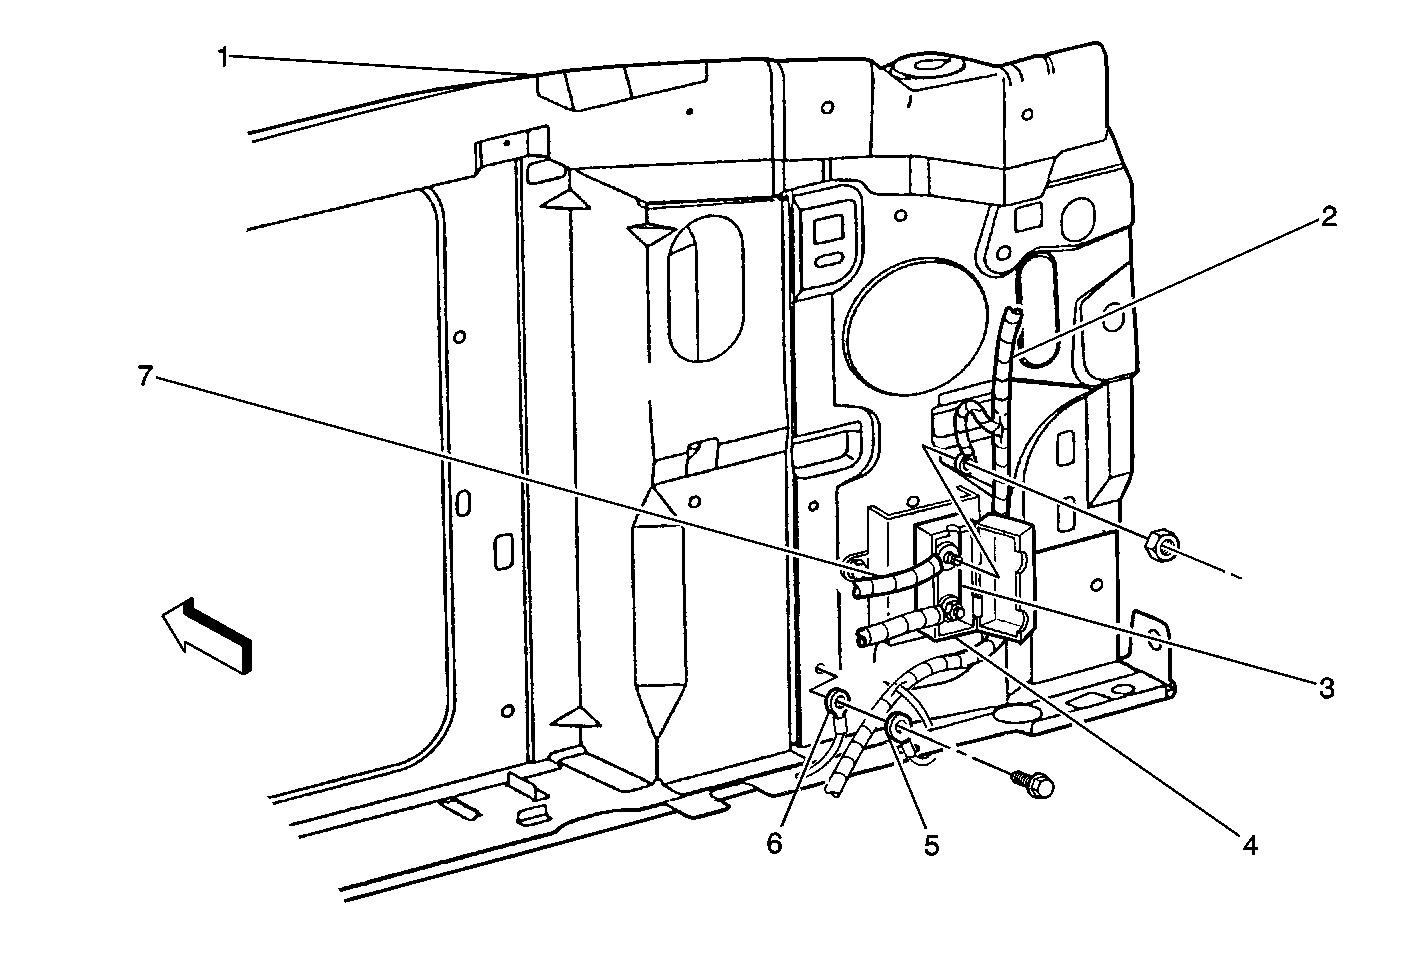
|
| Figure 3: |
Battery MegaFuse® Cable to Junction Block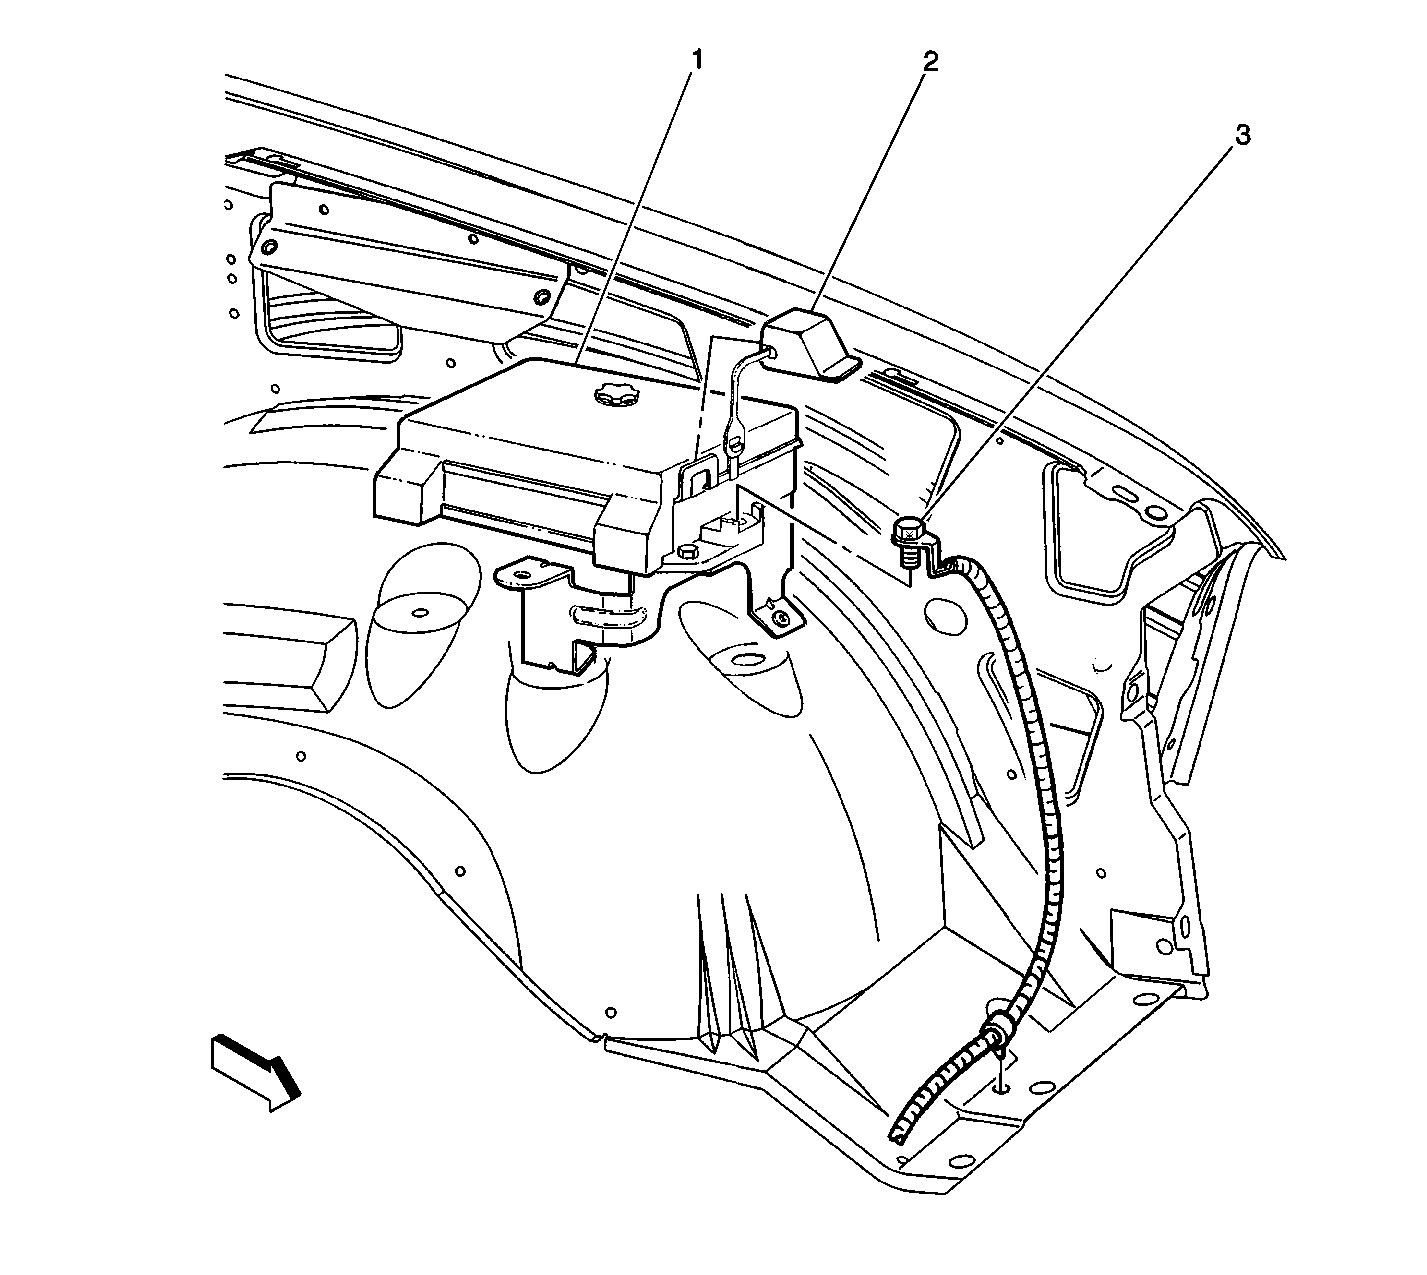
|
| Figure 4: |
Battery Negative Cable and Ground (2.2 L Engine)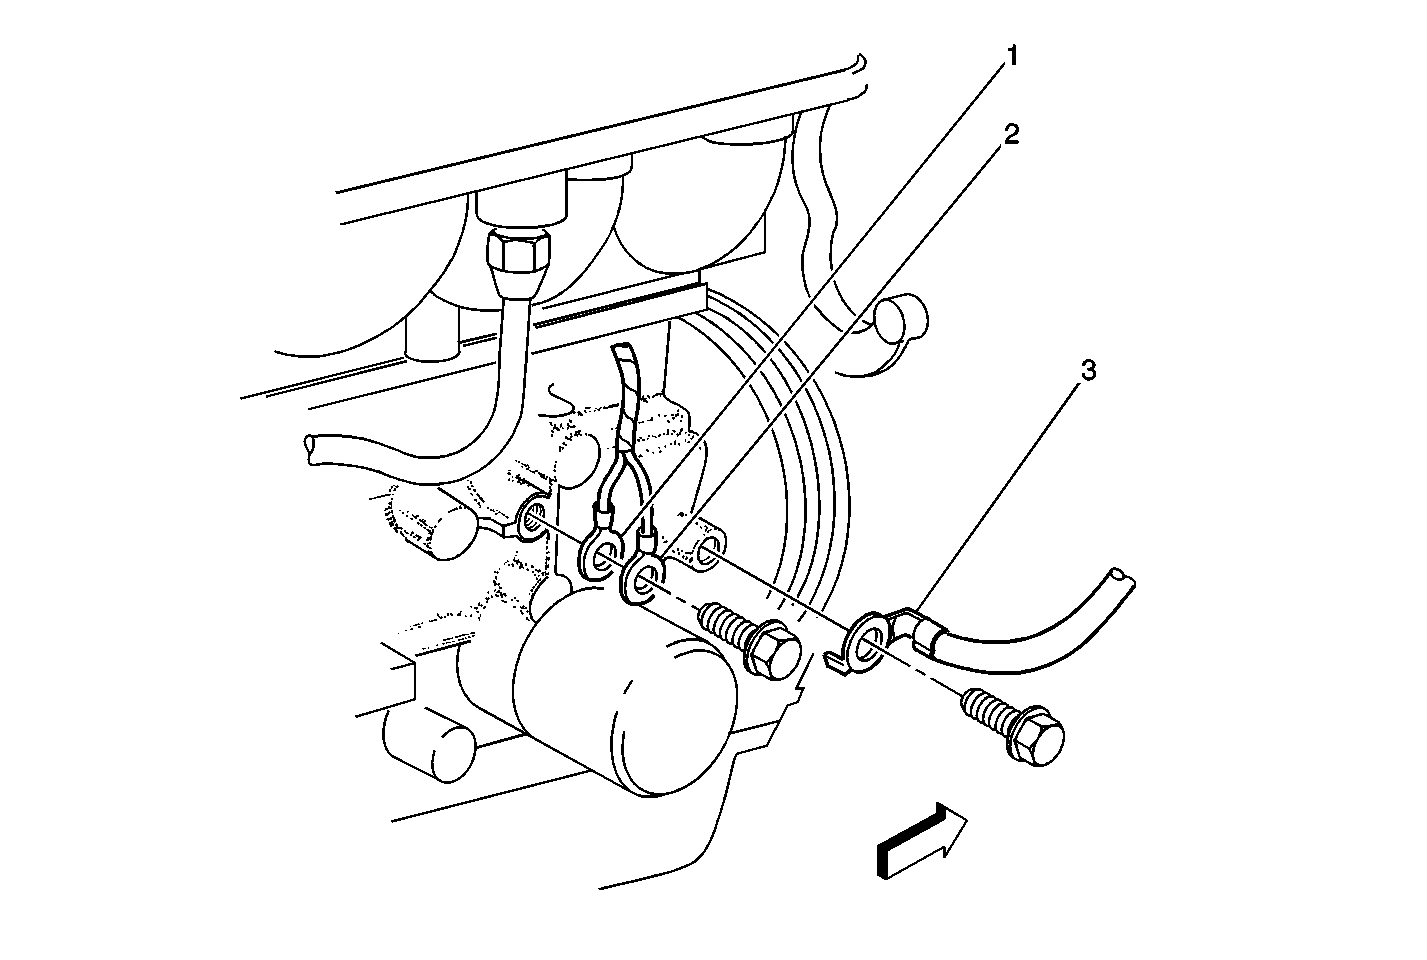
|
| Figure 5: |
Body Wiring to Body Side Trim Panel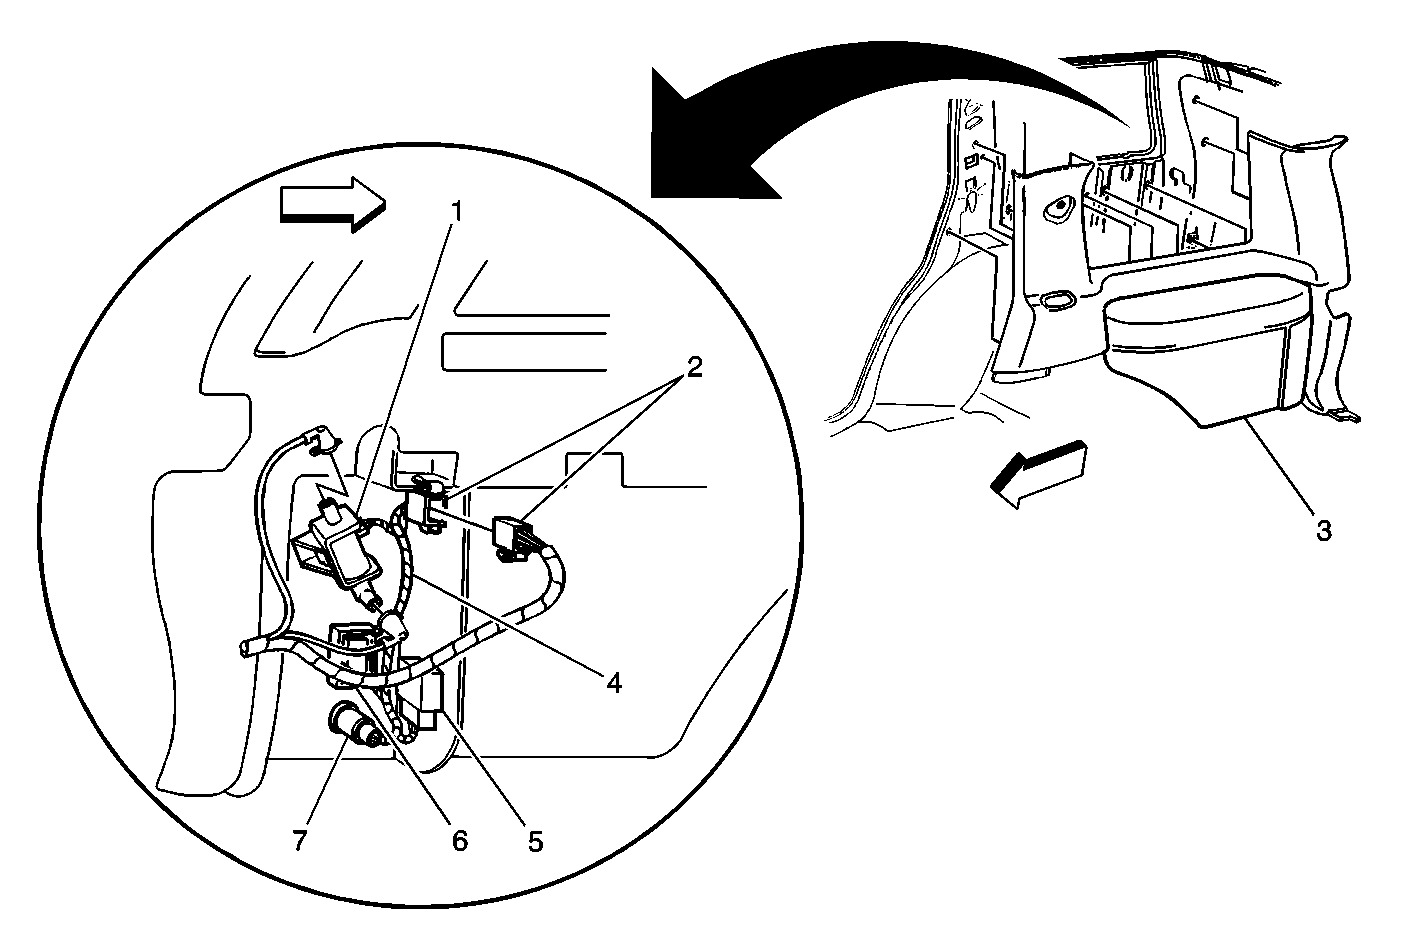
|
| Figure 6: |
Cigar Lighter and Envoy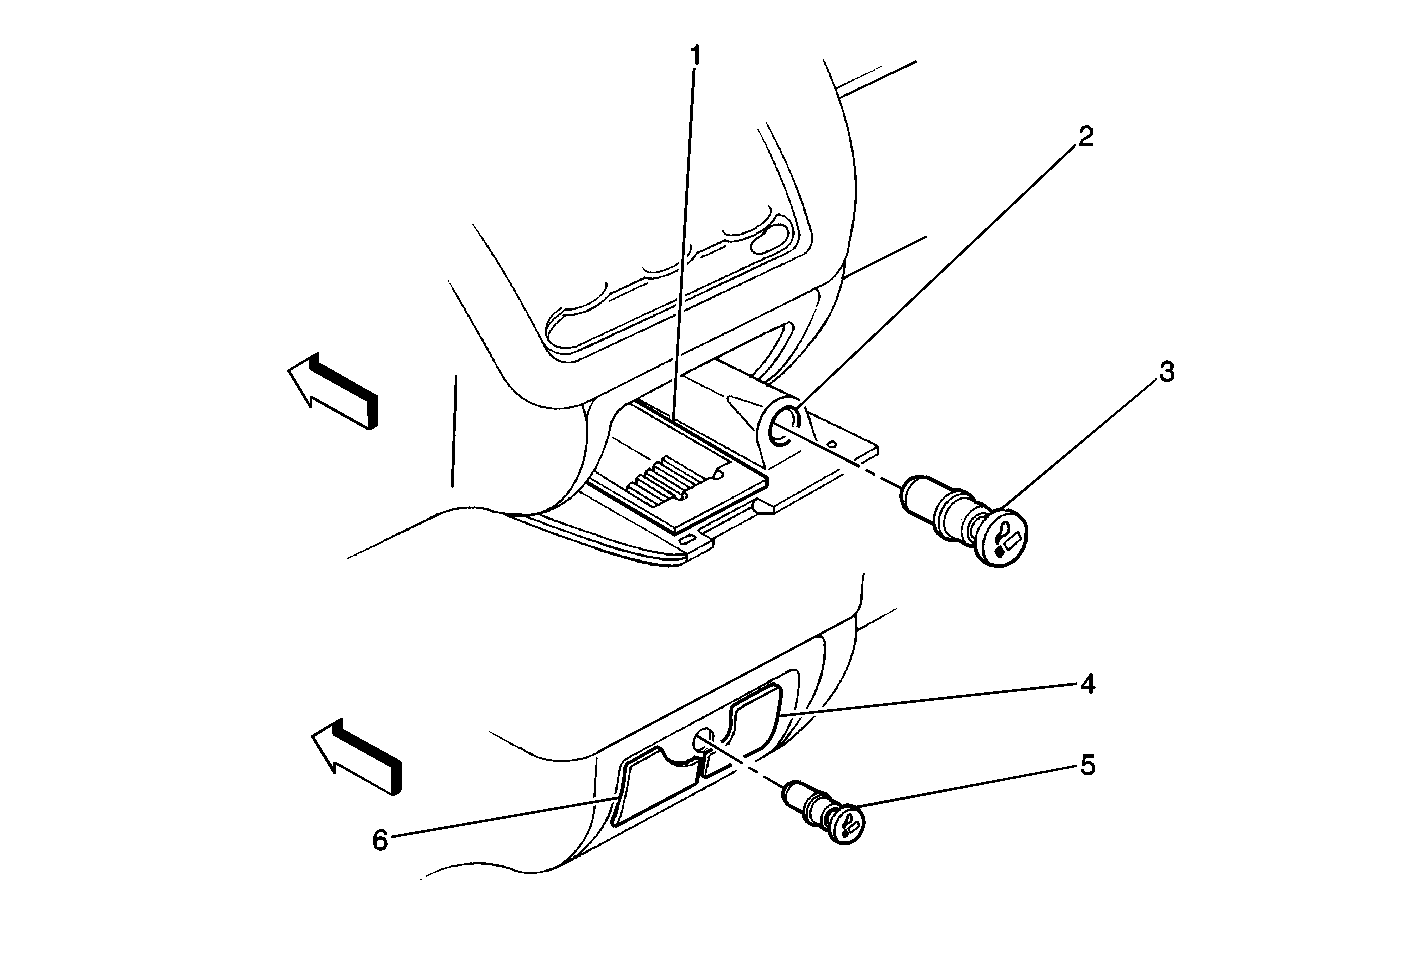
|
| Figure 7: |
Body Relay Block Relays
|
| Figure 8: |
Instrument Panel Fuse Block (Label)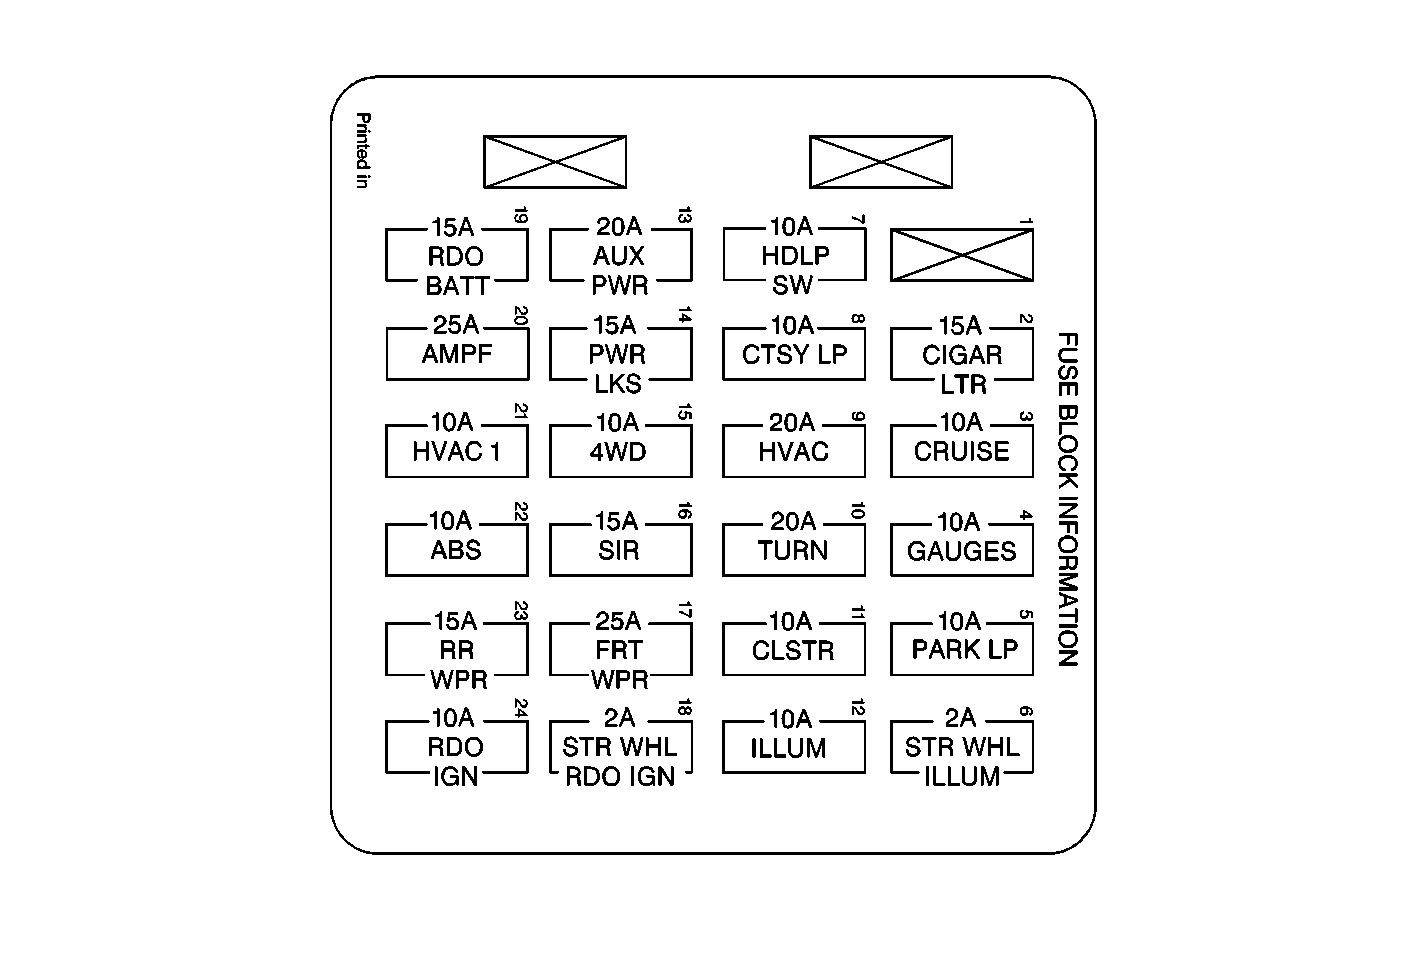
|
| Figure 9: |
Underhood Bussed Electrical Center (UBEC) Connector Location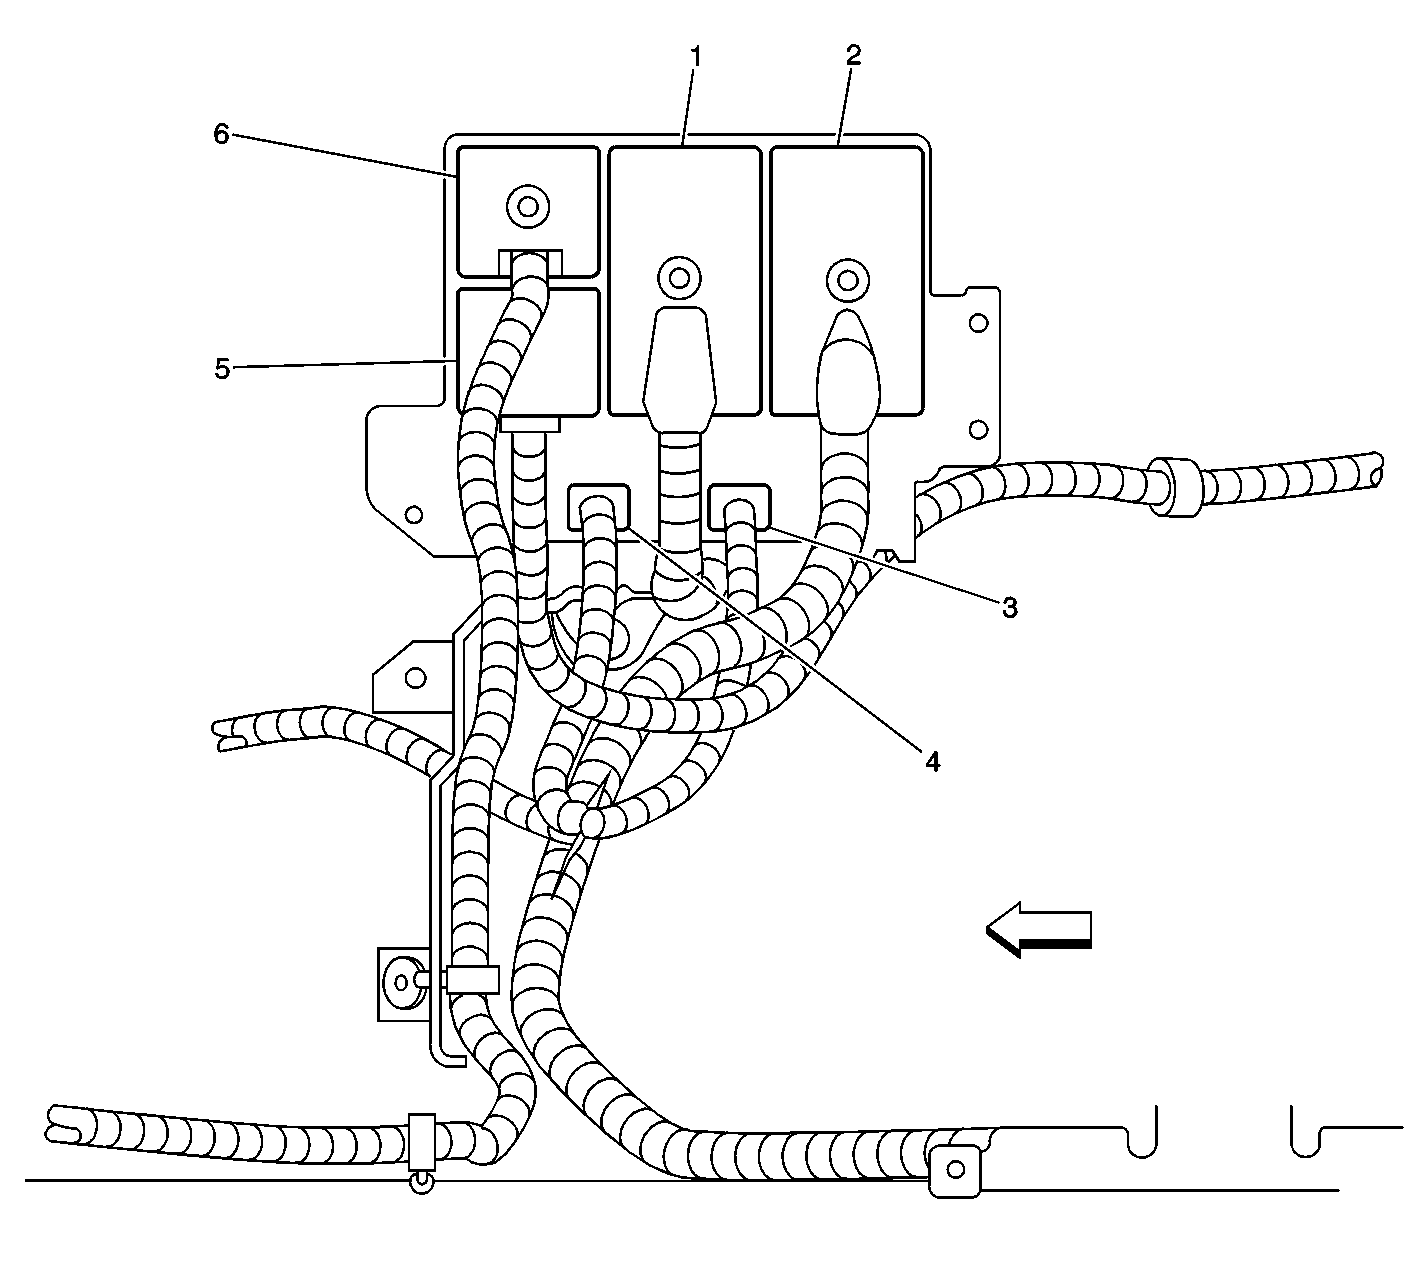
|
