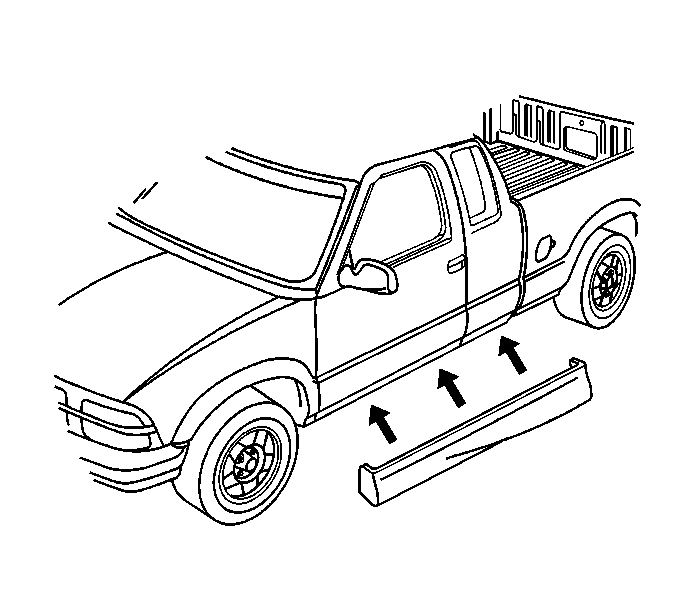
Rocker Panel Molding Replacement XTREME
Tools Required
J 25070 Heat Gun
Removal Procedure
- Raise the vehicle. Refer to Lifting and Jacking the Vehicle in General Information.
- Remove the fender flare.
- Remove the pushpins that retain the rocker molding to the vehicle.
- Use a heat gun J 25070 in a circular motion for 30 seconds 152 mm (6 in) from the surface in order to heat the rocker molding to 21-32°C (70-90°F).
- Use the plastic, flat-bladed tool to remove the rocker molding from the surface.
- Remove the rocker molding from the vehicle.
- Remove all adhesive from the rocker panel using 3M™ P/N 07501 or equivalent.
- Clean the rocker panel surface using Varnish Makers and Painters (VMP) naphtha and allow to air dry.
Installation Procedure
- Use a heat gun J 25070 in a circular motion for 30 seconds 152 mm (6 in) from the surface in order to heat the rocker panel to 21-32°C (70-90°F).
- Remove the protective liner form the back side of the rocker molding.
- Install the rocker molding to the vehicle.
- Install the pushpins that retain the rocker molding to the vehicle.
- Install the fender flare .
- Lower the vehicle.
Important: Do not touch the adhesive backing on the molding.
Press the molding firmly and evenly in order to ensure that the tape seats properly.
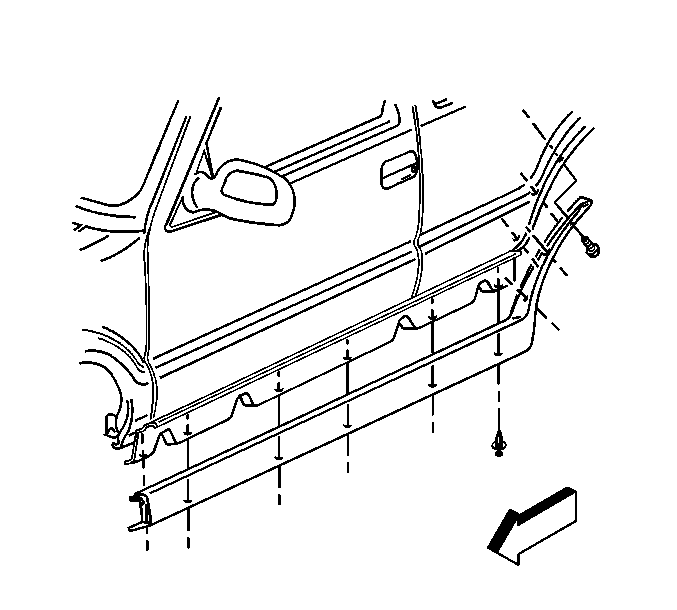
Rocker Panel Molding Replacement Blazer
Removal Procedure
- Remove the front fender lower rocker panel molding.
- Remove the push pin retainer.
- Remove the screw from the rear wheel opening.
- Carefully lift up on the rocker panel molding in order to remove the rocker panel molding from the vehicle.
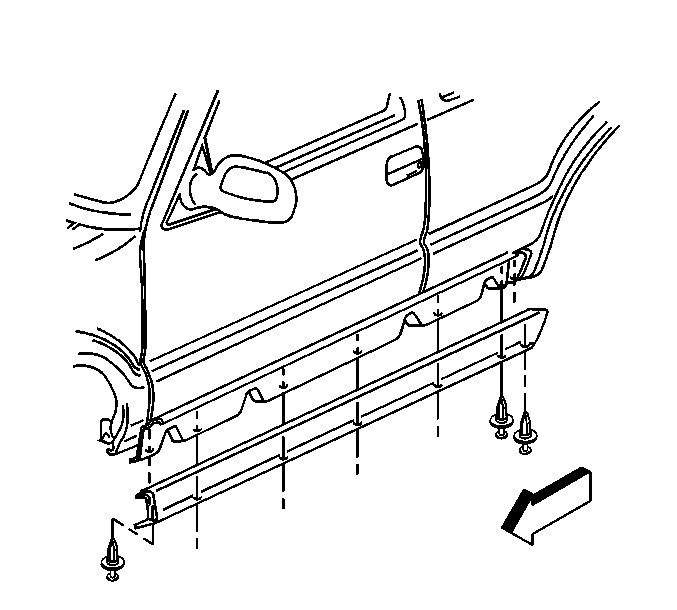
Installation Procedure
- Install the rocker panel molding to the vehicle.
- Install the screw to the rear wheel opening.
- Install the push pin retainers. Gently push up on the rocker panel molding until the rocker panel molding is flush with the metal retaining channel.
Important: When installing the rocker panel molding, pull the lower portion of the rocker panel molding away from the vehicle in order to help install the rocker panel molding to the retaining channel.
Notice: Use the correct fastener in the correct location. Replacement fasteners must be the correct part number for that application. Fasteners requiring replacement or fasteners requiring the use of thread locking compound or sealant are identified in the service procedure. Do not use paints, lubricants, or corrosion inhibitors on fasteners or fastener joint surfaces unless specified. These coatings affect fastener torque and joint clamping force and may damage the fastener. Use the correct tightening sequence and specifications when installing fasteners in order to avoid damage to parts and systems.
Tighten
Tighten the rocker panel molding screw to 7 N·m (62 lb in).
Important: Install the rocker panel molding all the way into the channel in order to eliminate the air gap.
Rocker Panel Molding Replacement Bravada
Removal Procedure
- Remove the 7 retainers that secure the panel to the retainer.
- Remove the rocker panel molding.
Installation Procedure
- Load the molding horizontally inboard to the rocker retainer in order to engage the top flange of the molding with the channel at the top of the retainer.
- Install the molding to the retainer using the pushpin retainers.
Important: The net locator hole is the second hole from the rear.
| 2.1. | Install the first retainer in the net locating hole on the bottom of the molding. |
| 2.2. | Install the remaining pushpin retainers through the slots in the molding into the retainer holes. |
Rocker Panel Molding Replacement Jimmy
Removal Procedure
- Remove the 7 retainers that secure the panel to the retainer.
- Remove the rocker panel molding.
Installation Procedure
- Load the molding horizontally inboard to the rocker retainer in order to engage the top flange of the molding with the channel at the top of the retainer.
- Install the molding to the retainer.
Notice: Use the correct fastener in the correct location. Replacement fasteners must be the correct part number for that application. Fasteners requiring replacement or fasteners requiring the use of thread locking compound or sealant are identified in the service procedure. Do not use paints, lubricants, or corrosion inhibitors on fasteners or fastener joint surfaces unless specified. These coatings affect fastener torque and joint clamping force and may damage the fastener. Use the correct tightening sequence and specifications when installing fasteners in order to avoid damage to parts and systems.
| 2.1. | Align the molding fore-aft against the rear wheel opening. |
| 2.2. | Install the 3 screws into the door frame. |
Install the top screw first while pushing the molding inboard.
Tighten
Tighten the molding screws to 1.9 N·m (17 lb in).
| 2.3. | Install the 6 pushpin retainers through the slots in the molding into the retainer holes. |
