Tools Required
| • | J 22888-20A Crankshaft Gear Puller |
| • | J 5590 Crankshaft Gear Installer |
Removal Procedure
- Remove the engine front cover. Refer to Engine Front Cover Replacement .
- Install a bolt in the end of the crankshaft.
- Rotate the crankshaft until the number 1 piston is at Top Dead Center (TDC) of the compression stroke.
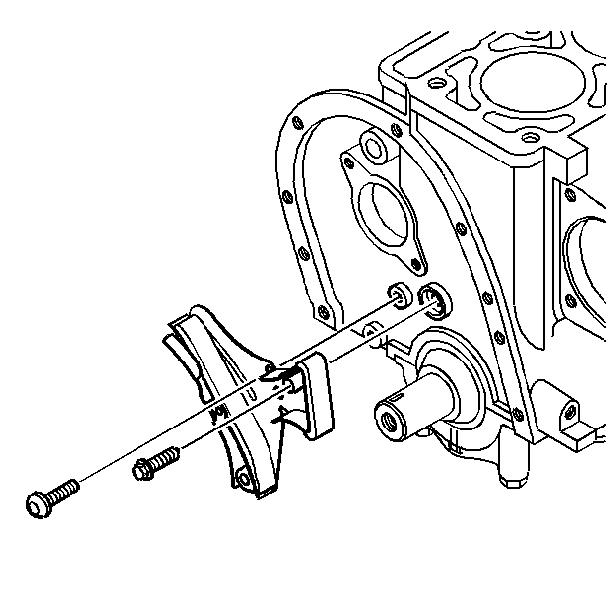
- Remove the timing chain tensioner bolts.
- Remove the timing chain, the timing chain tensioner, and the camshaft sprocket at the same time.
- If replacing camshaft, remove the camshaft position sensor. Refer to Camshaft Position Sensor Replacement in Engine Controls 2.2 L (LN2)
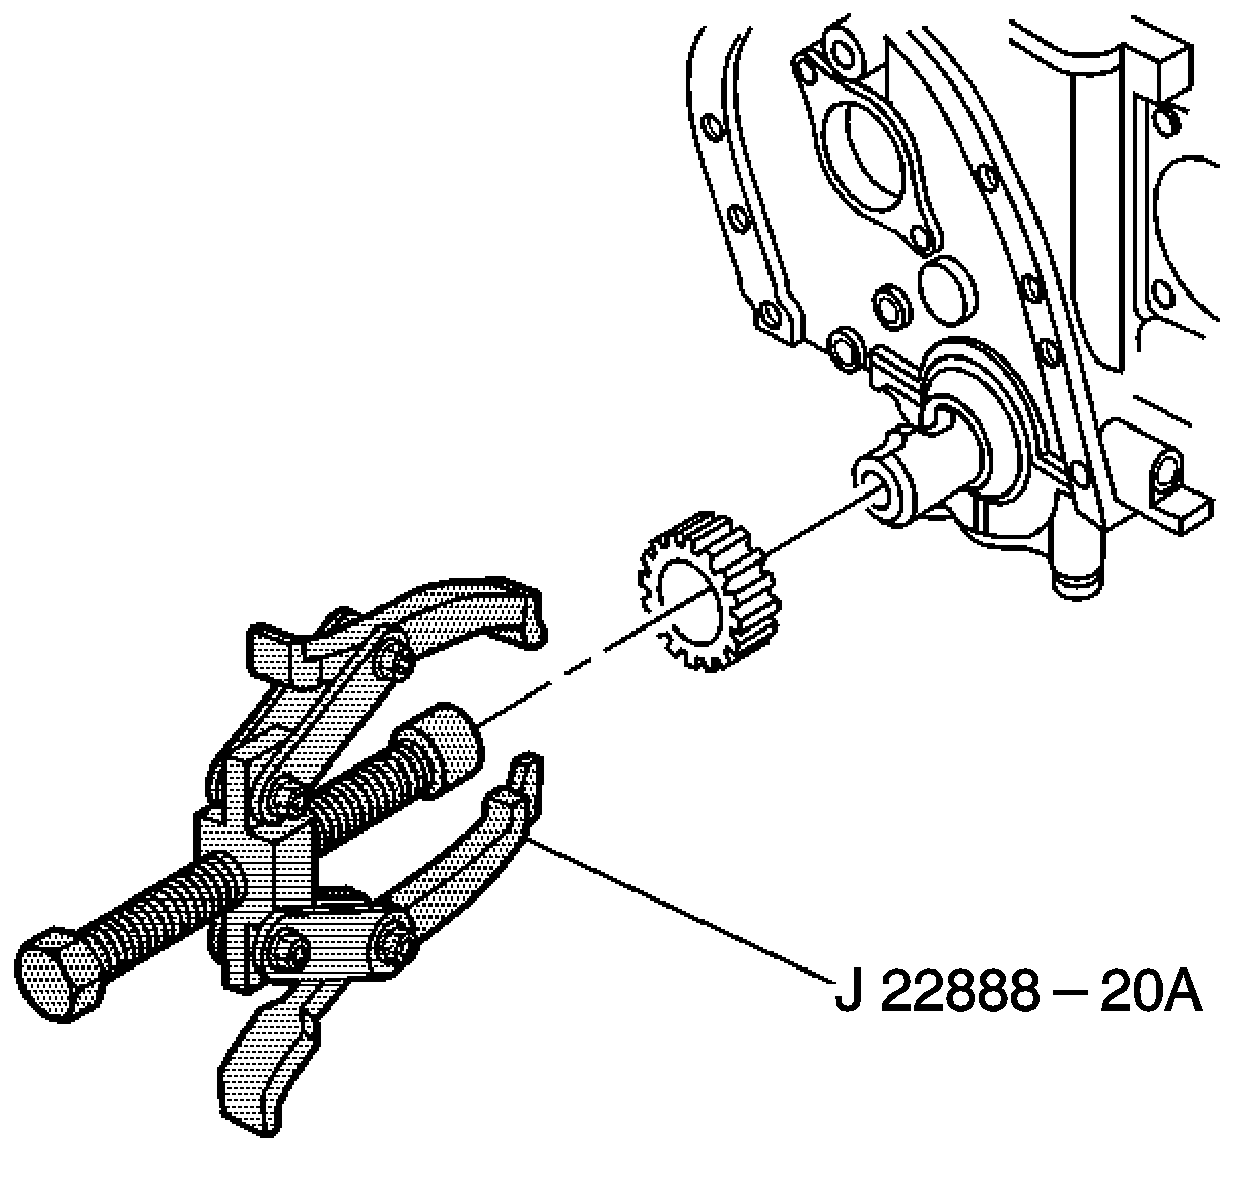
- Remove the crankshaft sprocket. Use the J 22888-20A .
- Clean and inspect the timing chain and sprockets.
Notice: In order to rotate the engine install a bolt with the same threads as the crankshaft, but do not use the crankshaft balancer bolt or a bolt longer than 1 inch, in the crankshaft. Failing to do so will cause damage to the bolt threads and the crankshaft threaded hole when removing the bolt.
Notice: Align the timing marks before removing the timing chain. If it is necessary to turn either the camshaft or the crankshaft with the timing chain removed, loosen or remove the valve rocker arms. Turning either the crankshaft or camshaft with the timing chain removed may cause the pistons to contact the valves, resulting in damage.
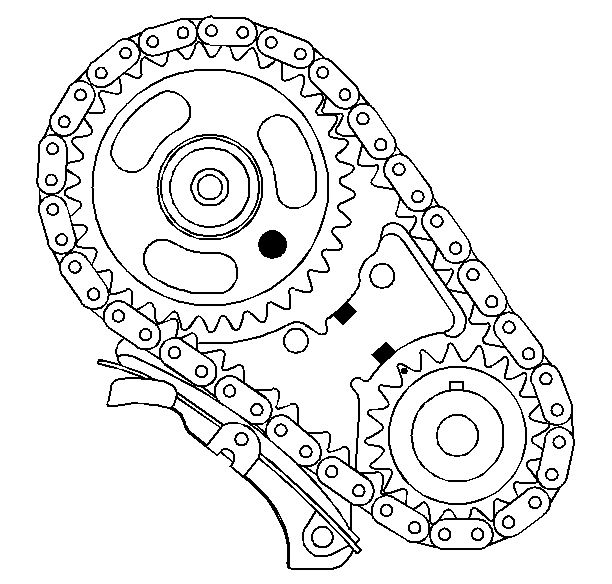
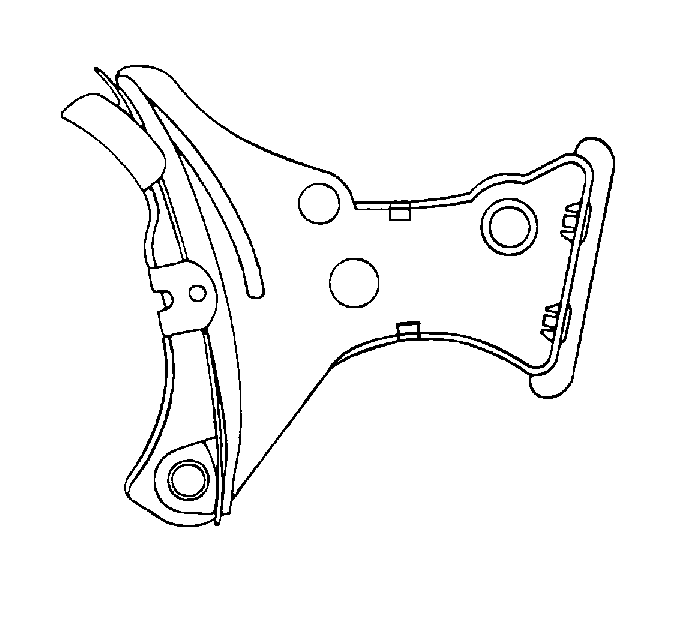
Make sure the camshaft sprocket alignment mark, which is an 8 mm (0.31 in) hole, and the stamped circle in the crankshaft sprocket align with the tabs on the timing chain tensioner.
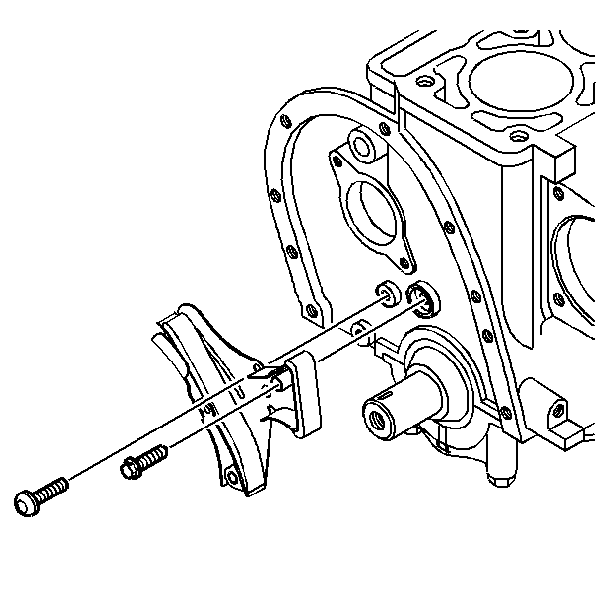
Important: Before removing the timing chain, measure the distance between the hole in the bracket and the unworn surface of the timing chain tensioner shoe.
If the distance between the hole and the unworn surface of the timing chain tensioner shoe is more than 8 mm (0.314 in), replace the tensioner, timing chain, and both sprockets.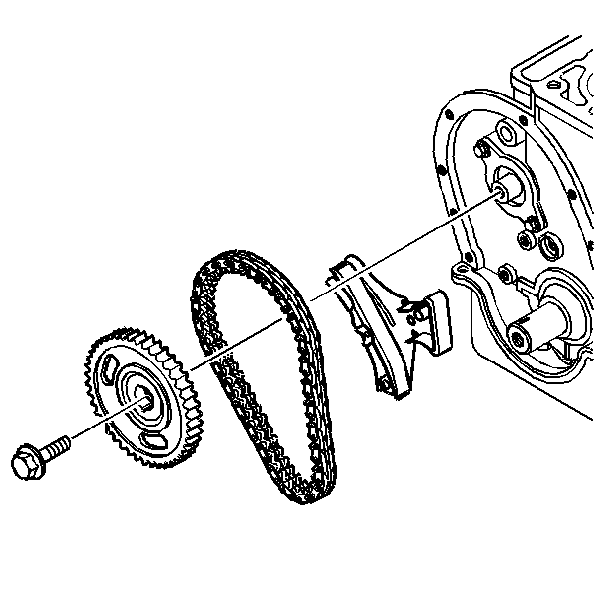
Notice: Do not replace only the tensioner or the chain to correct a noise condition caused by the camshaft drive components. When replacing the tensioner or chain to correct a noise condition all of the camshaft drive components must be replaced.
Installation Procedure
- Install crankshaft sprocket alignment key.
- Install the crankshaft sprocket using J 5590 .
- Install the timing chain and install the timing chain tensioner.
- Compress the timing chain tensioner spring.
- Insert a cotter pin or a nail into the hole in the tensioner to retain the timing chain tensioner shoe.
- Install the timing chain tensioner. Do not tighten the timing chain tensioner bolts.
- Align the crankshaft sprocket timing mark with the tab on the timing chain tensioner.
- Align the camshaft sprocket timing mark with the tab on the timing chain tensioner.
- Install the camshaft sprocket and install the timing chain.
- Remove the cotter pin or nail from the hole in the timing chain tensioner.
- Remove the bolt from the end of the crankshaft.
- Install the engine front cover. Refer to Engine Front Cover Replacement .
Important: If any of the camshaft drive components are being replaced to correct a noise condition, replace all of the components in the camshaft drive system.
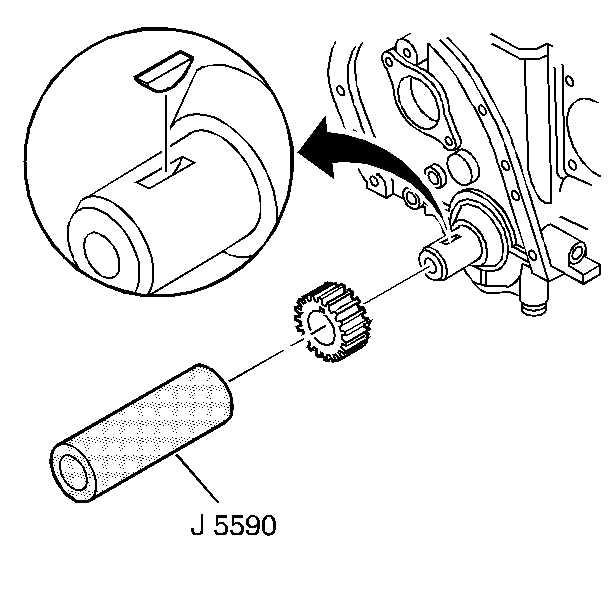
Important: Install crankshaft sprocket alignment key.
If any of the camshaft drive components are being replaced to correct a noise condition, replace all of the components in the camshaft drive system.Make sure that the crankshaft sprocket is seated against the crankshaft.

Notice: Use the correct fastener in the correct location. Replacement fasteners must be the correct part number for that application. Fasteners requiring replacement or fasteners requiring the use of thread locking compound or sealant are identified in the service procedure. Do not use paints, lubricants, or corrosion inhibitors on fasteners or fastener joint surfaces unless specified. These coatings affect fastener torque and joint clamping force and may damage the fastener. Use the correct tightening sequence and specifications when installing fasteners in order to avoid damage to parts and systems.
Tighten
| • | Tighten the timing chain tensioner bolts to 24 N·m (18 lb ft). |
| • | Tighten the camshaft sprocket bolt to 130 N·m (96 lb ft). |

