For 1990-2009 cars only
Removal Procedure
Tools Required
| • | J 22794 Spark Plug Port Adapter |
| • | J 5892-D Valve Spring Compressor |
- Disconnect the battery negative cable. Refer to Battery Replacement in Engine Electrical.
- Drain the cooling system. Refer to Cooling System Draining and Filling in Engine Cooling.
- Remove the valve rocker arm cover from the cylinder head. Refer to Valve Rocker Arm Cover Replacement .
- Remove both heater hoses from the heater core. Refer to Heater Hoses Replacement in Heater and Ventilation (Non-A/C).
- Remove the spark plugs from the cylinder head. Refer to Spark Plug Replacement in Engine Electrical.
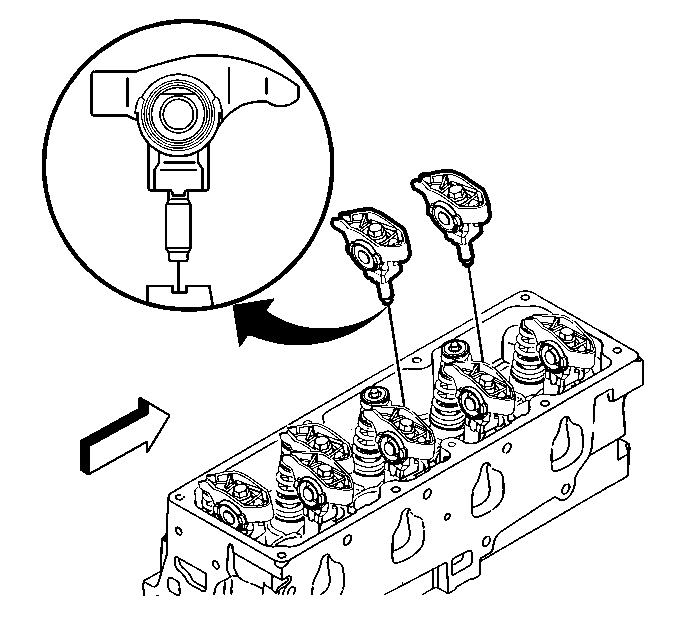
- Remove the valve rocker arm (s) from the cylinder head. Refer to Valve Rocker Arm and Push Rod Removal .
- Install the J 22794 to the spark plug hole in the cylinder head.
- Apply compressed air in order to hold the valve in place.
- Tap the valve retainer with a soft-faced hammer in order to loosen the valve keys.
- Install an 8 mm by 65 mm bolt with a hardened washer into the rocker arm bolt hole.
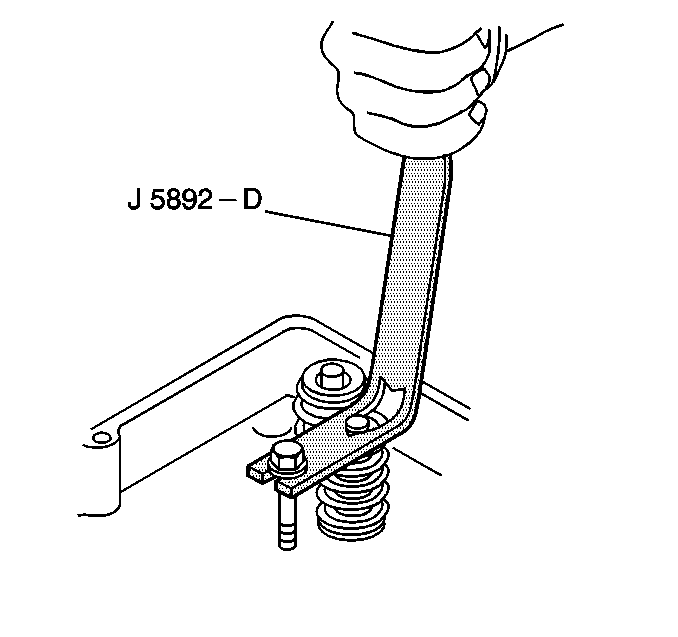
- Place the J 5892-D over the valve spring.
- Compress the valve spring with the J 5892-D .
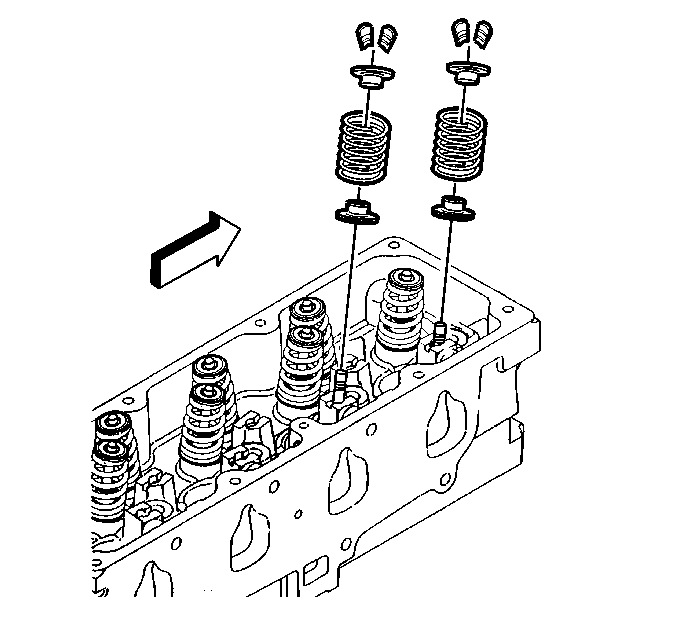
- Remove the valve keys.
- Carefully release the spring tension.
- Remove the J 5892-D .
- Remove the valve spring cap.
- Remove the valve spring.
- Remove the valve stem oil seal.
- Clean and inspect all parts. Refer to Cylinder Head Cleaning and Inspection .


Installation Procedure
Tools Required
| • | J 22794 Spark Plug Port Adapter |
| • | J 5892-D Valve Spring Compressor |
| • | J 38820 Valve Seal Installer |
- Lubricate the outside of the valve guide and the valve seal with clean engine oil.
- Using the J 38820 install the valve spring seat and seal unit onto the guide. Push and twist the valve seal into position on the valve guide until the spring seat flange is flush with the cylinder head surface.
- Set the valve spring in place.
- Set the valve spring cap in place.
- Compress the valve spring with the J 5892-D .
- With air pressure still applied, install the valve keys. Use grease in order to hold the valve keys in place.
- Remove the J 5892-D from the valve spring.
- Remove the J 22794 from the cylinder head.
- Remove the 8 mm by 65 mm bolt and washer.
- Install the valve rocker arms to the cylinder head. Refer to Valve Rocker Arm and Push Rod Installation .
- Install the spark plugs to the cylinder head. Refer to Spark Plug Replacement in Engine Electrical.
- Install both heater hoses on to the heater core. Refer to Heater Hoses Replacement in Heater and Ventilation (Non-A/C).
- Install the valve rocker arm cover. Refer to Valve Rocker Arm Cover Replacement .
- Fill the cooling system. Refer to Cooling System Draining and Filling in Engine Cooling.
- Connect the battery negative cable. Refer to Battery Replacement in Engine Electrical.

Important: The LN2 Engine uses a unique valve spring seat and seal combination unit. Under no circumstances should this seal and seat unit be replaced with a different type of seal. Use care to ensure that the valve stem seal and spring seat are not damaged during installation. Do not use excessive force or a hammer to install the seal on the guide. The seal will go on if straight and properly lubricated using hand pressure only.


