Body Side Trim Panel Replacement Standard Cab Pickup
Removal Procedure
- Remove the door sill trim plate. Refer to Door Sill Plate Replacement .
- Remove the coat hook. Refer to Coat Hook Replacement .
- Remove the upper and the lower seat belt anchor bolts.
- Disconnect the electrical connectors, as needed.
- Remove the shoulder belt opening trim cover.
- Feed the seat belt through the trim cover.
- Remove the body side trim panel from the vehicle.
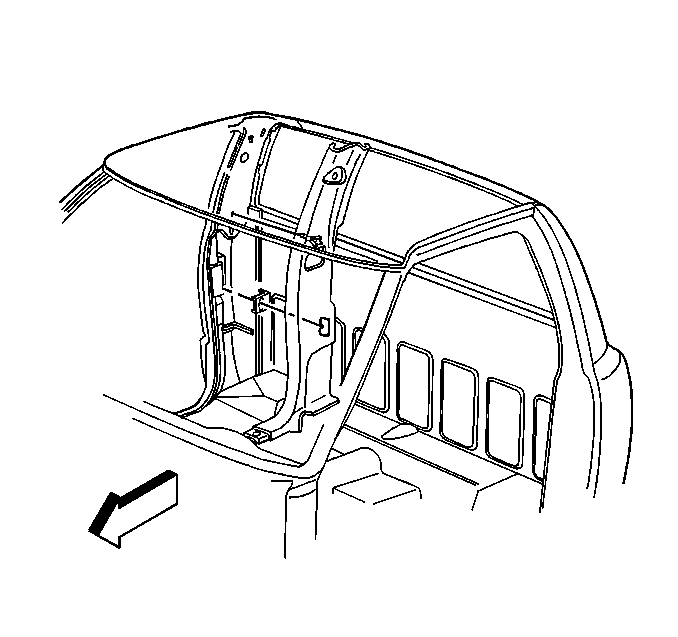
Installation Procedure
- Feed the seat belt through the trim panel.
- Install the shoulder belt opening trim cover.
- Connect the electrical connectors, as needed.
- Install the body side trim panel to the vehicle.
- Install the upper and lower seat belt anchor bolts.
- Install the coat hook. Refer to Coat Hook Replacement .
- Install the door sill trim plate. Refer to Door Sill Plate Replacement .

Body Side Trim Panel Replacement Extended Cab Pickup
Removal Procedure
- Remove the upper and the lower seat belt anchor bolts.
- Remove the coat hook. Refer to Coat Hook Replacement .
- Remove the door sill trim plate. Refer to Door Sill Plate Replacement .
- Remove the screws that retain the body side trim panel to the vehicle .
- Disconnect the electrical connectors, as needed.
- Remove the shoulder belt opening trim cover.
- Feed the seat belt through the trim cover.
- Remove the body side trim panel from the vehicle.
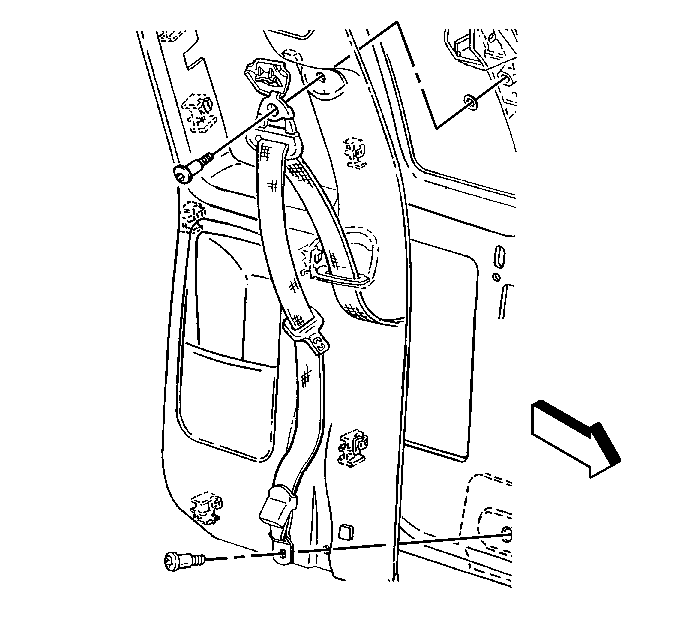
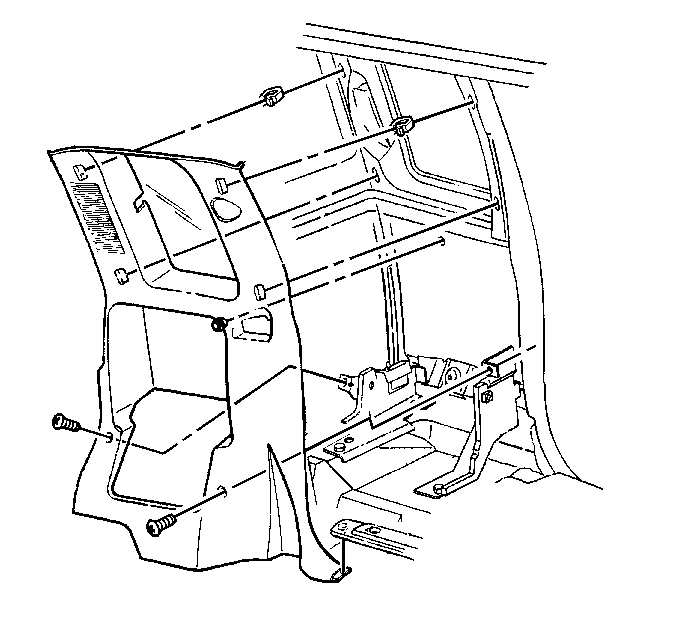
Installation Procedure
- Feed the seat belt through the trim panel.
- Install the shoulder belt opening trim cover.
- Connect the electrical connectors, as needed.
- Install the body side trim panel to the vehicle.
- Install the screws that retain the body side trim panel to the vehicle.
- Install the upper and lower seat belt anchor bolts.
- Install the coat hook. Refer to Coat Hook Replacement .
- Install the door sill trim plate. Refer to Door Sill Plate Replacement .

Notice: Use the correct fastener in the correct location. Replacement fasteners must be the correct part number for that application. Fasteners requiring replacement or fasteners requiring the use of thread locking compound or sealant are identified in the service procedure. Do not use paints, lubricants, or corrosion inhibitors on fasteners or fastener joint surfaces unless specified. These coatings affect fastener torque and joint clamping force and may damage the fastener. Use the correct tightening sequence and specifications when installing fasteners in order to avoid damage to parts and systems.
Tighten
Tighten the screws to 1.9 N·m (17 lb in).

Tighten
| • | Tighten the upper bolts to to 70 N·m (52 lb ft). |
| • | Tighten the lower bolts to to 80 N·m (59 lb ft). |
Body Side Trim Panel Replacement 2-Door Utility
Removal Procedure
- Remove the upper and lower front seat anchor bolts.
- Remove the rear seat belt lower anchor nut.
- Remove the assist handle. Refer to Assist Handle Replacement .
- Remove the coat hook. Refer to Coat Hook Replacement .
- Remove the endgate or the liftgate opening door sill trim plate. Refer to Rear Floor Rear Trim Plate Replacement or Liftgate Door Sill Plate Replacement .
- Fold the rear seats down.
- Remove the jack storage cover (left side only).
- Remove the screw that retains the upper body side trim body side trim panel to the vehicle (left side only).
- Remove the upper body side trim panel from the vehicle.
- Feed the seat belt through the trim panel.
- Remove the body side front lower trim panel from the vehicle.
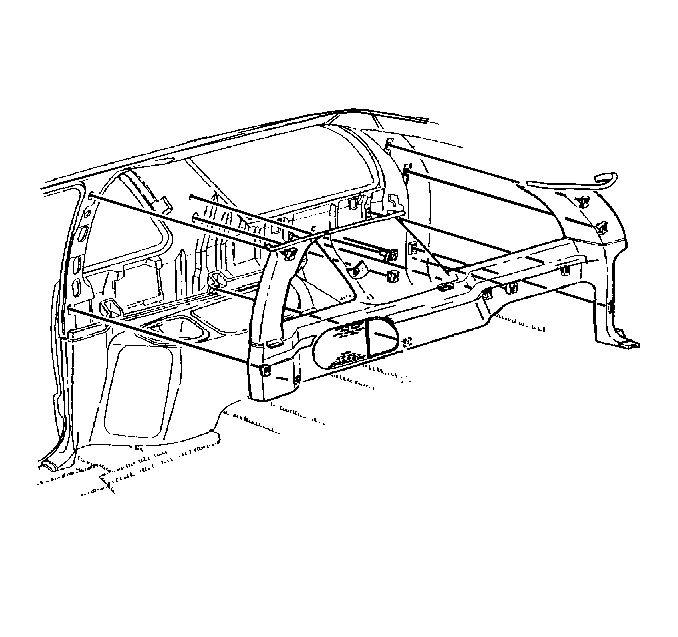
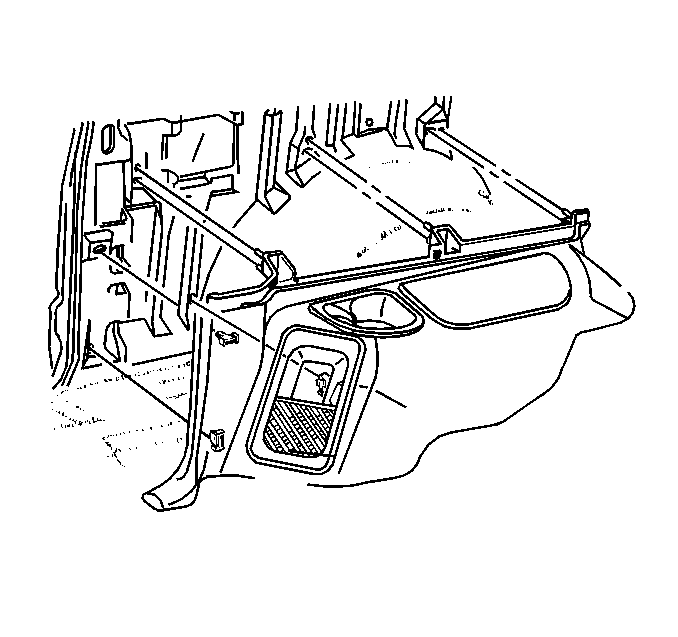
Installation Procedure
- Install the body side front lower trim panel to the vehicle.
- Install the upper body side trim panel to the vehicle.
- Feed the seat belt through the trim panel.
- Install the screw that retains the upper body side trim panel to the vehicle.
- Install the jack storage cover (left side only).
- Install the endgate or the liftgate opening door sill trim plate. Refer to Rear Floor Rear Trim Plate Replacement or Liftgate Door Sill Plate Replacement .
- Install the coat hook. Refer to Coat Hook Replacement .
- Install the assist handle. Refer to Assist Handle Replacement .
- Install the rear seat belt anchor nut.
- Install the upper and lower front seat belt anchor bolts.


Notice: Use the correct fastener in the correct location. Replacement fasteners must be the correct part number for that application. Fasteners requiring replacement or fasteners requiring the use of thread locking compound or sealant are identified in the service procedure. Do not use paints, lubricants, or corrosion inhibitors on fasteners or fastener joint surfaces unless specified. These coatings affect fastener torque and joint clamping force and may damage the fastener. Use the correct tightening sequence and specifications when installing fasteners in order to avoid damage to parts and systems.
Tighten
Tighten the screw to 1.9 N·m (17 lb ft).
Tighten
Tighten the nut to 80 N·m (59 lb ft).
Tighten
Tighten the bolts to 70 N·m (52 lb ft).
Body Side Trim Panel Replacement 4-Door Utility
Removal Procedure
- Remove the upper and lower rear seat belt anchor bolts.
- Remove the endgate or the liftgate opening door sill trim plate. Refer to Rear Floor Rear Trim Plate Replacement or Liftgate Door Sill Plate Replacement .
- Remove the jack storage cover (driver side only).
- Remove the screws that retain the body side trim panel to the vehicle (driver side only).
- Remove the spare tire and the carrier assembly (if equipped).
- Remove the left and right body side trim panel from the vehicle.
- Feed the seat belt through the trim panel.
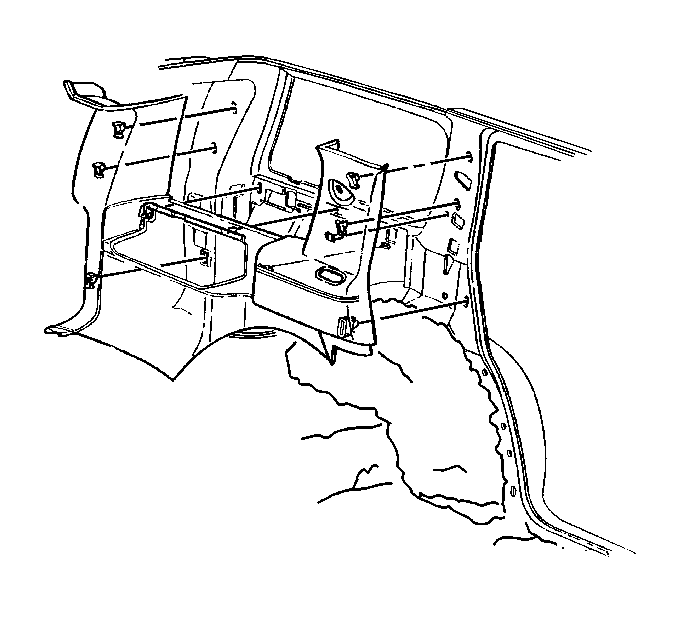
Installation Procedure
- Install the body side trim panel to the vehicle.
- Feed the seat belt through the trim panel.
- Install the screws that retain the body side trim panel to the vehicle (left side only).
- Install the spare tire and the carrier assembly (if equipped).
- Install the jack storage cover (left side only).
- Install the endgate or liftgate opening door sill trim plate. Refer to Rear Floor Rear Trim Plate Replacement or Liftgate Door Sill Plate Replacement .
- Install the upper and lower rear seat belt anchor bolts.

Notice: Use the correct fastener in the correct location. Replacement fasteners must be the correct part number for that application. Fasteners requiring replacement or fasteners requiring the use of thread locking compound or sealant are identified in the service procedure. Do not use paints, lubricants, or corrosion inhibitors on fasteners or fastener joint surfaces unless specified. These coatings affect fastener torque and joint clamping force and may damage the fastener. Use the correct tightening sequence and specifications when installing fasteners in order to avoid damage to parts and systems.
Tighten
Tighten the screws to 1.9 N·m (17 lb ft).
Tighten
| • | Tighten the upper bolts to to 70 N·m (52 lb ft). |
| • | Tighten the lower bolts to to 80 N·m (59 lb ft). |
Body Side Trim Panel Replacement Crew Cab
Removal Procedure
- Remove the door sill trim plate. Refer to Door Sill Plate Replacement .
- Remove the upper seat belt anchor bolt (3) and the lower seat belt anchor bolt (7).
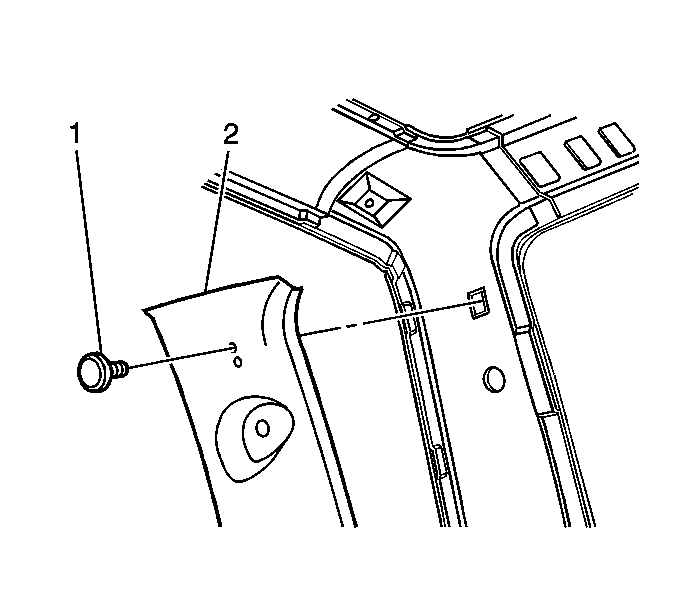
- Using a flat-bladed tool, gently pry the coat hook plug (1) away from the trim panel (2).
- Remove the shoulder belt opening trim cover.
- Feed the seat belt through the trim cover.
- Remove the body side trim panel from the vehicle.
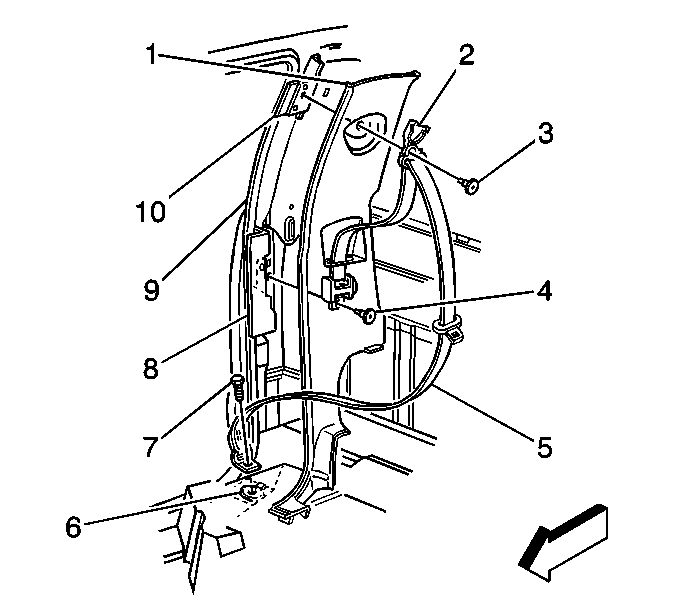
Installation Procedure
- Feed the seat belt through the trim panel.
- Install the shoulder belt opening trim cover.
- Install the body side trim panel to the vehicle.
- Install the coat hook plug (1) into the trim panel (2).
- Install the upper (3) and lower (7) seat belt anchor bolts.
- Install the door sill trim plate. Refer to Door Sill Plate Replacement .


Notice: Use the correct fastener in the correct location. Replacement fasteners must be the correct part number for that application. Fasteners requiring replacement or fasteners requiring the use of thread locking compound or sealant are identified in the service procedure. Do not use paints, lubricants, or corrosion inhibitors on fasteners or fastener joint surfaces unless specified. These coatings affect fastener torque and joint clamping force and may damage the fastener. Use the correct tightening sequence and specifications when installing fasteners in order to avoid damage to parts and systems.
Tighten
Tighten the seat belt anchor bolts to 70 N·m (52 lb ft).
