Removal Procedure
Notice: Broken engine mountings can cause misalignment of certain drive-train components. Misalignment of drive-train components causes eventual destruction of the drive-train components.
If one engine mount breaks, the rest of the engine mounts will have increased stress put on them. This could cause the rest of the engine mounts to break.- Disconnect the negative battery cable. Refer to Battery Negative Cable Disconnection and Connection in Engine Electrical.
- Raise and support the vehicle. Refer to Lifting and Jacking the Vehicle in General Information.
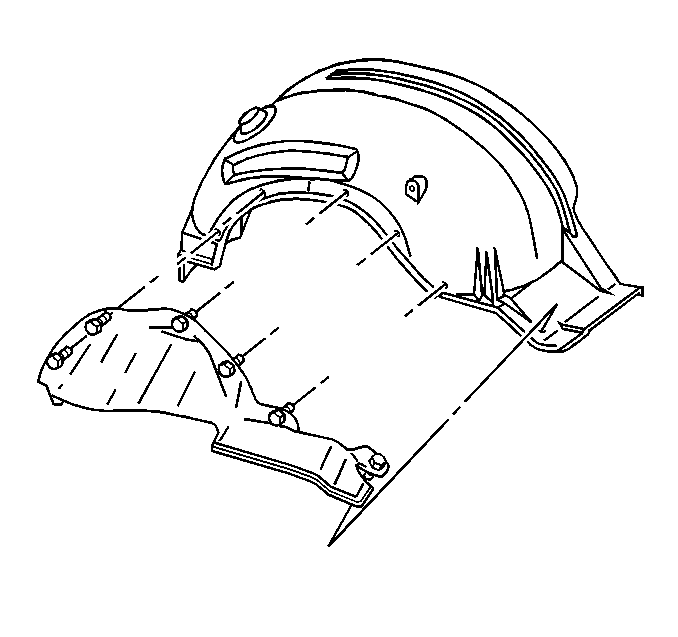
- Remove the right fender wheelhouse extension.
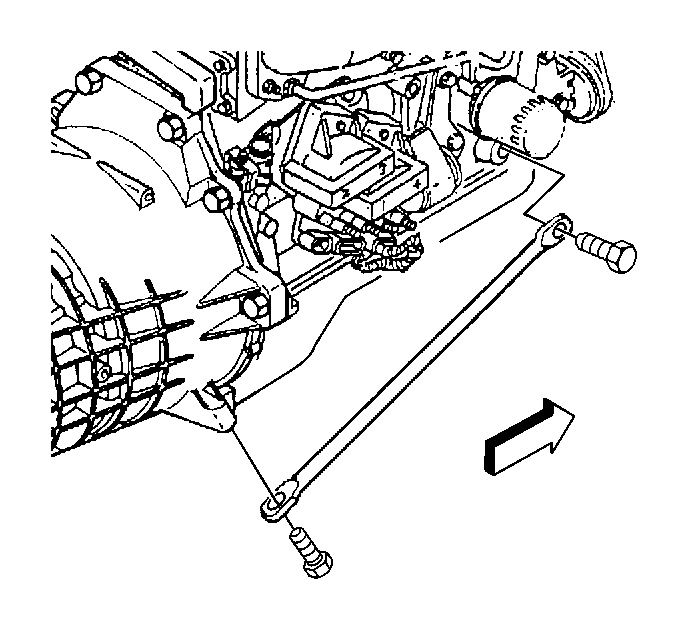
- Remove the right side transmission support brace bolts, if equipped.
- Remove the right side transmission support brace, if equipped.
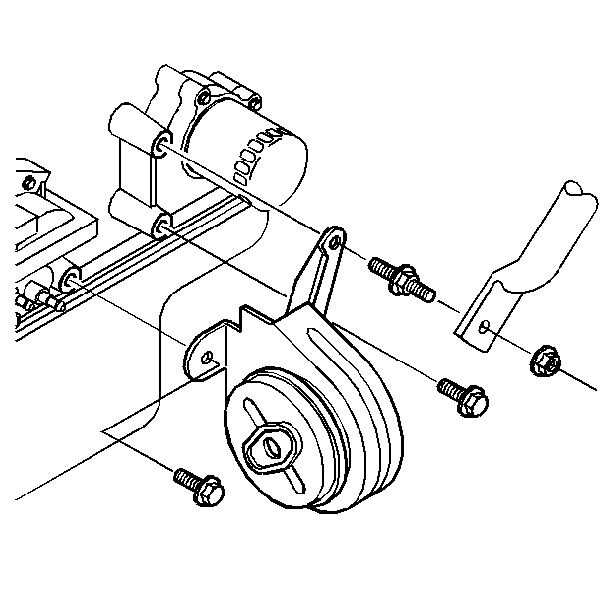
- Working through the wheelhouse, remove the generator rear brace from the engine.
- Lower the vehicle.
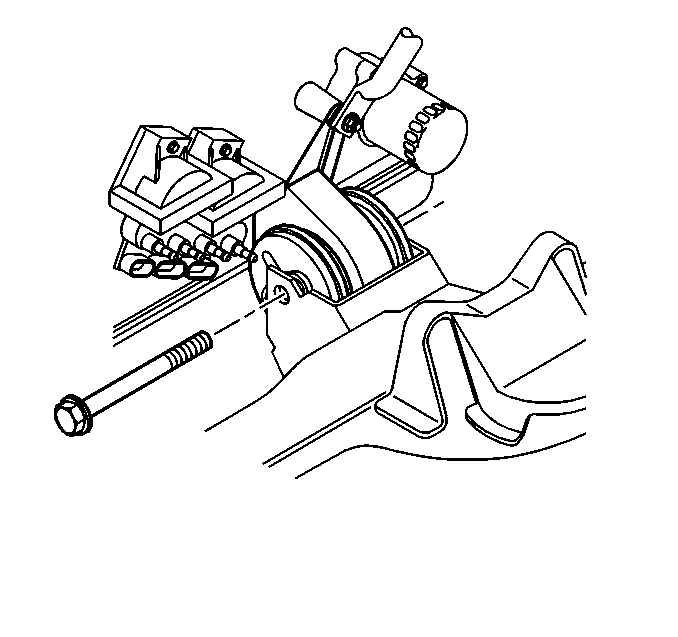
- Install a suitable engine lifting device to the eyelet on the accessory mounting bracket.
- Raise the engine only enough to remove the weight from the engine mount.
- Remove the engine mount through-bolt.
- Remove the stud and the two bolts holding the engine mount to the engine.
- Remove the engine mount.
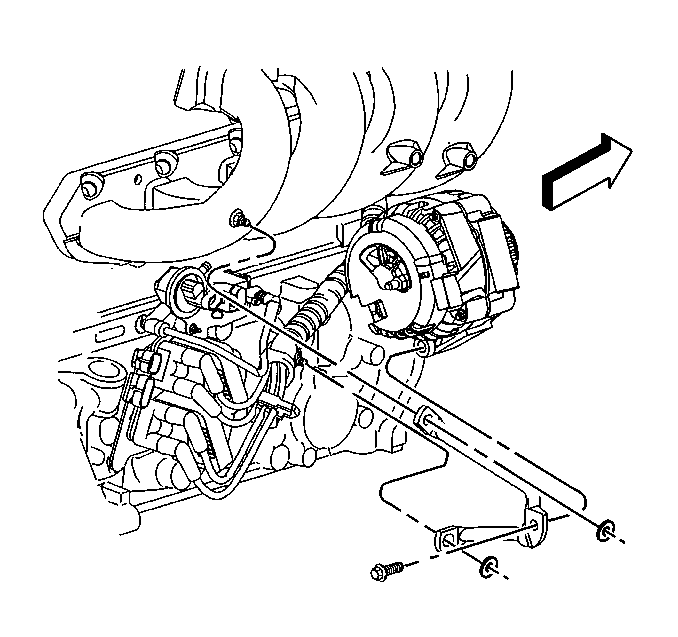
| • | Remove the nuts holding the brace to the intake studs and the stud on the engine. |
| • | Remove the bolt holding the brace to the rear of the generator. |
Installation Procedure
- Install the engine mount, the stud and the two bolts.
- Install the engine mount through-bolt.
- Remove the engine lifting device.
- Raise the vehicle.
- Working through the wheelhouse, install the generator rear brace.
- Install the nuts holding the brace to the intake stud and the stud on the engine.
- Install the bolt holding the brace to the rear of the generator.
- Install the transmission support brace.
- Install the right fender wheelhouse extension.
- Lower the vehicle.
- Connect the negative battery cable. Refer to Battery Negative Cable Disconnection and Connection in Engine Electrical.
Notice: Use the correct fastener in the correct location. Replacement fasteners must be the correct part number for that application. Fasteners requiring replacement or fasteners requiring the use of thread locking compound or sealant are identified in the service procedure. Do not use paints, lubricants, or corrosion inhibitors on fasteners or fastener joint surfaces unless specified. These coatings affect fastener torque and joint clamping force and may damage the fastener. Use the correct tightening sequence and specifications when installing fasteners in order to avoid damage to parts and systems.
Tighten
Tighten the engine mount stud and bolts to 55 N·m (41 lb ft).
Tighten
Tighten the engine mount through-bolt to 45 N·m (33 lb ft).
Tighten
Tighten the generator rear brace nuts and bolt to 25 N·m
(18 lb ft).
Tighten
Tighten the transmission support bolts to 50 N·m (37 lb ft).
