For 1990-2009 cars only
Tools Required
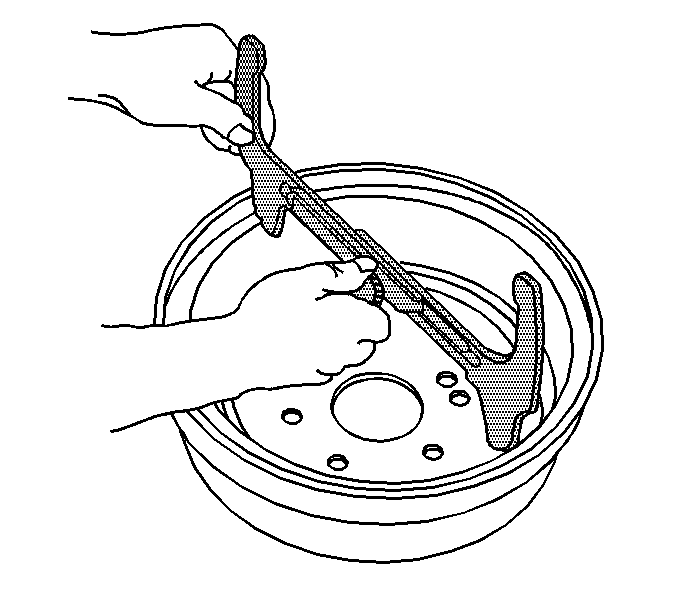
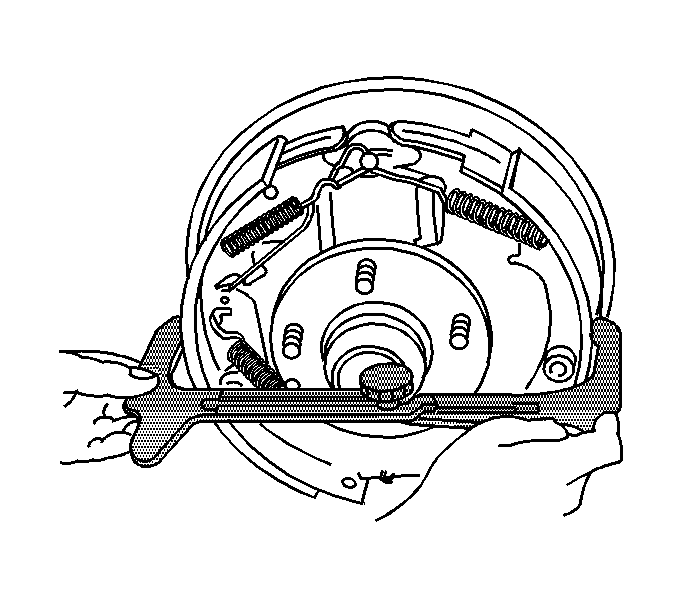
J 21177-A Drum to Brake Shoe Clearance Gauge
Caution: Refer to Brake Dust Caution in the Preface section.
Important: The rear brakes must be adjusted manually after replacing the rear brake shoes.
- Raise the vehicle. Refer to Lifting and Jacking the Vehicle in General Information.
- Remove the brake drum. Refer to Brake Drum Replacement .
- Using the J 21177-A measure the inside diameter of the brake drum.
- Using the J 21177-A , adjust the brakes shoes until there is approximately 0.50 mm (0.020 in) clearance between the rear brake shoes and the rear brake drum.
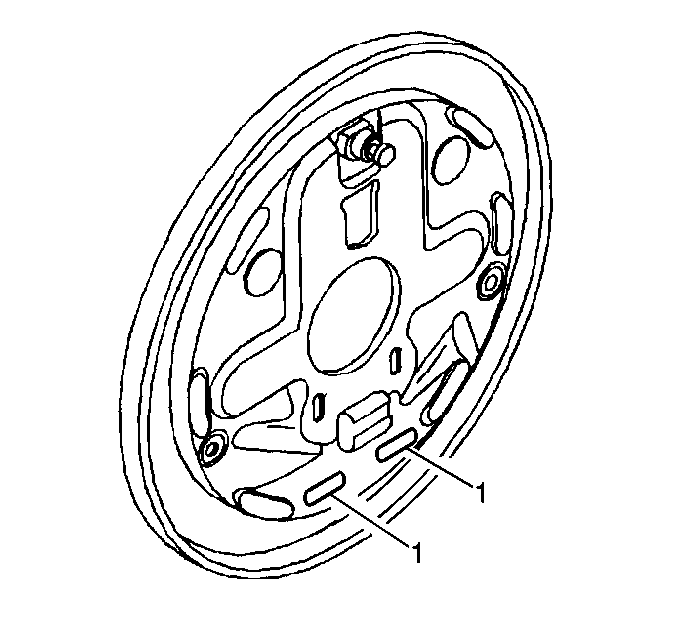
- Using a punch and hammer, remove and discard the knockout plug in the backing plate (1) which is directly behind the star wheel adjuster.
- Install the brake drum.
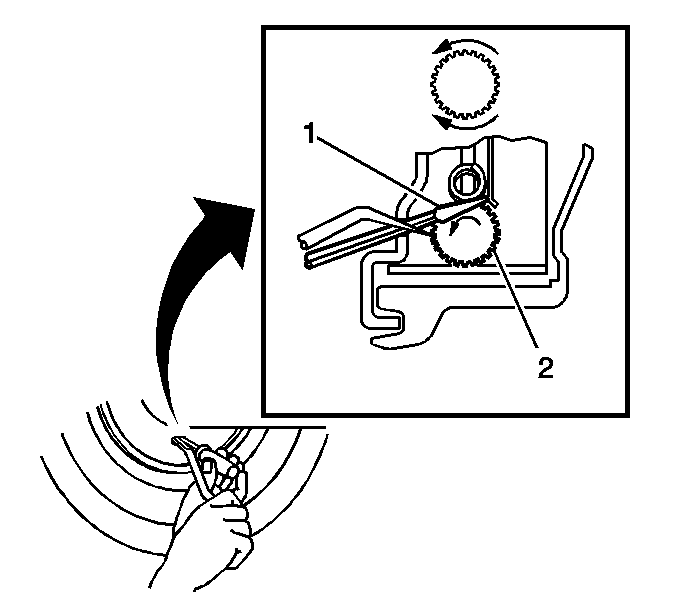
- Insert a flat bladed screw driver (1) and move the adjuster lever away from the star wheel.
- Using a brake adjusting tool, rotate the brake adjuster (2) until the amount of drag is equal on the left and right rear brake drums.
- Apply the brake pedal two times in order to center the brake shoes on the locating pins.
- Check the drums again for light drag. Adjust as necessary.
- Install an adjusting hole cover in the backing plate.
- Lower the vehicle. Refer to Lifting and Jacking the Vehicle in General Information.
- Check the park brake adjustment. Refer to Park Brake Adjustment in Park Brake.


Important: When performing the following service procedure, ensure that the J 21177-A is level before taking the measurement.


