Blower Motor Replacement C42
Removal Procedure
- Disconnect the PCM. Refer to the appropriate procedure:
- Remove the coolant reservoir. Refer to Coolant Recovery Reservoir Replacement in Engine Cooling.
- Remove the rear coolant recovery reservoir mounting stud.
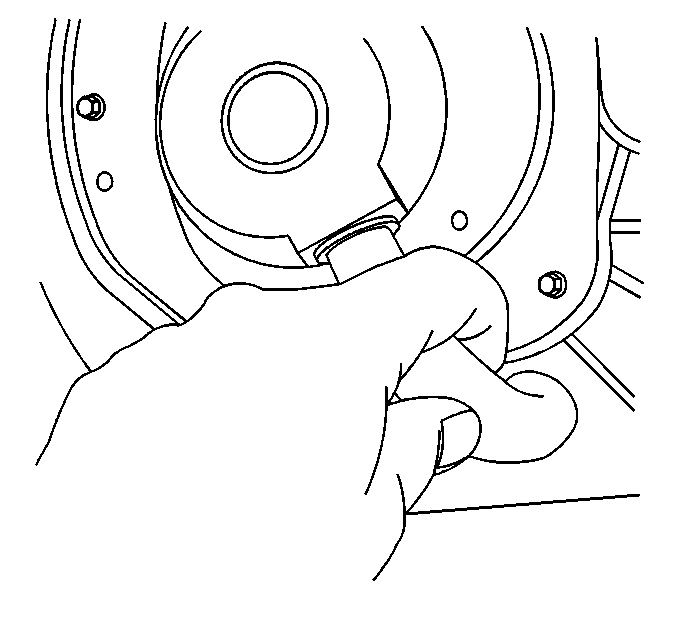
- Disconnect the cooling tube from the blower motor.
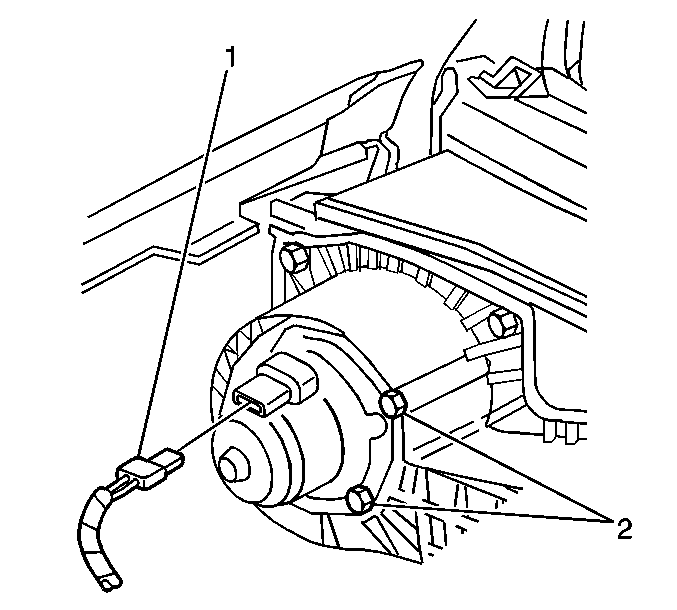
- Disconnect the electrical connector (1).
- Remove the blower motor mounting bolts (2).
- Remove the blower motor.
| • | Powertrain Control Module Replacement in Engine Controls - 2.2L |
| • | Powertrain Control Module Replacement in Engine Controls - 4.3L |
Installation Procedure
- Install the blower motor.
- Install the blower motor mounting bolts (2).
- Connect the electrical connector (1).
- Connect the cooling tube to the blower motor.
- Install the rear coolant recovery reservoir mounting stud.
- Install the coolant reservoir. Refer to Coolant Recovery Reservoir Replacement in Engine Cooling.
- Install the PCM. Refer to the appropriate procedure:
Notice: Use the correct fastener in the correct location. Replacement fasteners must be the correct part number for that application. Fasteners requiring replacement or fasteners requiring the use of thread locking compound or sealant are identified in the service procedure. Do not use paints, lubricants, or corrosion inhibitors on fasteners or fastener joint surfaces unless specified. These coatings affect fastener torque and joint clamping force and may damage the fastener. Use the correct tightening sequence and specifications when installing fasteners in order to avoid damage to parts and systems.
Tighten
Tighten the bolts to 4.5 N·m (40 lb in).
| • | Powertrain Control Module Replacement in Engine Controls - 2.2L |
| • | Powertrain Control Module Replacement in Engine Controls - 4.3L |
Blower Motor Replacement C60, C68
Removal Procedure
- Remove the PCM. Refer to Powertrain Control Module Replacement in Engine Controls - 4.3L.
- Remove the coolant reservoir. Refer to Coolant Recovery Reservoir Replacement in Engine Cooling.
- Remove the rear coolant recovery reservoir mounting stud.
- Disconnect the electrical connector from the blower motor.
- Position the PCM harness connectors out of the way.
- Remove the blower motor access cover retaining screws.
- Cut through the cover on the cut line using a razor blade or a sharp utility knife.
- Disconnect the cooling tube from the blower motor.
- Disconnect the electrical connector from the blower motor.
- Remove the blower motor mounting bolts.
- Remove the blower motor.
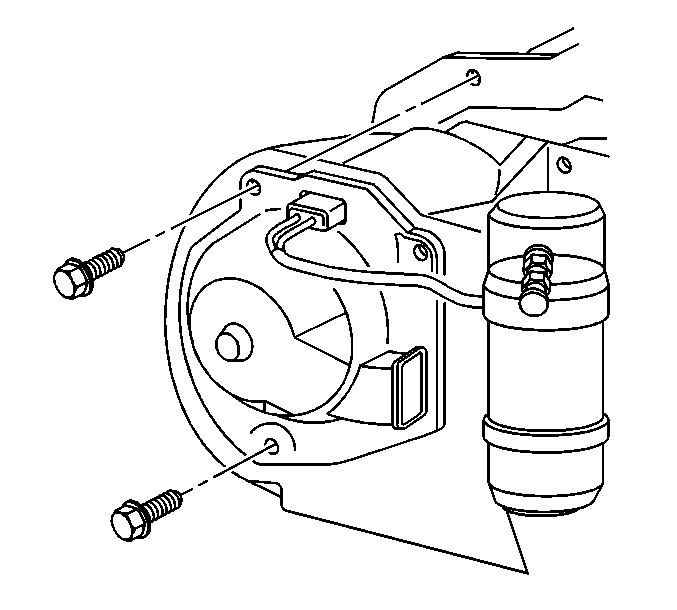
Important: Cut through the cover as straight as possible because the access cover must be replaced. Part of this repair is visible to the customer. In order to prevent damage to the component, do not cut any deeper than necessary in order to remove the access cover.
Installation Procedure
- Install the blower motor.
- Install the blower motor mounting bolts.
- Connect the cooling tube to the blower motor.
- Install the blower motor access cover.
- Install the blower motor access cover retaining screws.
- Seal the cut line using black weather-strip adhesive.
- Connect the electrical connector to the blower motor.
- Reposition the PCM harness connectors.
- Install the rear coolant recovery reservoir mounting stud.
- Install the coolant reservoir. Refer to the Coolant Recovery Reservoir Replacement in Engine Cooling.
- Install the PCM. Refer to Powertrain Control Module Replacement in Engine Controls - 4.3L.
Notice: Use the correct fastener in the correct location. Replacement fasteners must be the correct part number for that application. Fasteners requiring replacement or fasteners requiring the use of thread locking compound or sealant are identified in the service procedure. Do not use paints, lubricants, or corrosion inhibitors on fasteners or fastener joint surfaces unless specified. These coatings affect fastener torque and joint clamping force and may damage the fastener. Use the correct tightening sequence and specifications when installing fasteners in order to avoid damage to parts and systems.
Tighten
Tighten the bolts to 4.5 N·m (40 lb in).
Tighten
Tighten the screws to 2.5 N·m (22 lb in).
Important: Do not use RTV. Apply the adhesive bead as straight as possible. Allow the adhesive to set for 15 minutes or until the adhesive becomes tacky.
