For 1990-2009 cars only
Upper Outside Rearview Mirror Loose (Tighten Retaining Ring of Mirror Assembly)

| Subject: | Upper Outside Rearview Mirror Loose (Tighten Retaining Ring of Mirror Assembly) |
| Models: | 2003-2004 Chevrolet Kodiak C4500-C8500 Series Models |
| 2003-2004 GMC Topkick C4500-C8500 Series Models |
| with Manual Mirror (RPO DB5), Manual Lighted Mirror (RPO DB7) or Manual Heated Mirror (RPO DB8) |
Condition
Some customers may comment that the outside rearview mirror is loose or moves out of adjustment while driving the vehicle.
Cause
The mirror movement may be caused by insufficient friction between the inner and outer cups that retain the mirror.
Correction
DO NOT REPLACE THE MIRROR ASSEMBLY .
Follow the procedure outlined below to adjust the retaining ring, which will increase the friction between the inner and outer cups of the mirror assembly.
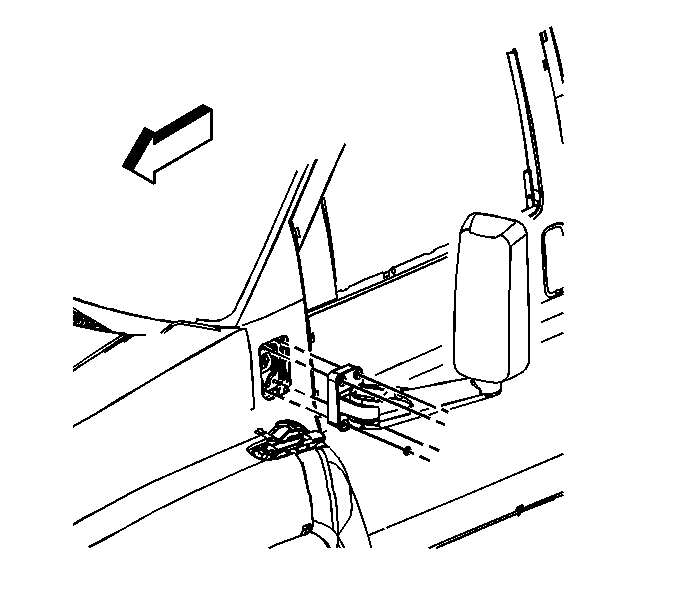
- Remove the black caps from the mirror bracket.
- Remove the nuts that retain the outside rearview bracket to the vehicle.
- If equipped with the lighted or heated mirror, disconnect the electrical connector.
- Remove the outside rearview mirror assembly/bracket from the vehicle.
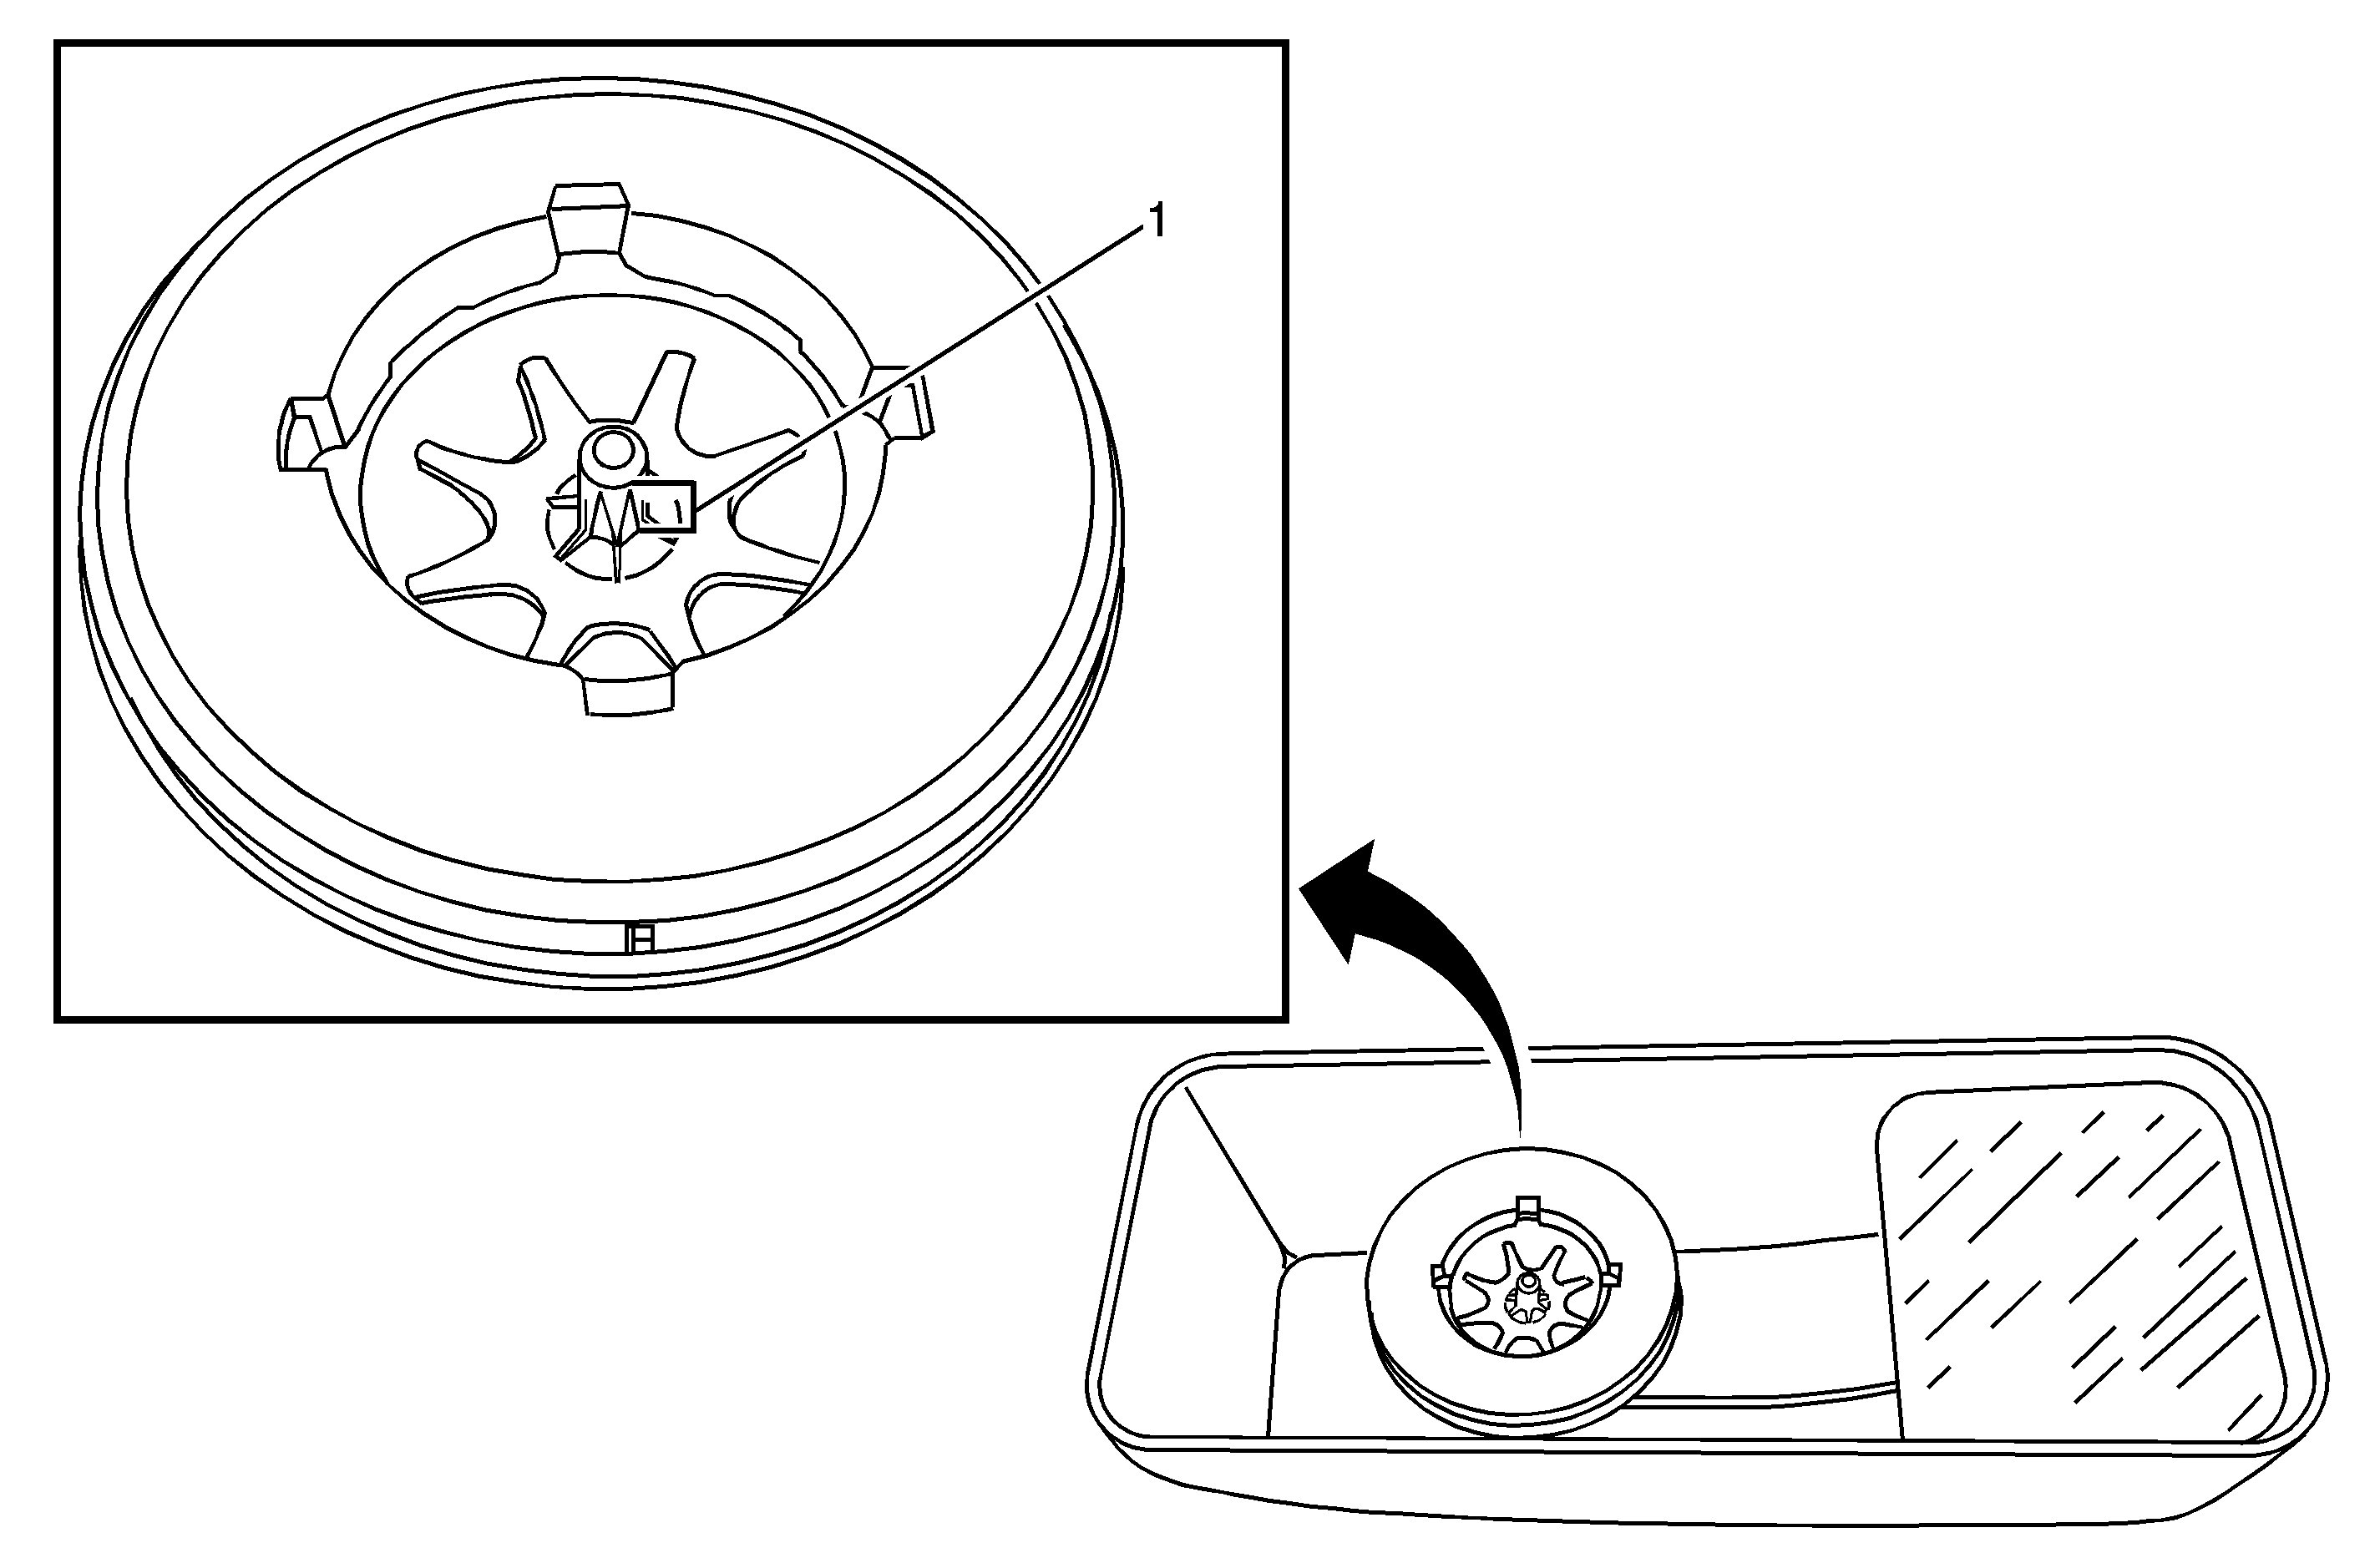
- Remove the mirror glass assembly from the mirror housing by completing the following steps:
- Fit a 15 mm deep well socket over the pin of the mirror adjustment assembly. Hammer the retaining ring down until it measures a minimum distance of 14 mm (0.55 in) from the retaining ring to the chamfer of the pin (reference #1 in graphic). The retaining ring should be tight to move by hand.
- Align the mirror back into the adjuster mechanism. With the palm of the hand on the center of the glass, rotate the glass about the glass pivot until the engagement of the snap-fit hooks.
- Perform the following procedure in order to ensure the mirror glass is fully installed:
- If equipped with lighted or heated mirror, connect the electrical connector at the vehicle.
- Install the nuts that retain the mirror assembly/bracket to the vehicle.
- Install the black caps that cover the mirror nuts.
| 5.1. | Insert your fingers as far as possible behind the mirror toward the center of the back. |
| 5.2. | With force sufficient to disengage the snap-fits from the adjuster mechanism, pull the mirror back out of the housing. |
| 8.1. | Place foam below the mirror assembly to catch the glass if the mirror should fall. |
| 8.2. | Hold the assembly so that the mirror glass is face down. While taking care that the mirror housing is not scratched, slap the upward surface of the housing. The mirror glass should stay retained in the housing. |
Tighten
Tighten the nuts to 25 N·m (18 lb ft).
Warranty Information
For vehicles repaired under warranty, use:
Labor Operation | Description | Labor Time |
|---|---|---|
B9701 | OSRV Mirror - Retaining Ring LF - Adjust | 0.3 hr |
B9703 | OSRV Mirror - Retaining Ring RH - Adjust | 0.3 hr |
