For 1990-2009 cars only
Special Tools
| • | J 33013-B Hub and Drive Plate Remover/Installer |
| • | J 33017 Pulley and Bearing Installer |
| • | J 33023-A Puller Pilot |
| • | J 33024 Clutch Coil Installer Adapter |
| • | J 41552 Compressor Pulley Puller |
| • | J 41790-A Compressor Holding Fixture |
Removal Procedure
- Remove the compressor from the vehicle. Refer to Air Conditioning Compressor Replacement.
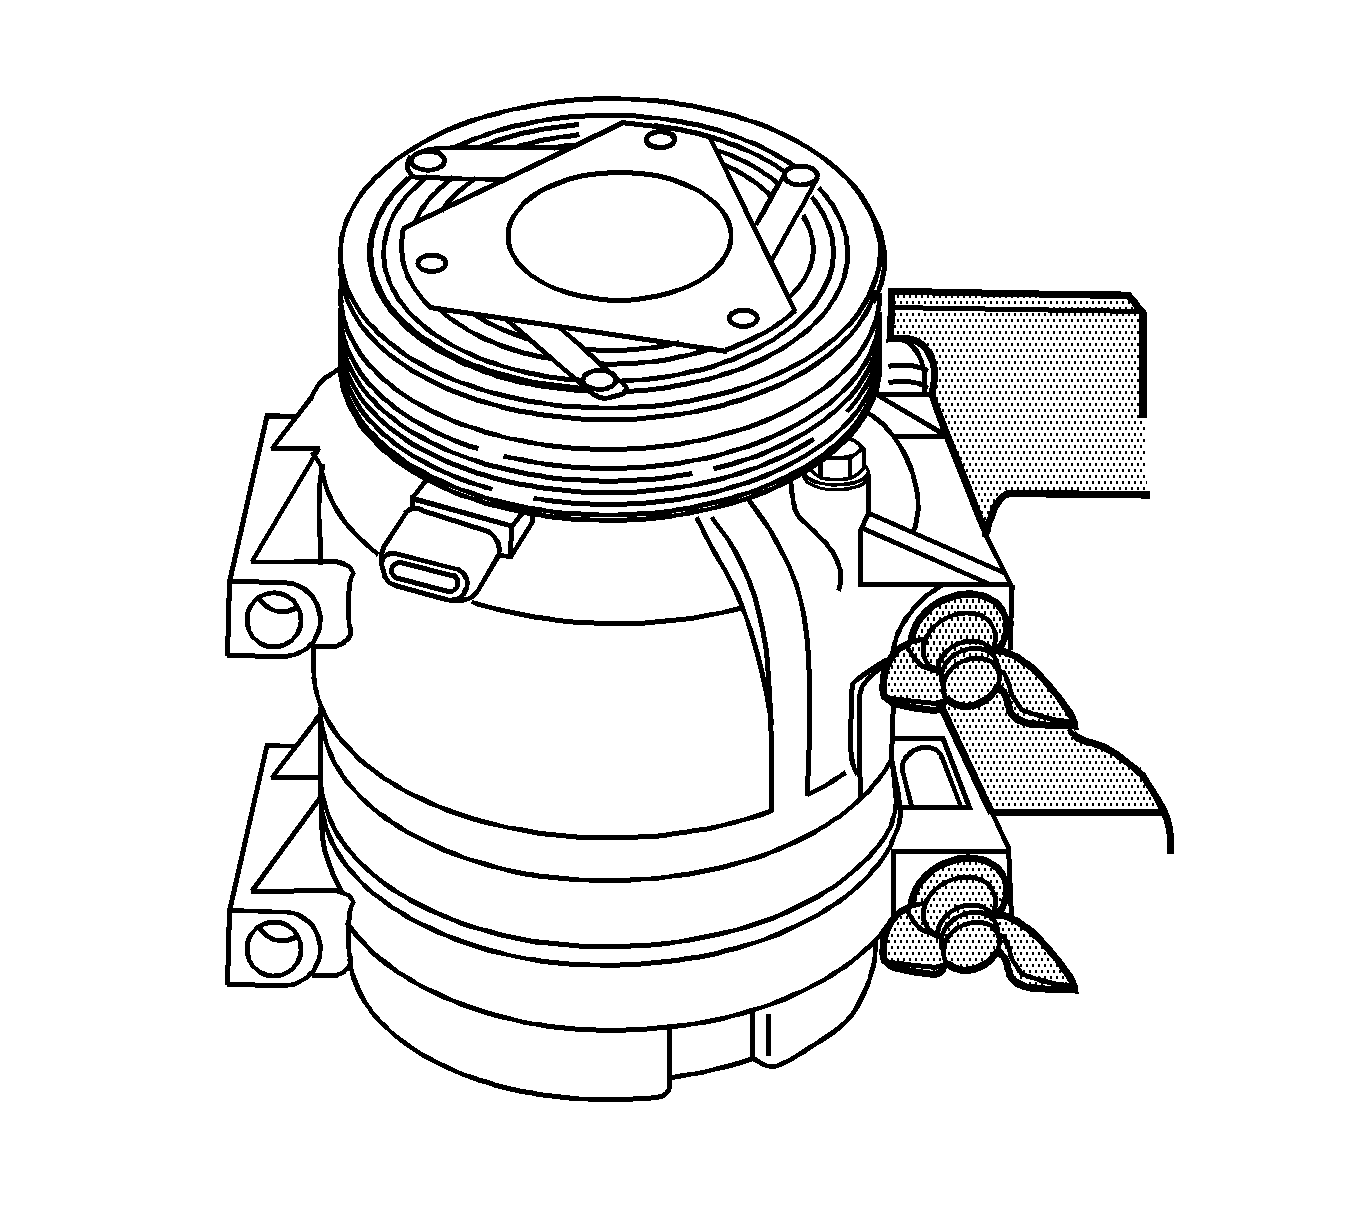
- Clamp the holding fixture J 41790-A in a vise.
- Attach the A/C compressor to holding fixture J 41790-A using thumb screws.
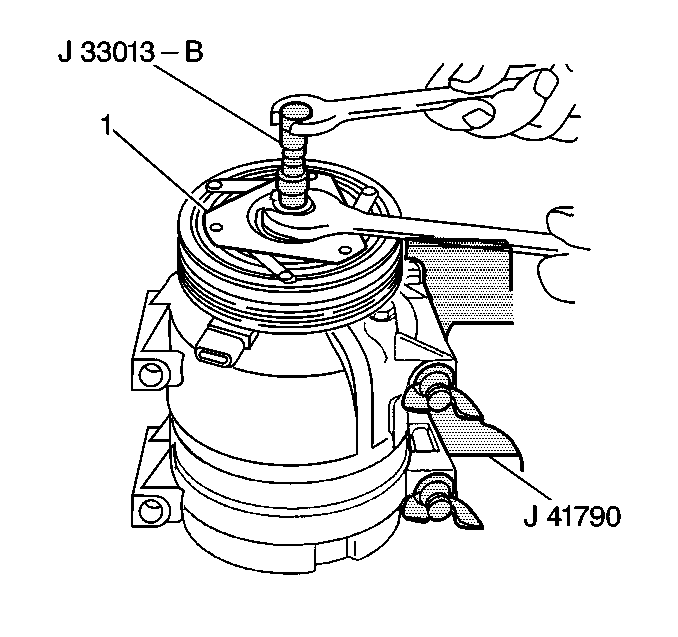
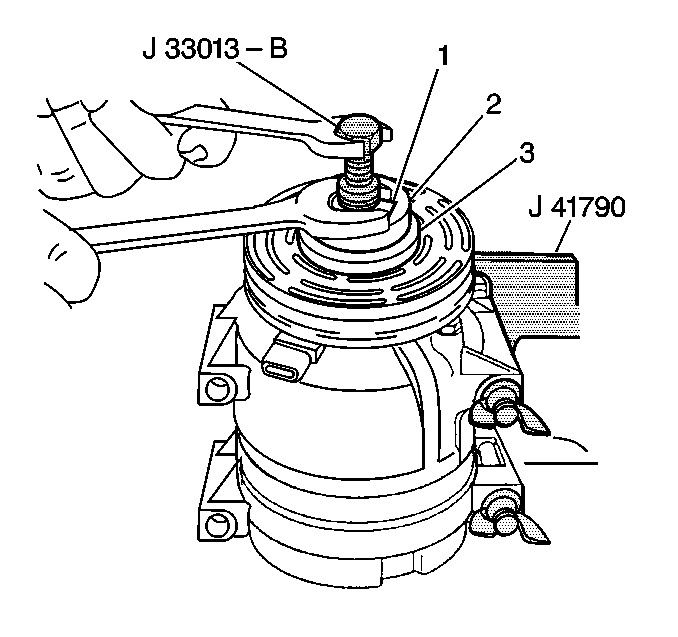
- Thread J 33013-B into the hub.
- Ensure that the center screw forces the tip to thrust against the end of the compressor shaft.
- While holding the body of J 33013-B with a wrench, turn the center screw into the remover body in order to remove the clutch plate (1).
- Remove the shaft key. Retain the shaft key for reassembly.
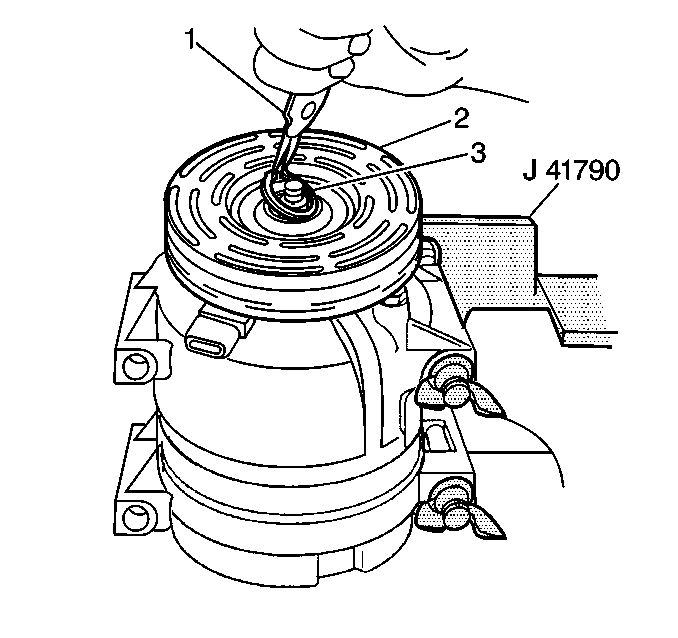
- Using external snap ring pliers (1), remove the pulley assembly retaining ring (3).
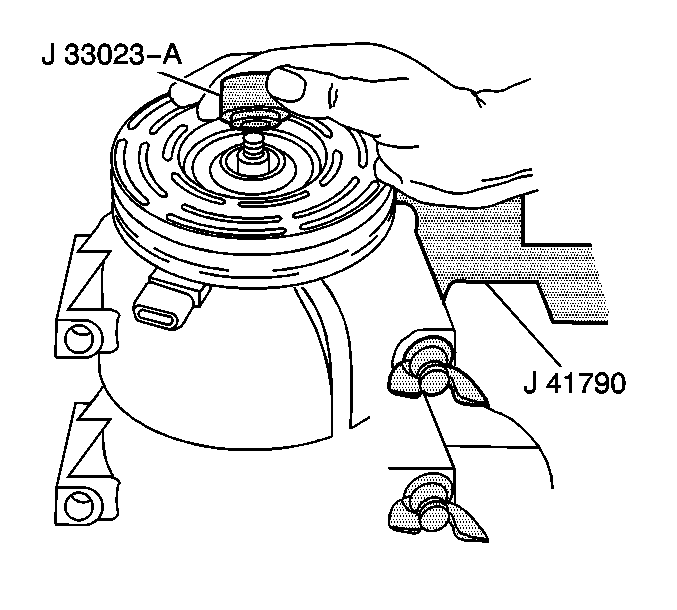
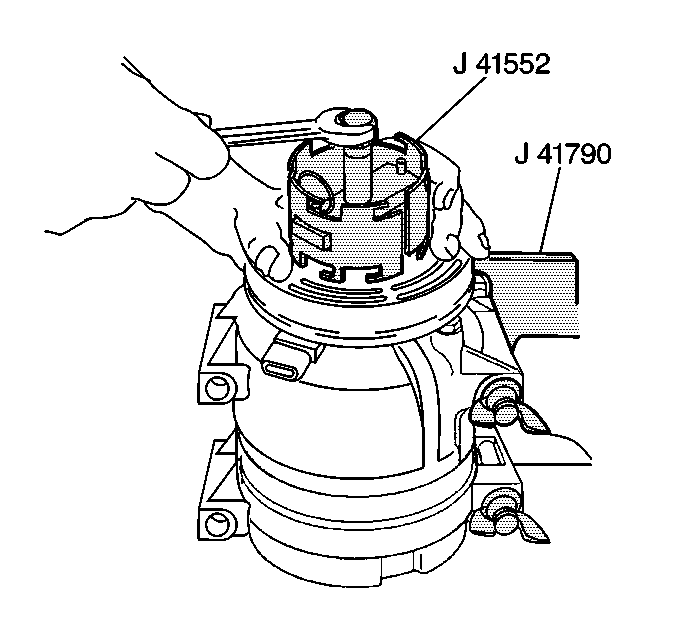
- Place J 33023-A over the compressor shaft.
- Install J 41552 down into the inner circle of slots in the pulley. Turn J 41552 clockwise in the slots to engage the puller tangs with the pulley assembly.
- Hold J 41552 in place and use a wrench to turn the center forcing screw against J 33023-A to remove the pulley assembly.
Installation Procedure
- Position the pulley assembly onto the A/C compressor.
- Position J 33017 and the bearing (1) from J 33013-B directly over the inner race of the bearing.
- Place the washer (3) onto the body of J 33013-B .
- Remove the center screw from the body of J 33013-B .
- Install the center screw into the opposite end of J 33013-B .
- Back the body of J 33013-B off enough to thread the center screw onto the end of the A/C compressor shaft.
- Thread the center screw several turns onto the end of the A/C compressor shaft DO NOT tighten the screw.
- Hold the center screw with a wrench.
- Tighten the hex portion of J 33013-B several turns.
- Press the pulley assembly (2) onto the nose of the A/C compressor far enough to clear the groove for the retaining ring.
- Install the pulley assembly retaining ring (3) using external snap ring pliers (1). Make sure that the camphor side of the retaining ring is facing up when the retaining ring is being installed.
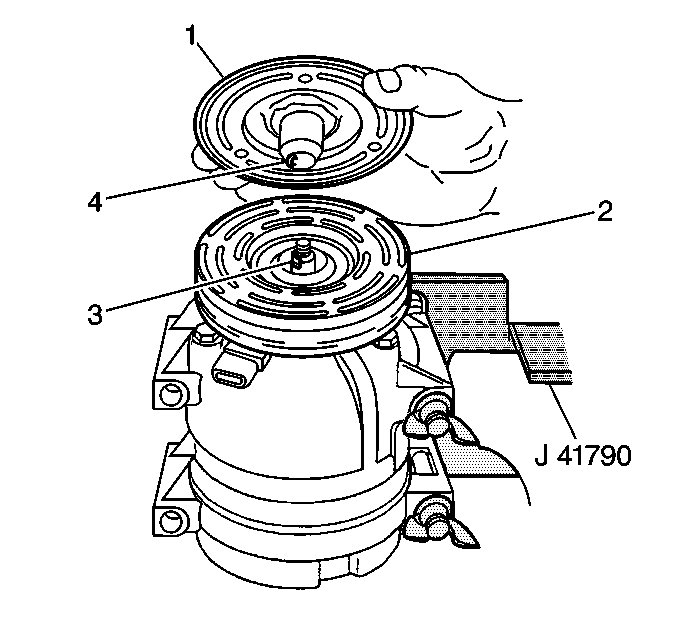
- Install the shaft key into the clutch plate hub key groove (4) approximately 3.2 mm (1/8 in) out of the keyway. The shaft key is curved slightly to provide an interference fit in the clutch plate hub key groove.
- Clean the surfaces of the clutch plate (1) and the pulley assembly (2) before installing the clutch plate.
- Align the shaft key with the shaft keyway of the clutch plate and the pulley assembly and place onto the A/C compressor shaft (3).
- Remove the center screw from J 33013-B and install the center screw into the opposite end of the J 33013-B .
- Install J 33013-B and bearing tools (1) onto the clutch plate (3) and the hub assembly (2).
- Hold the center screw with a wrench. Tighten the hex portion of J 33013-B several turns.
- Remove J 33013-B from the compressor making sure that the shaft key is still in place in the keyway.
- Reinstall J 33013-B .
- Place a feeler gage between the pulley assembly and the clutch plate.
- Tighten the hex portion of J 33013-B until the air gap between the clutch plate and pulley assembly is 0.40 mm (0.015 in).
- Remove J 33013-B .
- Spin the pulley by hand to make sure the pulley is not rubbing against the clutch plate.
- Remove the A/C compressor from J 41790-A .
- Install the A/C compressor into the vehicle. Refer to Air Conditioning Compressor Replacement.



| • | Back the body of J 33013-B off enough to allow the center screw to be threaded onto the end of the A/C compressor shaft. |
| • | Thread the center screw several turns onto the end of the A/C compressor shaft. DO NOT tighten the center screw on the A/C compressor shaft. |
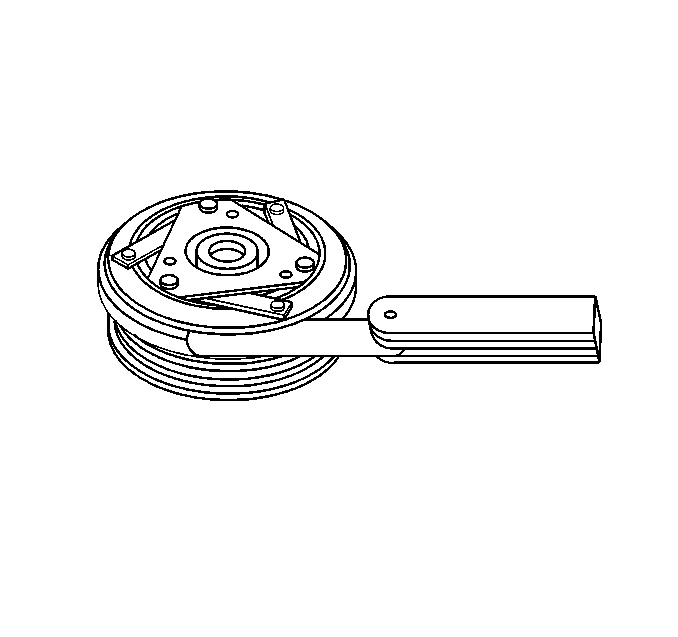
Important: Make sure that the air gap is even all around the clutch plate and pulley assembly.
