Tools Required
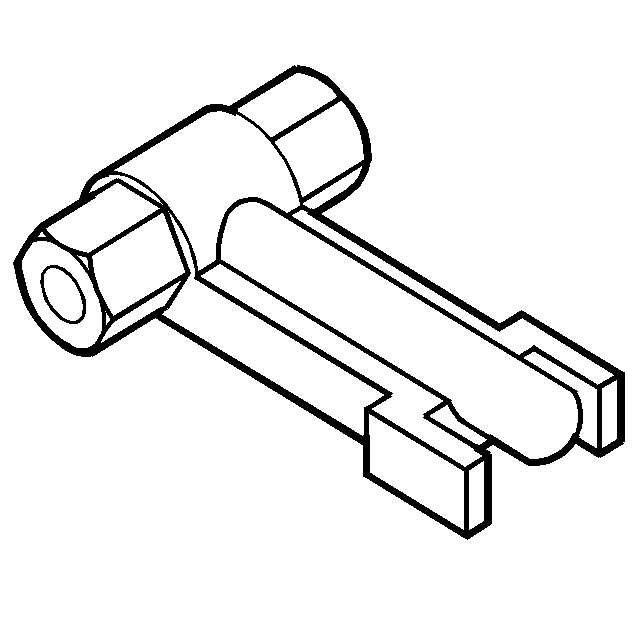
| • | J 44639 Fuel Injector Puller |
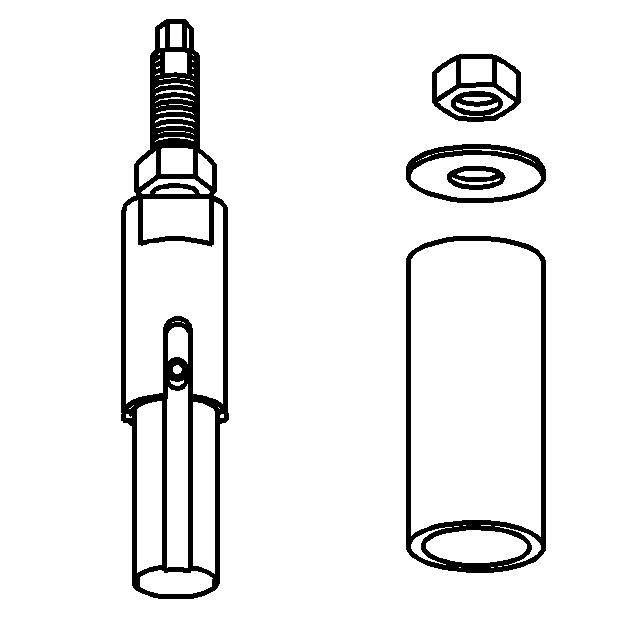
| • | J 45910 Fuel Injector Sleeve Remover/Installer |
Removal Procedure
- Drain the coolant. Refer to Cooling System Draining and Filling in Engine Cooling.
- Perform the lower valve cover removal procedure. Refer to Valve Rocker Arm Cover Replacement - Lower Left Side or to Valve Rocker Arm Cover Replacement - Lower Right Side .
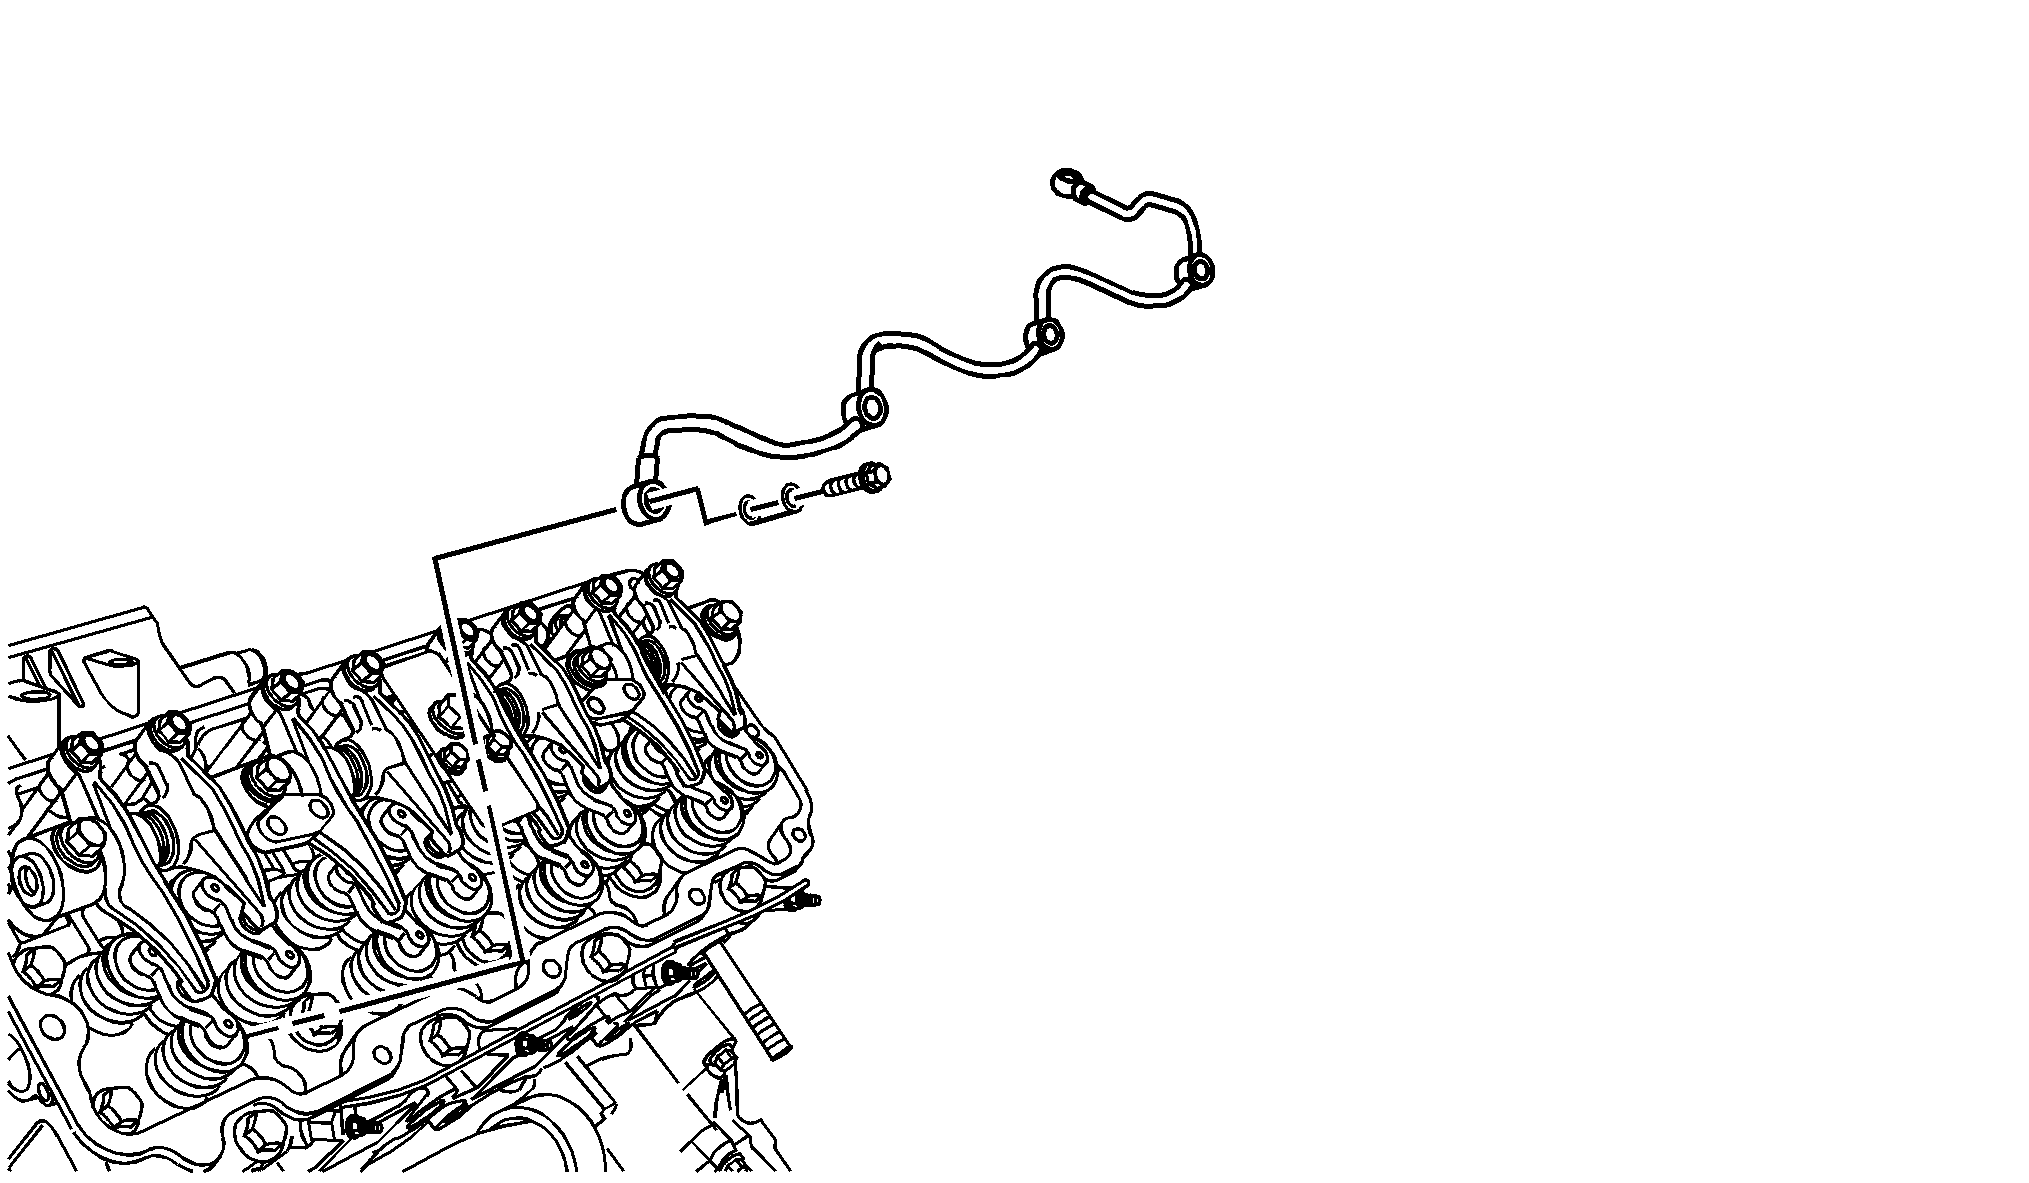
- Remove the return line from injectors.
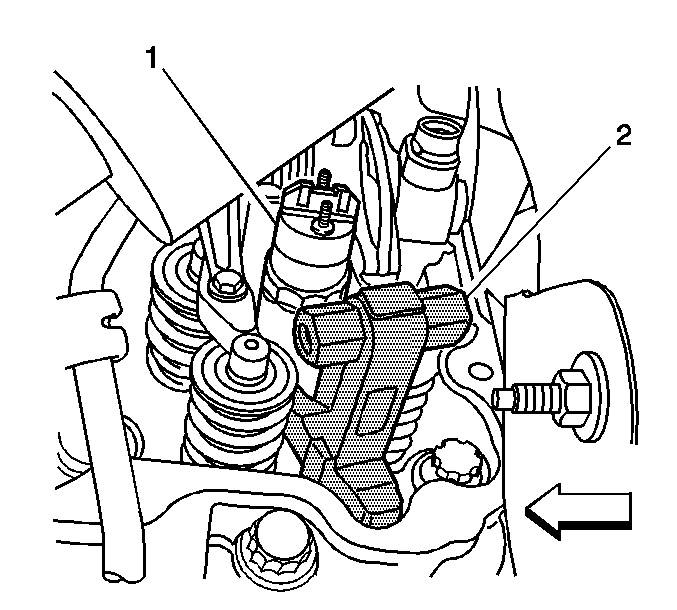
- Remove the retaining bolt from the injector bracket.
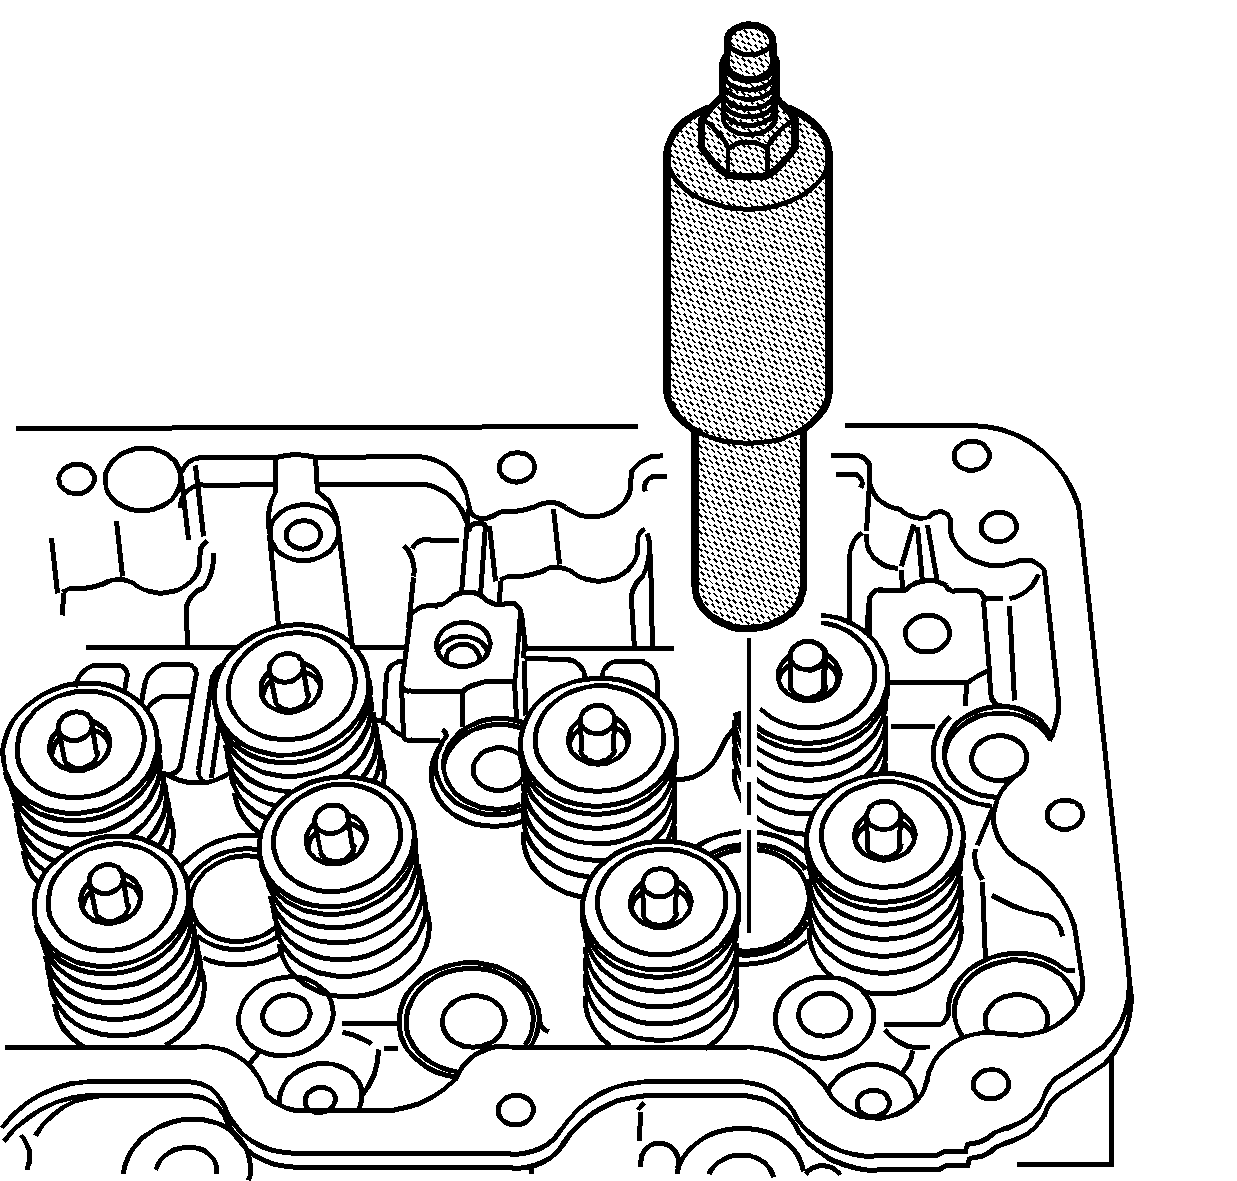
- Install the J 44639 (2) on the injector retainer bracket.
- Install a wrench on the J 44639 (2) and pry away from the fuel injector (1).
- Remove the faulty injectors.
- Remove the copper compression washer from injection hole if the washer did not remove with the injector.
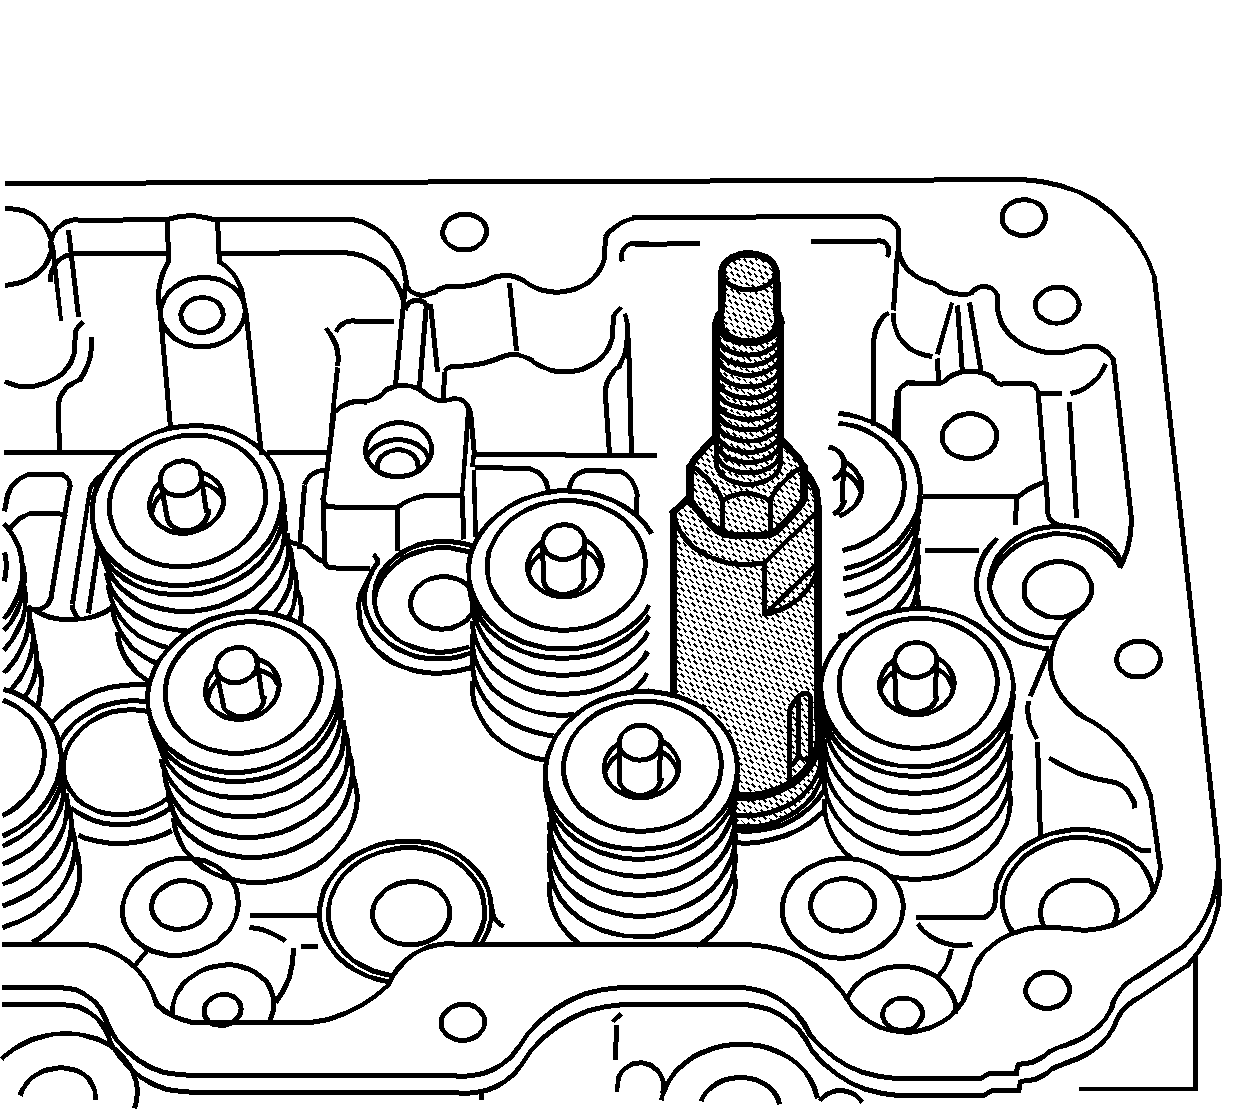
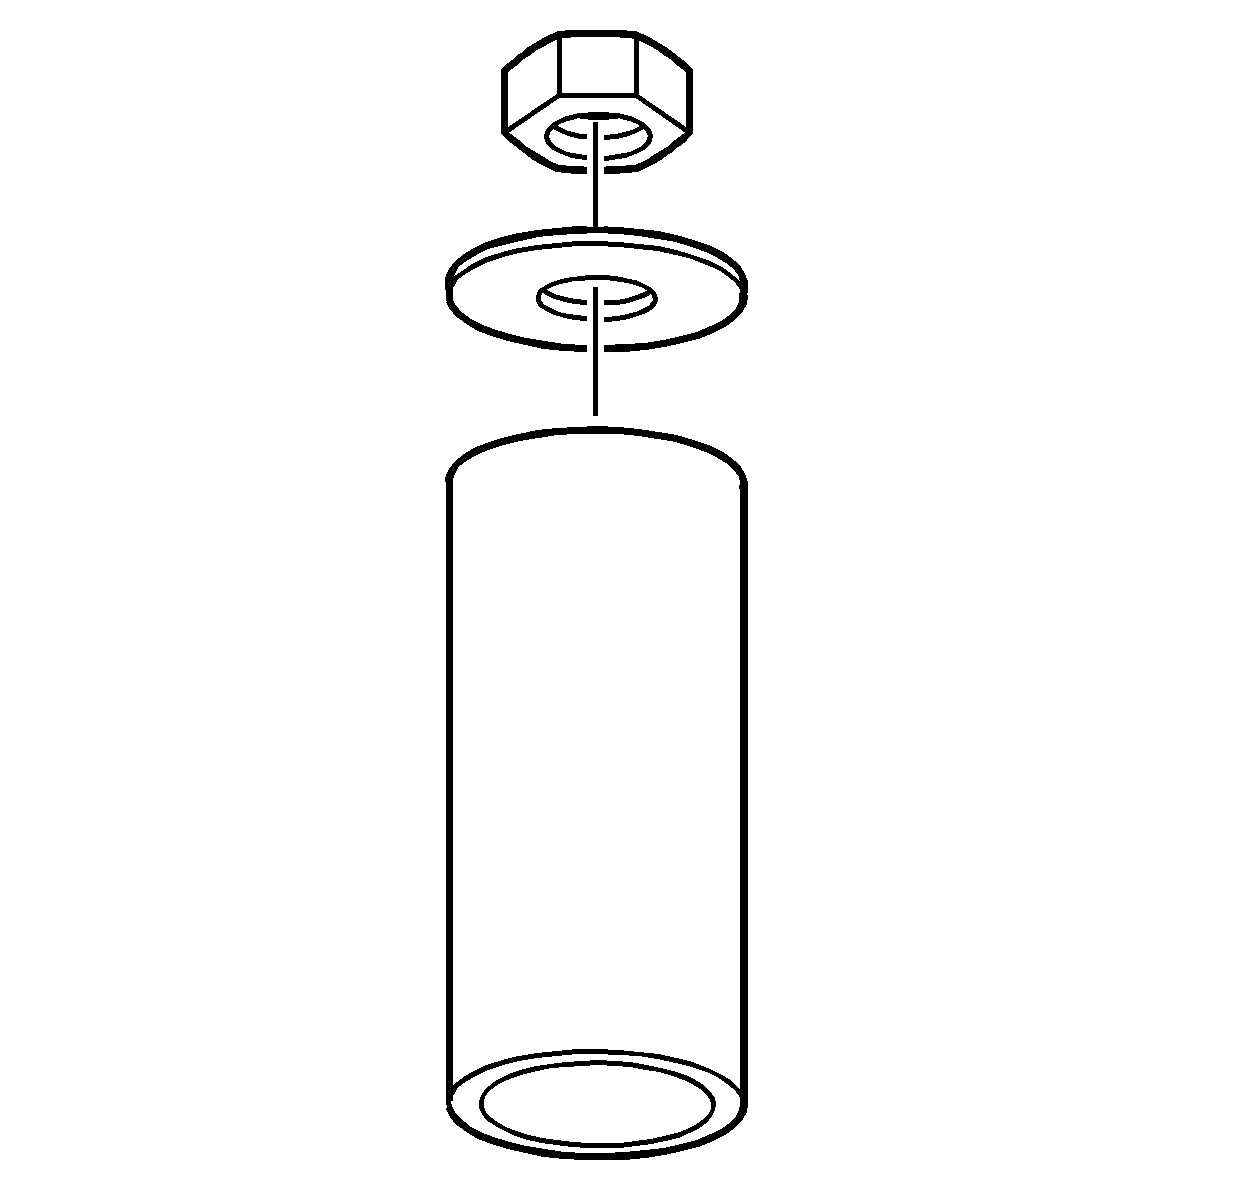
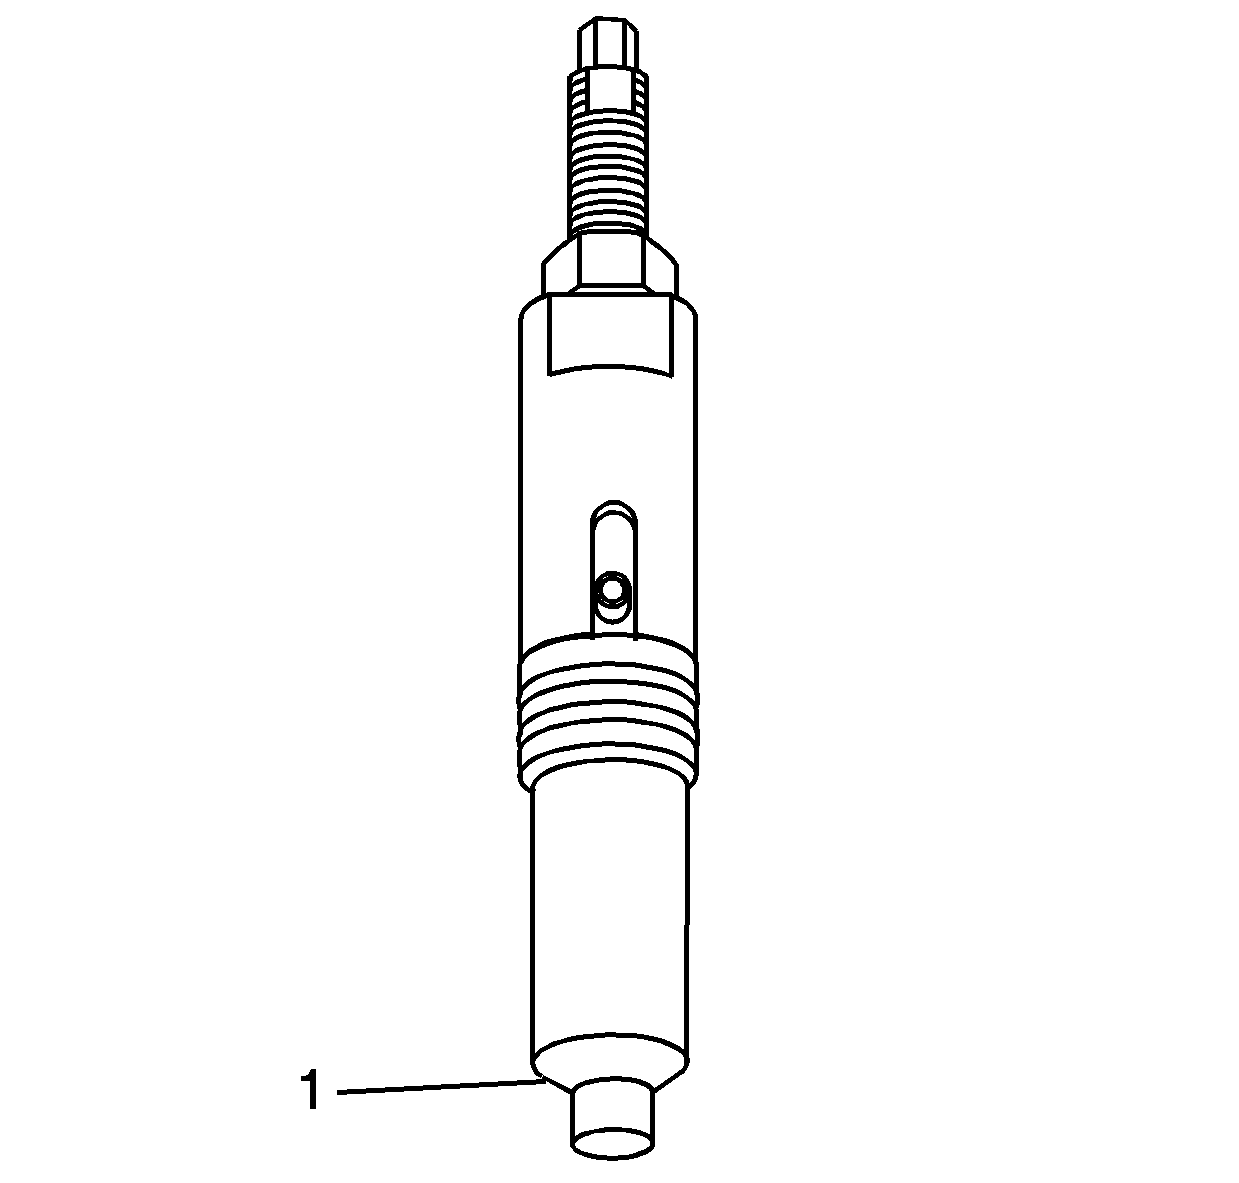
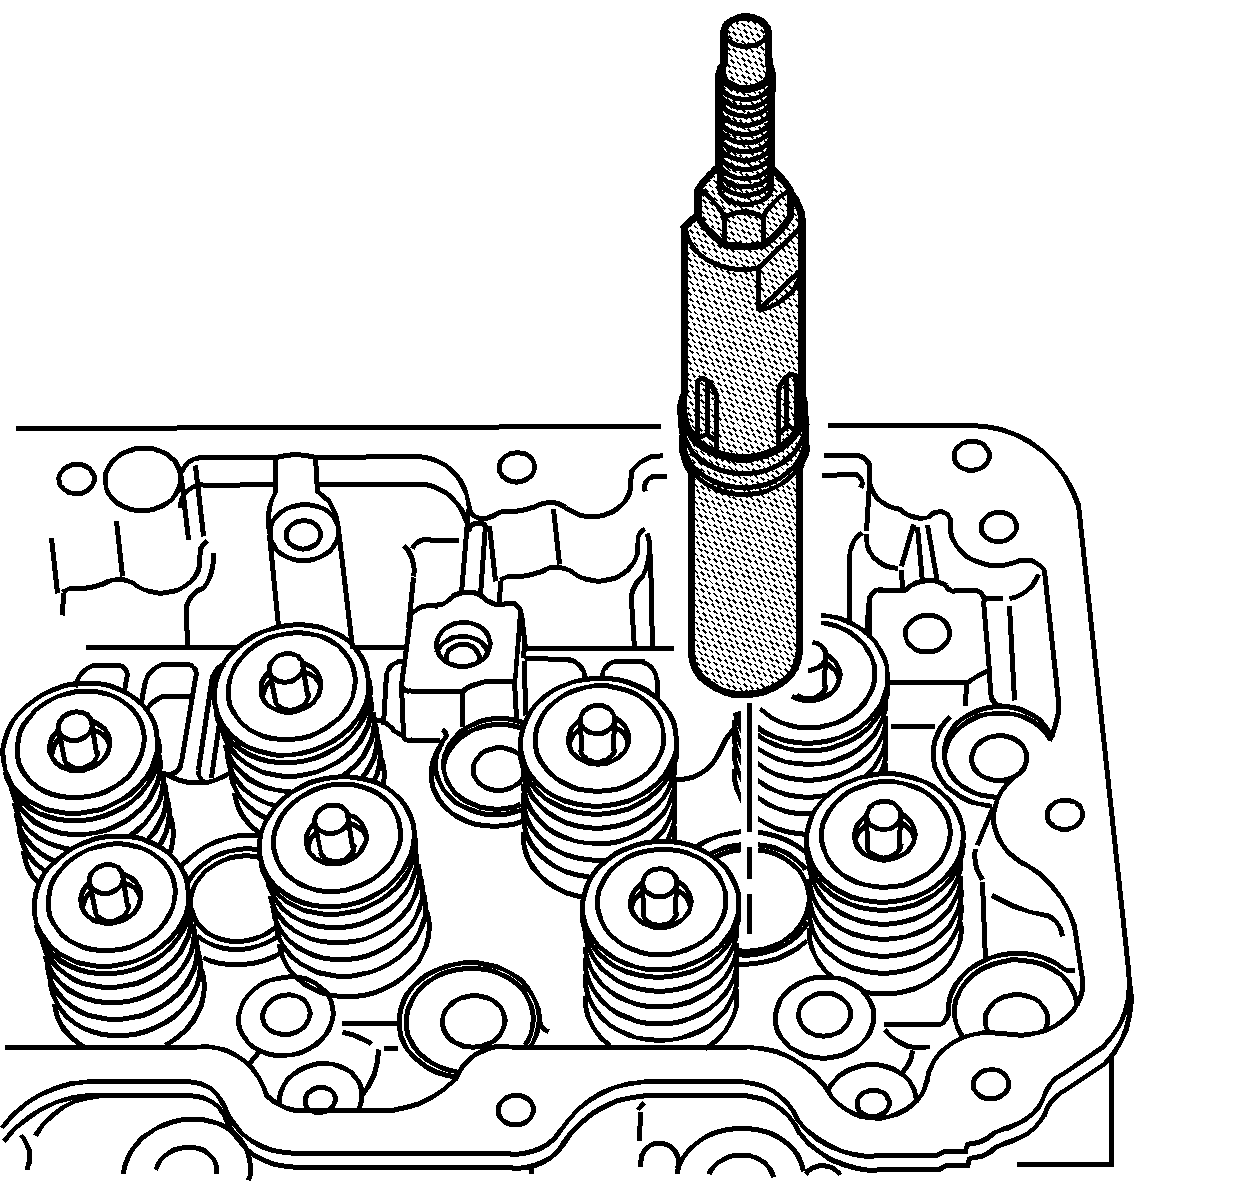
- Install J 45910 into the fuel injector sleeve.
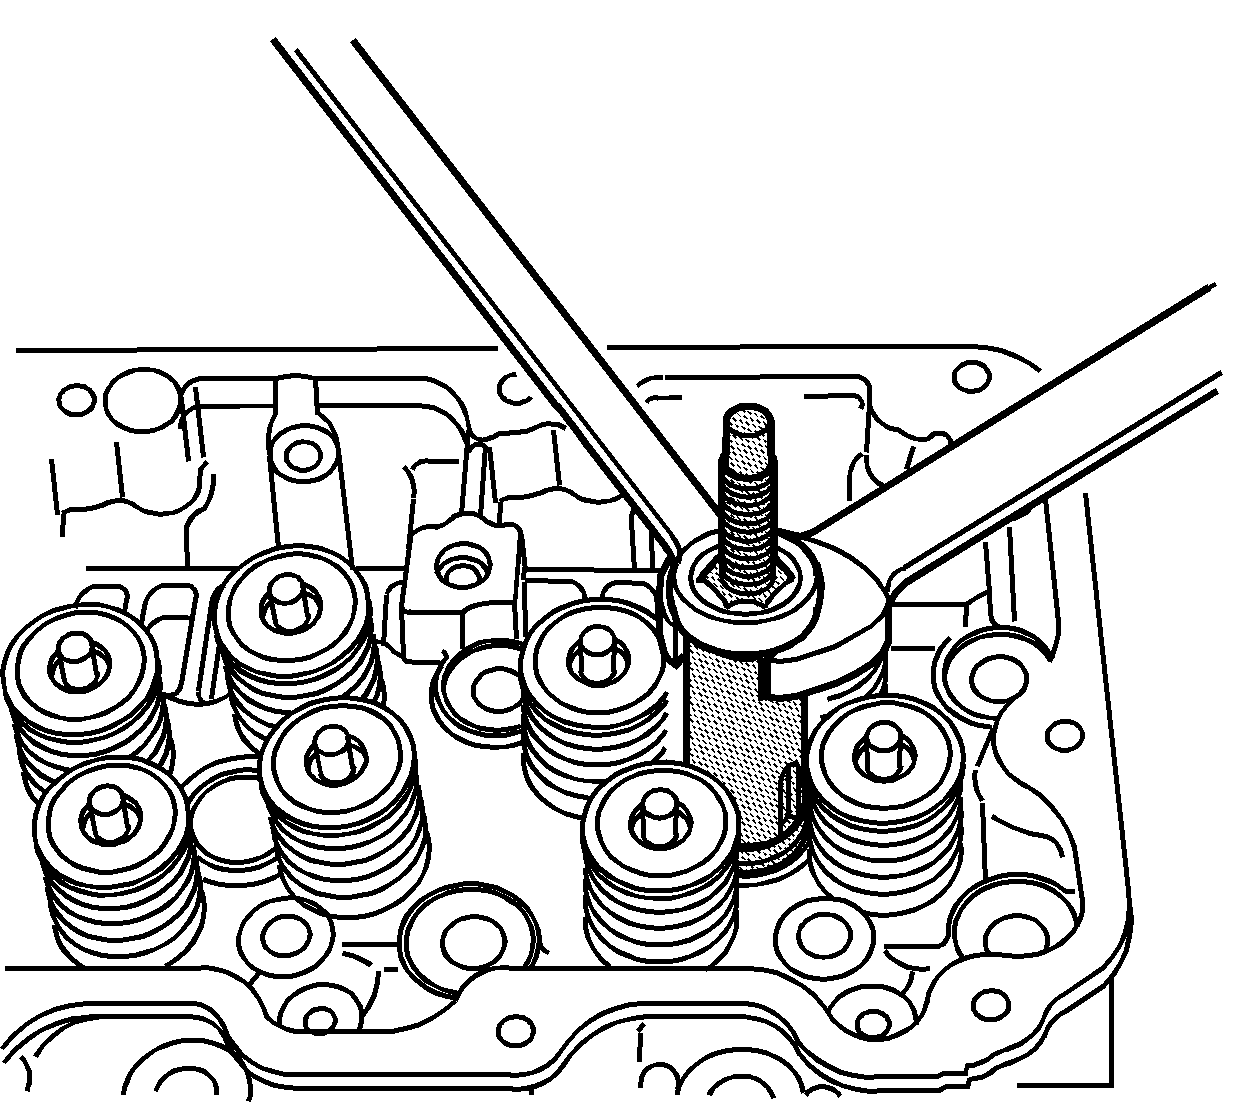
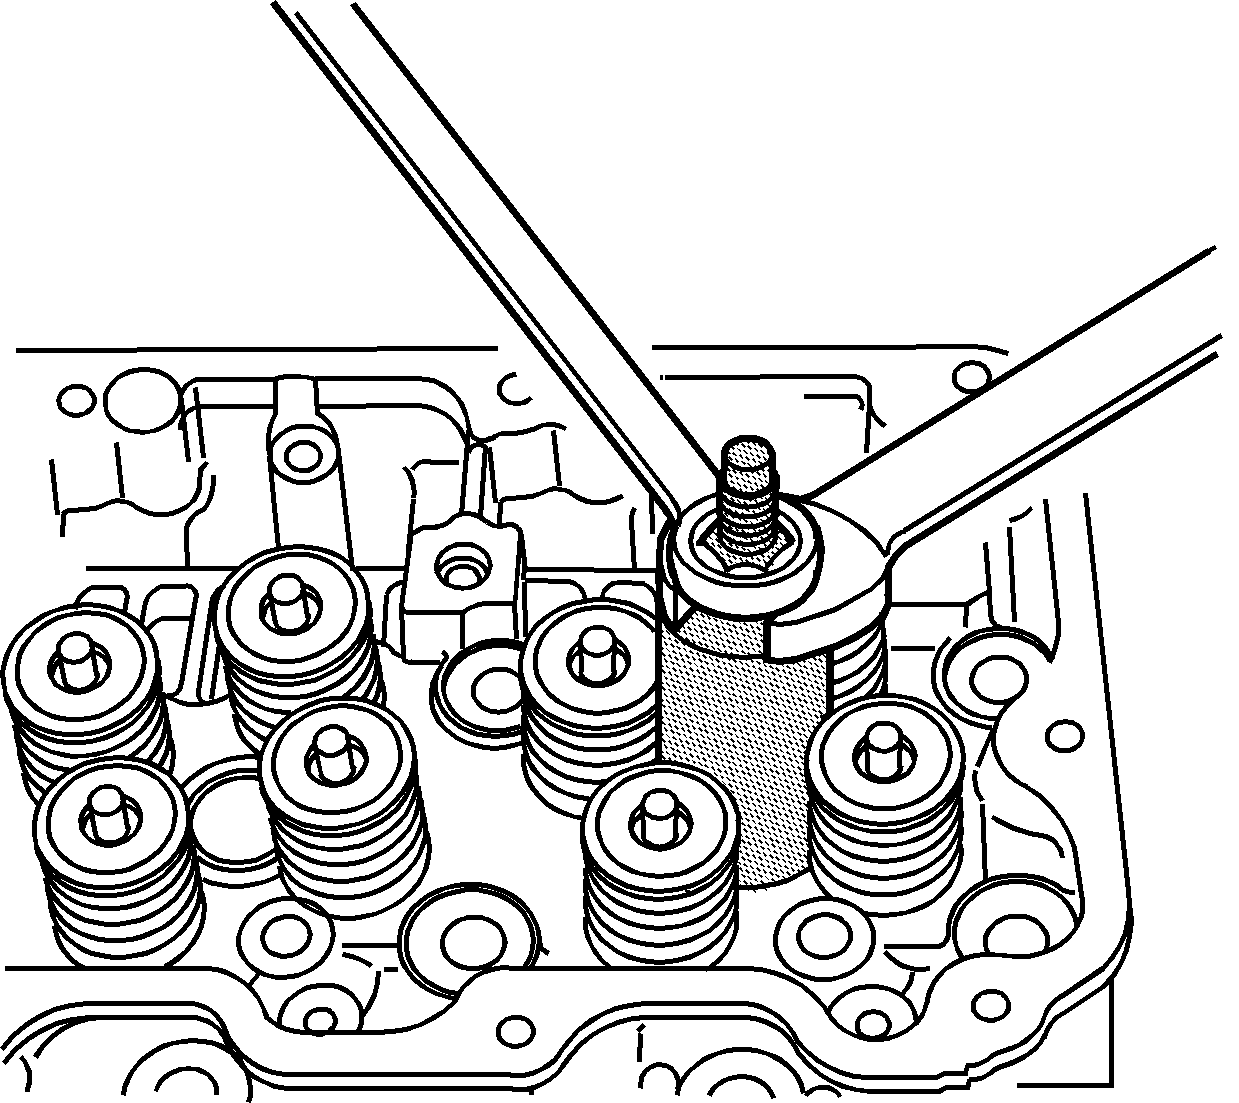
- Tighten the nut while holding J 45910 .
- Install J 45910-2 over J 45910-1 which are both part of kit J 45910 , and add the washer and nut.
- Hold J 45910 while turning the nut to remove the fuel injector sleeve.
- Remove J 45910 with the fuel injector sleeve.
- Remove the O-rings (1).
Important: Confirm which side of the banjo washers have the largest hole.
Installation Procedure
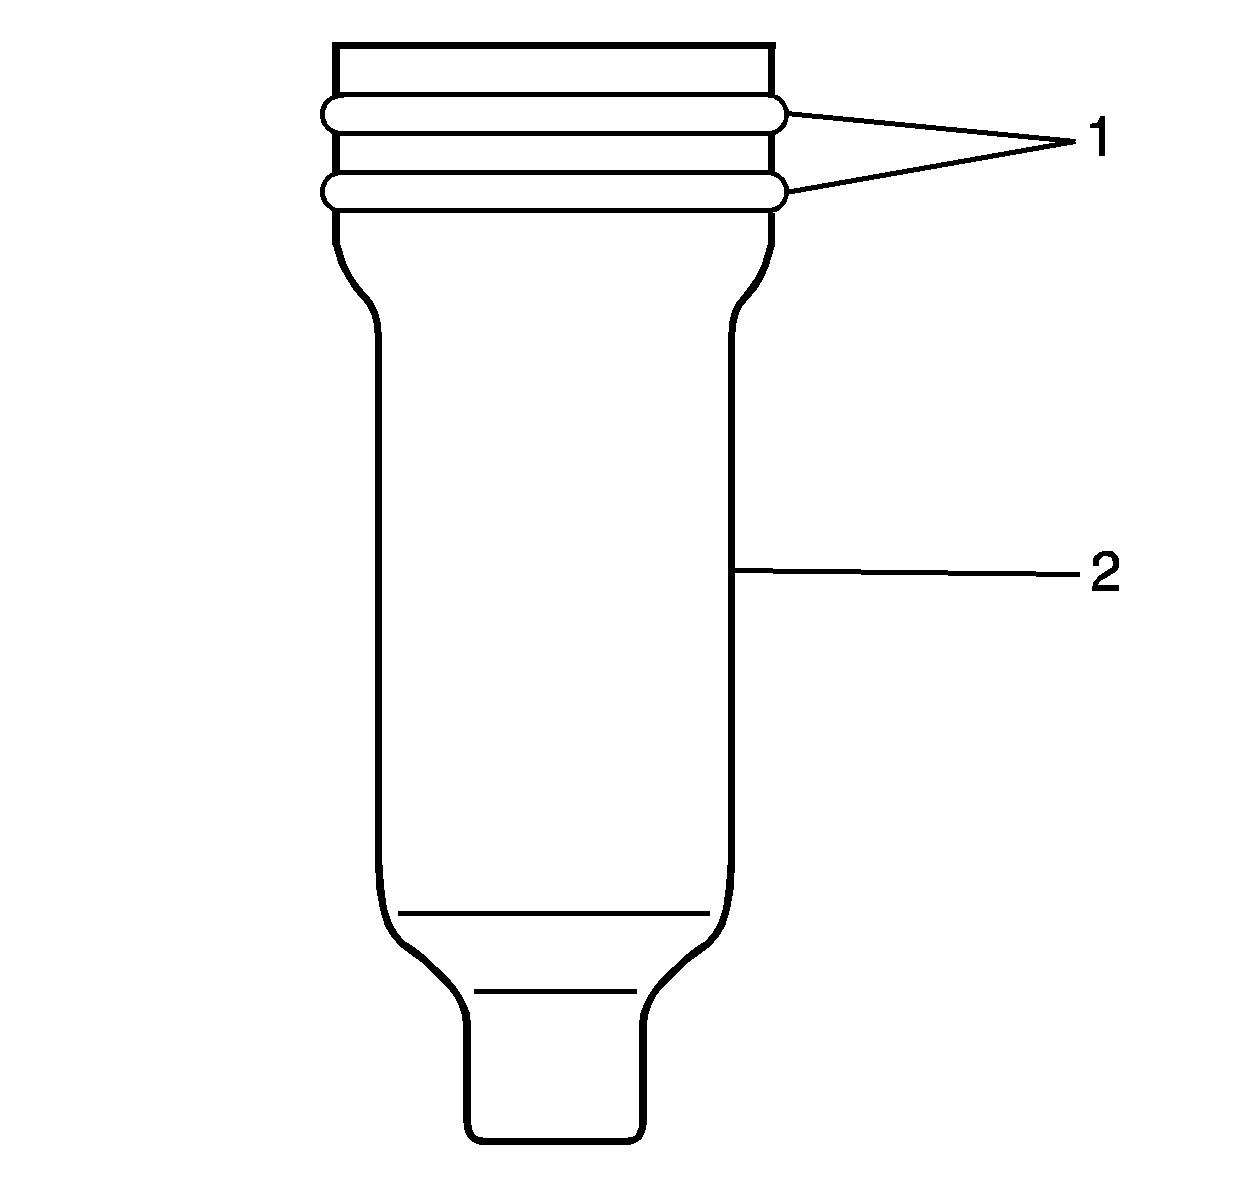
- Clean the fuel injector sleeve lower sealing area (1) and the sleeve bore with GM P/N 12377981 (Canadian P/N 10953463).
- Lubricate and install new O-rings (1) on the fuel injector sleeve (2).
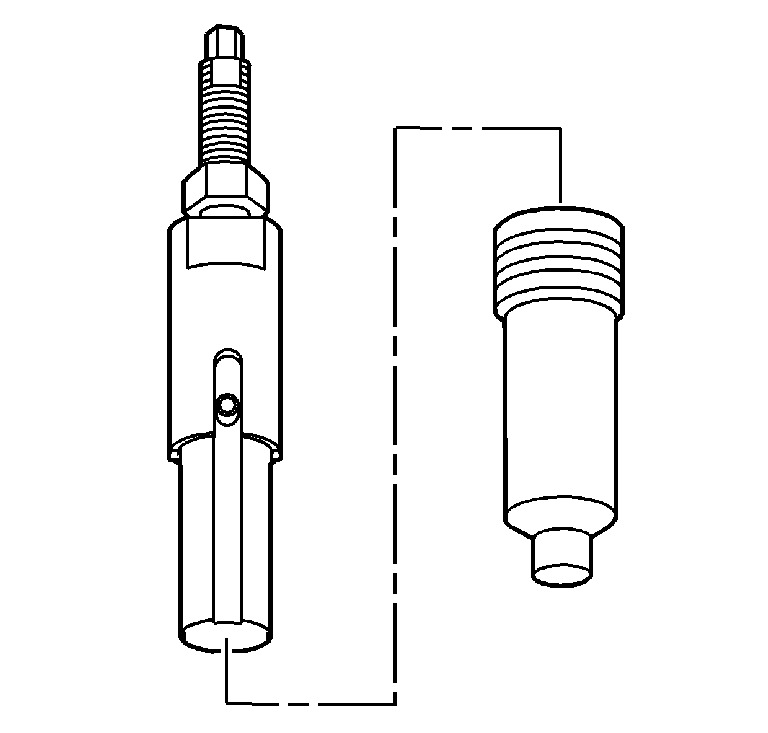
- Install the fuel injector sleeve onto J 45910 .
- Apply GM P/N 12345493 (Canadian P/N 10953488) or equivalent to the fuel injector sleeve lower sealing area (1).
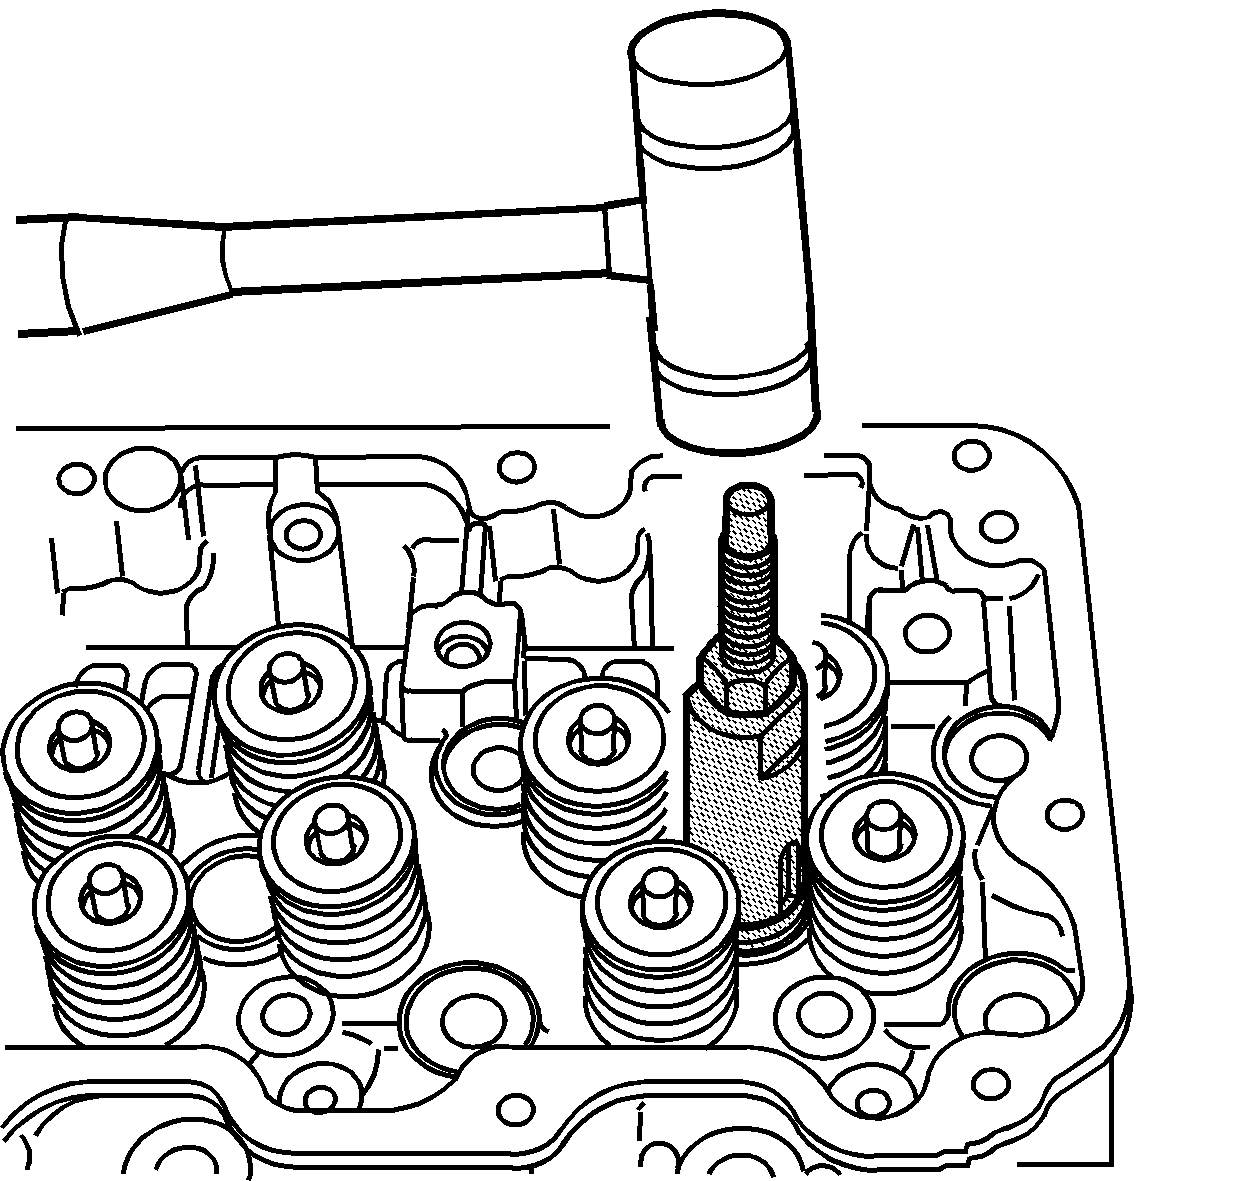
- Install the fuel injector sleeve with J 45910 into the cylinder head.
- Lightly tap on J 45910 with a hammer to install and seat the fuel injector sleeve.
- Remove J 45910 from the fuel injector sleeve.
- Replace the copper compression washer. Assembly grease may be needed to hold the washer in place.
- Install the new injectors.
- Install the retaining bolt on the injector bracket.
- Install the return line fuel injector.
- Perform the lower valve cover installation procedure. Refer to Valve Rocker Arm Cover Replacement - Lower Left Side or to Valve Rocker Arm Cover Replacement - Lower Right Side .
- Fill the cooling system. Refer to Cooling System Draining and Filling in Engine Cooling.
Important: Inspect the seating surface on the fuel injector sleeve and the fuel injector sleeve bore in the cylinder head for debris or damage. If the fuel injector sleeve bore is damaged, the cylinder head may need to be replaced.
Notice: Use the correct fastener in the correct location. Replacement fasteners must be the correct part number for that application. Fasteners requiring replacement or fasteners requiring the use of thread locking compound or sealant are identified in the service procedure. Do not use paints, lubricants, or corrosion inhibitors on fasteners or fastener joint surfaces unless specified. These coatings affect fastener torque and joint clamping force and may damage the fastener. Use the correct tightening sequence and specifications when installing fasteners in order to avoid damage to parts and systems.
Tighten
Tighten the fuel injector bracket bolt to 49 N·m (36 lb ft).
Important: Always install new copper gaskets on the fuel injector lines.
Tighten
Tighten the return line bolts to 12 N·m (106 lb in).
