For 1990-2009 cars only
Stabilizer Shaft Replacement 6500, 7500, 8500
Removal Procedure
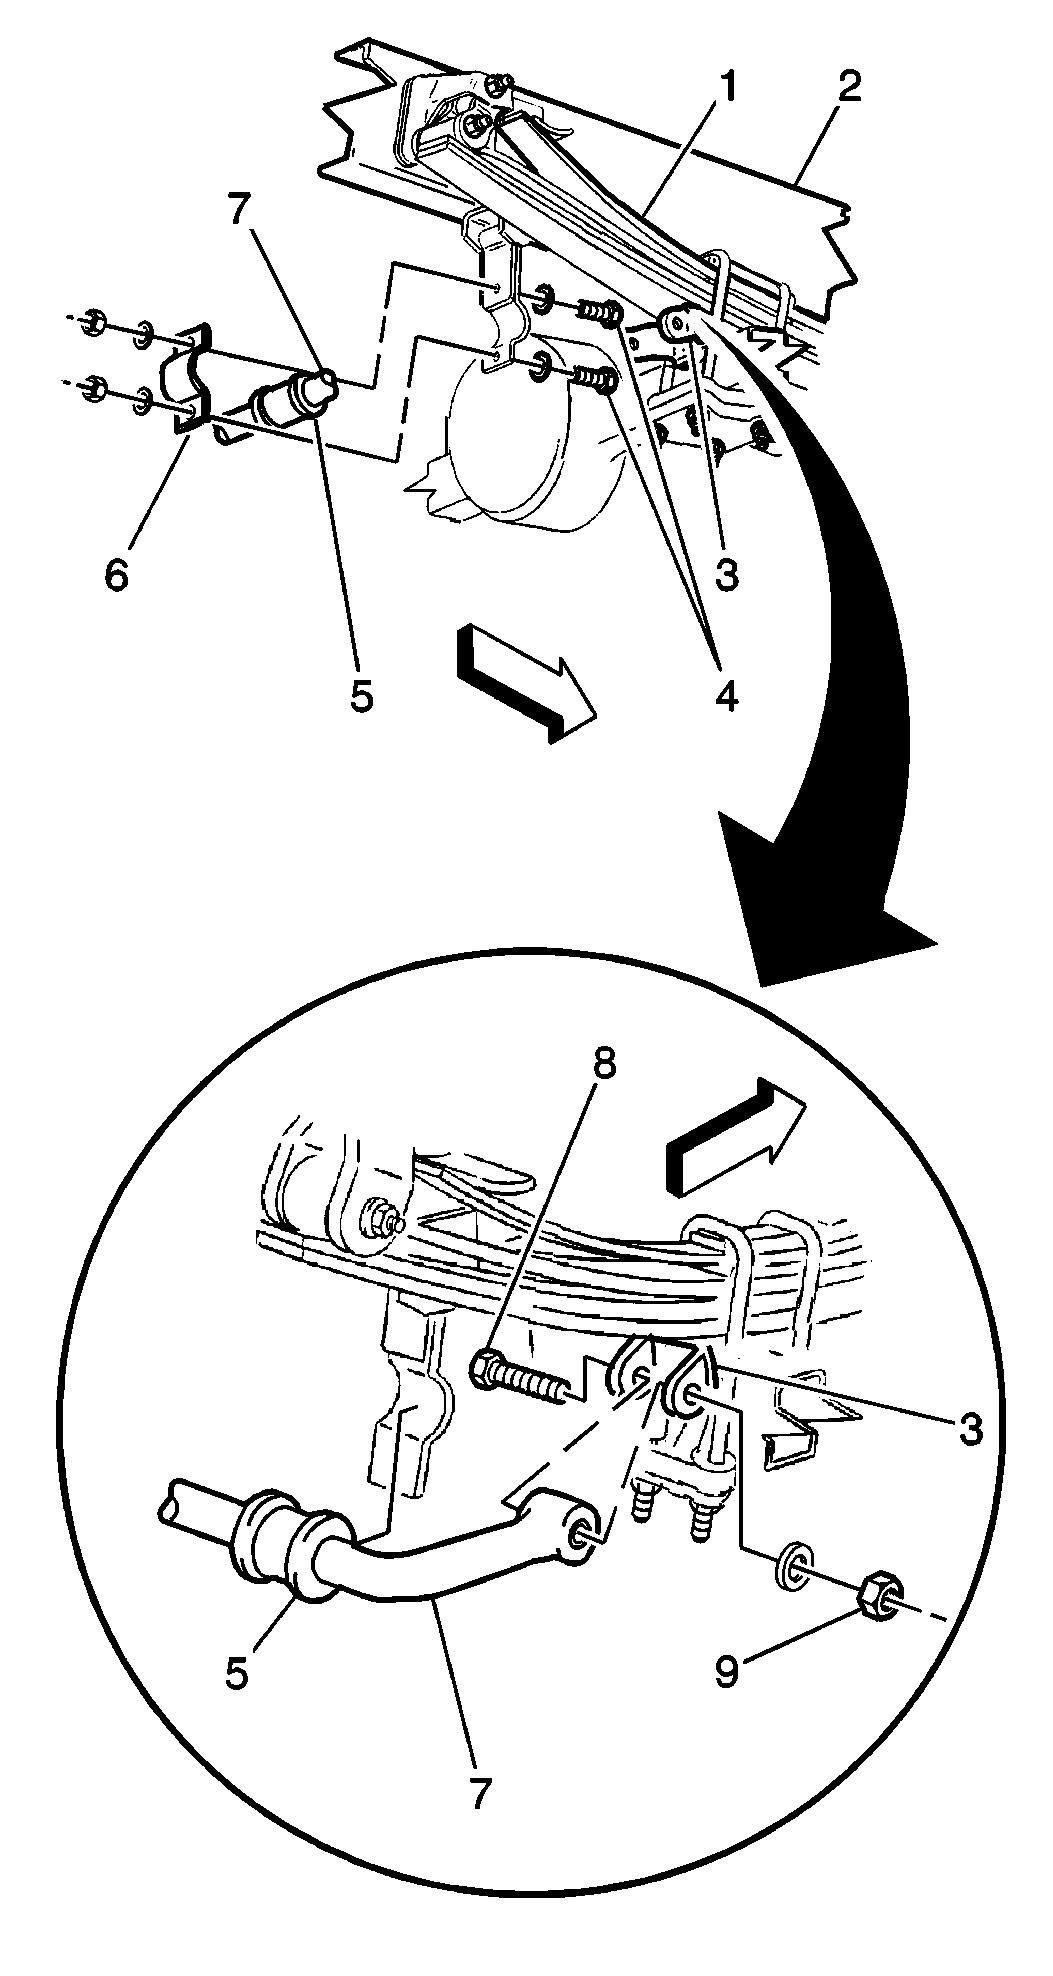
- Remove the stabilizer shaft clamp nuts and washers.
- Remove the stabilizer shaft clamp (6).
- Remove the stabilizer shaft clamp bolts (4).
- Remove the stabilizer shaft bracket/spring seat nuts (9) and washers.
- Remove the stabilizer shaft bracket/spring seat bolts (8).
- Remove the stabilizer shaft (7) from the vehicle.
- Inspect the stabilizer insulators (5) for wear and damage. Replace the stabilizer insulators if wear or damage is evident.
- Remove the stabilizer insulator from the stabilizer shaft.
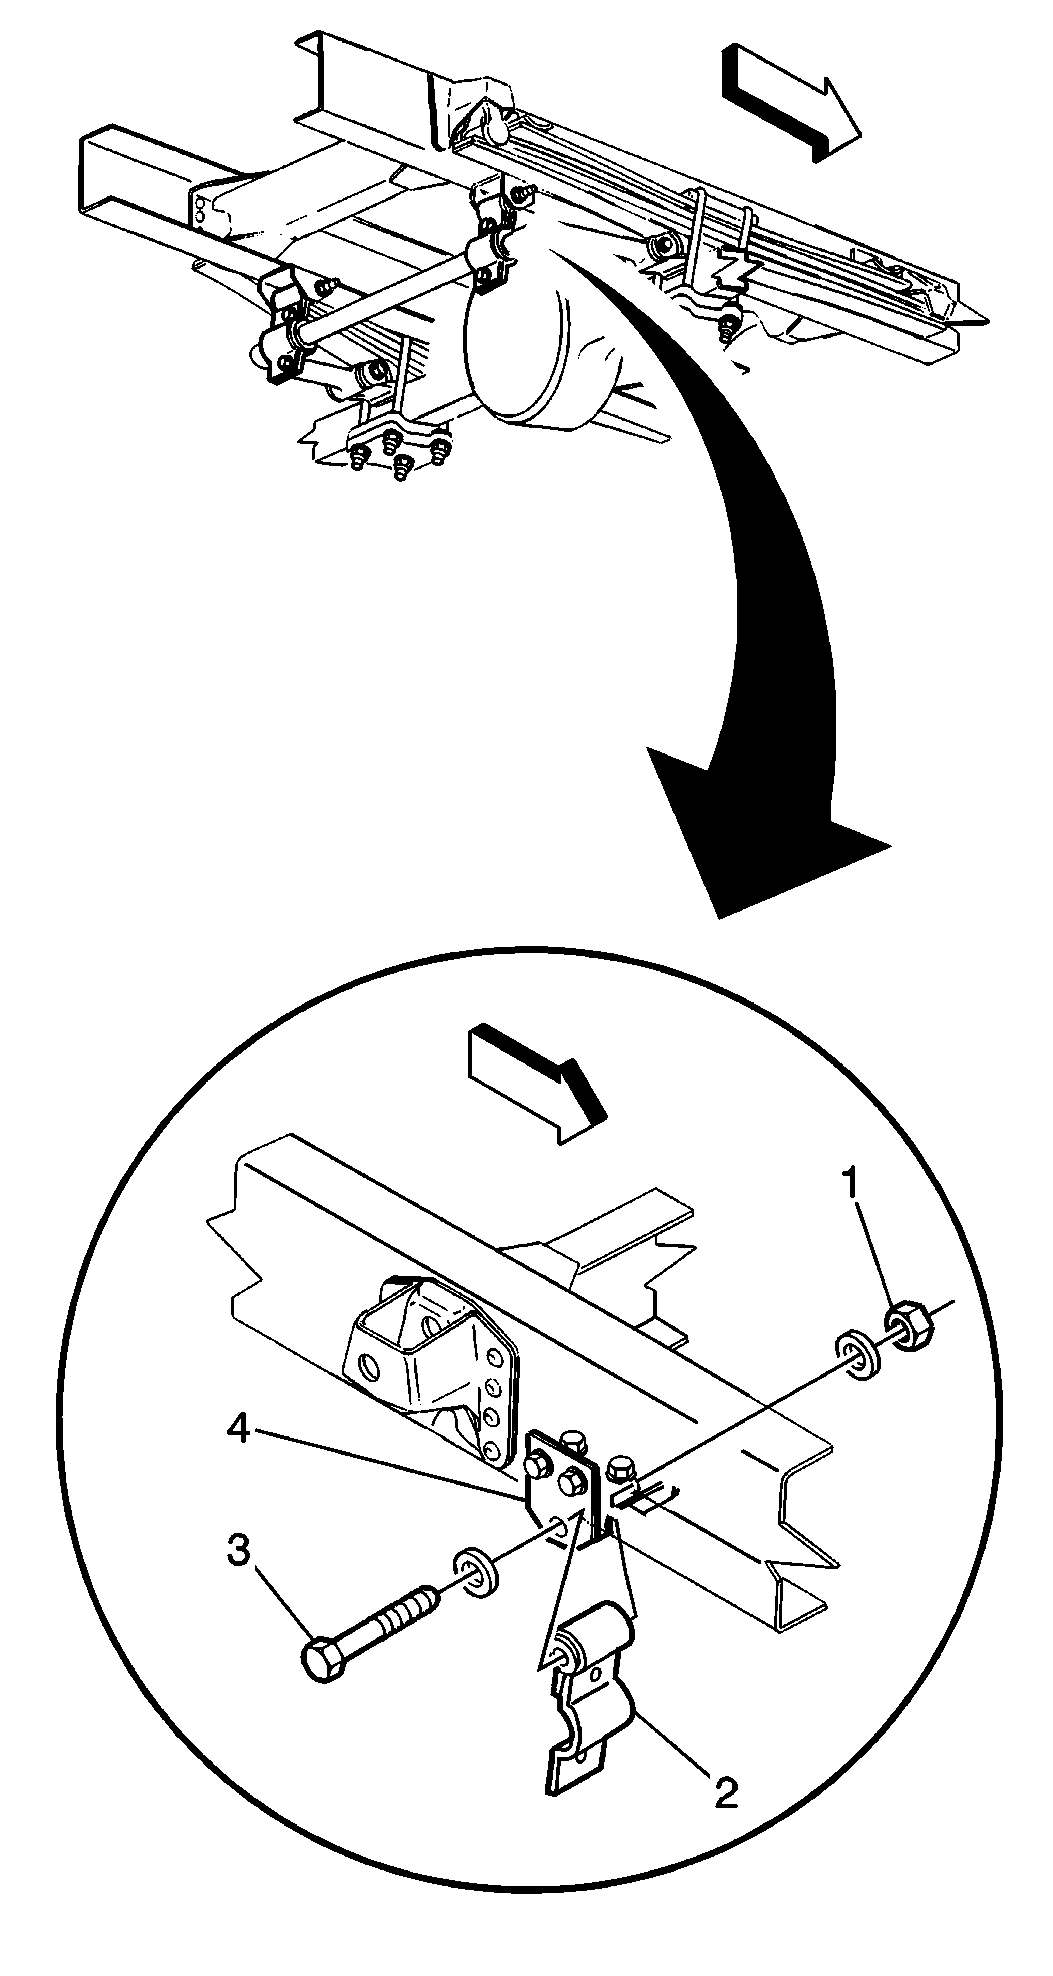
- Remove the stabilizer shaft bracket retaining nuts (1) and washers.
- Remove the stabilizer shaft bracket retaining bolts (3).
- Remove the stabilizer shaft bracket (2).
- Remove the stabilizer shaft bracket to side member retaining nuts (3, 7) and washers.
- Remove the stabilizer shaft bracket to side member bolts (4, 5).
- Remove the stabilizer shaft bracket (2, 6) from the side member.
Important: If the stabilizer brackets require replacement, perform the next 2 steps.
Installation Procedure
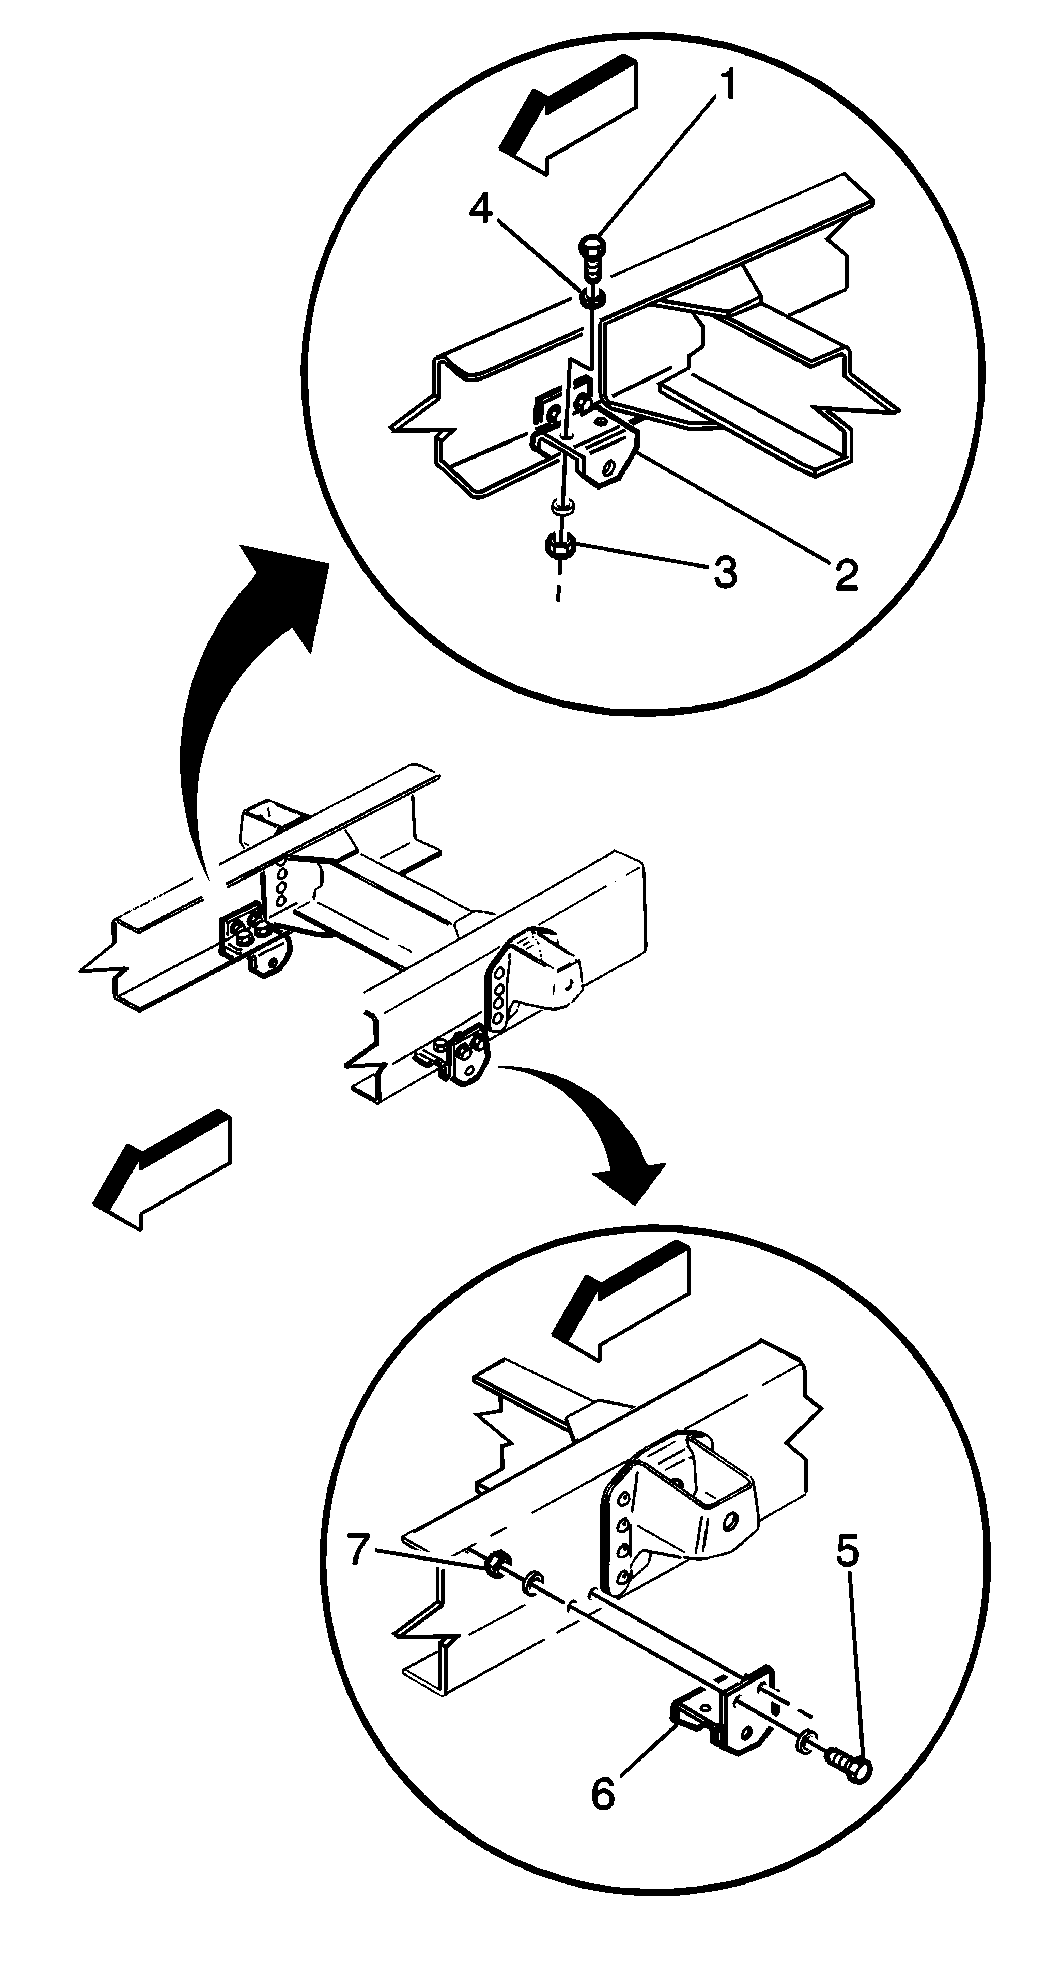
- Install the stabilizer shaft bracket (2, 6) to the side member.
- Install the stabilizer shaft bracket to the side member bolts (4, 5).
- Install the stabilizer shaft bracket to side member washers and retaining nuts (3, 7).
- Install the stabilizer shaft bracket (2).
- Install the stabilizer shaft bracket retaining bolt (3).
- Install the stabilizer shaft bracket washers and retaining nuts (1).
- Install the stabilizer insulator to the stabilizer shaft.
- Install the stabilizer shaft (7) to the stabilizer bracket/spring seats (3).
- Install the stabilizer shaft bracket/spring seat retaining bolts (8).
- Install the stabilizer shaft bracket/spring seat washers and nuts (9).
- Install the stabilizer shaft clamps (6).
- Install the stabilizer shaft clamp bolts (4).
- Install the stabilizer shaft clamp washers and bolts.
- Tighten the stabilizer shaft nut to 240 N·m (177 lb ft).
- Tighten the stabilizer clamp nut to 220 N·m (162 lb ft).
Important: If the stabilizer brackets require replacement, perform the first 2 steps.
Notice: Refer to Fastener Notice in the Preface section.
Tighten
Tighten the nut to 85 N·m (63 lb ft).
Tighten
Tighten the stabilizer link nut to 240 N·m (177 lb ft).
Important: Do not tighten the nuts at this time.
Tighten
Stabilizer Shaft Replacement 4500, 5500
Removal Procedure
- Set the parking brake.
- Block the front wheels.
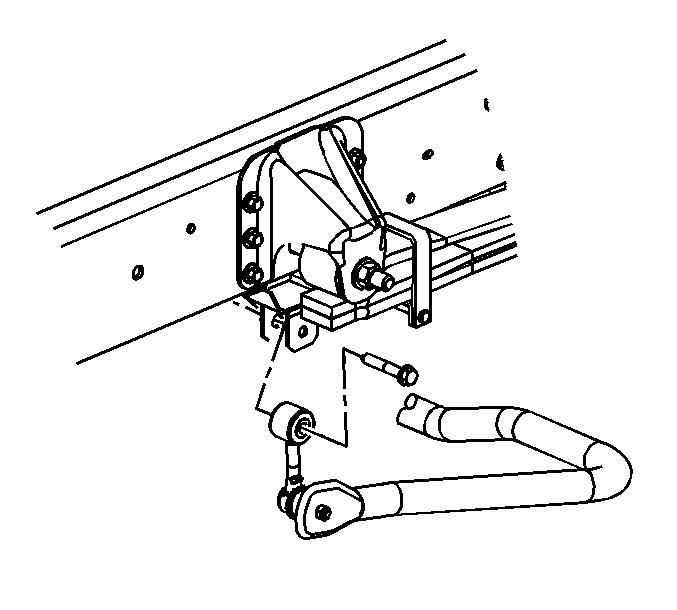
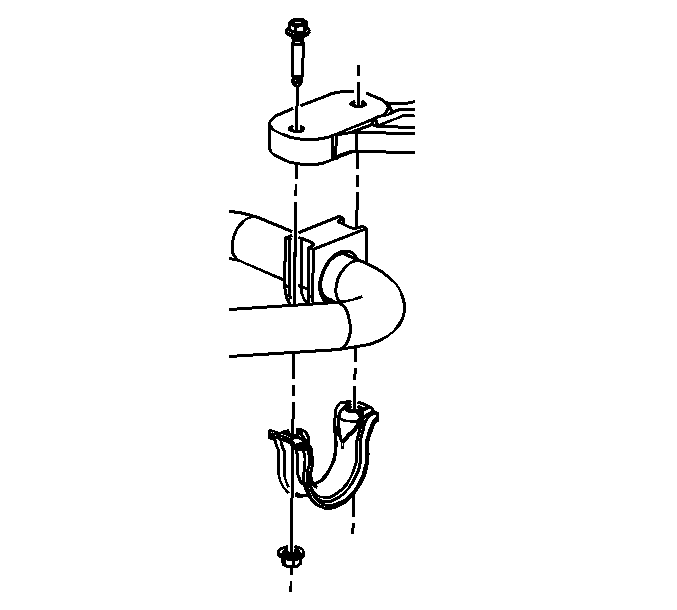
- Remove the stabilizer links bolts.
- Remove the rear stabilizer shaft to rear spring anchor plate bolts.
- Remove the rear stabilizer shaft.
- Remove the stabilizer insulator from the stabilizer shaft.
- Inspect the stabilizer insulators for wear and damage. Replace the stabilizer insulators if wear or damage is evident.
Installation Procedure
- Install the stabilizer insulators to the shaft if they were removed.
- Install the stabilizer shaft into the vehicle.
- Install the rear stabilizer shaft to rear spring anchor plate bolts and nuts.
- Install the stabilizer shaft links to the shaft if removed.
- Install the stabilizer shaft links to the rear stabilizer shaft bracket.
- Remove the blocks from the front wheels.
Notice: Refer to Fastener Notice in the Preface section.
Tighten
Tighten the stabilizer nut to 50 N·m (37 lb ft).
Tighten
Tighten the stabilizer link nut to 100 N·m (74 lb ft).
