Removal Procedure
Caution: To prevent injury, use jacks and other equipment to block the vehicle
securely to prevent the axle assemblies from rolling or pivoting at the equalizer
beam ends when the torque rods are disconnected.
Important: Remove the tandem axle suspension either as a complete suspension unit or as individual components. Refer to
Torque Rod Replacement
or to
Leaf Spring Replacement
or to
Equalizing Beam Replacement
.
- Set the parking brake.
- Block the front wheels.
- Cage the spring brake chambers. Refer to
Caging the Rear Air Brake Chamber
.
- Drain the air system. Refer to
Air Brake Reservoir Draining
.
- Raise the vehicle frame using a suitable lifting device.
- Support the frame forward of the rear axle. Refer to
Lifting and Jacking the Vehicle
.
- Remove the brake lines.
- Remove the wiring.
- Remove the propeller shaft from between the axles. Refer to the appropriate procedure:
- Remove the differential lock lines.
- Remove the nut and washer.
- Remove the rebound bolt.
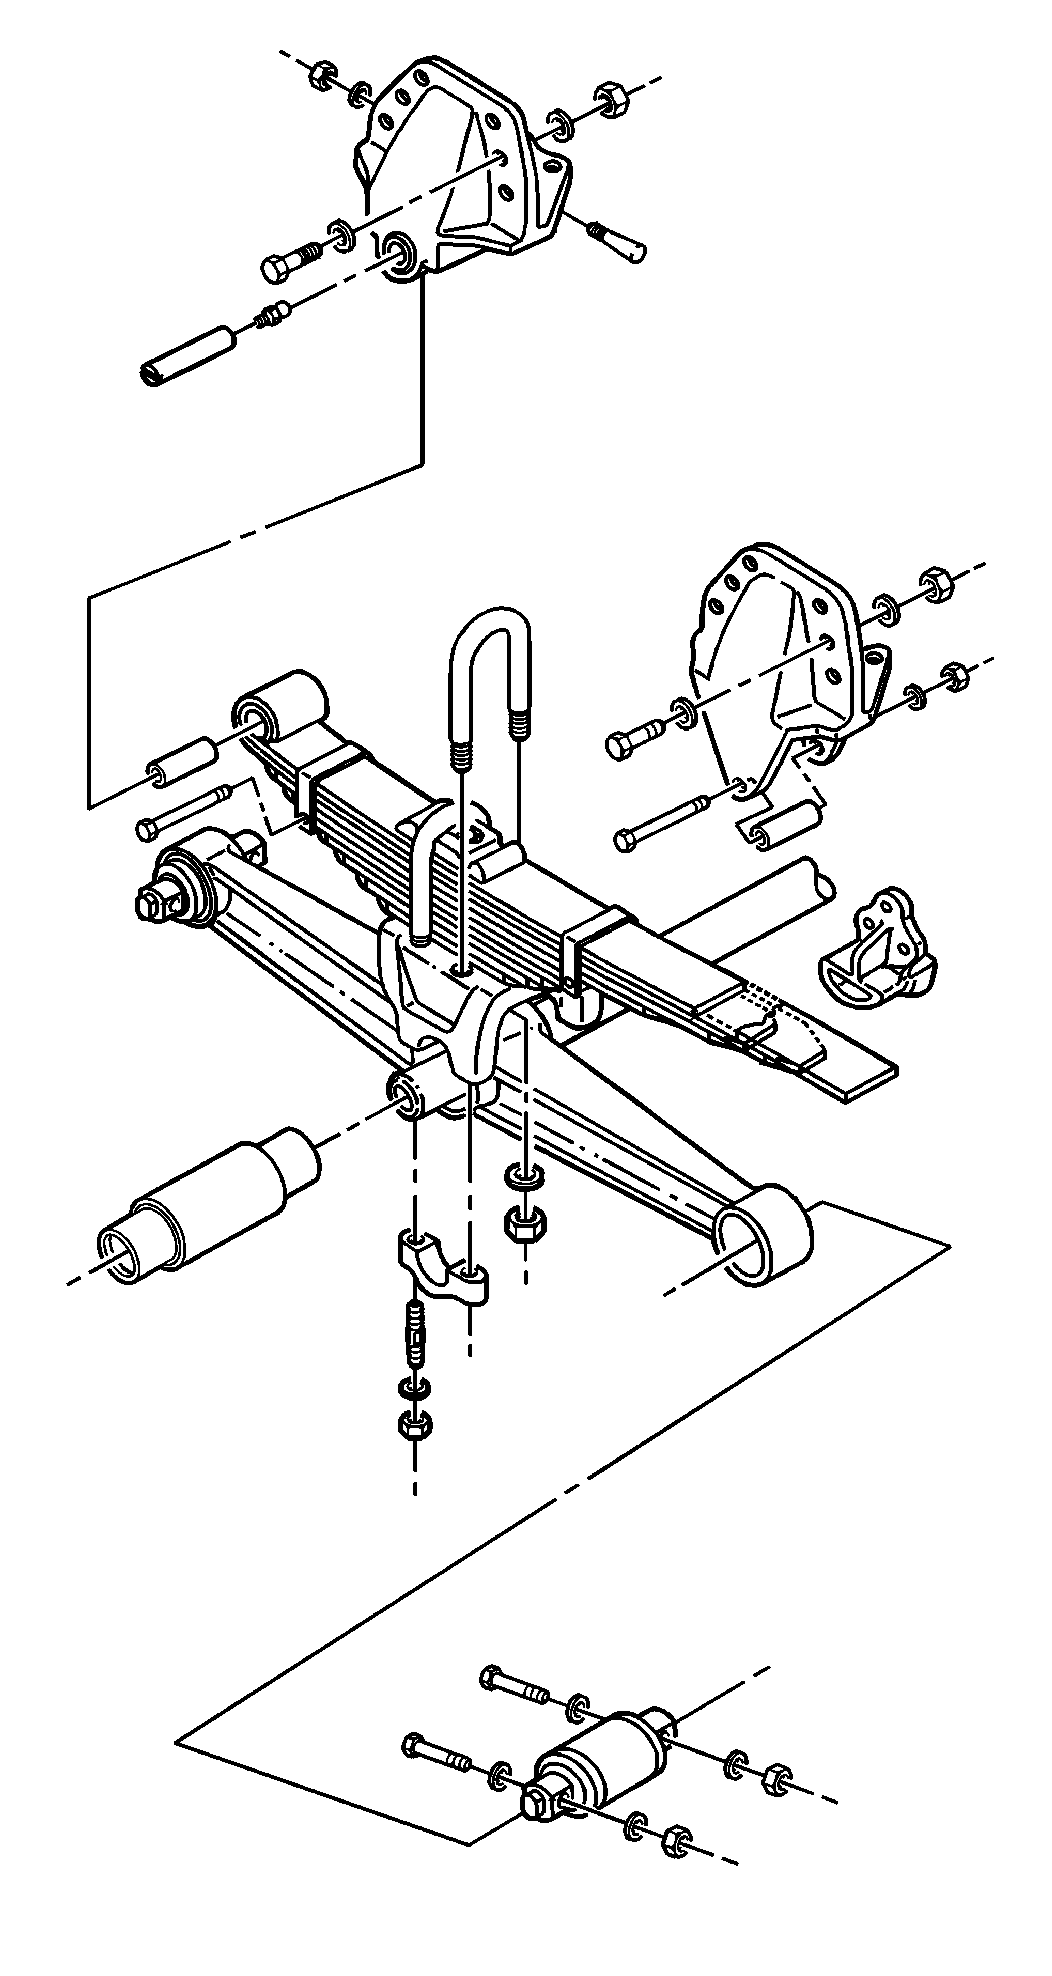
- Remove the following components from the spring brackets:
Caution: To avoid the possibility of injury, have an assistant remove the spacers
(when used), and pivot the forward spring mounting brackets to the rear, letting
them rest on the top of the spring assembly.
- Remove the propeller shaft from the forward rear axle. Refer to the appropriate procedure:
- Remove the suspension assembly and the frame spacers, if used.
| 15.1. | Raise the frame and roll out the axles. |
| 15.2. | Secure the spring mounting bracket to the top of the spring assembly. |
Installation Procedure
- Install the suspension assembly.
| 1.1. | Raise the frame and roll the axles into place. |
| 1.2. | Lower the frame in order to line up the brackets. |
- Install the frame spacers, if used.
Notice: Use the correct fastener in the correct location. Replacement fasteners
must be the correct part number for that application. Fasteners requiring
replacement or fasteners requiring the use of thread locking compound or sealant
are identified in the service procedure. Do not use paints, lubricants, or
corrosion inhibitors on fasteners or fastener joint surfaces unless specified.
These coatings affect fastener torque and joint clamping force and may damage
the fastener. Use the correct tightening sequence and specifications when
installing fasteners in order to avoid damage to parts and systems.
- Install the following components to the spring brackets:
Tighten
| • | Tighten the front spring bracket nut to 200 N·m (149 lb ft).
|
| • | Tighten the rear spring bracket nut to 175 N·m (130 lb ft).
|
- Install the following components:
Tighten
Tighten the rebound nut to 75 N·m (55 lb ft).
- Install the propeller shafts. Refer to the appropriate procedure:
- Install the wiring.
- Install the differential lock lines.
- Install the brake lines.
- Uncage the spring brake chambers. Refer to
Caging the Rear Air Brake Chamber
.
