Fuel Tank Replacement Rear
Removal Procedure
- Drain the fuel tank. Refer to Fuel Tank Draining .
- Raise the vehicle on a suitable hoist. Refer to Lifting and Jacking the Vehicle .
- If equipped with a fuel tank shield, support the fuel tank shield.
- If equipped with a fuel tank shield, remove the 16 bolts and the fuel tank shield from the frame.
- Disconnect the vent hose at the fuel tank.
- Disconnect the filler tube at the fuel tank.
- Support the fuel tank.
- With the aid of an assistant, remove the fuel tank strap attaching bolts and the fuel tank strap bolts.
- Lower the fuel tank enough to disconnect the fuel sender electrical connector and the retaining clips.
- Remove the nut and ground strap from the fuel sender assembly.
- Disconnect the hoses from the fuel sender assembly.
- Remove the fuel tank from the vehicle and place the tank in a suitable work area.
- Remove the fuel sender assembly from the fuel tank. Refer to Fuel Sender Assembly Replacement .
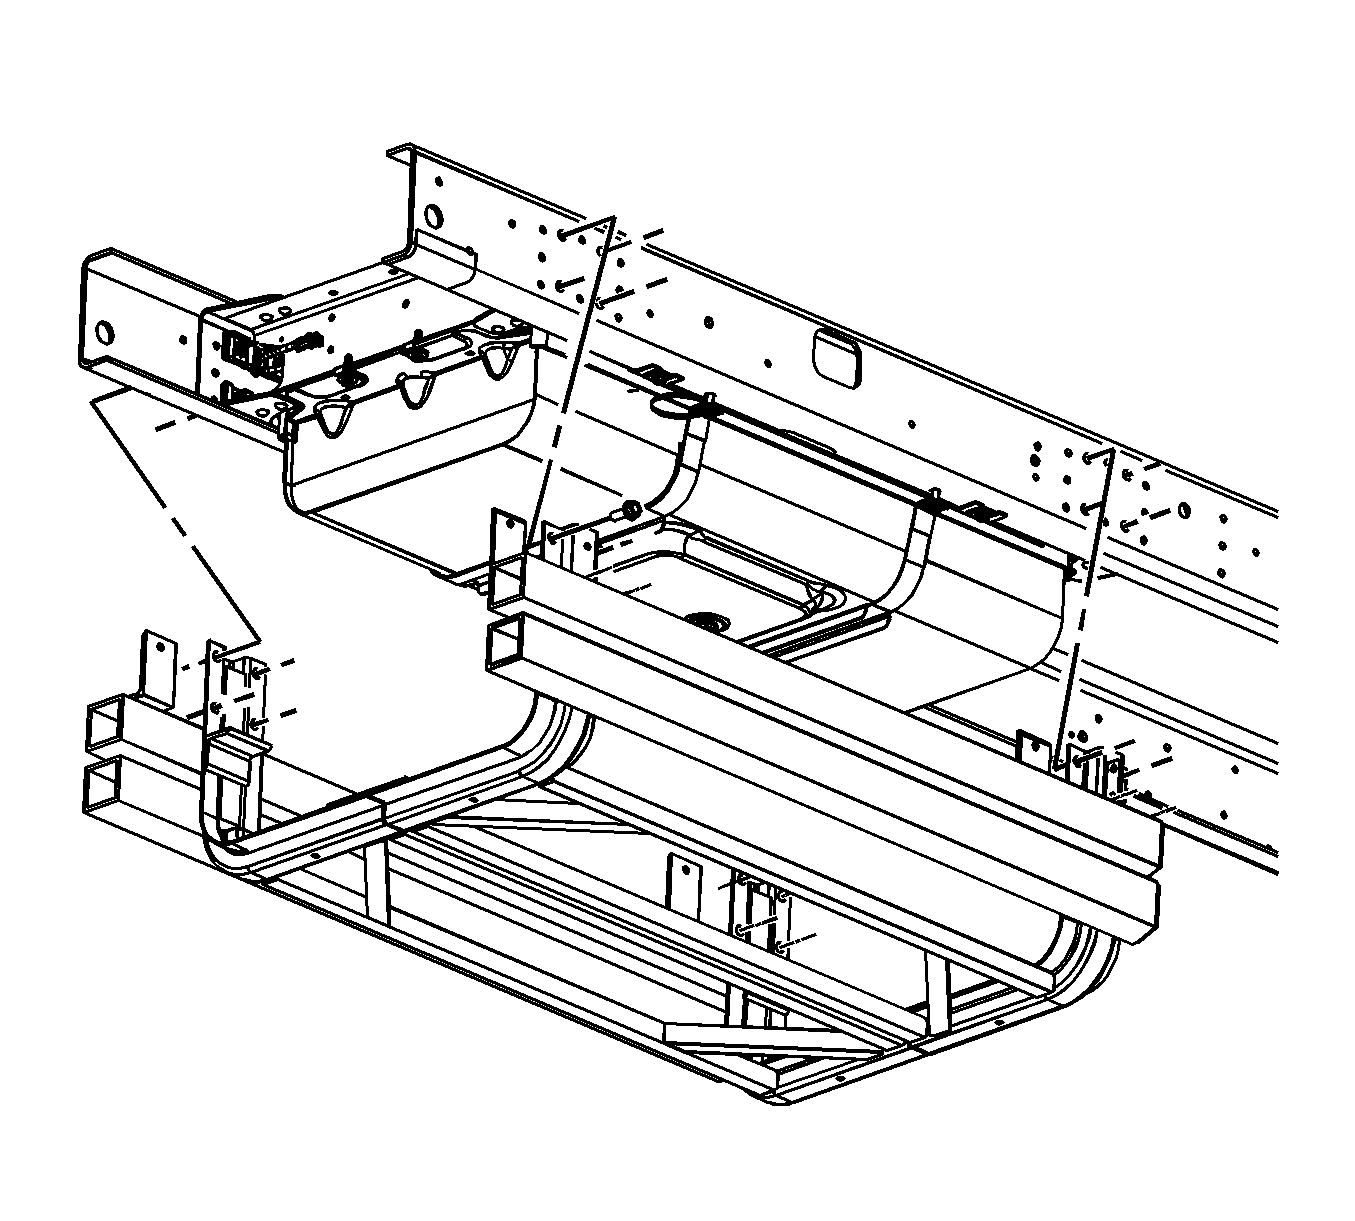
Important: Clean all the fuel pipe and hose connections as well as the surrounding areas before disconnecting the fuel pipes and hoses.
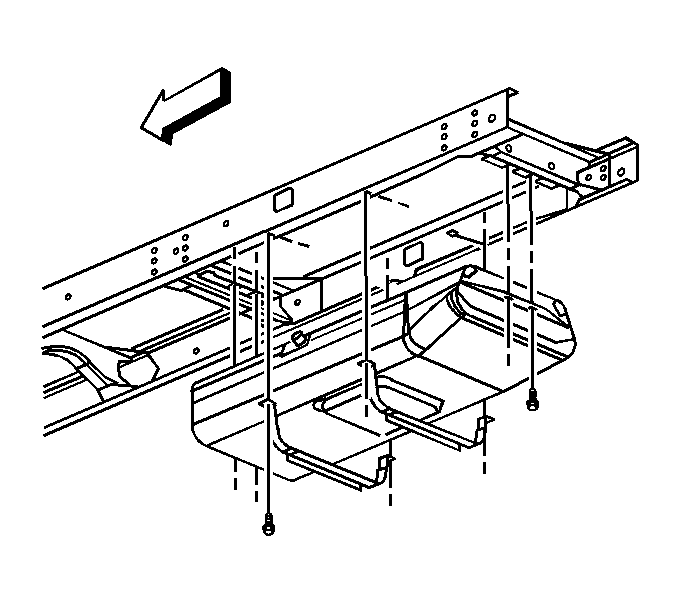
Installation Procedure
- Install the fuel sender assembly with new O-rings on the fuel pipes. Refer to Fuel Sender Assembly Replacement .
- Position and support the fuel tank.
- Position the fuel tank straps and connect the fuel feed and return hoses to the fuel sender fittings.
- Install the ground strap to the fuel sender assembly with nut.
- Connect the electrical connector to the fuel sender assembly.
- Install the retaining clips.
- Install the fuel filler vent hose to the vent pipe.
- Install the fuel filler neck connecting tube to the fuel tank.
- Install the fuel tank strap bolts.
- Install the fuel tank attaching bolts.
- If equipped with a fuel tank shield, install the fuel tank shield to the frame with 16 bolts.
- Start the engine and inspect for leaks.

Notice: Refer to Fastener Notice in the Preface section.
Tighten
Tighten the nut to 9 N·m (80 lb in).
Tighten
Tighten the fuel tank strap bolts to 35 N·m (26 lb ft).
Tighten
Tighten the fuel tank attaching bolts to 85 N·m (63 lb ft).

Tighten
Tighten the fuel tank shield bolts to 175 N·m (129 lb ft).
Fuel Tank Replacement 15 Gallon Tank
Removal Procedure
- Drain the fuel tank. Refer to Fuel Tank Draining .
- If required, raise the vehicle on a suitable hoist. Refer to Lifting and Jacking the Vehicle .
- Support the fuel tank shield.
- Remove the 4 nuts, 2 bolts and fuel tank shield from the frame.
- Disconnect the vent hose at the fuel tank.
- Disconnect the filler tube at the fuel tank.
- Support the fuel tank.
- With the aid of an assistant, remove the fuel tank strap attaching bolts and the fuel tank straps.
- Lower the fuel tank enough to disconnect the fuel sender electrical connector and the retaining clips.
- Disconnect the hoses from the fuel sender assembly. Refer to Metal Collar Quick Connect Fitting Service .
- Remove the fuel tank from the vehicle and place the tank in a suitable work area.
- If required, remove the fuel sender assembly from the fuel tank . Refer to Fuel Sender Assembly Replacement .
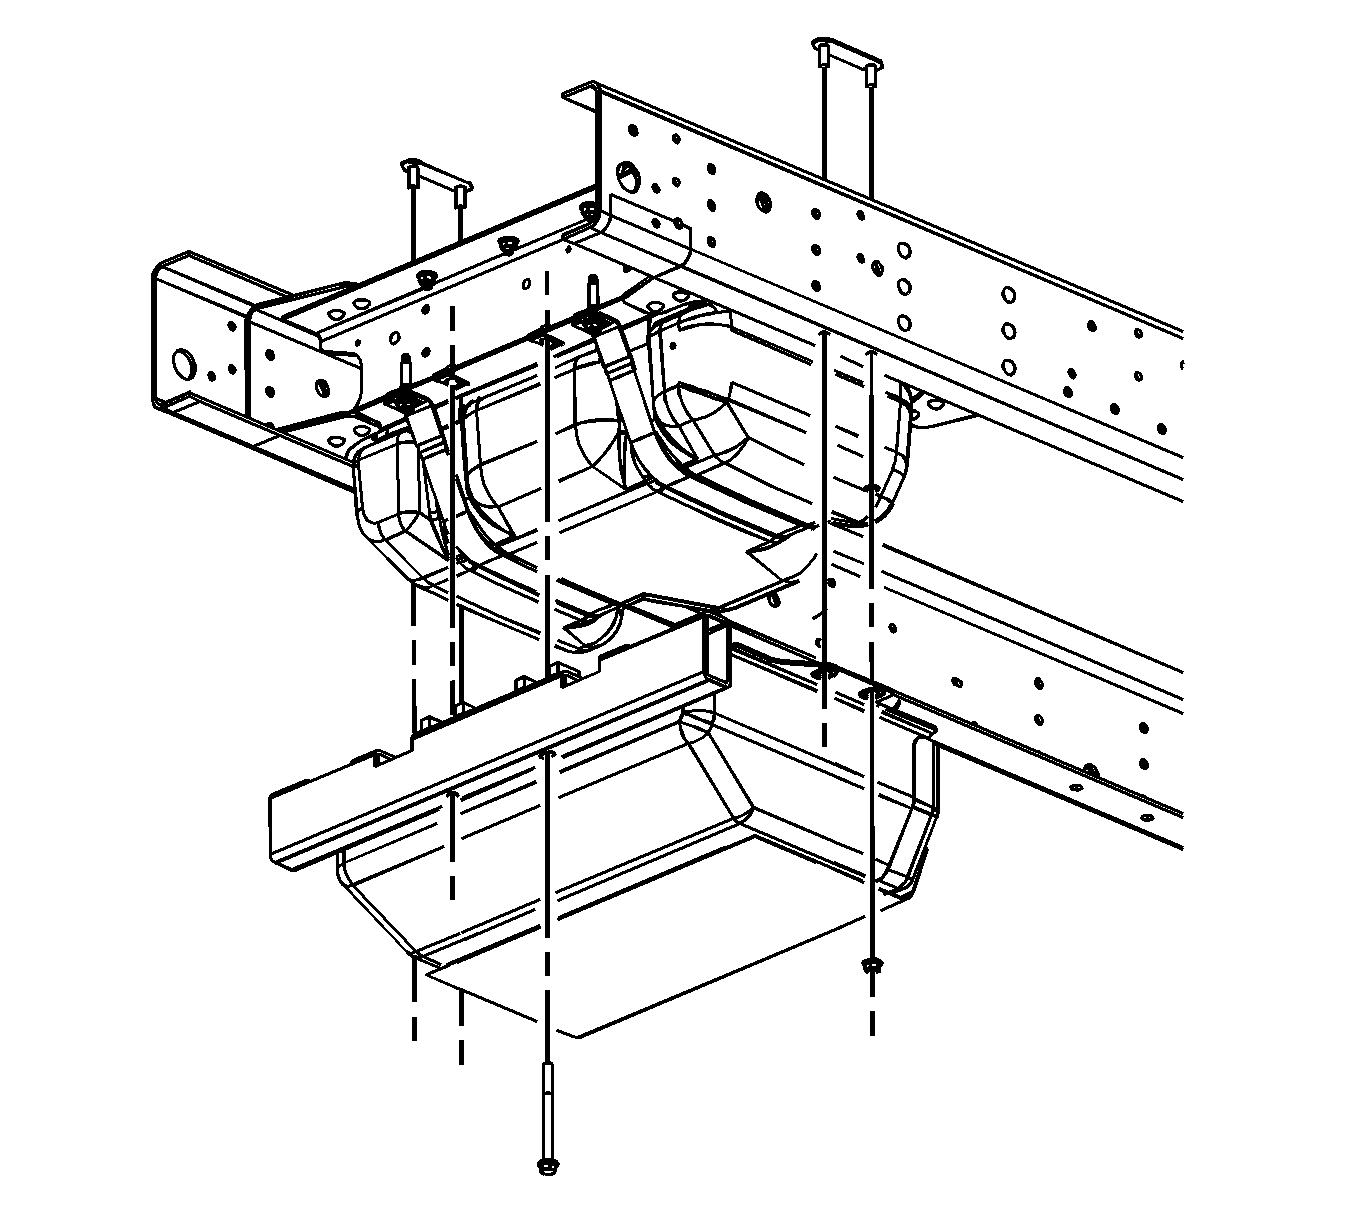
Important: Clean all the fuel pipe and hose connections as well as the surrounding areas before disconnecting the fuel pipes and hoses.
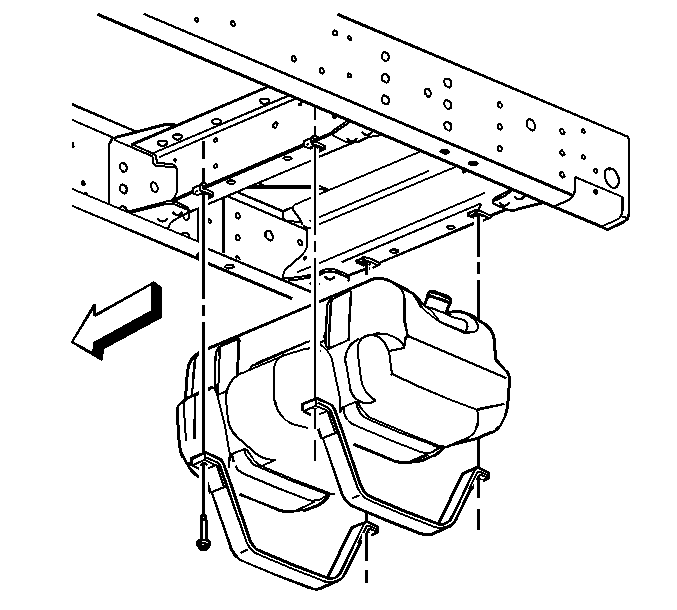
Installation Procedure
- Install the fuel sender assembly with new O-rings on the fuel pipes. Refer to Fuel Sender Assembly Replacement .
- Position and support the fuel tank .
- Position the fuel tank straps and connect the fuel feed and return hoses to the fuel sender fittings.
- Connect the electrical connector to the fuel sender assembly.
- Install the retaining clips.
- Install the fuel filler vent hose to the vent pipe.
- Install the fuel filler neck connecting tube to the fuel tank.
- Install the fuel tank strap bolts.
- Install the fuel tank shield with 4 nuts and 2 bolts.
- If required, lower the vehicle.
- Start the engine and inspect for leaks.

Notice: Refer to Fastener Notice in the Preface section.

Tighten
Tighten the fuel tank strap bolts to 40 N·m (30 lb ft).
Tighten
Tighten the fuel tank shield nuts and bolts to 85 N·m (63 lb ft).
Fuel Tank Replacement Mid Mount
Removal Procedure
- Drain the fuel tank. Refer to Fuel Tank Draining .
- Raise the vehicle. Refer to Lifting and Jacking the Vehicle .
- Disconnect the fuel fill and vent pipes from the fuel tank.
- Support the fuel tank, with the aid of an assistant.
- Remove the fuel tank strap attaching bolts.
- Remove the fuel tank straps .
- Lower the fuel tank slightly.
- Disconnect the fuel pipes from the fuel sender. Refer to Metal Collar Quick Connect Fitting Service .
- If equipped with an auxiliary fuel tank, disconnect the rear chassis balance pipes.
- Disconnect the fuel sender harness connector.
- Remove the fuel tank.
- Place the fuel tank in a suitable work area.
- Cap the fuel pipes on the vehicle in order to prevent possible fuel system contamination.
- Remove the fuel sender assembly from the fuel tank. Refer to Fuel Sender Assembly Replacement .
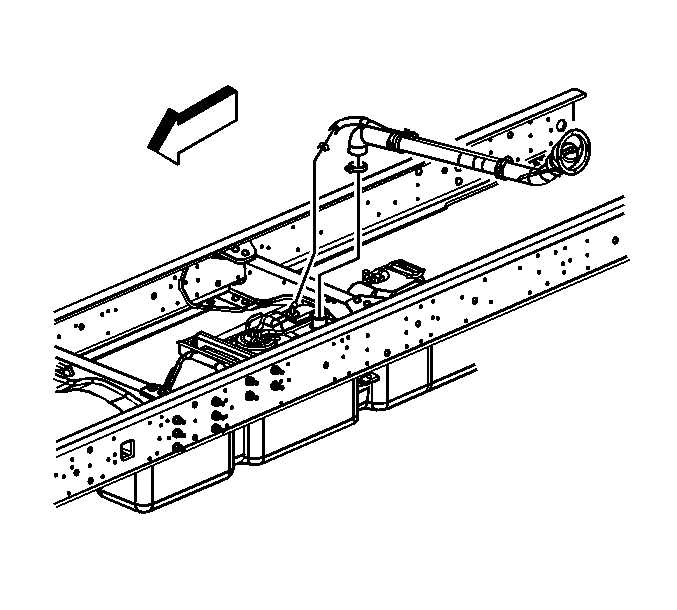
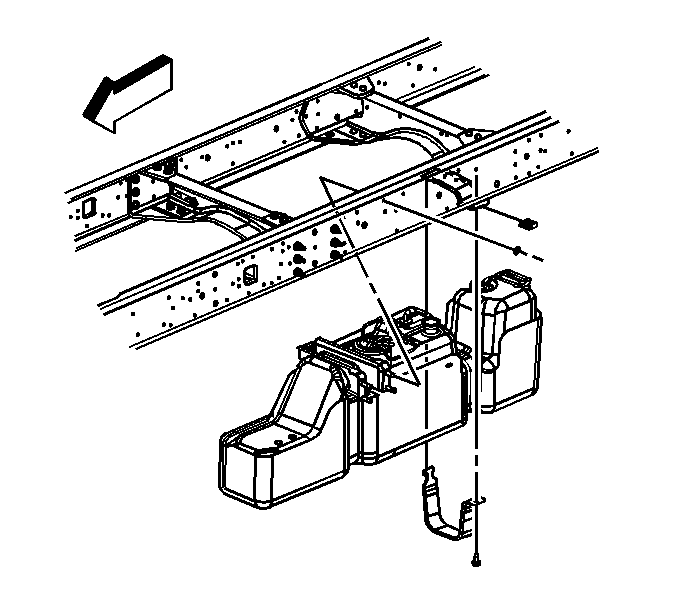
Notice: Do not bend the fuel tank straps. Bending the fuel tank straps may damage the straps.
Installation Procedure
- Install the fuel sender assembly to the fuel tank. Refer to Fuel Sender Assembly Replacement .
- Remove the caps from the fuel pipes.
- Support and partially raise the fuel tank, with the aid of an assistant.
- Connect the fuel sender harness connector.
- If equipped with an auxiliary fuel tank connect the rear chassis balance pipes.
- Connect the fuel pipes to the fuel sending unit. Refer to Metal Collar Quick Connect Fitting Service .
- Fully raise the fuel tank.
- Install the fuel tank straps.
- Connect the fuel fill and vent pipes to the fuel tank.
- Lower the vehicle.
- Refill the fuel tank.
- Install the fuel filler cap.
- Connect the negative battery cable. Refer to Battery Negative Cable Disconnection and Connection .
- Prime the fuel system. Refer to Fuel Feed Pipe and Return Pipe Purging .
- Start the engine and test for fuel leaks.

Notice: Refer to Fastener Notice in the Preface section.
Tighten
Tighten the fuel tank strap attaching bolts to 40 N·m (30 lb ft).

Tighten
Tighten the hose clamps to 2.5 N·m (22 lb in).
