GM Service Manual Online
For 1990-2009 cars only

Thermostat Housing Crossover Replacement 6.6L LMM

Removal Procedure

  1. Remove the air cleaner. Refer to Air Cleaner Assembly Replacement .
  2. Drain the cooling system. Refer to Cooling System Draining and Filling .
  3. Disconnect the negative battery cables. Refer to Battery Negative Cable Disconnection and Connection .
  4. Remove the charge air inlet and outlet pipes. Refer to Charge Air Cooler Inlet Pipe and Outlet Pipe Replacement.
  5. Remove the upper fan shroud. Refer to Fan Shroud Replacement .
  6. Remove the drive belt. Refer to Drive Belt Replacement .

  7. Object Number: 769156  Size: SH
  8. Disconnect the air conditioning (A/C) compressor clutch electrical connector.
  9. Disconnect the A/C cut out switch electrical connector.
  10. Remove the A/C compressor bolts (1).
  11. Reposition the A/C compressor (3), with the hoses attached, to the right side of the engine compartment.
  12. Remove the generator bracket. Refer to Generator Bracket Replacement .
  13. Remove the front oil fill tube. Refer to Oil Filler Tube Replacement .
  14. Disconnect the engine coolant temperature (ECT) sensor electrical connectors. Refer to Engine Coolant Temperature Sensor Replacement .
  15. Remove the water outlet tube. Refer to Water Outlet Tube Replacement .

  16. Object Number: 798057  Size: SH
  17. Without disconnecting the power steering hoses, remove the power steering pump bolts and the power steering pump. Reposition the power steering pump and secure to the side. Refer to Power Steering Pump Replacement .

  18. Object Number: 1335429  Size: SH
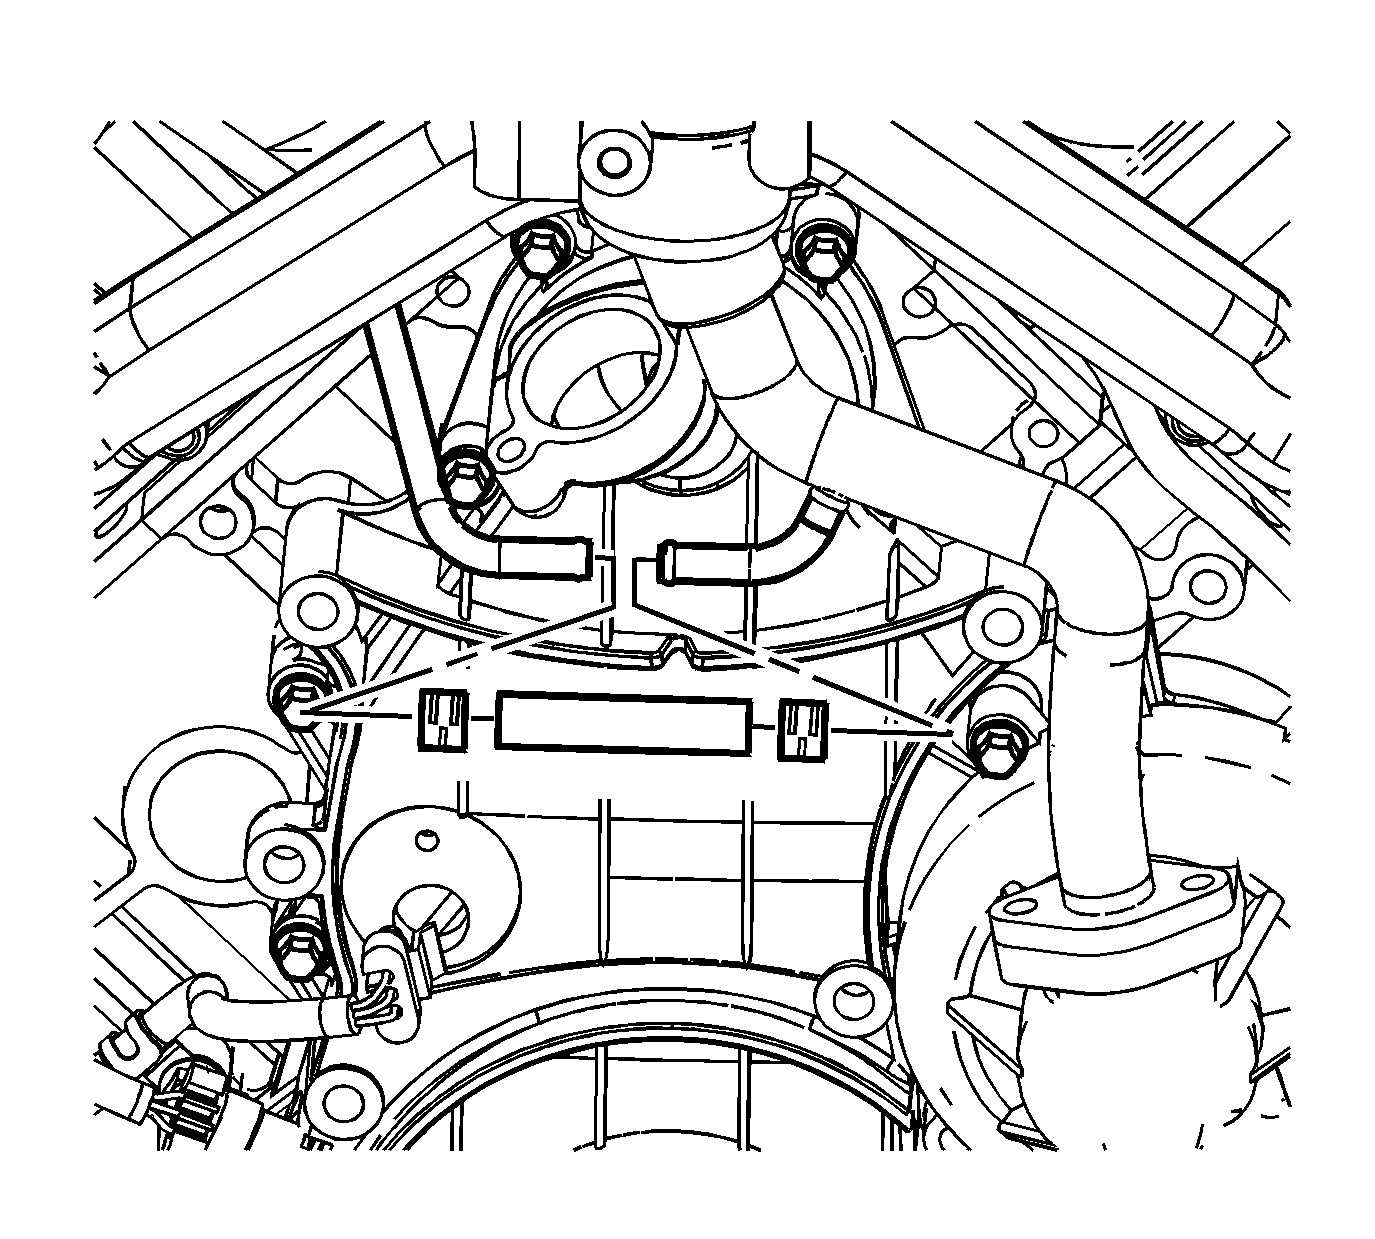
  19. Reposition the turbocharger coolant return pipe hose clamp.
  20. Remove the turbocharger coolant return pipe hose.

  21. Object Number: 1869891  Size: SH
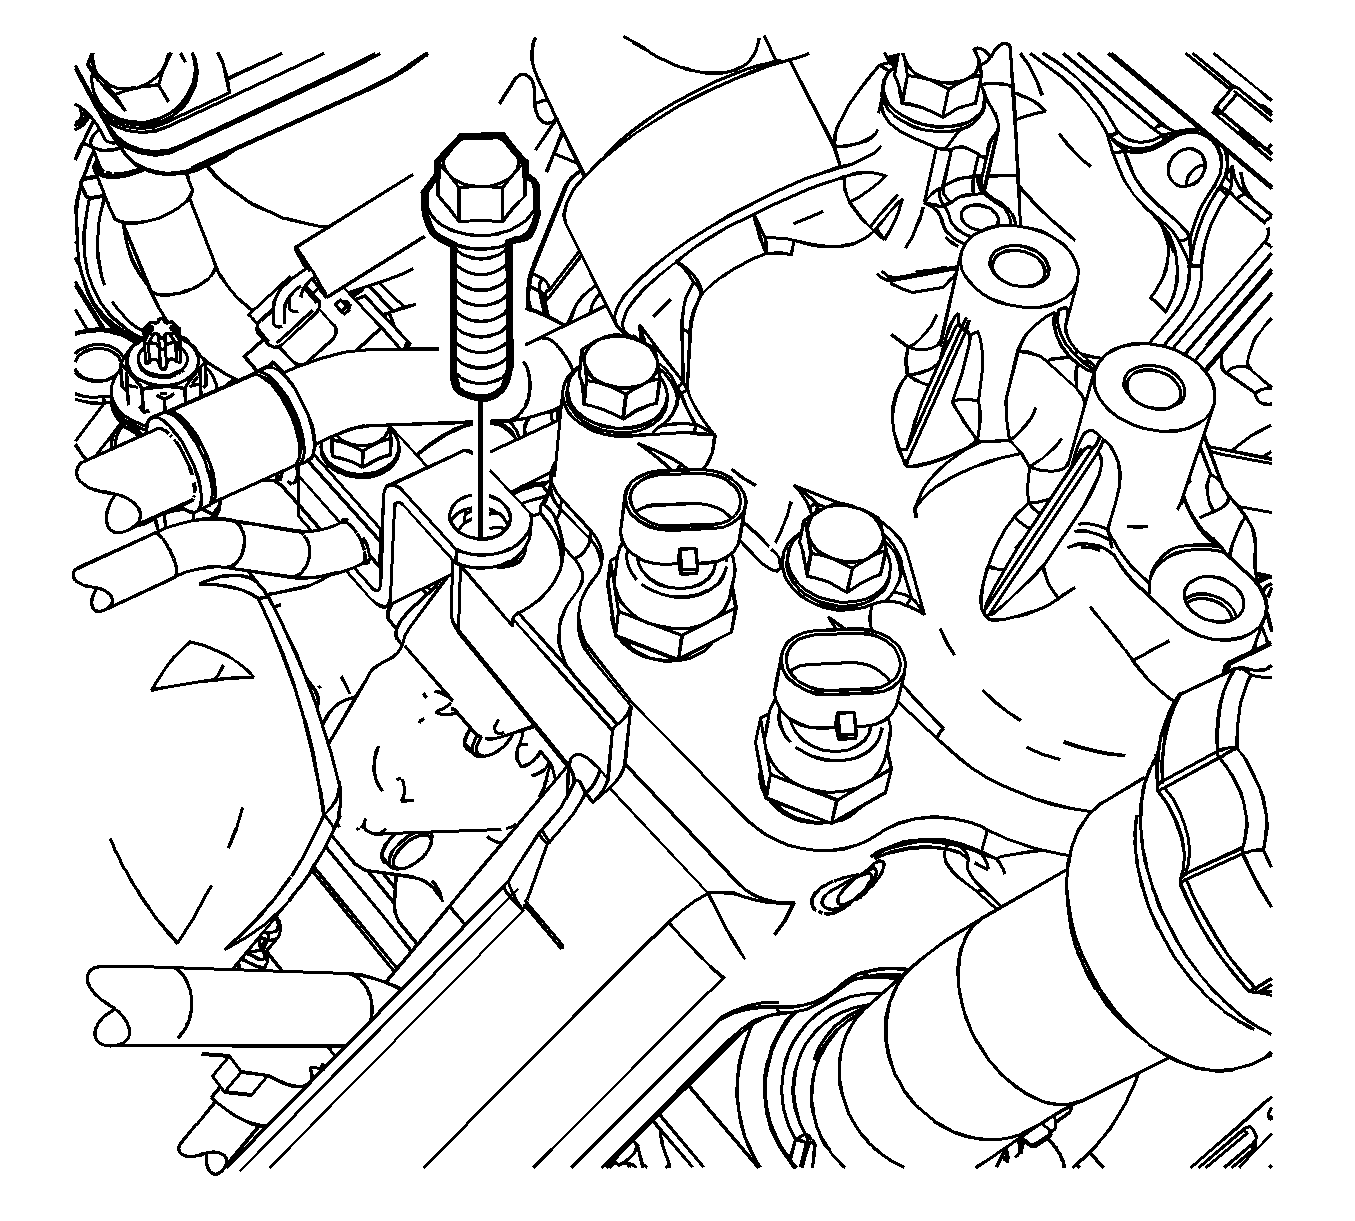
  22. Remove the fuel line bracket bolt at the thermostat housing crossover.
  23. Remove the cooling fan pulley. Refer to Cooling Fan Pulley Replacement .

  24. Object Number: 1335424  Size: SH
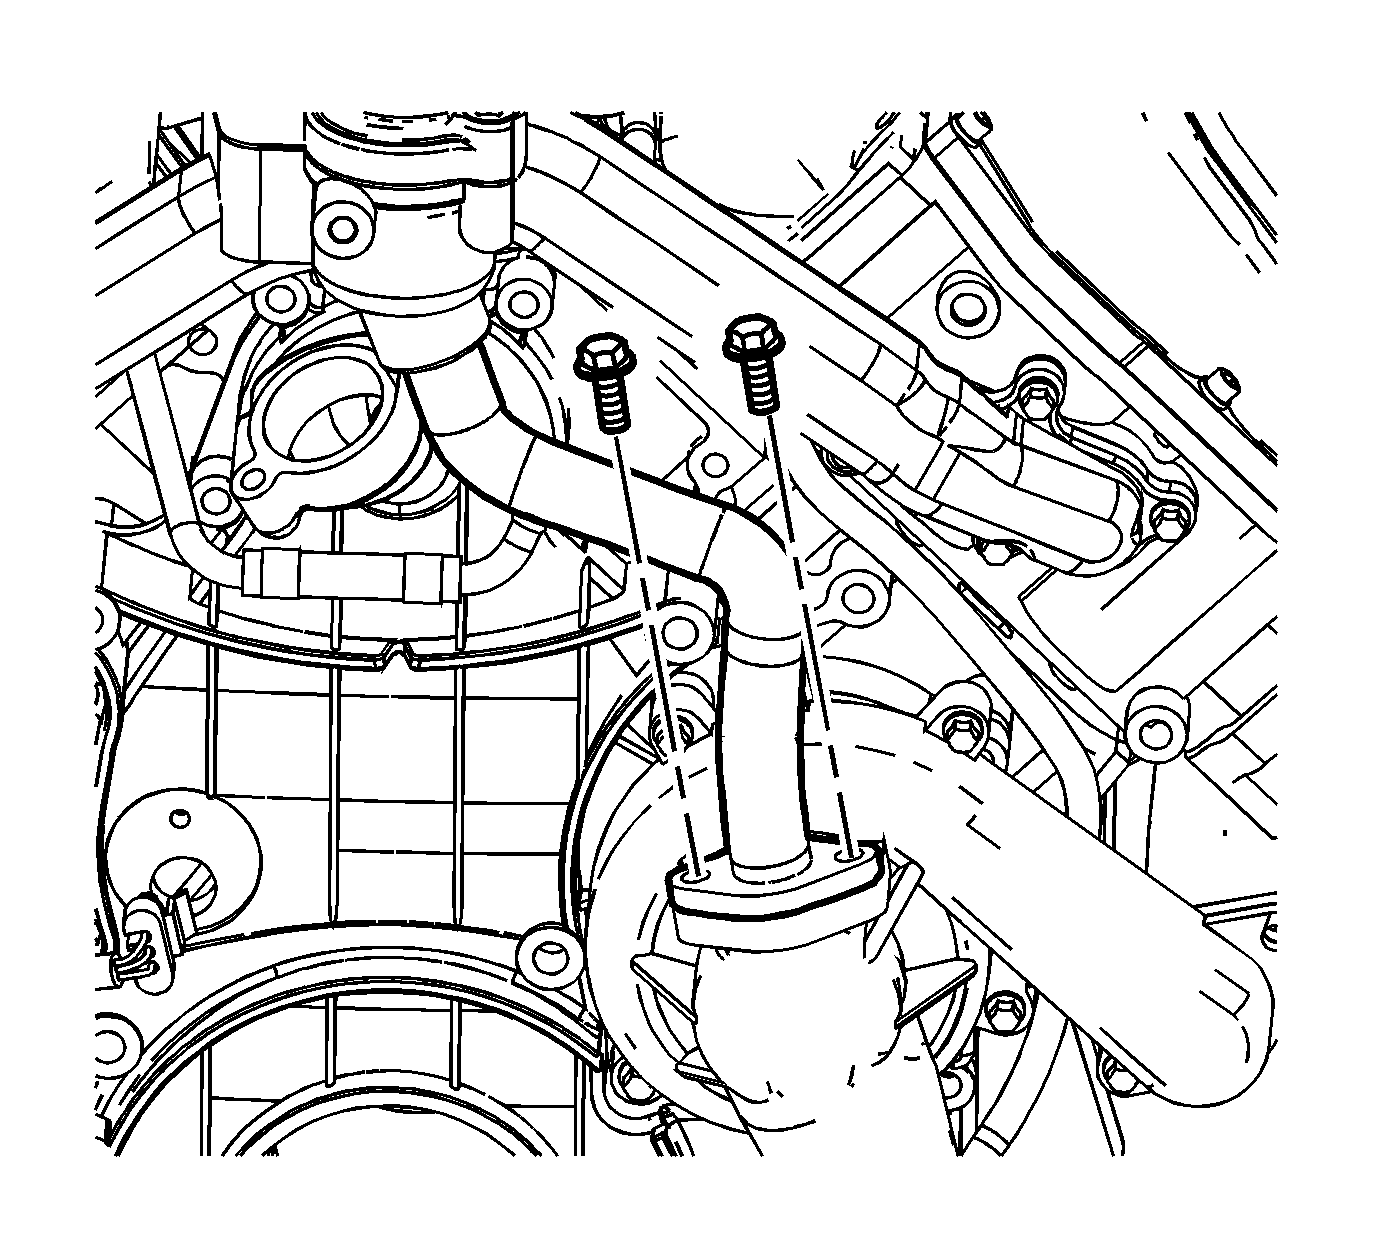
  25. Remove the water pump inlet pipe bolts.

  26. Object Number: 1335441  Size: SH
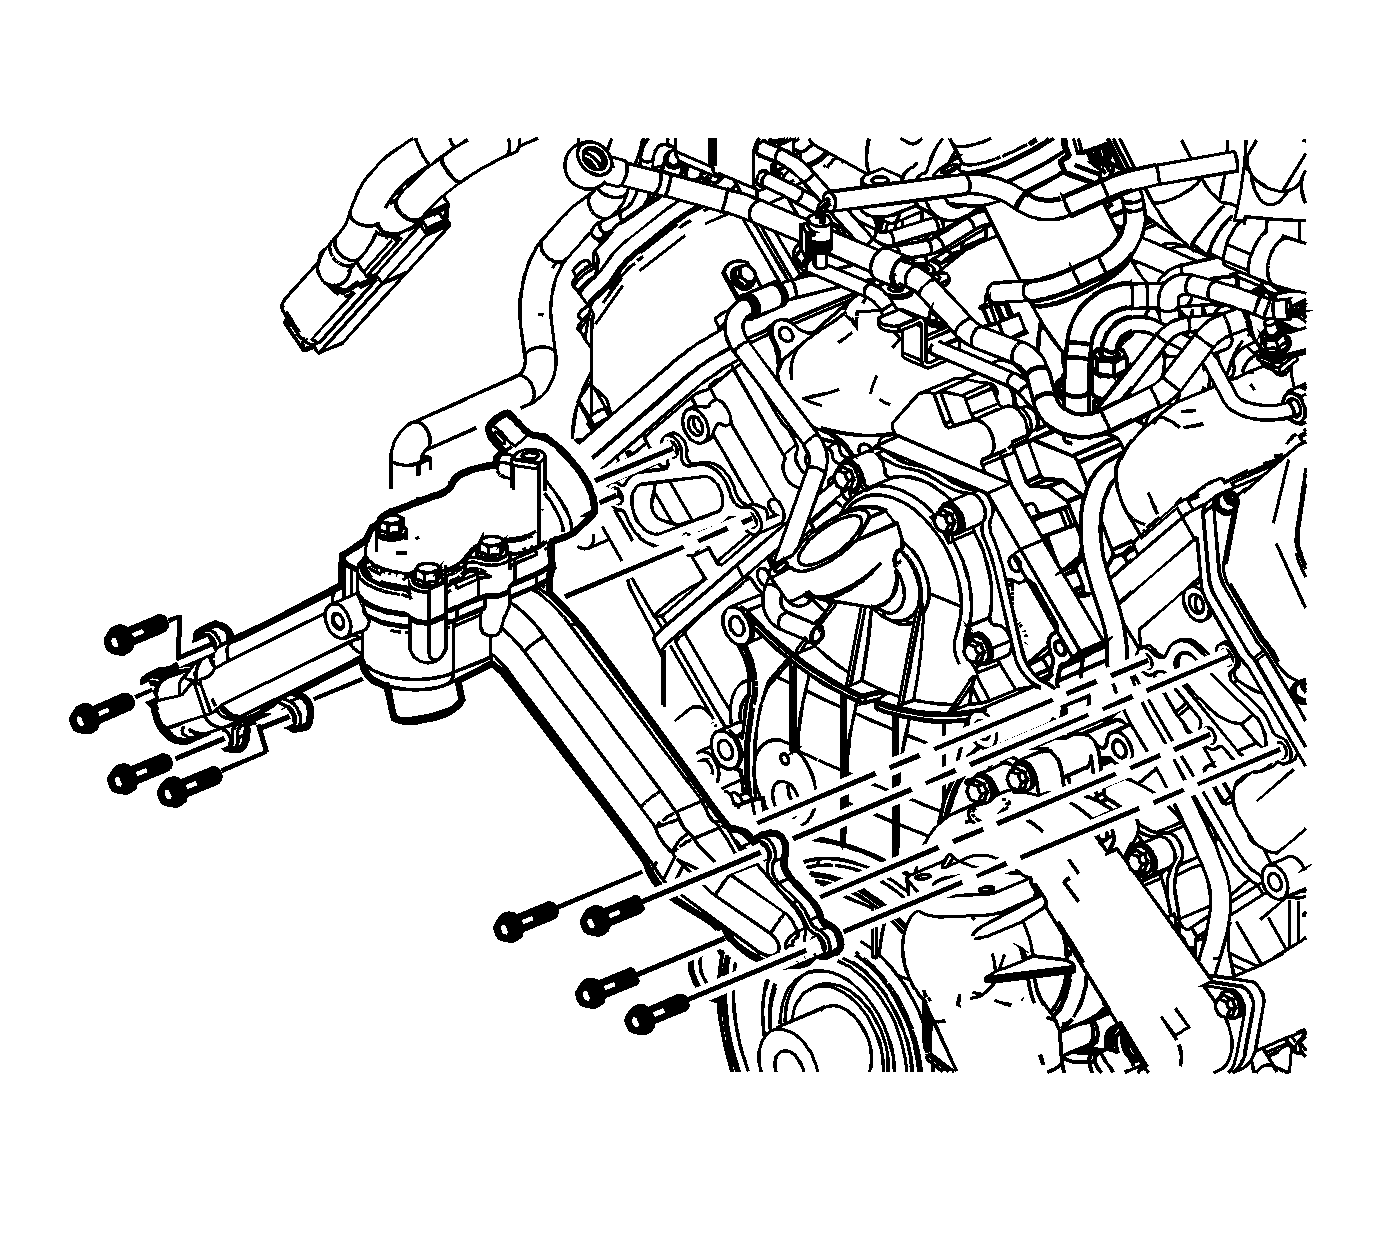
  27. Remove the thermostat housing crossover bolts and nuts.
  28. Remove the thermostat housing crossover, with the bypass pipe.
  29. Remove and discard the thermostat bypass pipe to water pump O-ring seal.
  30. Remove and discard the thermostat housing crossover gaskets.
  31. If necessary, perform the following:
  32. 25.1. Remove the thermostat bypass pipe from the thermostat housing crossover.
    25.2. Remove and discard the thermostat bypass pipe O-ring seal.
    25.3. Remove the thermostat cover bolts and cover.
    25.4. Remove the thermostats.
    25.5. Remove and discard the thermostat seals.
  33. If required, clean and inspect the thermostat housing. Refer to Engine Coolant Thermostat Housing Cleaning and Inspection .

Installation Procedure

    Notice: Refer to Fastener Notice in the Preface section.

    Object Number: 1335441  Size: SH
  1. If necessary, perform the following:
  2. 1.1. Install NEW seals to the thermostats.
    1.2. Install the thermostats.
    1.3. Install the thermostat cover and bolts.

    Tighten
    Tighten the bolts to 21 N·m (15 lb ft).

    1.4. Install a NEW O-ring seal to the thermostat bypass pipe.
    1.5. Install the thermostat bypass pipe to the thermostat housing.
  3. Install a NEW thermostat bypass pipe to water pump O-ring seal.
  4. Install the thermostat housing crossover using NEW gaskets.
  5. Install the thermostat housing crossover bolts and nuts.
  6. Tighten
    Tighten the bolts/nuts to 21 N·m (15 lb ft).

    Object Number: 1335424  Size: SH
  7. Install the water pump inlet pipe bolts.
  8. Tighten
    Tighten the bolts to 21 N·m (15 lb ft).

  9. Install the cooling fan pulley. Refer to Cooling Fan Pulley Replacement .
  10. Object Number: 1869891  Size: SH
  11. Install the fuel line bracket bolt at the thermostat housing crossover.
  12. Tighten
    Tighten the bolt to 21 N·m (15 lb ft).

    Object Number: 1335429  Size: SH
  13. Install the turbocharger coolant return pipe hose.
  14. Position the turbocharger coolant return pipe hose clamp.
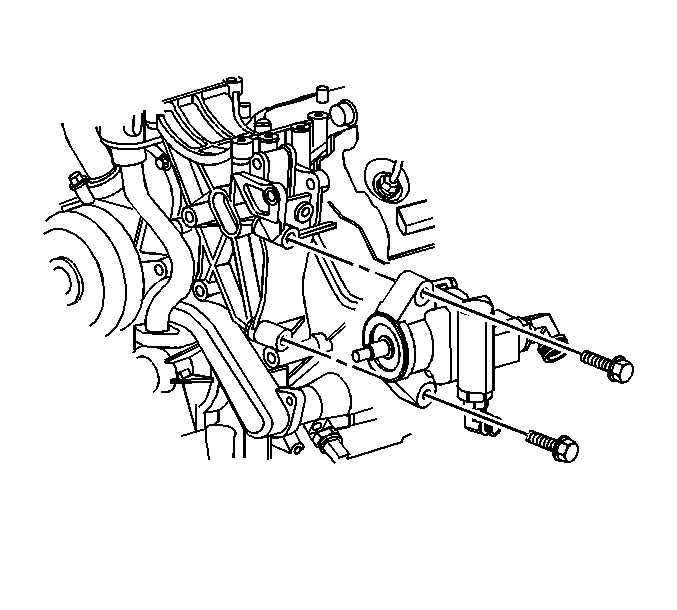
  15. Object Number: 798057  Size: SH
  16. With the power steering hoses attached, install the power steering pump to the Bracket. Refer to Power Steering Pump Replacement .
  17. Install the water outlet tube. Refer to Water Outlet Tube Replacement .
  18. Install the front oil fill tube. Refer to Oil Filler Tube Replacement .
  19. Connect the engine coolant temperature (ECT) sensor electrical connectors. Refer to Engine Coolant Temperature Sensor Replacement .
  20. Install the generator bracket. Refer to Generator Bracket Replacement .
  21. Position the engine wiring harness to the retainer and secure the retainer.
  22. Install the engine wiring harness brackets and clamps to the thermostat housing and the air intake pipe with nut and bolt.
  23. Tighten
    Tighten the nut and bolt to 25 N·m (18 lb ft).
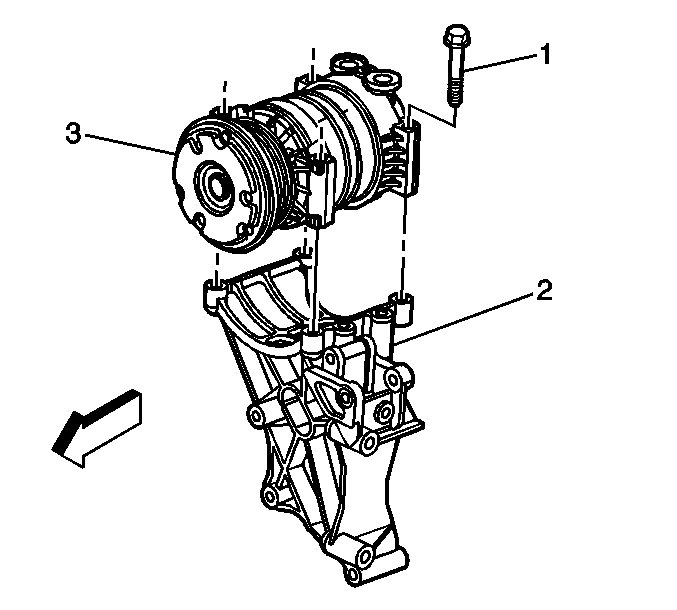

    Object Number: 769156  Size: SH
  24. With the A/C compressor hoses attached, install the AC compressor (3) to the compressor bracket.
  25. Install the A/C compressor bolts (1).
  26. Tighten
    Tighten the AC compressor bolts to 50 N·m (37 lb ft).

  27. Connect the A/C cut out switch electrical connector.
  28. Connect the air conditioning (A/C) compressor clutch electrical connector.
  29. Install the drive belt. Refer to Drive Belt Replacement .
  30. Install the charge air inlet and outlet pipes. Refer to Charge Air Cooler Inlet Pipe and Outlet Pipe Replacement.
  31. Install the upper fan shroud. Refer to Fan Shroud Replacement .
  32. Connect the negative battery cables. Refer to Battery Negative Cable Disconnection and Connection .
  33. Install the air cleaner. Refer to Air Cleaner Assembly Replacement .
  34. Fill the cooling system. Refer to Cooling System Draining and Filling .