For 1990-2009 cars only
Exhaust Particulate Service Filter Replacement With LF8
Removal Procedure
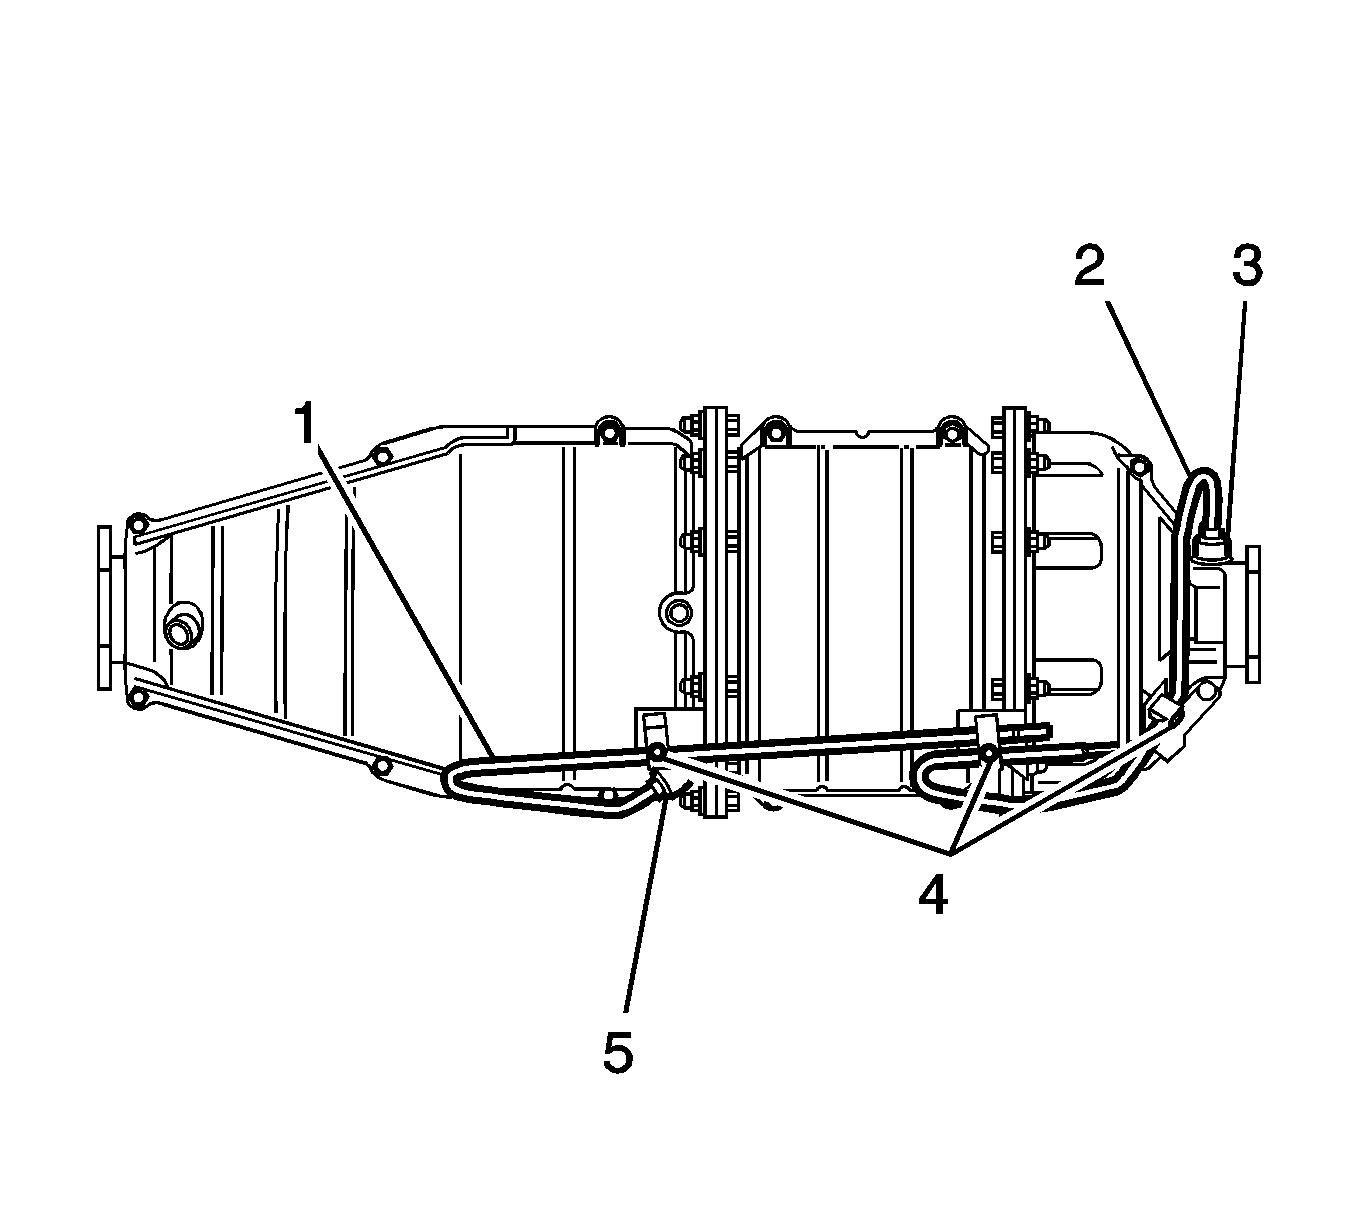
- Loosen the differential pressure pipes fittings (3,5) until they are entirely disengaged from the exhaust particulate filter assembly.
- Remove the differential pressure pipe retaining clips (4).
- Remove the differential pressure pipes (1,2) from the exhaust particulate filter assembly.
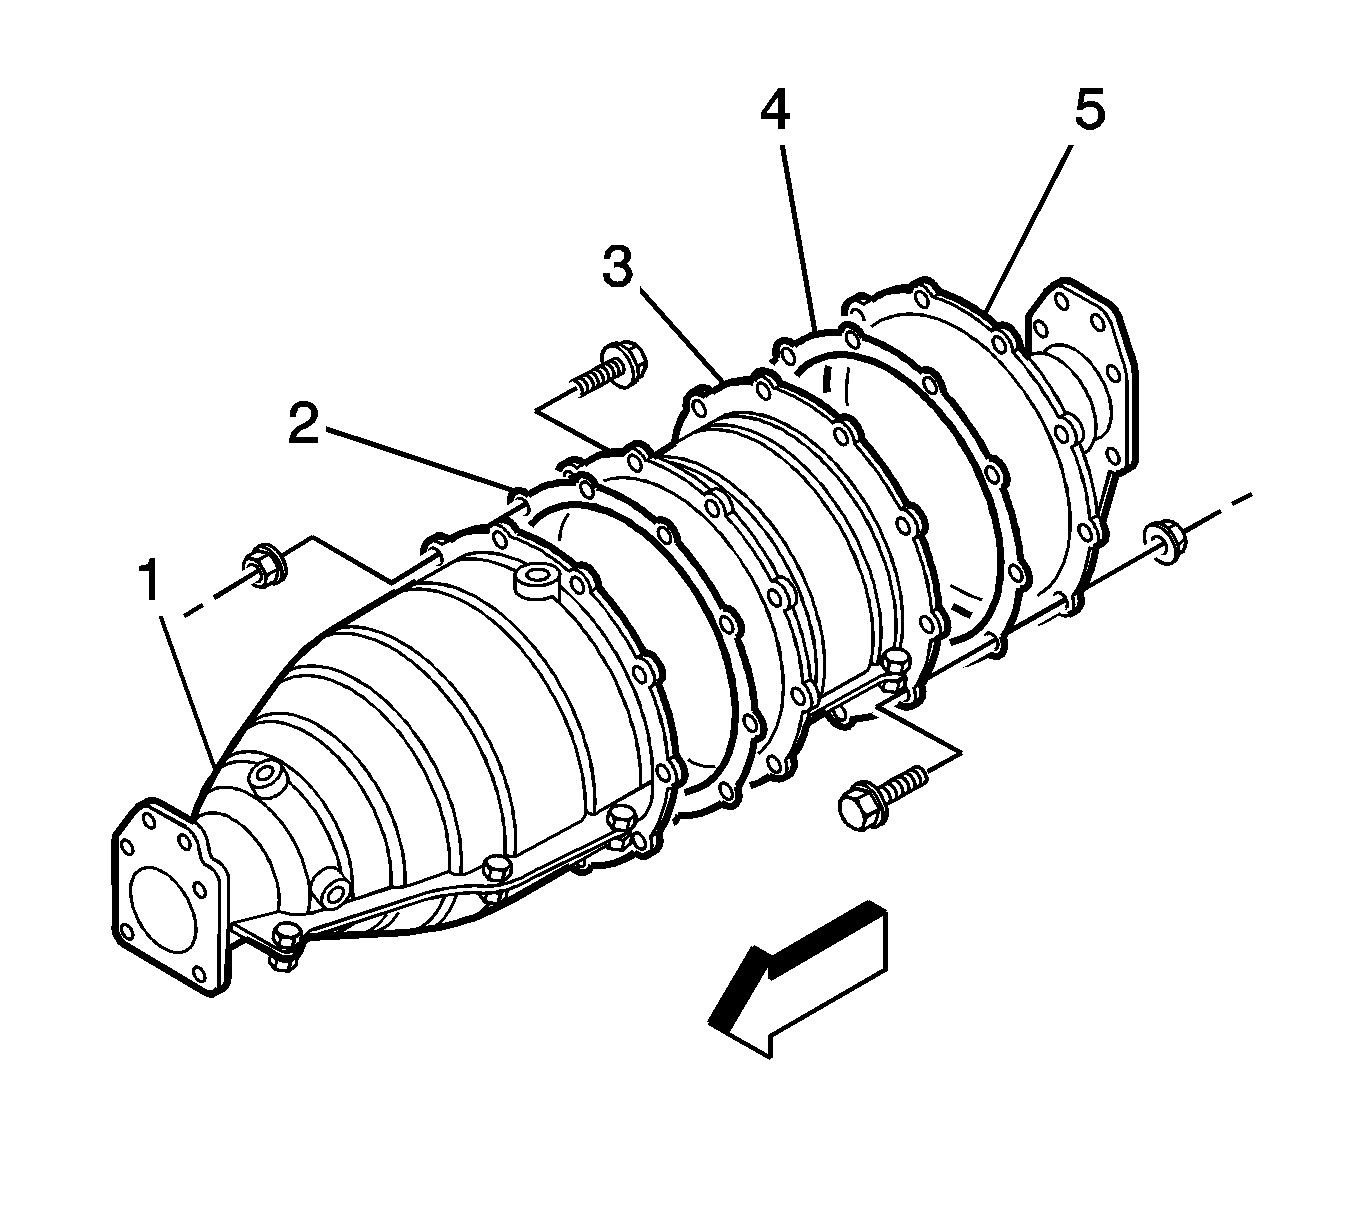
- Remove the nuts and bolts securing the oxidation catalyst section (1) and separate it from the filter section (3).
- Remove the nuts and bolts securing the filter section (3) and separate it from the rear case section (5).
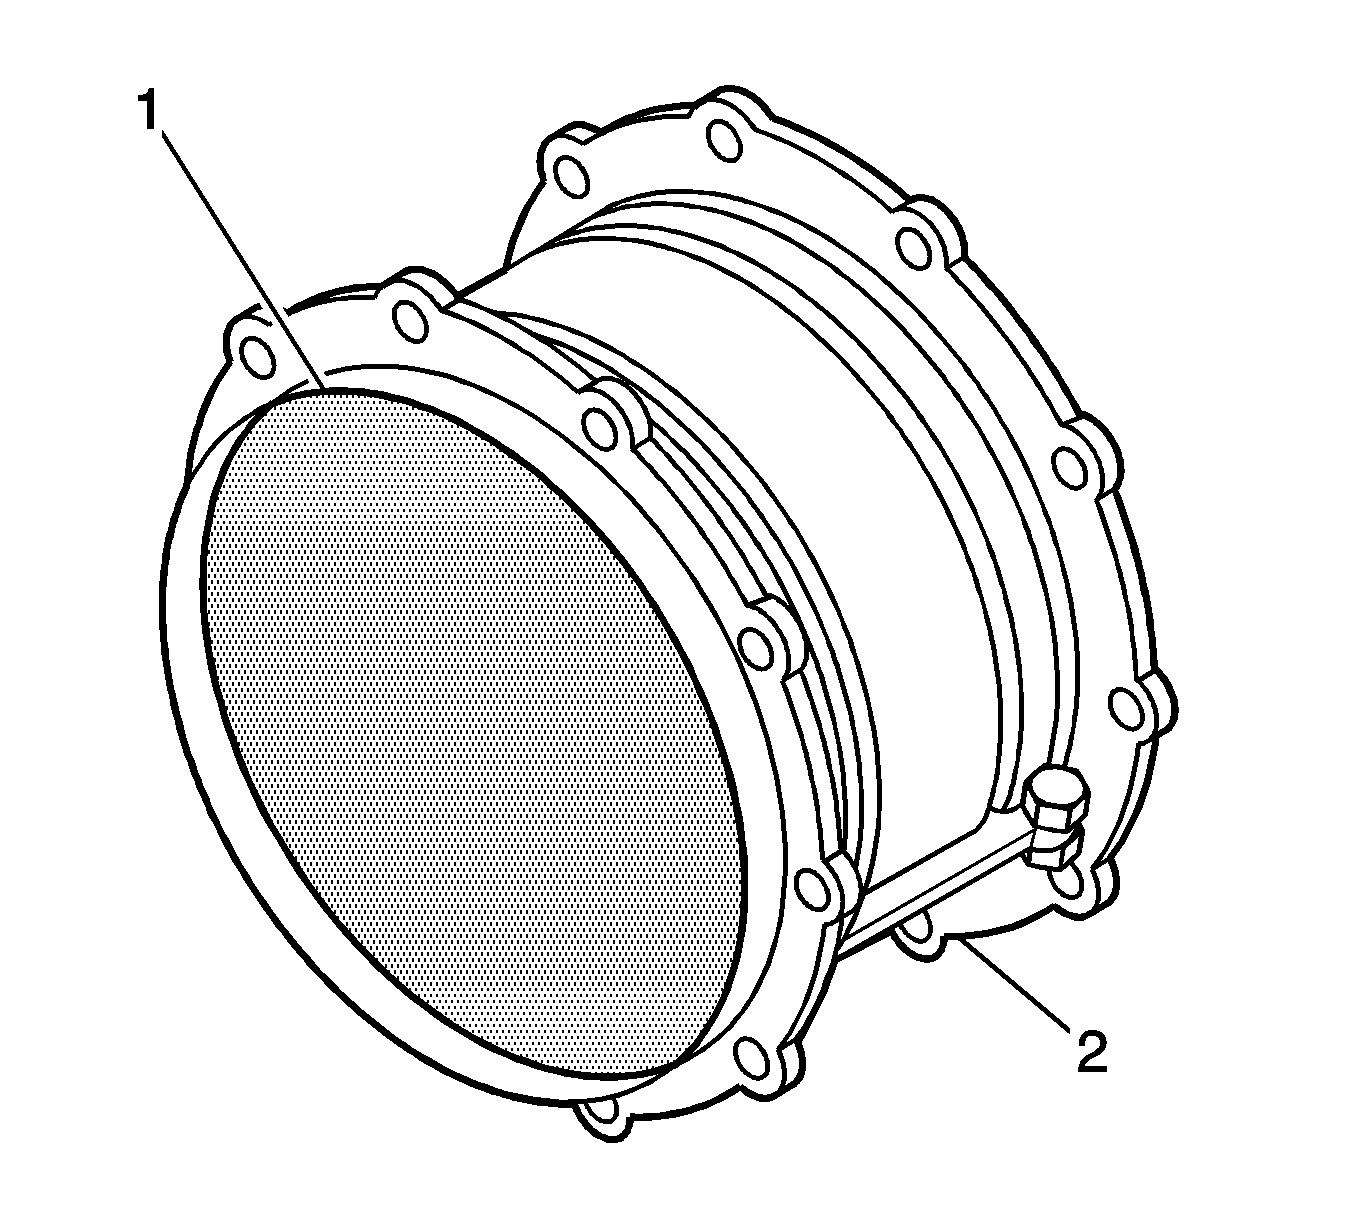
- Check for any damage to the exhaust particulate service filter (1) and case (2) and replace or clean as needed.

Important: Make sure to clean off any of the old burning prevention agent from the differential pressure pipe fittings.

Important: Do not drop the exhaust particular filter assembly.

Installation Procedure
- Align the filter section (3) to the rear case gasket (4) and the rear case section (5) and install the nuts and bolts.
- Repeat the torque procedure above a second time.
- Align the oxidation catalyst section (1) to the filter section (3) and install the nuts and bolts.
- Repeat the torque procedure above a second time.
- Position the differential pressure pipes (1,2) to the exhaust particulate filter assembly.
- Install the differential pressure pipe retaining clips (4).
- Tighten the differential pressure pipes fittings (3,5).
Notice: Refer to Fastener Notice in the Preface section.

Tighten
Tighten the nuts and bolts to 25 N·m (18 lb ft).
Tighten
Tighten the nuts and bolts to 25 N·m (18 lb ft).

Important: Make sure to apply new burning prevention agent to the differential pressure pipe fittings before installing.
Important: Do not finalize the differential pressure pipe retaining clip torques until the fittings have been started in the next step.
Tighten
Tighten the clips to 10 N·m (89 lb in).
Tighten
Tighten the fittings to 35 N·m (26 lb ft).
