For 1990-2009 cars only
Removal Procedure
- Raise and support the vehicle. Refer to Lifting and Jacking the Vehicle .
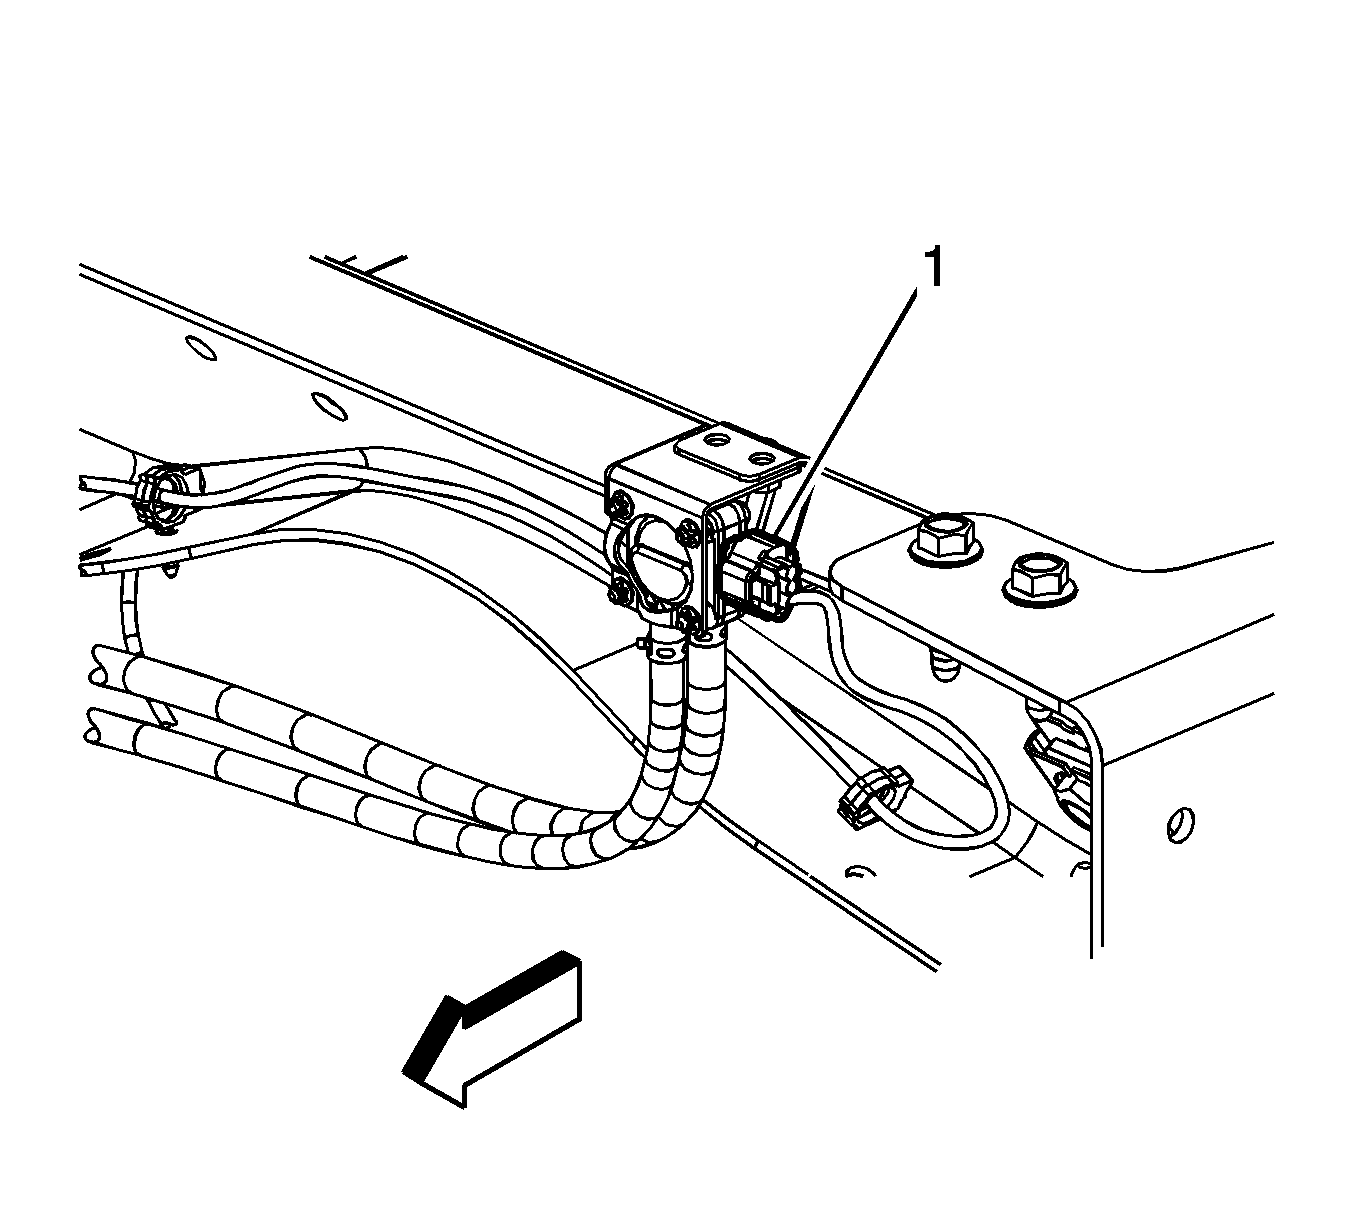
- Disconnect the chassis wiring harness electrical connector (1) from the exhaust differential pressure sensor. (2WD shown, 4WD similar).
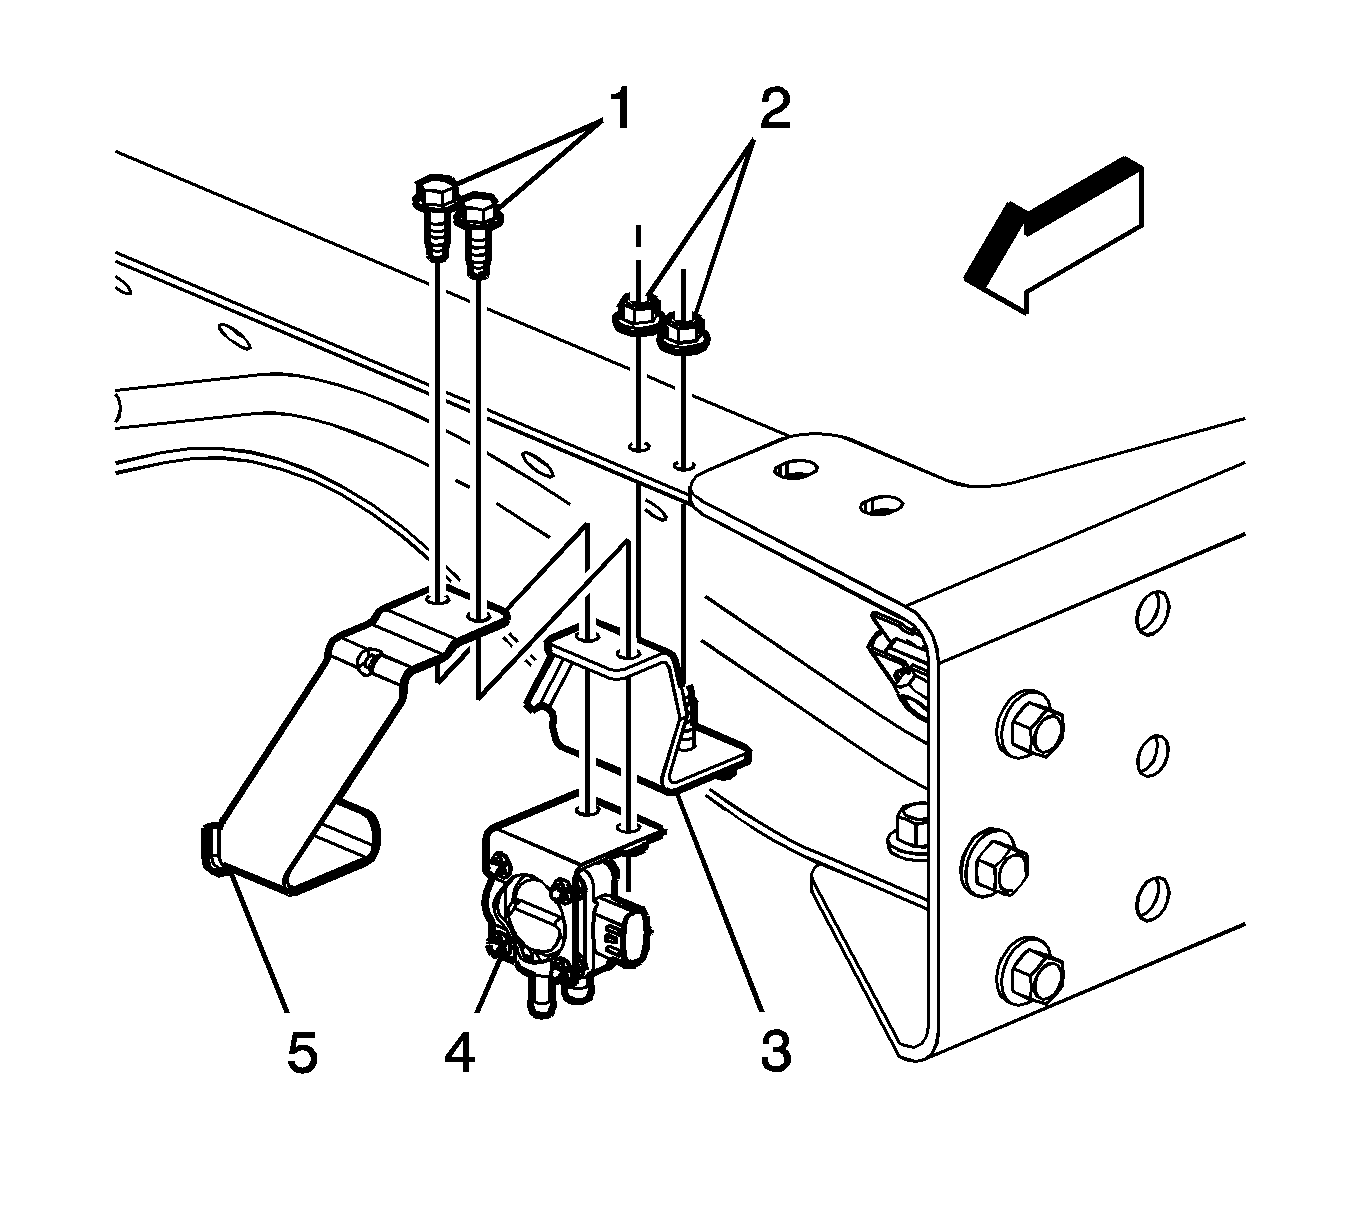
- Reposition the exhaust differential pressure sensor pipe assembly hose clamps (1).
- Remove the exhaust differential pressure sensor pipe assembly hoses from the sensor and hose bracket.
- Remove the exhaust differential pressure sensor hose bracket bolts (1).
- Remove the exhaust differential pressure sensor hose bracket (5) and sensor (4).
- Remove the exhaust differential pressure sensor mounting bracket nuts (2), if required.
- Remove the exhaust differential pressure sensor mounting bracket (3), if required.

Installation Procedure
- Position the exhaust differential pressure sensor mounting bracket (3) to the crossmember, if required.
- Install the exhaust differential pressure sensor mounting bracket nuts (2), if required.
- Position the exhaust differential pressure sensor (4) and hose bracket (5).
- Install the exhaust differential pressure sensor hose bracket bolts (1).
- Install the exhaust differential pressure sensor pipe assembly hoses to the sensor and hose bracket.
- Position the exhaust differential pressure sensor pipe assembly hose clamps (1).
- Connect the chassis wiring harness electrical connector (1) to the exhaust differential pressure sensor.
- Lower the vehicle.
Notice: Refer to Fastener Notice in the Preface section.
Tighten
Tighten the nuts to 22 N·m (16 lb ft).
Tighten
Tighten the bolts to 22 N·m (16 lb ft).
